Ametek Land LANCOM 4 User Manual
Portable flue gas analyser
Hide thumbs
Also See for LANCOM 4:
- User manual (28 pages) ,
- User manual (42 pages) ,
- User manual (44 pages)

Related Manuals for Ametek Land LANCOM 4


Summary of Contents for Ametek Land LANCOM 4
- Page 1 LANCOM 4 USER GUIDE PUBLICATION N 806885 LANGUAGE: ENGLISH LANCOM 4 Portable Flue Gas Analyser Q U A L I T Y C U S T O M E R S O L U T I O N S...
- Page 2 Observe precautions for handling electrostatic discharge sensitive devices. Equipment Operation Use of this instrument in a manner not specified by AMETEK Land may be hazardous. Read and understand the user documentation supplied before installing and operating the equipment. The safety of any system incorporating this equipment is the responsibility of the assembler.
- Page 3 This manual is provided as an aid to owners of AMETEK Land’s products and contains information proprietary to AMETEK Land. This manual may not, in whole or part, be copied, or reproduced without the expressed written consent of AMETEK Land.
-
Page 4: Table Of Contents
Contents About Your Analyser About the Control Panel LED Indicators Probe Connections Dos and Don’ts Preparing the Lancom 4 for use Connecting the Battery Setting the Date and Time Operating your Analyser Operating Instructions 4.2 Stopping Gas Sampling Without Turning Off the Analyser Using the Standard Probe... - Page 5 Portable Flue Gas Analyser Lancom 4 Calibrating the Analyser 10-1 10.1 Important Safety Information 10-1 10.2 Automatic Zero Calibration 10-1 10.3 Calibration Gas Requirements 10-1 10.4 Calibration Connections 10-3 10.5 Performing an Upscale Calibration 10-3 10.6 Carbon Dioxide Sensor Zero Calibration 10-5 10.7 Oxygen Sensor Zero Calibration...
-
Page 6: About Your Analyser
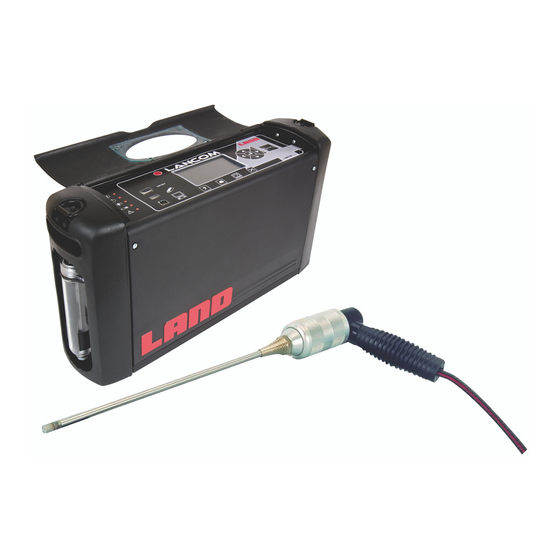
ABOUT YOUR ANALYSER... - Page 7 Portable Flue Gas Analyser Lancom 4 About Your Analyser Lancom 4 is a portable analyser designed to measure flue gas emissions. Up to 9 gases can be measured, allowing you to check that your flue gas emissions are within permitted limits, and also ensure that your combustion process is operating as efficiently as possible. On/Off Control panel (See Section 1.1) Data connections Probe handle Catch-pot Sample line Probe pipe Sinter filter Thermocouple connection...
-
Page 8: About The Control Panel
PC. USB Port (Type A) - for use with USB memory stor- age devices. USB Port (Type B) - for connecting Lancom 4 to a PC via USB. Lancom 4 will appear as an external disk. Data log files can be downloaded to the PC. 1 - 2... -
Page 9: Led Indicators
Portable Flue Gas Analyser Lancom 4 1.2 LED Indicators Standby The analyser is running in ‘Wake & sleep’ mode The analyser is powered and operational. Charge The battery is being charged or the analyser is connect- ed to an external power supply. -
Page 10: Dos And Don'ts
DOs AND DON’Ts... - Page 11 Leave the analyser in direct area. sunlight. Use the probe without the sinter filter. Use the Lancom 4 in a confined space without connecting an exhaust tube to the sample outlet. User Guide 2 - 1...
-
Page 12: Preparing The Lancom 4 For Use
PREPARING THE LANCOM 4 FOR USE... -
Page 13: Connecting The Battery
Portable Flue Gas Analyser Lancom 4 Preparing the Lancom 4 for use WARNING Due to shipping regulations, your instrument has been shipped with the batteries disconnected. Please follow the instructions gi Please follow the instructions given in the User Guide to reconnect the batteries and prepare the instrument for use. -
Page 14: Setting The Date And Time
Lancom 4 Portable Flue Gas Analyser 3.2 Setting the Date and Time The date format is DAY:MONTH:YEAR. In the Main Menu screen, use the up/down arrow keys to the highlight the Settings option, then press the enter key. The Settings screen is displayed. -
Page 15: Operating Your Analyser
OPERATING YOUR ANALYSER... - Page 16 Lancom 4 Portable Flue Gas Analyser Blank User Guide...
-
Page 17: Operating Instructions
The countdown lasts 180 seconds. During this time, air is passed over the sensors in the Lancom 4 and a ‘baseline’ calibration value established. Wait for the analyser to complete the zero calibration. Do not abort the zero calibration. -
Page 18: Stopping Gas Sampling Without Turning Off The Analyser
Lancom 4 Portable Flue Gas Analyser 4.2 Stopping Gas Sampling Without Turning Off the Analyser From the main menu select Purge and Pump Off. The analyser will stop sampling and pass air through the gas sensors for about 30 seconds (Air purging). -
Page 19: Emptying The Catch-Pot
Portable Flue Gas Analyser Lancom 4 4.4 Emptying the Catch-pot Pull OUT the catch-pot from the clip. Remove the catch-pot by gently turning clockwise. Empty the catch-pot. To avoid air leaks when replacing the catch- pot make sure the gasket is still in position (see Section 11.5) and the... -
Page 20: Setting Up The Analyser
SETTING UP THE ANALYSER... -
Page 21: Setting The Date And Time
Portable Flue Gas Analyser Lancom 4 Setting up the Analyser 5.1 Setting the Date and Time The date format is DAY:MONTH:YEAR. In the Main Menu screen, use the up/ down arrow keys to the highlight the Settings option, then press the enter key. -
Page 22: Oxygen Normalization
Press the exit button to return to the Settings screen. To return to the Main Menu screen, press the Home button. 5.4 Configuration for Emission Monitoring to enable Wet Analysis By default, gas readings measured by Lancom 4 are given on a ‘dry’ basis i.e. the water vapour present in the flue gas is removed from the gas prior to analysis. -
Page 23: Calculated No 2 Factor
Portable Flue Gas Analyser Lancom 4 5.5 Calculated NO Factor If an NO sensor has not been fitted to the analyser, the NO factor is used to calculate NO from the NO reading. From the Main Menu, select the Settings option. The Settings screen is displayed. Select the System Parameters option. -
Page 24: Alternative Probe Options
ALTERNATIVE PROBE OPTIONS... -
Page 25: Using The Smoke Probe
Note: Making a smoke measurement with the Lancom 4 consumes a lot of battery power. Make sure that there is plenty of charge in the battery before using the Smoke Probe. - Page 26 Lancom 4 Portable Flue Gas Analyser Connect the flow meter to the exhaust port. Use the flow meter reading to determine the sample time from the table. Do not disconnect the flow meter. Flow Rate (l/min) Sample Time (s) Flow rate (l/min) Sample Time (s) Sample Times for LAND Smoke Probe Example If the flow meter reads 0.7 litres per minute set SMOKE MEASUREMENT to 137 seconds. The heated smoke probe will operate from fully charged batteries for a maximum of 20 minutes.
-
Page 27: Using The High Temperature Probe
Portable Flue Gas Analyser Lancom 4 6.2 Using the High Temperature Probe The LAND High Temperature Probe can be used in flue gas temperatures up to 1400°C (2552°F) The High Temperature Probe is used in the same way as the standard probe, however it cannot be used to measure fuel efficiency as the gas temperature is not measured. CAUTION The Probe Pipe and Heat Shield become HOT when in use. -
Page 28: Using The Drysampler Probe
Lancom 4 Portable Flue Gas Analyser 6.3 Using the DrySampler Probe Once assembled the DrySampler probe is used in the same way as the standard probe. Make sure the catch-pot (5) has been emptied, and is secure. Unscrew the coolant pot (7) and remove it. -
Page 29: Using The Flow Probe To Find The Flue Gas Velocity
Portable Flue Gas Analyser Lancom 4 6.4 Using the Flow Probe to Find the Flue Gas Velocity Do not insert the probe into the stack until step 6. From the Main Menu, select Flow. Enter all of the information required on this screen. -
Page 30: Understanding Mass Flow
Lancom 4 Portable Flue Gas Analyser 6.5 Understanding Mass Flow Mass flow rates can be measured with a standard or DrySampler probe. To measure mass flow rate you must know the velocity of the flue gas in the stack. If you know this you can enter it from the control panel. If you do not have this information you can use the LAND’s Flow Probe to measure it. -
Page 31: Recording Gas Readings
RECORDING GAS READINGS... - Page 32 Lancom 4 Portable Flue Gas Analyser Blank User Guide...
-
Page 33: Using Data Logging
Recording Gas Readings Gas readings can be stored in memory. Data logging stores gas readings in the memory of the Lancom 4. This allows you to download data logs to a personal computer. The responsivity of the electrochemical sensors in the Lancom 4 decreases if they are continuously exposed to stack gas for a long time. -
Page 34: Defining Data Log Locations
Lancom 4 Portable Flue Gas Analyser Automatic Data Logging Automatic data logging allows you to specify the number of logs you need and how often you make them. You can store the logs to the memory or print them as they are made. -
Page 35: Management Of Log Files
Each time a new data entry is logged, it will be appended to the selected log file. 7.3 Management of log files The Data Log File Management option in the Lancom 4 software allows you to move or copy data log files from your Lancom 4 onto a USB memory device. You can also delete unwanted data log files from the Lancom 4. Insert a USB Memory device* into the USB connector on the front panel of the Lancom 4. -
Page 36: About The Wake And Sleep Utility
ABOUT THE WAKE AND SLEEP UTILITY... -
Page 37: How "Wake And Sleep" Works
Portable Flue Gas Analyser Lancom 4 About the Wake and Sleep utility The Lancom 4 is not designed to be used continuously, however the Wake and Sleep option makes gas readings periodically and turns the analyser on and off automatically. This prevents the gas sensors from being poisoned by prolonged exposure to flue gas. 8.1 How “Wake and Sleep” Works... -
Page 38: When Should I Use The Wake And Sleep Option
Lancom 4 Portable Flue Gas Analyser 8.2 When should I use the Wake and Sleep option? When you need to monitor gas emissions over an extended time period. Using the Wake and Sleep option has several advantages: Saves battery life. -
Page 39: Output Options
OUTPUT OPTIONS... - Page 40 Lancom 4 Portable Flue Gas Analyser Blank User Guide...
-
Page 41: Serial Communications
PC Host • Analogue outputs 9.2 Printer Connect the printer to the serial port of the Lancom 4. From the Main Menu, select Readings (or press one of the Measurement buttons). When the Printer is connected, the Print readings option is displayed. - Page 42 Lancom 4 Portable Flue Gas Analyser To select a location tag for a specific measurement: From the Main Menu, select the Settings option. Select the Data log option. Select Use Location Tags and choose “Yes”. Press Exit. Return to the Readings screen and press ?.
-
Page 43: Usb Connection To A Pc
Portable Flue Gas Analyser Lancom 4 9.3 USB Connection to a PC The USB port on the Lancom 4 can be used to connect the analyser to a PC. The analyser will appear in the PC’s file system as a ‘removable disk’. You can transfer datalog files (*.csv format) from the Lancom 4 to your PC for further analysis. -
Page 44: Analogue Outputs (Optional)
Portable Flue Gas Analyser 9.4 Analogue Outputs (Optional) The Analogue Output module is designed to be connected to the Lancom 4 via the Serial Comms connector on the front panel (Refer to Section 1.1). The Analogue Outputs option allows you to allocate a gas reading to each analogue output channel. - Page 45 Portable Flue Gas Analyser Lancom 4 Configuring your Analogue Outputs in the Lancom 4 software From the Main Menu, select the Setting option. The Settings screen is displayed. Select the Analogue Output option. The 4-20mA Output setting screen is displayed.
-
Page 46: Calibrating The Analyser
CALIBRATING THE ANALYSER... -
Page 47: Important Safety Information
WARNING Calibration gas is dangerous. You must comply with local health and safety and fire regulations. The Lancom 4 must be calibrated in a well ventilated environment. The exhaust gases must be vented to a safe area. 10.2 Automatic Zero Calibration When the analyser is switched on it automatically performs a zero calibration. - Page 48 Lancom 4 Portable Flue Gas Analyser Binary mixtures containing the required calibration gas in a balance of nitrogen are recommended for most species. Calibration gases for NO CxHy should be balance Air, not nitrogen. This information is provided on a certificate which accompanies the cylinder and is the value which must be entered into the instrument.
-
Page 49: Calibration Connections
Make sure that you have a list of the calibration gas concentrations - you will need to enter these values during calibration. The Lancom 4 must be calibrated in a well ventilated environment. The exhaust gases must be vented to a safe area. - Page 50 Lancom 4 Portable Flue Gas Analyser 10) Enter the calibration gas concentration by pressing the up or down arrow keys to change the displayed value and then press Enter. Press CAL to calibrate. 11) Wait for the gas reading to stabilise (3 to 5 minutes) and then press enter.
-
Page 51: Carbon Dioxide Sensor Zero Calibration
Portable Flue Gas Analyser Lancom 4 10.6 Carbon Dioxide Sensor Zero Calibration It is recommended that the CO Zero Calibration is performed immediately prior to the CO Span Calibration. The method for this zero calibration is the same as for span calibration. -
Page 52: Maintenance Procedures
MAINTENANCE PROCEDURES... -
Page 53: Battery Charging And Maintenance
The instrument can be stored with the power supply connected, as the built-in intelligent charger maintains a float charge condition which does not overcharge the batteries. If it is necessary to store the Lancom 4 for a long time without power applied, you should charge the batteries fully and then disconnect the battery terminals. - Page 54 Lancom 4 Portable Flue Gas Analyser Low battery warning When the battery charge is low, the low battery warning LED will light. The power supply should be connected as soon as possible. When the batteries are fully discharged, the instrument will switch off automatically and without warning to protect the batteries.
- Page 55 Portable Flue Gas Analyser Lancom 4 Battery Replacement CAUTION Do not short-circuit the battery terminals. If it is necessary to change the batteries: Disconnect the charger and other connected equipment. Unscrew the side panel screws and remove both instrument side panels.
-
Page 56: The Service Light
Lancom 4 Portable Flue Gas Analyser To Check the Battery Power From the Main Menu, select the Diagnostics option. The Diagnostics screen is displayed. Select the System option. The Battery status (remaining charge) is displayed at the bottom of the system diagnostics screen. -
Page 57: Maintenance Schedule
Portable Flue Gas Analyser Lancom 4 11.3 Maintenance Schedule Item Check Sinter filter Keep the sinter filter clean. After use, allow 702.182 to cool and clean with a wire brush and a mild detergent. Replace if it is cracked or corroded. Do not operate with the sinter filter removed. Gas pre-filter Replace if: 703.144 the filter is dirty or discoloured;... -
Page 58: Maintenance Instructions
Lancom 4 Portable Flue Gas Analyser 11.4 Maintenance Instructions The filters must be replaced in the correct position. Changing the Filters Push over the wire clip and remove each filter. Wire clip Remove the two protective caps Gas Pre-filter from each replacement filter. To avoid air leaks make sure the filters are pushed fully into the analyser. CO Compensation Pull the wire clip over each filter. -
Page 59: Spare Parts
SPARE PARTS... - Page 60 Lancom 4 Portable Flue Gas Analyser Blank User Guide...
- Page 61 Portable Flue Gas Analyser Lancom 4 Spare Parts Spares kit containing items 1 to 4 - 703.314 CO compensation filter 703.145 Gas pre-filter 703.144 Sinter filter for standard probe 702.182 Sample line connector 317.109 Other spare parts Catch-pot with hinge (left) 703.344 Catch-pot (right) 701.828 Catch-pot gasket (not shown) 703.752...
- Page 62 Lancom 4 Portable Flue Gas Analyser Spare Parts for Probes Standard Probe O-Ring for Standard Probe 319.211. Standard Probe Handle and Hose 10ft 703.128 32ft 703.163 Replacement stainless steel probe pipe for standard probe 300mm 12in 702.141 702.205 1.5m 702.206 6.5ft...
-
Page 63: Shipping Instructions
SHIPPING INSTRUCTIONS... - Page 64 Lancom 4 Portable Flue Gas Analyser Blank User Guide...
- Page 65 Portable Flue Gas Analyser Lancom 4 Shipping Instructions WARNING Before shipping the instrument by air, you must abide by the IATA Special Provision A67 by following the instructions below. Unscrew the side panel screws and remove both instrument side panels.
-
Page 66: Technical Specification
TECHNICAL SPECIFICATION... - Page 67 Portable Flue Gas Analyser Lancom 4 Technical Specification Sensor Detection Limit Full Scale Range Upscale Repeatability Resolution 0.2 % v/v 0 to 30% v/v ±1 % 0.1% v/v CO (low) 2 ppm 0 to 6000 ppm ±2 % 0.1 ppm...
-
Page 68: Sample Port Diameters
Lancom 4 Portable Flue Gas Analyser 14.1 Sample Port Diameters Port Diameter (mm / in) Probe Type Minimum Maximum Standard 11mm (7/16in) 16mm (5/8in) Flow 40mm (1.6in) 55mm (2.2in) High Temperature 11mm (7/16in) 16mm (5/8in) Dry Sampler 11mm (7/16in) 16mm (5/8in) -
Page 69: Insight Pc Software
INSIGHT PC SOFTWARE... - Page 70 Lancom 4 Portable Flue Gas Analyser Blank User Guide...
-
Page 71: Getting Started
Insight PC Software The Insight software and full User guide can be downloaded free-of-charge from the AMETEK Land Instruments website www.landinst.com. Insight provides a convenient method to log and display Lancom data using a Windows PC. The following pages are intended as a quick reference guide. - Page 72 Step Function See Insight User Guide Page Connect the Lancom 4 analyser to the PC using the USB-to- RS232 converter which is supplied with the Lancom instru- ment Turn on the Lancom 4 analyser, when the calibration cycle is complete select Gas Measurements and press GO.
- Page 73 Portable Flue Gas Analyser Lancom 4 Step Function See Insight User Guide Page Select the User Table by clicking on the User Table tab. Select Rename from the Table menu, and name the table SO2 Check. Remove columns for gases that are not required by moving to the column heading and pressing the right hand mouse button, the column menu will appear.
- Page 74 Lancom 4 Portable Flue Gas Analyser Step Function See Insight User Guide Page Complete the Edit Trigger dialog box as shown in the exam- ple. Select the Save icon from the Toolbar Enter the project name and store in the desired directory us- ing the Save dialog box.
-
Page 75: Insight Software: Glossary Of Icons
Data is not being recorded from the analyser Instrument Connection Status The PC is connected to the Lancom 4 analyser The PC is attempting to connect to the Lancom 4 analyser The PC is not connected to the Lancom 4 analyser File Management Create a new project 14.1... - Page 76 Lancom 4 Portable Flue Gas Analyser Icon Function See Insight User Guide Section Data Table Tools Insert a new table Delete the current data table Rename the current data table Configure the input parameters for the current table Insert a new data column into the table Delete the current column from the data table...
- Page 77 Portable Flue Gas Analyser Lancom 4 Icon Function See Insight User Guide Section Graph Pan and Zoom Tools Reset the graph scale to the default axis Zoom out on the X Axis only 10.4 Zoom out 10.4 Zoom out on the Y Axis only 10.4...
-
Page 78: Glossary
GLOSSARY... - Page 79 The standard time/flow regulation is subject to local regulations. Contact LAND Instruments International for advice. Service Light The service light illuminates when the Lancom 4 requires attention. Show Negatives SET-UP > SYSTEM > SHOW NEGATIVES: YES, NO. Negative values for gas concentrations and other values can be displayed.
- Page 80 Lancom 4 Portable Flue Gas Analyser Smoke Measurement This option is available when a heated smoke probe has been purchased as an option with the instrument. The time period (1 - 500 seconds) is the time the instrument draws smoke through the test paper.
- Page 81 For a full list of international offices, please visit our website www.ametek-land.com Copyright © 2008-18 LAND Instruments International. Continuous product development may make it necessary to change these details without notice. Lancom 4 User Guide, Issue 17, 25 September 2018...
Need help?
Do you have a question about the LANCOM 4 and is the answer not in the manual?
Questions and answers