Table of Contents

Advertisement

Matrox Iris GTR
Installation and Technical Reference
Manual no. Y11377-201-0200
July 12, 2018

Advertisement

Table of Contents
loading

Summary of Contents for Matrox Iris GTR Series

  • Page 1 Matrox Iris GTR Installation and Technical Reference Manual no. Y11377-201-0200 July 12, 2018...
  • Page 2 1055 St-Regis Blvd. Dorval, Quebec, Canada H9P 2T4 Web: http://www.matrox.com/imaging Limitation of Liabilities: In no event will Matrox or its suppliers be liable for any indirect, special, incidental, economic, cover or consequential damages arising out of the use of or inability to use the product, user documentation or related...
  • Page 3: Table Of Contents

    Inspecting your Matrox Iris GTR package ....... . . 12...
  • Page 4 Matrox Iris GTR smart camera summary ....... . . 60...
  • Page 5 ........79 Matrox Imaging operating system utilities ....... . . 80 Upgrading the Matrox Imaging operating system .
  • Page 6 Routing input signals to Matrox Iris GTR ....... . 107...
  • Page 7 Output-to-ICS3 selector switch ....... . . 140 Appendix G: Listing of Matrox Iris GTR smart cameras ..141 Key feature changes .
  • Page 9: Chapter 1: Before You Begin

    Chapter Before you begin Chapter 1: This chapter describes the features of your Matrox Iris GTR, lists the various smart camera models available, describes the software required to develop your imaging applications, outlines documentation conventions, provides an overview of this manual, and specifies where to find further support.
  • Page 10: Introduction

    Iris GTR can come pre-installed with Matrox Design Assistant or with MIL-only; contact your sales representative for more information. Note that the information found in this manual applies to both Matrox Iris GTR with Design Assistant and Matrox Iris GTR with MIL-only, unless otherwise specified.
  • Page 11: Models Available

    Introduction Matrox Iris GTR is fully integrated in an IP67 enclosure, eliminating the need to separately source a sealed camera housing, while still providing easy access to the lens. Matrox Iris GTR can connect to a display device through the VGA/USB connector and it can communicate with other devices through the Gigabit Ethernet network interface (100/1000 BaseT) and digital auxiliary I/O signals.
  • Page 12: Inspecting Your Matrox Iris Gtr Package

    • Liquid lens connector cap. • Matrox Design Assistant DVD. ❖ Note that your Matrox Iris GTR base package does not include any cables, a power supply, or a manual iris lens. To purchase these items, contact a Matrox sales representative.
  • Page 13: Matrox Iris Gtr Starter Kits

    Windows 10 IoT enterprise license). • System and Drivers Utilities DVD. ❖ Note that your Matrox Iris GTR base package does not include any cables, a power supply, or a manual iris lens. To purchase these items, contact a Matrox sales representative.
  • Page 14: Available Separately

    Matrox Iris GTR smart camera. • One C-mount 12 mm lens. Handling The lens of Matrox Iris GTR is a sensitive device. It should never be touched precautions directly. Always cover the lens if the smart camera is not in use to reduce dust buildup.
  • Page 15: Third-Party Supported Devices

    For more details about this cable, refer to VGA/USB connector subsection of the Matrox Iris GTR connectors section, in Appendix B: Technical reference. This cable is meant to connect your Matrox Iris GTR to a display device and a USB device (such as, a keyboard or mouse).
  • Page 16 Matrox Iris GTR smart camera (for example, to grab an image and communicate with connected devices) to build projects. Once the project is built, it runs on your Matrox Iris GTR without relying on the resources of your development computer.
  • Page 17: Documentation Conventions

    In this document, any computer that can communicate with your Matrox Iris GTR is referred to as “your computer”. If you use your computer to develop your applications for your Matrox Iris GTR, it is referred to as your development computer.
  • Page 18: Matrox Iris Gtr Safety Warnings And Key To Symbols

    • There are no serviceable parts inside this product. In case of defect, contact your Matrox representative. • To maintain IP67 conformity, all unused connectors on your Matrox Iris GTR must be capped and the IP case must be screwed firmly into place.
  • Page 19: Manual Overview

    To select a lens, refer to Appendix C: Selecting a lens. If you have a Matrox Iris GTR with Design Assistant, to use the various utilities and to recover the Matrox Imaging operating system (MIOS) on a Matrox Iris GTR, refer to Appendix D: Matrox Imaging operating system utilities and recovery.
  • Page 20: Need Help

    20 Chapter 1: Before you begin Need help? Additional help can be found on the support page of the Matrox Imaging website: http://www.matrox.com/imaging/en/support. This page provides answers to frequently asked questions, as well as offers registered customers additional ways of obtaining support.
  • Page 21: Chapter 2: Powering And Connecting To Your

    Chapter Powering and Chapter 2: connecting to your Matrox Iris GTR This chapter guides you through powering your Matrox Iris GTR, connecting it to another device, and reading the LEDs.
  • Page 22: Powering And Connecting To Your

    USB device (such as a keyboard or a mouse). • 100/1000 BaseT Ethernet connector. Provides connectivity between your Matrox Iris GTR and your computer or your network. Matrox Iris GTR can gain access to a LAN via Gbit Ethernet (GigE, 1G BaseT, or 1000BaseT), fast Ethernet (100BaseT), or twisted pair Ethernet (10BaseT).
  • Page 23 I/O and power cable from Matrox; however, you must use a custom cable to connect it to a power supply. For more information regarding the pin-out of your Matrox Iris GTR power and I/O connector, refer to the Digital I/O and power connector subsection of the Matrox Iris GTR connectors section, in Appendix B: Technical reference.
  • Page 24 & hub display device ❖ Note that if you are using a Matrox VGA/USB cable, the cable has a type A USB connector. If you are not using this connector, the VGA/USB cap must remain in place for IP67 conformity.
  • Page 25 Optionally connecting a liquid lens section, later in this chapter. Important Screw on the IP lens case until it is firmly in place over the lens and on the Matrox Iris GTR housing. Note that the IP lens case must be in place for IP67 conformity.
  • Page 26: Optionally Connecting A Liquid Lens

    Unused Caspian lens cable Liquid lens connector Matrox Iris GTR To do so, perform the following steps: 1. Disconnect the power from your Matrox Iris GTR. 2. If in place, unscrew the IP lens case from your Matrox Iris GTR.
  • Page 27 7. Tuck the 3-pin connector (and its branched wire) into the folds of the longer cable. The 3-pin connector is not used.. 8. Slide the IP lens case over the lens, and screw it into the Matrox Iris GTR housing, until it is firmly in place.
  • Page 28: Reading The State Of Your Matrox Iris Gtr

    Reading the state of your Matrox Iris GTR From the moment you power up your Matrox Iris GTR to the moment you power it down, at least one of the four light-emitting diodes (LEDs) at the back of Matrox Iris GTR should be lit.
  • Page 29 Overheat detected. Temperature is above the throttle temperature limit. Orange/Off blink a. This LED is not pre-configured on the Matrox Iris GTR with MIL-only smart cameras, but can be configured using Msy- sControl with M_LED_USER. The Status LED typically displays one of the following sets of colors:...
  • Page 30: Adding Matrox Iris Gtr To Your Network

    Adding Matrox Iris GTR to your network Corporate-wide networks typically use DHCP servers to assign each connected device an IP address. If your Matrox Iris GTR is still in its factory-configured state, and your network uses a DHCP server, no configuration is required to use your Matrox Iris GTR on your network.
  • Page 31: Device Name (Auto Netname)

    Connecting directly to your Matrox Iris GTR If you do not know your Matrox Iris GTR’s IP address, you can physically connect to it and change its IP address; to do so for a Matrox Iris GTR, perform the following: 1.
  • Page 32 Using the Matrox Iris GTR Discovery utility for Matrox Iris GTR If you do not know your Matrox Iris GTR’s IP address, you can use the Matrox Iris GTR Discovery utility to access it and change its IP address; to do so, perform the following: 1.
  • Page 33: Connecting To Your Matrox Iris Gtr Desktop

    The following instructions are for Matrox Iris GTR with Matrox Design Assistant. If you have Matrox Iris GTR with MIL-only, it has Windows 10 IoT, so you can set up remote access to your camera using the Windows Remote Desktop Connection utility.
  • Page 34: Accessing Your Matrox Iris Gtr From Your Pc

    Typically, Matrox Iris GTR will be listed as a computer under the Network folder. When you try to access the files on your Matrox Iris GTR, you are prompted for a user name and password. Note that these fields are case-sensitive.
  • Page 35: Connecting To The Auxiliary I/O Interface

    When setting up auxiliary I/O, be aware that you need to configure these pins on the software side as well. If you are using Matrox Design Assistant, refer to the Connecting to your Matrox Iris GTR as your runtime platform section of the Matrox Iris GTR appendix in the Matrox Design Assistant help file for this information.
  • Page 36: Connecting Devices To The Auxiliary Output Signals

    36 Chapter 2: Powering and connecting to your Matrox Iris GTR Connecting devices to the auxiliary output signals Matrox Iris GTR auxiliary output signals can be interfaced with input modules (with sourcing or sinking input signals) found on most programmable logic controllers (PLCs) and other devices.
  • Page 37 AUX OUT Sinking device AUX OUT _COMMON Matrox Iris GTR (in a sourcing configuration) VDC- (typical) Equivalent circuit only When an auxiliary output signal is on, the circuit between its AUX_OUT pin and AUX_OUT_COMMON pin is closed, allowing current to flow from the AUX_OUT pin to the AUX_OUT_COMMON pin, if the AUX_OUT pin is attached to a power source or a sourcing device.
  • Page 38 38 Chapter 2: Powering and connecting to your Matrox Iris GTR When the auxiliary output signal is attached to a device, the following can be observed: Observed voltage Signal on Signal off Connection Observed at (closed so current can flow from...
  • Page 39 As a precaution, the auxiliary output signals are individually fuse-protected up to 50 mA. Matrox Iris GTR uses resettable fuses. The fuses protect Matrox Iris GTR if you accidentally connect their corresponding auxiliary output signal to a device that sources/sinks more current than Matrox Iris GTR can safely transmit. If more than 50 mA of current goes through your Matrox Iris GTR, the fuse will eventually trip.
  • Page 40 The Matrox Iris GTR auxiliary output signals are optically isolated from the power output signals and analog intensity (dimming) control signal as well as from the Matrox Iris GTR auxiliary input signals. They are not, however, optically isolated from each other as they share a common pin (AUX_OUT_COMMON).
  • Page 41: Connecting An Auxiliary Output Signal To A Sourcing Input

    Connecting to the auxiliary I/O interface Connecting an auxiliary output signal to a sourcing input Connect a Matrox Iris GTR auxiliary output signal to a sourcing input, as shown below. Input sensing AUX_OUT INPUT Up to 24V Sourcing device –...
  • Page 42: Connecting An Auxiliary Output Signal To A Sinking Input

    42 Chapter 2: Powering and connecting to your Matrox Iris GTR Connecting an auxiliary output signal to a sinking input Connect a Matrox Iris GTR auxiliary output signal to a sinking input, as shown below. In this case, the pullup circuitry is used to source the current to the sinking input.
  • Page 43 Note that, in this configuration, you will need to connect an external pullup resistor. Since your Matrox Iris GTR auxiliary output signals can sink up to 50 mA, use the documentation of your sinking device to calculate the required resistance for your external pullup resistor (if necessary).
  • Page 44: Connecting An Auxiliary Output Signal To An Inductive Load Input

    44 Chapter 2: Powering and connecting to your Matrox Iris GTR Connecting an auxiliary output signal to an inductive load input Connect a Matrox Iris GTR auxiliary output signal to an inductive load input, as shown below. An inductive load device, such as a traditional relay, requires that you use a flyback diode to protect Matrox Iris GTR from over and under-voltage, as shown below.
  • Page 45: Connecting Devices To The Auxiliary Input Signals

    Connecting to the auxiliary I/O interface Connecting devices to the auxiliary input signals Matrox Iris GTR auxiliary input signals can be interfaced with a wide variety of devices (such as proximity detectors). The Matrox Iris GTR auxiliary input signals only detect when current flows between their AUX_IN pin and AUX_IN_COMMON pin.
  • Page 46 In this case, select a resistor value that will not overcurrent the output device and instead provide just enough current and voltage to your Matrox Iris GTR auxiliary input signals, according to the Electrical specifications subsection in Appendix B: Technical reference.
  • Page 47 Matrox Iris GTR auxiliary input signals. following subsections Note that Matrox Iris GTR auxiliary input signals are optically isolated. Ground is only shown in the following subsections for reference, in case you need to reference your return path to ground.
  • Page 48: Connecting A Sourcing Output Device To An Auxiliary Input Signal

    48 Chapter 2: Powering and connecting to your Matrox Iris GTR Connecting a sourcing output device to an auxiliary input signal Connect a sourcing output device to Matrox Iris GTR auxiliary input signal, as shown below. AUX IN Sensing Circuit...
  • Page 49: Connecting A Sinking Output Device To An Auxiliary Input Signal

    Connecting to the auxiliary I/O interface Connecting a sinking output device to an auxiliary input signal Connect a sinking output device to a Matrox Iris GTR auxiliary input signal, as shown below. AUX IN_COMMON Sensing Circuit AUX IN Matrox Iris GTR...
  • Page 50: Connecting A 3-Wire Pnp Proximity Sensor To An Auxiliary Input Signal

    50 Chapter 2: Powering and connecting to your Matrox Iris GTR Connecting a 3-wire PNP proximity sensor to an auxiliary input signal Connect a 3-wire PNP proximity sensor to a Matrox Iris GTR auxiliary input signal, as shown below. Brown wire...
  • Page 51: Connecting A 3-Wire Npn Proximity Sensor To An Auxiliary Input Signal

    Connecting to the auxiliary I/O interface Connecting a 3-wire NPN proximity sensor to an auxiliary input signal Connect a 3-wire NPN proximity sensor to a Matrox Iris GTR auxiliary input signal, as shown below. AUX IN_COMMON Sensing Circuit Brown wire...
  • Page 52: Connecting A 2-Wire Proximity Sensor To An Auxiliary Input Signal

    52 Chapter 2: Powering and connecting to your Matrox Iris GTR Connecting a 2-wire proximity sensor to an auxiliary input signal You can connect a 2-wire proximity sensor to a Matrox Iris GTR auxiliary input signal in either a sourcing or sinking configuration (that is, on a positive or negative power wire).
  • Page 53 AUX_IN_COMMON pin. Brown wire Blue wire AUX IN Sensing Bleeding 2-wire PNP Circuit Resistor proximity sensor AUX IN_COMMON Matrox Iris GTR Sinking configuration Optional because the auxiliary input signals are optically isolated. Equivalent circuit only...
  • Page 54: Connecting A Light Controller And The Analog Intensity Control Signal

    Physical Camera under the Cameras item of the Platform configuration dialog, and enter a value for Intensity. See the Grab and auxiliary I/O overview section of the Matrox Iris GTR appendix in the Matrox Design Assistant help file for more information.
  • Page 55: Connecting A Sourcing Light Controller (Npn Pin)

    To do so, connect the sourcing light controller to an auxiliary output signal and the analog intensity control signal (AUX_AREF_OUT7) of Matrox Iris GTR as shown below Connection to Matrox Iris GTR...
  • Page 56: Connecting A Sinking Light Controller (Pnp Pin)

    56 Chapter 2: Powering and connecting to your Matrox Iris GTR Connecting a sinking light controller (PNP Pin) If your lighting controller has a PNP pin (sinking input signal), it expects to be connected in a PNP topology, whereby the connected, controlling auxiliary output signal sources the current and the input pin sinks current.
  • Page 57: Appendix A: Glossary

    Appendix A: Glossary Appendix A: This appendix defines some of the specialized terms used in this manual.
  • Page 58: Glossary

    • Sinking. A DC circuit that provides the common reference (low) for the circuit. In the case of your Matrox Iris GTR, determining whether the connection is sinking or sourcing determines how to connect the auxiliary input common signal and auxiliary output common signal, respectively.
  • Page 59: Appendix B: Technical Reference
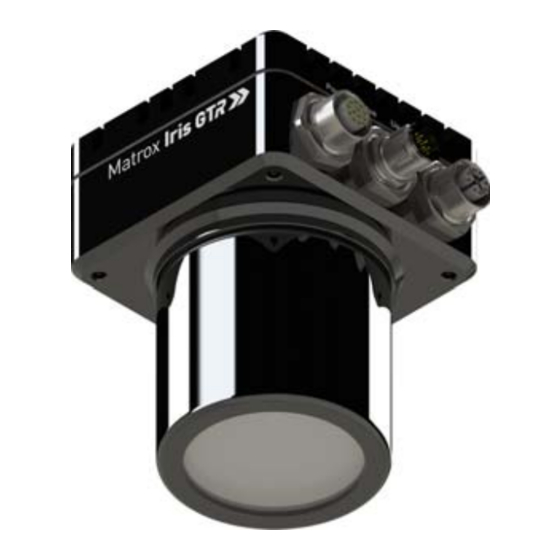
    Appendix B: Technical reference Appendix B: This appendix summarizes the hardware elements of Matrox Iris GTR. In addition, this appendix provides pinout descriptions for the external connectors of your Matrox Iris GTR.
  • Page 60: Matrox Iris Gtr Smart Camera Summary

    60 Appendix B: Technical reference Matrox Iris GTR smart camera summary Sensor board Specifications GTR300 GTR300C GTR1300 GTR1300C CMOS sensor Geometry 1/4”-type 1/2”-type Format Monochrome Color Monochrome Color Make and model ON Semiconductor - Python family (NOIP1SN or NOIP1SE) Effective resolution (H x V)
  • Page 61: Cpu Board

    The debouncing time can be configured using Matrox Design Assistant. For more information, refer to the Matrox Design Assistant help file. If you have a Matrox Iris GTR with MIL-only, refer to the MIL help file for more information.
  • Page 62 (dimming) control (0-10 V translates to 0-100% illumination). - Timers.1 exposure, 1 strobe, 8 general purpose. 1 exposure timer. A 28-bit timer used to control the exposure of your Matrox ❯ Iris GTR, and allows a range of exposure time from 50 usec to 4 sec. The timer output will always set camera exposure, but can be simultaneously redirected to any auxiliary output signal.
  • Page 63: Lenses

    Lenses • Display. Your Matrox Iris GTR can use a video screen connected to the VGA/USB connector to display the Matrox Iris GTR interface.The following information relates to the device that can be connected to the VGA/USB connector. - Output: RGB analog output.
  • Page 64: General Care And Cleaning

    The Matrox Iris GTR works with the Varioptic Caspian C-39N0-160-I2C or C-39N0-250-I2C lens (liquid lens). This electronically focus-controllable C-mount lens, fits within the IP lens case, provided with your Matrox Iris GTR. The Varioptic lens connects to the liquid lens connector inside the lens case housing of your Matrox Iris GTR.
  • Page 65 Minimum input current at minimum ON voltage. This can be used to calculate bleeding resistor needed for 2-wire proximity sensor. Recommended > 12 V when using Matrox Iris GTR breakout board. GTR300, GTR300C, GTR1300, GTR1300C, GTR2000, GTR2000C, GTR5000, GTR5000C...
  • Page 66: Environmental Specifications

    66 Appendix B: Technical reference Environmental specifications • For indoor use only. • Maximum altitude: 2000 meters. • Operating temperature: 0 to 50 C (32 °F to 122 °F) • Ventilation requirements: Natural convection. • Pollution degree: 2 environment. • Over-voltage category: I •...
  • Page 67 Matrox Iris GTR specifications Camera heatsink Camera housing .945 .236 24.00 6.00 O-ring .673 17.10 M12 connectors 1.811 2.126 46.00 54.00 O-ring 2.834 Flange 72.00 REF. M4X0.7 - 6H 4.00 0.157 IP lens case .276 2.402 7.00 61.00 1.043 26.50 1.614...
  • Page 68: Matrox Iris Gtr Connectors

    68 Appendix B: Technical reference Matrox Iris GTR connectors Your Matrox Iris GTR has several interface connectors. These are the Digital I/O and power connector, the VGA/USB connector, the100/1000 BaseT Ethernet connector, and the Liquid lens connector. Digital I/O and...
  • Page 69 Opto-isolated industrial auxiliary signal 2 (output). Supported function: user-bit 2 (output 3 of 3). + VDC Positive pin of the power provided to your Matrox Iris GTR. This pin must be connected to a + 24 V +/- 10% power supply. AUX(TRIG)_OPTOIND_IN3 M_AUX_IO3 Opto-isolated industrial auxiliary signal 3 (input).
  • Page 70: 100/1000 Baset Ethernet Connector

    70 Appendix B: Technical reference To interface with this connector, you can use either the cable that comes with the starter kit, GTR-CBL-PWR/3, or you can build your own. To build your own digital I/O and power cable, parts can be purchased from: Cable information Manufacture Phoenix Contact GmbH &...
  • Page 71: Vga/Usb Connector

    Matrox Iris GTR connectors To interface with this connector, you can use either the cable that comes with the starter kit, GTR-CBL-ETH/5, or your can purchase a similar cable from an alternate source. For an alternate source of 100/1000 BaseT Ethernet cables,...
  • Page 72 GND 11 8 GND VGA Reference VGA Reference DRAIN WIRE SHELL SHELL USB DATA USB DATA# USB VCC USB Reference DRAIN WIRE SHELL SHELL This cable can be purchased as part of the starter kit, or separately from Matrox (GTR-CBL-VGAUSB).
  • Page 73: Liquid Lens Connector

    C-39N0-250-I2C lens. The secondary, 3-pin male connector, from the Varioptic lens is not used. This connector is located inside the lens cap housing of your Matrox Iris GTR. The pinout for the liquid lens connector is as follows: Pin number...
  • Page 74 74 Appendix B: Technical reference...
  • Page 75: Appendix C: Selecting A Lens

    Appendix C: Selecting a lens Appendix C: This appendix provides information on how to select the lens best suited to your needs.
  • Page 76: Introduction

    76 Appendix C: Selecting a lens Introduction This appendix includes information on lens selection, an important consideration when building your application. The primary consideration during lens selection is that the focal length of the selected lens meets your application’s requirements. The focal length is the distance between the principal plane and the point where parallel light rays, bent at the principal plane, intersect the optical axis.
  • Page 77: Calculating The Required Focal Length

    To calculate the required focal length, measure the distance from the smart camera to the object, as well as the height (vertical size) and width (horizontal size) of the object. Matrox Iris GTR Distance from object Use the following calculations to determine the required focal length for your situation.
  • Page 78 In this example, a lens with a focal length of 7.34 mm (horizontal) is required. If the lens shipped with your Matrox Iris GTR starter kits has a focal length equal to the focal length of your calculation, you have the correct lens for your situation.
  • Page 79: Appendix D: Matrox Imaging Operating System

    Appendix D: operating system utilities and recovery This appendix describes the utilities found on your Matrox Iris GTR and provides instructions on how to recover the Matrox Imaging operating system (MIOS) that comes with Matrox Iris GTR with Design Assistant.
  • Page 80: Matrox Imaging Operating System Utilities

    Bonjour browser is a program that lists all the services on your subnet. This provides a way to find the IP address of any Matrox Iris GTR on the subnet. • FileZilla. A client utility for transferring files from one computer to another using FTP, FTPS, or SFTP.
  • Page 81: Upgrading The Matrox Imaging Operating System

    3. Once the MIOS ISO file has been selected, click on the Update button in the Update dialog and your update will begin. The ISO file will be copied to Matrox Iris GTR; then, the camera will power cycle. Some early production cameras do not have the ability to automatically power cycle;...
  • Page 82: Restoring The Matrox Imaging Operating System

    Restoring the Matrox Imaging operating system If required, you can restore the Matrox Imaging operating system either to factory defaults, available on your Matrox Iris GTR, or boot from a USB key with an upgraded MIOS ISO. Restoring the MIOS to factory defaults The factory default version of the MIOS ISO is stored on Matrox Iris GTR.
  • Page 83: Acquiring And Restoring Mios From A Usb Key

    To safely copy your ISO and use it to install a new operating system on multiple Matrox Iris GTRs, you should burn the ISO of the MIOS to a blank USB key with a capacity of 2 Gbytes, or more. To do so: 1.
  • Page 84: Updating The Matrox Iris Gtr Bios

    Updating the BIOS is a delicate operation that requires user-intervention to ensure it is executed without interruption. Note that if a power failure occurs during the BIOS update process, your Matrox Iris GTR will have to be sent to Matrox for repair.
  • Page 85 IR110018.bin). The BIOS update starts after a 10-second delay. Once the BIOS update begins, information will appear on your local display. 5. When the BIOS update completes, you will be prompted to reboot Matrox Iris GTR. Changes made will not take effect until you reboot.
  • Page 86 86 Appendix D: Matrox Imaging operating system utilities and recovery...
  • Page 87: Appendix E: Microsoft Windows Operating System Partition Backup And Recovery

    This appendix provides instructions on how to restore or backup your Matrox Iris GTR if it was purchased with MIL-only. If you purchased the Matrox Iris GTR with Design Assistant see Appendix D: Matrox Imaging operating system utilities...
  • Page 88: Matrox Iris Gtr Windows 10 Iot Enterprise Configuration Utility

    USB key (that is, to also configure the key with other files necessary for installing the backup image). • Restore a Matrox Iris GTR to its factory default settings or to a backup or captured backup image of all its files.
  • Page 89 The RECOVERY partition houses the Matrox Iris GTR Rescue utility and does not get reformatted if you restore a backup .wim file from the Matrox Rescue utility console. However, if you use a rescue USB key with a captured backup .wim file (W10EGTR.wim), or restore to a factory default settings file...
  • Page 90: Microsoft Windows Out-Of-Box-Experience (Oobe)

    MtxUser, and password, Matrox. The OOBE also generates a unique ID for your Matrox Iris GTR. At the end of your OOBE, you will be asked to leave User Account Control (UAC) on; select OK. For more information on the OOBE default settings, refer to the ResQReadme.txt file on...
  • Page 91: Capturing The Matrox Iris Gtr Operating System Partition For Deployment

    Note The capture process should be done once your Matrox Iris GTR is configured to your specifications and you do not need to make any more changes. To perform a capture, you must access your Matrox Iris GTR directly; you cannot perform this task remotely.
  • Page 92 This will reformat your USB key and all data will be erased. The Matrox Iris GTR Rescue utility configures the USB key to be a rescue USB key with all the necessary settings to restore your captured backup .wim file onto other Matrox Iris GTRs.
  • Page 93: Backup Matrox Iris Gtr Windows 10 Iot Enterprise

    ID of the camera; this ID will be applied to any Matrox Iris GTR that is restored with this backup .wim file. If two cameras with the same unique ID are running on the same network, there will be network conflicts.
  • Page 94: Making A Rescue Usb Key For Windows10 Iot Enterprise

    This procedure requires a USB key with at least 16 Gbytes free. To create a rescue USB key, you must access your Matrox Iris GTR directly; you cannot perform this task remotely. To access the camera directly, connect a display devices, keyboard, and mouse to your Matrox Iris GTR.
  • Page 95 Making a rescue USB key for Windows10 IoT Enterprise When creating a rescue USB key, you must already have a backup file that you want to use for the recovery. This could either be the Matrox default factory settings backup .wim file (W10Ex64GTR.wim) that comes with your installation DVD, or a backup file that you have created (W10EGTR.wim) using the...
  • Page 96: Restore Windows 10 Iot Enterprise

    Restore Windows 10 IoT Enterprise You can restore the Windows 10 IoT Enterprise operating system partition of your Matrox Iris GTR smart camera, using the Matrox Iris GTR Rescue utility with a backup .wim file or a captured backup .wim file.
  • Page 97 Restore Windows 10 IoT Enterprise 3. When in the Matrox Rescue utility dialog, select the Matrox Iris GTR - Restore OS menu option. 4. Select which .wim file (W10Ex64GTR.wim or W10EGTR.wim) to restore. ❖ Note that these files are created with the backup or captured options, described earlier in this chapter.
  • Page 98 98 Appendix E: Microsoft Windows operating system partition backup and recovery...
  • Page 99: Appendix F: The Matrox Iris Gtr Breakout Board

    The Matrox Iris GTR Appendix F: breakout board This appendix describes how to use the Matrox Iris GTR breakout board to connect your Matrox Iris GTR to power and/or to third-party devices. Note that the Matrox Iris GTR breakout board is strictly intended for development purposes only.
  • Page 100: Introducing The Matrox Iris Gtr Breakout Board

    The Matrox Iris GTR breakout board allows you to test the inputs and outputs of your Matrox Iris GTR, as well as initially power your smart camera. The Matrox breakout board provides a convenient way to connect the digital I/O and power cable, re-route signals, connect third-party devices, and generate triggers.
  • Page 101 Introducing the Matrox Iris GTR breakout board Power source connectors Matrox camera connector OUT_COM IN_COM selector selector Output-to-input bypass switches OUT2 → IN6 Output pullup OUT1 → IN5 resistor switches OUT0 → IN4 IN_COM_TERM OUT0 → IN3 (External/on-board) OFF/ON OFF/ON...
  • Page 102 • Matrox camera connector. Connects your Matrox breakout board to your Matrox Iris GTR, using the Matrox Iris GTR digital I/O and power cable. • Power source connectors. Connects your Matrox Iris GTR breakout board to a source of power. The power source connectors includes both a terminal block connector and a DC power socket.
  • Page 103: Flow Diagram Of The Auxiliary Input And Output Signals

    Introducing the Matrox Iris GTR breakout board Flow diagram of the auxiliary input and output signals The following is a flow diagram of the auxiliary input and auxiliary output signals of the Matrox Iris GTR breakout board: Matrox Iris GTR...
  • Page 104: Connecting An Open-Wire To A Spring Wire-Terminal

    1. Press down on the orange flange (the spring) with a small tool or pen. 2. Insert the un-insulated and tinned wire tip into the hole before releasing the orange flange. The wire is now attached to the terminal block connector on the Matrox Iris GTR breakout board.
  • Page 105: Powering And Connecting

    To power your Matrox Iris GTR and connect its I/O signals to your Matrox Iris GTR breakout board, perform the following: 1. Connect the gray-pink and green wires of the Matrox Iris GTR digital I/O and power cable to the gray-pink and green wire-terminals of the Matrox camera connector on the Matrox Iris GTR breakout board, respectively.
  • Page 106 ICS3 connector. For more information, refer to ICS3 connector subsection of the Open-wire connectors reference section, later in this appendix. 5. To power your Matrox Iris GTR breakout board, you can use one of two connectors: the DC power socket (J3) or the power screw wire-terminals (J2).
  • Page 107: Routing Input Signals To Matrox Iris Gtr

    Routing input signals to Matrox Iris GTR Routing input signals to Matrox Iris GTR There are three ways to route a signal to an auxiliary input signal of your Matrox Iris GTR: • Route an output signal from a third-party device to an auxiliary input signal of your Matrox Iris GTR.
  • Page 108: Routing An Output Signal From A Third-Party Device To An Auxiliary Input Signal Of Your Matrox Iris Gtr

    Iris GTR auxiliary input signal through your Matrox Iris GTR breakout board, perform the following: 1. Connect the power and the digital I/O signals of your Matrox Iris GTR to your Matrox Iris GTR breakout board by following the steps in the Powering and connecting section, earlier in this appendix.
  • Page 109 Routing input signals to Matrox Iris GTR Connecting a sourcing output device to a Matrox Iris GTR auxiliary input signal If connecting to a sourcing output of a third-party device, the input common should provide the common return path for the circuit. To provide the common...
  • Page 110 110 Appendix F: The Matrox Iris GTR breakout board Connecting a sinking output device to a Matrox Iris GTR auxiliary input signal If connecting to a sinking output of a third-party device, the input common should be connected to a voltage source so that the auxiliary input signal acts as a sourcing input.
  • Page 111: Routing A Matrox Iris Gtr Auxiliary Output Signal To An Auxiliary Input Signal

    Routing a Matrox Iris GTR auxiliary output signal to an auxiliary input signal You can route Matrox Iris GTR auxiliary output signal 0 to 2 to Matrox Iris GTR auxiliary input signal 3 to 6, respectively (auxiliary input signal 0 can be routed to auxiliary input signal 3 or 4).
  • Page 112: Generating A Matrox Iris Gtr Auxiliary Input Signal Using

    Matrox Iris GTR breakout board. To do so, perform the following: 1. Connect the power and the digital I/O signals of your Matrox Iris GTR to the Matrox Iris GTR breakout board by following the steps in the Powering and connecting section, earlier in this appendix.
  • Page 113: Routing Matrox Iris Gtr Auxiliary Output Signals

    There are three ways to route a Matrox Iris GTR auxiliary output signal: • Route a Matrox Iris GTR auxiliary output signal to an auxiliary input signal; to do so, see Routing a Matrox Iris GTR auxiliary output signal to an auxiliary input signal subsection of the Routing input signals to Matrox Iris GTR section, earlier in this appendix.
  • Page 114: Routing A Matrox Iris Gtr Auxiliary Output Signal To A

    To route a Matrox Iris GTR auxiliary output signal to a third-party input signal through your Matrox Iris GTR breakout board, perform the following: 1. Connect the power and the digital I/O signals of your Matrox Iris GTR to the Matrox Iris GTR breakout board by following the steps in the Powering and...
  • Page 115 2. Perform the instructions in one of the following subsections, depending on the type of connection to be made: • Connecting a sinking Matrox Iris GTR auxiliary output signal to a sourcing input of a device. • Connecting a sinking Matrox Iris GTR auxiliary output signal to a sourcing input with a different voltage source.
  • Page 116 If the device doesn’t need to be electrically isolated, you can use the common return path through the Matrox Iris GTR breakout board (internally); to do so, set the OUT_COM selector switch (SW3) to -VDC.
  • Page 117 If connecting to a sourcing input of a third-party device which requires less than 24 V, then your Matrox Iris GTR breakout board and your third-party device must each have their own voltage source. In addition, set the OUT_COM selector switch (SW3) to OPEN.
  • Page 118 118 Appendix F: The Matrox Iris GTR breakout board Connecting a sourcing Matrox Iris GTR auxiliary output signal to a sinking input of a device If connecting to a sinking input of a third-party device, an output wire-terminal (for example, OUT0) should be connected to a voltage source so that the auxiliary output signal provides a sourcing output through the OUT_COM wire-terminal.
  • Page 119 If you need an output pullup, you can use the output pullup resistor switches (SW6) on the Matrox Iris GTR breakout board. To do so, turn on the output pullup resistor switch for the auxiliary output signal used. Each of the output pullup resistor switches (SW6[1-3]) is associated to one of the three auxiliary output signals of your Matrox Iris GTR.
  • Page 120: Routing Matrox Iris Gtr Auxiliary Output Signal 0

    To route Matrox Iris GTR auxiliary output signal 0 and the analog intensity (dimming) control signal to a lighting controller, perform the following: 1. Connect the power and the digital I/O signals of your Matrox Iris GTR to the Matrox Iris GTR breakout board by following the steps in the Powering and connecting section, earlier in this appendix.
  • Page 121 On, the signal on the PNP wire-terminal is high; when it is set to Off, the signal on the PNP wire-terminal is low. When the Matrox Iris GTR breakout board supplies the power to the lighting controller, verify that the total power required by the lighting controller and your smart camera does not exceed the rating of your power supply.
  • Page 122 ❖ Note that in this configuration, auxiliary output signal 1 and auxiliary output signal 2 are still available via the Matrox Iris GTR breakout board. Connecting Matrox Iris GTR auxiliary output signal 0 to a sourcing lighting controller (NPN pin)
  • Page 123: Open-Wire Connectors Reference

    Matrox breakout board connector name Wire-terminal Connector type Matrox camera connector Connects your Matrox Iris GTR to the Matrox Iris GTR breakout board via the digital I/O and power cable. Power source connectors J2-J3 Provides power to the Matrox Iris GTR breakout board and your Matrox Iris GTR.
  • Page 124: Matrox Camera Connector

    124 Appendix F: The Matrox Iris GTR breakout board Matrox camera connector The Matrox camera connector (J1) is a series of 12 wire-terminals. Connect it to the digital I/O and power connector of your Matrox Iris GTR, using the Matrox open-wire digital I/O and power cable that comes with the Matrox Iris GTR starter kit.
  • Page 125 Can be either the positive or negative pin, depending on whether the auxiliary input signals are in sinking or sourcing mode, respectively. b. Note that the status LEDs on your Matrox Iris GTR breakout board break the electrical isolation provided by the opto-isolated auxiliary signals from your Matrox...
  • Page 126: Power Source Connectors

    DC power socket (J3). You can either connect power to the DC power socket or the two wire-terminals, but not both simultaneously. This connection powers both the Matrox Iris GTR breakout board and your connected Matrox Iris GTR smart camera. Note that a DC power supply (compatible with the DC power socket (J3) is provided in the Matrox Iris GTR starter kit.
  • Page 127: Input Connector

    (labeled IN3 (CAM TRIG) through IN6) connect to your third-party devices so that the devices can send signals to the auxiliary input signals of your Matrox Iris GTR (such as, trigger signals). The fifth-wire terminal can connect to an external voltage source/return path for the auxiliary input signals.
  • Page 128: Output Connector

    If the IN_COM_TERM selector switch (SW6[4]) is set to ON, this wire-terminal should remain disconnected since your Matrox Iris GTR breakout board provides the common return path or voltage signal for the auxiliary input signals of your smart camera (depending on the setting of the IN_COM selector switch (SW2)).
  • Page 129 In addition, if the OUT_COM selector switch (SW3) is set to -VDC, this wire-terminal should remain disconnected. Instead, your Matrox Iris GTR breakout board will provide the output common signal. +VDC_OUT +VDC supply up to a maximum of 150 mA.
  • Page 130: Ics3 Connector

    130 Appendix F: The Matrox Iris GTR breakout board ICS3 connector The ICS3 connector (J7) is a series of 5 wire-terminals that has been designed to connect to a lighting controller (such as, an Advanced Illumination inline control system (ICS3) a Smart Vision Lights Brick light, or a similar device).
  • Page 131 Positive pin of the power provided to the third-party lighting Green Pin 1(brown) controller. The +VDC pin must be used in conjunction with the -VDC pin, and only if you want your third-party lighting controller to be powered by the Matrox Iris GTR breakout board.
  • Page 132: Push Buttons

    Input6 Input5 Input4 Input3 The Matrox Iris GTR breakout board reference for the push buttons is as follows: Push button Description Matrox Iris GTR Routed through the signal received Matrox Iris GTR breakout board’s...
  • Page 133: Leds Reference

    LEDs reference LEDs reference Your Matrox Iris GTR breakout board has 9 LEDs designed to report activity on various auxiliary signals and power.
  • Page 134 Matrox Iris GTR breakout board’s camera connector A. Input LEDs Reports whether there is activity on each Matrox Iris GTR auxiliary input signal, regardless of whether it comes from a push button, rerouted auxiliary output signal, or connected third-party device. AUX(TRIG)_OPTOIND_IN3 Pink Activity on auxiliary signal 3 (input).
  • Page 135: Switches Reference

    Switches reference Switches reference Your Matrox Iris GTR breakout board has 6 switches designed to redirect the signals of your Matrox Iris GTR. Each switch has two states: on and off; each state is described below. IN_COM OUT_COM selector selector...
  • Page 136: Output-To-Input Bypass Switches

    Output-to-input bypass switches The output-to-input bypass switches (SW5[1] to SW5[4]) allow you to reroute a Matrox Iris GTR auxiliary output signal to a Matrox Iris GTR auxiliary input signal. ❖ When creating an output-to-input bypass, enable the pullup for the auxiliary output signal using the corresponding output pullup resistor switch (SW6[1] - SW6[3], respectively), if required.
  • Page 137: Output Pullup Resistor Switches

    The output pullup resistor switches (SW6[1] through SW6[3]) provide an on-board pullup for each auxiliary output signal. They are used when routing a Matrox Iris GTR auxiliary output signal to a Matrox Iris GTR auxiliary input signal using the output-to-input bypass switches (SW5). Alternatively, they can be used when routing an auxiliary output signal to a third-party device that requires a pullup between itself and the Matrox Iris GTR.
  • Page 138: In_Com_Term Switch

    IN wire-terminal of an auxiliary input signal to the output signal of the third-party device. If creating an electrically isolated circuit with a third-party device, see Connecting a sinking Matrox Iris GTR auxiliary output signal to a sourcing input with a different voltage source subsection, previously in this appendix.
  • Page 139: Out_Com Selector Switch

    (J6) OUT wire-terminals. -VDC Specifies that output common is provided internally. Your Matrox Iris GTR breakout board will provide the electrical return path for the auxiliary output signals. This setting can only be used when the auxiliary output signal is sinking.
  • Page 140: Output-To-Ics3 Selector Switch

    Output-to-ICS3 selector switch The Output-to-ICS3 selector switch (SW8) allows you to specify whether you are connecting auxiliary output 0 of your Matrox Iris GTR through the Matrox Iris GTR breakout board’s ICS3 connector (J7) to a lighting controller that has either a PNP pin (sinking input signal) or an NPN pin (sourcing input signal).
  • Page 141: Appendix G: Listing Of Matrox Iris Gtr Smart Cameras

    Appendix G: Listing of Matrox Appendix G: Iris GTR smart cameras This appendix lists the key feature changes to the Matrox Iris GTR smart cameras.
  • Page 142: Key Feature Changes

    Part number Version Description GTR300C, GTR1300C, First shipping of Matrox Iris GTR color models running Matrox Imaging operating system GTR2000C, GTR5000C (64-bit) with Matrox Design Assistant IDE. Updated BIOS to version 1.10.018. Installed Matrox Design Assistant 5 on the smart camera.
  • Page 143 Key feature changes Part number Version Description GTR300MW, GTR1300MW, First shipping of Matrox Iris GTR monochrome models running Microsoft® Windows® GTR2000MW, GTR5000MW Embedded Standard 7 with run-time software-only license. Updated BIOS to version 1.10.018. Updated BIOS to version 1.10.026. Updated firmware for Windows 10 SKU of the Matrox Iris GTR.
  • Page 144 144 Appendix G: Listing of Matrox Iris GTR smart cameras...
  • Page 145: Index

    – 100/1000 BaseT 13 Lens, physical 14 Configuring 30 Focal length 76 LED 28 – Liquid lens 15 Breakout board 99 Matrox Iris GTR Breakout board 14 MIL 16 MIL-Lite 17 – Connecting 23 – – 100/1000 BaseT 13 –...
  • Page 146 Trigger 123 User name 33 Utilities 33 VGA/USB cable 15 – connector 13 – VNC 33 VNC See Connecting remotely...
  • Page 147: Regulatory Compliance

    Regulatory Compliance FCC Compliance Statement Warning Changes or modifications to these units not expressly approved by the party responsible for the compliance could void the user's authority to operate this equipment. The use of shielded cables for connections of these devices to other peripherals is required to meet the regulatory requirements.
  • Page 148 Bitte wenden Sie sich an dem Matrox-Website (www.matrox.com/environment/weee) für Recycling Informationen. (Italiano) Informazioni per gli utenti europei – Direttiva sui rifiuti di apparecchiature elettriche ed elettroniche (RAEE) Si prega di riferirsi al sito Web Matrox (www.matrox.com/environment/weee) per le informazioni di riciclaggio.
  • Page 149: Limited Warranty

    Limited Warranty Refer to the warranty statement that came with your product.

Table of Contents