Chapters
Table of Contents

Related Manuals for Amica KMC 745 100 E


Summary of Contents for Amica KMC 745 100 E
- Page 1 PG5VQ205FTN / (KMC 745 100 E ) (EN) INSTRUCTION MANUAL........2 (NL) GEBRUIKERSHANDLEIDING......26 IO-HOB-0606 / 8071067 (04.2018 / v2)
-
Page 2: Basic Information
DEAR USER, Your hob combines exceptional ease of use with excellent effectiveness. Once you have read the instructions, operating your hob will not be a problem. Before being packed and leaving the factory, the safety and functions of this hob were ca- refully tested. -
Page 3: Table Of Contents
TABLE OF CONTENTS Basic information ....................2 Safety instructions ....................4 Saving energy .......................8 Description of the appliance ................9 Installation......................10 Operation ......................15 Cleaning and routine maintenance ..............21 Emergency procedure..................23 Technical data .....................25 Warranty ......................25... -
Page 4: Safety Instructions
SAFETY INSTRUCTIONS Warning: The appliance and its accessible parts become hot during use. Care should be taken to avoid touching heating elements. Children less than 8 years of age shall be kept away unless continuously supervised. This appliance can be used by children aged from 8 years and above and persons with reduced physical, sensory or mental capabilities or lack of experience and knowledge if they have been given supervision or... - Page 5 SAFETY INSTRUCTIONS Warning: If the surface is cracked, switch off the ap- pliance to avoid the possibillity of electric shock. The appliance is not intended to be operated by me- ans of an external timer or separate remote-control system. You should not use steam cleaning devices to clean the appliance.
- Page 6 SAFETY INSTRUCTIONS ● Before using the ceramic plate for the first time read the Operating Manual carefully as thus you can ensure safe operation and avoid damage to the plate. ● If the ceramic plate is operated near a radio, TV set or other emitting device, please check whether the touch panel works correctly.
- Page 7 SAFETY INSTRUCTIONS ● The heating surface of the ceramic plate is resistant to thermal shock. It is neither hot nor cold-sensitive. ● Avoid dropping objects on the plate. A point hit, for example a falling bottle with spices, may in unfavourable circumstances lead to cracks and splits appearing on your ceramic plate.
-
Page 8: Saving Energy
SAVING ENERGY UNPACKING Everybody who properly The appliance is protected from damage during transpor- uses energy not only saves money but also consciously tation by its packaging. After unpacking please dispose acts in aid of the natural of the packing materials in a environment. -
Page 9: Description Of The Appliance
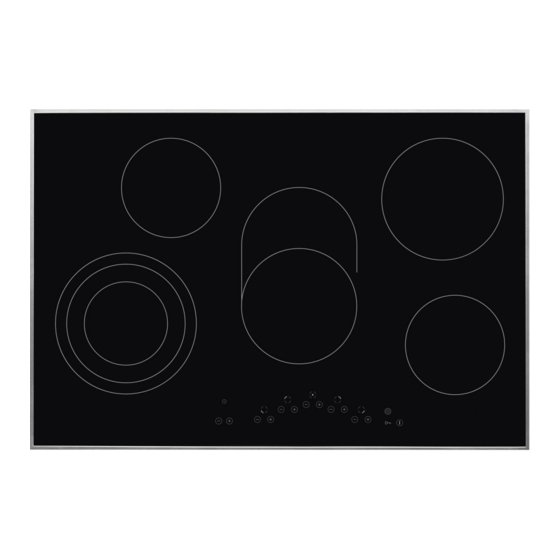
DESCRIPTION OF THE APPLIANCE Description of hob Cooking zone - rear right Cooking zone - rear left Double cooking zone - middle Triple ring cooking zone - front left Cooking zone - front right Control Panel Triple cooking zone Child Lock Timer sensor Timer display Indicator... -
Page 10: Installation
INSTALLATION Making the worktop recess l Worktop thickness should be 28 - 40 mm, while its width at least 600 mm. The worktop must be flat and level. Edge of the worktop near the wall must be sealed to prevent ingress of water or other liquids. - Page 11 INSTALLATION Note. When installing the hob in the kit- chen worktop, install a partition panel, as shown on the picture. If the hob is to be installed above a built-in oven, instal- lation of the partition panel is not requ- ired.
- Page 12 INSTALLATION Installation of self-adhesive foam gasket * Do not install the appliance without the foam gasket. The gasket must be applied on the appliance as follows: Before fitting the appliance in the kitchen worktop, apply self-adhesive foam gasket provided underneath the rim. - before applying, remove the protective film from the self-adhesive foam gasket - apply the self-adhesive foam gasket underneath the appliance rim (Figure)
- Page 13 INSTALLATION Installing hob - bracket • Use four “A” brackets for 38 mm thick worktops. Fit the hob into worktop opening as shown on figure 2 and 3. To properly secure hob in 28 mm thick worktop, use four 15x15x50 mm wooden blocks in addition to “A”...
-
Page 14: Connecting The Plate To The Electrical System
INSTALLATION Connecting the plate to the electrical system Note! The plate can be connected to the mains only by a qualified certified installer. Wilful adaptations or modifications to the electric system are prohibited. Guidelines for the installer The plate is factory-set for three-phase alternating current power supply (400 V 3N~50 Hz). It may be adapted for one-phase current power supply (230 V) by adequate bridging on the connection strip, in accordance with the attached wiring diagram. -
Page 15: Operation
INSTALLATION DIAGRAM OF POSSIBLE CONNECTIONS Warning! Heating elements voltage - 230V Warning! In every type of connection protective grounding has to be connected to PE termina Recom- mended type of connector cable For 230 V power supply single pha- H05VV- se connection with a neutral lead, F3G4 1-2-3 and 4-5 terminals are shorted... - Page 16 OPERATION The ceramic plate is equipped with sensors operated by touching the marked areas with a finger. Every touch of a sensor is confirmed with a sound. When switching the plate on and off and setting the heating power always touch only one sensor.
-
Page 17: Control Panel
OPERATION Control Panel When you connect the appliance to power, Child Lock indicator will be on. Touch and hold the Child Lock sensor until the indicator is off. Now you can use the appliance. No objects should be placed on the sensors (this could cause an error). Touch sensors should be always kept clean. - Page 18 OPERATION Double and triple cooking zone To turn on extension of the middle double cooking zone touch "+" or "–" to select the double cooking zone and then touch Operation of the cooking zone extension is indicated by a red LED indicator light above the cooking zone display.
- Page 19 OPERATION If you do not start to select the The heat setting heat setting within 10 seconds, Fast cooking time [min] then the letter "A" turns off and the automatic warm-up function 1’11” is inactive. 2'44" 4"47" If you do not wish the automatic 5'28"...
- Page 20 OPERATION Limit the operating time In order to increase efficiency, the hob is fit- Cooking heat Maximum operat- ted with a operating time limiter for each of ing time (hours) setting the cooking zones. The maximum operating time is set according to the last heat setting selected.
-
Page 21: Cleaning And Routine Maintenance
CLEANING AND ROUTINE MAINTENANCE Daily cleaning and proper maintenance have crucial impact on the durability of your ceramic plate. Clean the ceramic plate observing the same rules as for glass. Never use abrasive or aggressive clean- ing agents, scrubbing powders or scratching sponges. - Page 22 CLEANING AND ROUTINE MAINTENANCE Never apply cleaning agent on a hot hotplate. Caution! Leave the cleaning agent to dry and then If from any reason you are not wipe it off with a wet cloth. Any residuals of able to control the switched on cleaning agents should be wiped off with a plate, switch off the main switch damp cloth before heating the plate for the...
-
Page 23: Emergency Procedure
EMERGENCY PROCEDURE Every time when emergency situation occurs you should: ● switch off the working assemblies of the plate ● disconnect power supply ● call in the service ● as some minor faults can be removed by the user in accordance with the be low specified instructions, before calling the Customer Service please go thro ugh the Table checking every point. - Page 24 EMERGENCY PROCEDURE PROBLEM CAUSE ACTION 7.Residual temperature in di- - power supply fa ilu re, the -the residual temperature in- ca tor is not lighted although ap plian ce has been di scon- di ca tor will work again after the hot pla tes are still hot nec ted from the mains swit ching the control panel...
-
Page 25: Technical Data
TECHNICAL DATA Rated voltage: 230/400V 3N~50 Hz Rated power: PG5VQ205FTN (KMC*) Model: 8,7 kW - hotplate: 2 x Ø 145 mm 1,2 kW - hotplate: 1 x Ø 180 mm 1,8 kW - hotplate: 1 x Ø 210/175/120 mm 2,3 kW - hotplate: 1 x Ø... -
Page 27: Basisinformatie
GEACHTE KLANT, Een kookplaat combineert uitzonderlijk gebruiksgemak met uitstekende prestaties. Na het lezen van de handleiding kent de bediening van de kookplaat voor u geen geheimen meer. Iedere kookplaat die de fabriek verlaat is vóór het inpakken op controleplekken grondig ge- controleerd op veiligheid en functionaliteit. - Page 28 INHOUDSOPGAVE Basisinformatie.......................27 Veiligheidsinstructies...................31 Beschrijving van het toestel.................34 Installatie......................35 Bediening....................40 Reiniging en onderhoud................46 Handelswijze bij probleemsituaties............48 Technische gegevens................50 Garantie....................50...
- Page 29 AANWIJZINGEN VOOR VEILIG GEBRUIK Attentie. Dit apparaat en de bereikbare onderdelen ervan worden tijdens het gebruik heet. Wees bijzon- der voorzichtig bij het aanraken van de verwarming- selementen. Zorg dat kinderen die jonger zijn dan 8 jaar niet bij het apparaat kunnen komen, tenzij ze onder permanent toezicht staan.
- Page 30 AANWIJZINGEN VOOR VEILIG GEBRUIK Attentie. Brandgevaar: geen voorwerpen verzame- len op de kookoppervlakte. Attentie. Schakel de stroom uit als de oppervlakte is gebarsten, om elektrische schokken te voorkomen. Het apparaat is niet bedoeld voor aansturing met een externe tijdschakelaar of een apart systeem voor afstandsbesturing.
-
Page 31: Veiligheidsinstructies
VEILIGHEIDSINSTRUCTIES • Vooraleer u de keramische kookplaat in gebruik neemt, dient u de gebruikershandleiding door te lezen. Op die manier garandeert u uw eigen veiligheid en voorkomt u beschadiging van de plaat. • Als de keramische plaat gebruikt wordt in de directe nabijheid van een radio, televisie of een ander toestel dat straling uitzendt, moet u controleren of het bedieningspaneel van de keramische plaat correct werkt. - Page 32 VEILIGHEIDSINSTRUCTIES • Gebruik op de keramische kookplaat enkel potten en pannen met een platte bodem, die geen scherpe randen of uitsteeksels hebben. Anders kunnen er onherstelbare krassen op de plaat ontstaan. • Het verwarmingsoppervlak van de keramische plaat is bestand tegen thermische schokken. Ze is niet gevoelig voor koude of warmte.
- Page 33 ENERGIEBESPARING UITPAKKEN Door op verantwoorde wijze Het toestel wordt door zijn energie te gebruiken, be- verpakking beveiligd tegen spaart u niet alleen op de beschadigingen tijdens het kosten van het huishouden, transport. Na het uitpakken maar werkt u ook bewust dient u de verpakkingsele- mee aan de bescherming menten op milieuvriendelijke...
-
Page 34: Beschrijving Van Het Toestel
BESCHRIJVING VAN HET TOESTEL Beschrijving van kookplaat Kookzone - rechtsachter Kookzone - linksachter Dubbele kookzone - midden Driedubbele kookzone - linksvoor Kookzone - rechtsvoor Bedieningspaneel Aanduiding Tiptoets timer Aanduiding Aanduiding driedubbele klok Blokkadeaanduiding kookzone Tiptoets verlagen / Tiptoets Tiptoets verlagen verhogen tijd driedubbele / verhogen... -
Page 35: Installatie
INSTALLATIE Voorbereiding van het werkblad voor inbouw van de kookplaat l De dikte van het werkblad van het meubel dient 28 tot 40 mm te bedragen, de diepte van het werkblad minimaal 600 mm. Het werkblad moet vlak en waterpas zijn. Aan de kant van de muur moet het werkblad worden afgedicht en beveiligd tegen vocht en overlopen. - Page 36 INSTALLATIE Attentie. Monteer bij de installatie van de kookplaat in het keukenkastje een isola- tieplaat volgens de afbeelding hiernaast. Wanneer u de kookplaat boven een oven monteert, is montage van de isolatieplaat niet nodig. Aménagement dans le plateau Wanneer u de kookplaat installeert in het d’un meuble porteur.
- Page 37 INSTALLATIE Montage van de schuimrubber dichting * Inbouw van het apparaat zonder dichting is verboden. Breng de dichting als volgt op het apparaat aan: Plak de meegeleverde schuimrubber dichting op de onderkant van het frame van de kookplaat, voordat u het apparaat in het werkblad inbouwt. - verwijder de beschermende folie van de dichting;...
- Page 38 INSTALLATIE Installatie van kookplaat klem • Gebruik bij een werkblad met een dikte van 38 mm, 4 “A”-klemmen voor het bevestigen van de kookplaat. Op de afbeeldingen 2 en 3 is de montagewijze weergegeven. Bij een werkblad met een dikte van 28 mm, gebruikt u naast de “A”-klemmen ook 4 houtblokjes met de afmetingen 15x15x50 mm.
- Page 39 INSTALLATIE Aansluiting van de plaat op de elektrische installatie Opgelet! Enkel een erkend installateur met de gepaste kwalificaties mag het toestel op de elektrische installatie aansluiten. Het is verboden om zelf aanpassingen of wijzigingen aan te brengen aan de elektrische installatie. Aanwijzingen voor de installateur De plaat is geproduceerd voor aansluiting op een elektrische voeding met driefasige wisselstroom (400 V 3N ~50 Hz).
-
Page 40: Bediening
INSTALLATIE SCHEMA VAN SCHAKELOPTIES Opgelet! De spanning van de verwarmingselementen bedraagt 230V Opgelet! Bij elke schakeloptie moet de aardingsle- iding op de klem aangesloten zijn. Aangeraden soort aan- sluitkabel Voor netwerken 230 V eenfasige aan- H05VV- koppeling met nulleider, de bruggen F3G6 verbinden klemmen 1-2-3 en 4-5,aar- dingsleiding op... - Page 41 BEDIENING De keramische kookplaat is uitgerust met sensors die bediend kunnen worden door met de vinger de aangeduide oppervlakken aan te raken. Elke bijsturing van een sensor wordt bevestigd met een geluidssignaal. Let erop, dat u bij het aan- en uitschakelen en het instellen van het verwarmingsver- mogen slecht één sensor tegelijk indrukt.
- Page 42 BEDIENING Bedieningspaneel Na aansluiting van de kookplaat op het lichtnet, gaat de diode boven de tiptoets van het kinderslot branden. Nu moet u de kookplaat deblokkeren door de tiptoets kinderslot aan te raken totdat de diode boven deze tiptoets dooft. Daarna kunt u de keramische kookplaat inschakelen.
- Page 43 BEDIENING Dubbele en driedubbele kookzones Om de dubbele verhoging van de middelste kookzone in te schakelen moet u de tiptoetsen "+" of “-" die overeenkomen met de betreffende kookzone aanraken en vervolgens Als deze kookzone is ingeschakeld, brandt de rode diode boven de display van de kookzone. Om de driedubbele uitbreiding van de kookzone linksvoor in te schakelen moet u de tiptoetsen "+"...
- Page 44 BEDIENING Wanneer u pas na 10 seconden Vermogensniveau begint met het instellen van het Duur van het snel- koken koken (min) vermogensniveau, dan dooft de letter "A" en is het systeem voor 1’11” automatische vermindering van 2'44" het vermogensniveau niet actief. 4"47"...
- Page 45 BEDIENING Beperking van de werkingsduur Om de feilloze werking van de kookplaat te Vermogens- Maximale wer- vergroten, is hij uitgerust met een beperking kingsduur in uren niveau van de werkingsduur voor elk van de kook- zones. De maximale werkingsduur wordt vastgesteld op grond van het laatste gekozen vermogensniveau.
-
Page 46: Reiniging En Onderhoud
REINIGING EN ONDERHOUD De zorg waarmee de gebruiker de kookplaat reinigt en onderhoudt, heeft een belangrijke invloed op haar levensduur en probleemloze werking. Bij het reinigen van de keramiek moeten dezelfde regels toegepast worden als voor het reinigen van glazen oppervlakken. Er mogen nooit schurende of bijtende re- inigingsmiddelen, schuurzand of schuursponzen met een ruw... - Page 47 REINIGING EN ONDERHOUD Opgelet! Breng nooit reinigingsmiddel op een hete Als de besturing om één of ande- kookplaat aan. Laat de reinigingsmiddelen re reden niet werkt als de plaat best wat opdrogen en verwijder ze daarna al aangeschakeld is, moet u de pas met een natte doek.
-
Page 48: Handelswijze Bij Probleemsituaties
HANDELSWIJZE BIJ PROBLEEMSITUATIES Bij elke probleemsituatie moet u: • de werkende onderdelen van de plaat uitschakelen • de elektrische voeding ontkoppelen • een herstelling aanvragen • sommige kleine problemen kan de gebruiker zelf op lossen met behulp van de aanwijzingen in de onderstaande tabel. - Page 49 HANDELSWIJZE BIJ PROBLEEMSITUATIES PROBLEEM OORZAAK HANDELSWIJZE 7. De restwarmte-indicator - stroompanne, het toestel - de restwarmte-indicator brandt niet, hoewel het werd van het elektriciteit- gaat pas opnieuw werken kookveld nog warm is snet ontkoppeld bij de volgende aanscha- keling en uitschakeling van het bedieningspaneel 8.
-
Page 50: Technische Gegevens
TECHNISCHE GEGEVENS Nominale spanning: 230/400V 3N~50 Hz Model: PG5VQ205FTN (KMC*) Nominaal vermogen 8,7 kW - kookveld: 2 x Ø 145 mm 1,2 kW - kookveld: 1 x Ø 180 mm 1,8 kW - kookveld: 1 x Ø 210/175/120 mm 2,3 kW - kookveld: 1 x Ø...
Need help?
Do you have a question about the KMC 745 100 E and is the answer not in the manual?
Questions and answers