Table of Contents
Advertisement
Available languages
Available languages
PORTABLE AIR CONDITIONER
WITH HEAT PUMP
INSTRUCTION MANUAL
CATALOG NUMBER
BPACT12H**
BPACT14H**
Thank you for choosing BLACK+DECKER!
PLEASE READ BEFORE RETURNING THIS PRODUCT FOR
ANY REASON.
If you have a question or experience a problem with your BLACK+DECKER
purchase, go to www.blackanddecker.com/instantanswers
If you can't find the answer or do not have access to the Internet, call
844-299-0879 from 10:30 a.m. to 6:30 p.m. EST Mon. - Fri. to speak with an
agent. Please have the catalog number available when you call.
SAVE THIS MANUAL FOR FUTURE REFERENCE.
Advertisement
Chapters
Table of Contents
Troubleshooting

Related Manuals for Black+Decker BPACT12H Series


Summary of Contents for Black+Decker BPACT12H Series
- Page 1 PLEASE READ BEFORE RETURNING THIS PRODUCT FOR ANY REASON. If you have a question or experience a problem with your BLACK+DECKER purchase, go to www.blackanddecker.com/instantanswers If you can’t find the answer or do not have access to the Internet, call 844-299-0879 from 10:30 a.m.
-
Page 2: Table Of Contents
Before You Call For Service ..........................21 Customer Service ..............................21 Troubleshooting ..............................22 Limited Warranty ...................................23 PRODUCT REGISTRATION Thank you for purchasing our BLACK+DECKER product. This Model number easy-to-use manual will guide you in getting the best use of your air conditioner. Serial number Remember to record the model and serial numbers. -
Page 3: Safety Information
SAFETY INFORMATION DANGER WARNING CAUTION DANGER - Immediate hazards WARNING - Hazards or unsafe CAUTION - Hazards or unsafe which WILL result in severe practices which COULD result in practices which COULD result in personal injury or death severe personal injury or death minor personal injury IMPORTANT SAFETY INSTRUCTIONS WARNING... -
Page 4: Save These Instructions
SAFETY INFORMATION HANDLING ALKALINE BATTERIES WARNING When handling alkaline batteries, basic safety precautions should be followed, including the following of loss of eyesight, do not rub them. Immediately rinse your eyes with clean tap water and then consult a physician immediately. explode. -
Page 5: Grounding Instructions
SAFETY INFORMATION GROUNDING INSTRUCTIONS ELECTRICAL REQUIREMENTS The electrical requirements are a 115 volt 60 Hz, AC only, 15 amp. It is recommended that a separate circuit serving only the product be provided. The product is equipped with a 3-wire cord having a 3-prong grounding plug. It must be plugged into a wall receptacle that is properly installed and grounded. -
Page 6: Safety Guidelines
SAFETY INFORMATION SAFETY GUIDELINES To prevent injury to the user or other people and property damage, the following instructions must be followed. Incorrect operation due to ignoring of instructions may cause harm or damage. ALWAYS DO THIS NEVER DO THIS ENERGY SAVE •... -
Page 7: Power Cord Operation
SAFETY INFORMATION POWER CORD OPERATION The power supply cord contains a current device that senses damage to the power 1. Plug in the Air Conditioner. 2. The power supply cord head has two buttons, a TEST button and a RESET button. -
Page 8: Set Up & Use
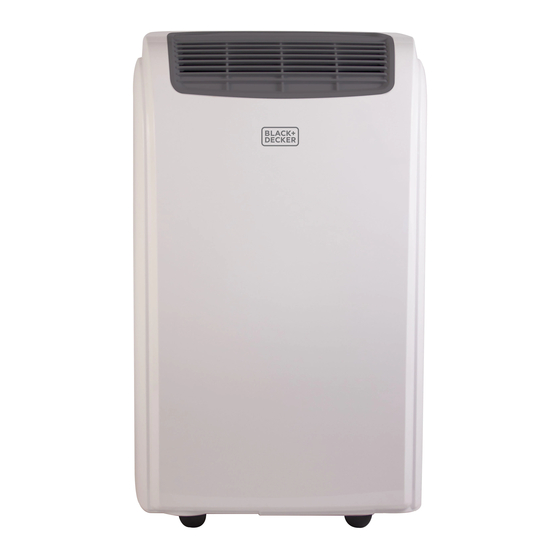
SET UP & USE PARTS & FEATURES Control Panel and Remote Control Sensor Air Outlet Grill Filter Handles Air Exhaust Hose Housing Intake Grill Condensation Drain Plug Air Exhaust Hose Hose Outlet Hose Inlet Castor Locks Metal Locking Screw Metal Locking Screw Drip Pan Window Bracket Window Bracket /... -
Page 9: Installation Guide
SET UP & USE SPECIFICATIONS BPACT12H / BPACT14H INSTALLATION GUIDE LOCATION • vibration. For safe and secure positioning, place the unit on a smooth, level • the unit over objects. • The unit must be placed within reach of a properly rated grounded socket. •... -
Page 10: Window Slider Kit Installation
SET UP & USE WINDOW SLIDER KIT INSTALLATION improvise/modify some aspect of the installation procedures for certain types of MAXIMUM NOTE: · A plastic locking pin is holding the window slider kit together during shipment. Prior to installation, remove plastic locking pin, adjust to desired length and use provided metal locking screws to secure. -
Page 11: Exhaust Hose Installation
SET UP & USE EXHAUST HOSE INSTALLATION The air exhaust hose and hose inlet must be installed or removed from the portable COOL, DEHUMIDIFY, AUTO, HEAT connected to the portable air conditioner. conditioner. 1. Connect hose inlet to one end of air exhaust hose. Push hose inlet over the end of the hose, push in slightly and then start threading it on in a counter clockwise 2. -
Page 12: Control Panel
SET UP & USE CONTROL PANEL Display Area Fan Speed Selected Mode Indicator Light Indicator Light Mode Selection Fan Speed Button Selection Button Decrease Temp/Time Increase Temp/Time Button Button Pictures are for illustration purpose only. Your model may or may not have all the features. OPERATING FROM THE CONTROL PANEL The Control Panel enables you to manage all the main functions of the appliance, but to fully exploit its potential, you must use the remote... - Page 13 SET UP & USE COOL MODE FAN MODE Ideal for hot muggy weather Adjust fan speed by pressing when you need to cool and the Fan Speed button as dehumidify the room. To set described for the cool mode. Fig. 9 Fig.
-
Page 14: Control Panel On Remote Control
SET UP & USE CONTROL PANEL ON REMOTE CONTROL Sleep Indicator Indicator Mode Indicator Indicator Timer On/Off Power Indicator Button Mode Button Increase Decrease Timer Button Sleep Fan Speed Button Button Air Swing Button Selector Button CORRECT USE Point the remote control at the receiver on the appliance. The remote control between the remote control and the receiver). -
Page 15: Operating From The Remote Control
SET UP & USE OPERATING FROM THE REMOTE CONTROL control panel of the appliance. You should therefore refer to the instructions in the chapter Operating from the Fan, Heat) and the fan speed. The following section describes the additional functions corresponding to the controls on the bottom part of the remote control. - Page 16 SET UP & USE MAX FUNCTION - Ideal for the summer to cool rooms rapidly. - The appliance operates in cool mode at fan speed auto. While this function is selected, it is not possible to set the temperature or change fan speed. SLEEP OPERATION automatically.
- Page 17 SET UP & USE SETTING THE TIMER - This timer can be used to delay the appliance start up to shutdown, this avoids wasting electricity by optimizing operating periods. PROGRAMMED SHUTDOWN - With the appliance on, press the TIMER button, the TIMER is displayed under - Set the time when you want the appliance to switch off using the buttons hours, one hour intervals can be selected.
-
Page 18: Water Drainage
SET UP & USE WATER DRAINAGE METHOD This air conditioner is equipped with the very latest MIST technology which the unit is in HEAT mode. Thus the tank may still require emptying in HEAT mode. NOTE: As a safety measure to positively prevent water spillage the air not restart until the tank has been drained. -
Page 19: Cleaning & Care
SET UP & USE CONTINUOUS DRAINAGE (FIG. 12 AND FIG. 13) When operating in HEAT mode, continuous drain method can also be used to avoid the trouble of manual drainage. • Empty the water tank completely. • Connect one end of the drain hose on the drain outlet and lead the other end to a permanent drain. - Page 20 SET UP & USE CLEANING Before cleaning or maintenance, turn the appliance off by pressing the button on the control panel or button on the remote control. Wait for a few minutes then unplug from the electrical outlet. CLEANING THE CABINET You should clean the appliance with a slightly damp cloth then dry with a dry cloth.
-
Page 21: Troubleshooting & Warranty
TROUBLESHOOTING & WARRANTY BEFORE YOU CALL FOR SERVICE A) Check to make sure that the air conditioner is plugged in securely. If it is not, remove the plug from the outlet, wait 10 seconds and plug it in again securely. B) Check for a blown circuit fuse or a tripped main circuit breaker. -
Page 22: Troubleshooting
TROUBLESHOOTING & WARRANTY Troubleshoot your problem by using the chart below. If the air conditioner still does not work properly, contact W Appliance Co. customer service center or the nearest authorized service center. Customers must never troubleshoot internal components. POSSIBLE REMEDY A. -
Page 23: Limited Warranty
TROUBLESHOOTING & WARRANTY LIMITED WARRANTY Any repair, replacement, or warranty service, 13. Food loss for loss due to product failure or delay in service, repair or and all questions about this product should be replacement. directed to W Appliance Co. at 844-299-0879 14. - Page 24 AVEC POMPE À CHALEUR MANUEL D’UTILISATION NUMÉRO DE CATALOGUE BPACT12H** BPACT14H** Merci d’avoir choisi BLACK+DECKER! VEUILLEZ LIRE AVANT DE RETOURNER CE PRODUIT POUR QUELQUE RAISON. Si vous avez une question ou rencontrez un problème avec votre achat BLACK+DECKER, allez à www.blackanddecker.com/instantanswers Si vous ne trouvez pas la réponse ou n’avez pas accès à...
- Page 25 Dépannage ................................46 Garantie Limitée ..................................47 ENREGISTREMENT DU PRODUIT Merci d’avoir acheté notre produit BLACK+DECKER. Ce manuel facile à utiliser vous aidera à tirer le meilleur parti de votre climatiseur. modèle et numéros de série. Ils sont sur une étiquette à l’arrière.
-
Page 26: Informations De Sécurité
INFORMATIONS DE SÉCURITÉ DANGER ATTENTION MISE EN GARDE ATTENTION - Dangers ou pratiques MISE EN GARDE - Dangers ou DANGER - Dangers immédiats qui pratiques dangereuses pouvant entraîneront des blessures graves entraîner des blessures graves ou entraîner des blessures corporelles ou la mort la mort mineures... - Page 27 INFORMATIONS DE SÉCURITÉ MANIPULATION DES PILES ALCALINES ATTENTION Lors de la manipulation des piles alcalines, des précautions de sécurité de base doivent être suivies, y compris les suivantes Si du liquide provenant de la pile entre accidentellement dans vos yeux, il y a une menace de perte de la vue, ne pas les frotter.
-
Page 28: Instructions De Mise À La Terre
INFORMATIONS DE SÉCURITÉ INSTRUCTIONS DE MISE À LA TERRE EXIGENCES ÉLECTRIQUES Les exigences électriques sont de 115 volts 60 Hz, CA seulement, 15 ampères. Il est recommandé de prévoir un circuit séparé desservant uniquement le produit. Il doit être branché dans une prise de courant murale correctement installée et mise à... -
Page 29: Consignes De Sécurité
INFORMATIONS DE SÉCURITÉ CONSIGNES DE SÉCURITÉ Pour éviter toute blessure de l’utilisateur, ou d’autres personnes, et tous blessures ou des dommages. TOUJOURS FAIRE NE JAMAIS FAIRE CECI ÉCONOMIE CECI D’ÉNERGIE • • être utilisé de manière à climatiseur dans une pièce de pièce recommandée. -
Page 30: Fonctionnement Du Cordon D'alimentation
INFORMATIONS DE SÉCURITÉ UTILISATION DU CORDON D’ALIMENTATION Le cordon d’alimentation contient un dispositif de courant qui détecte des dommages au cordon d’alimentation. Pour tester votre cordon d’alimentation, 1. Branchez le Climatiseur. 2. La tête du cordon d’alimentation possède deux boutons, un bouton TEST et un bouton RESET. -
Page 31: Configuration & Utilisation
CONFIGURATION ET UTILISATION PIÈCES & CARACTÉRISTIQUES Panneau De Commande et Capteur De Télécommande Grille de sortie d’air Filtre Poignées Boîtier de tuyau d’échappement d’air Grille d’entrée Drain de condensation Prise de courant Tuyau D’échappement Serrures De D’air Sortie De Tuyau Entrée De Tuyau Roulette Métal... -
Page 32: Guide D'installation
CONFIGURATION ET UTILISATION SPÉCIFICATIONS BPACT12H / BPACT14H GUIDE D’INSTALLATION EMPLACEMENT • Le climatiseur doit être placé sur un sol ferme pour minimiser le bruit et les • L’unité a des roulettes pour aider le placement, mais elle devrait être roulée sur les surfaces lisses et plates. -
Page 33: Installation Du Kit De Glissière De Fenêtre
CONFIGURATION ET UTILISATION INSTALLATION DE KIT DE GLISSIÈRE DE FENÊTRE MAXIMUM REMARQUE: fenêtre ensemble pendant l’expédition. Avant l’installation, retirer la goupille de verrouillage en plastique, ajuster à la longueur désirée et utiliser les vis de verrouillage en métal fournies pour sécuriser. REMARQUE: glissière de fenêtre, coupez celui qui a un trou pour l’ouverture de la fenêtre. -
Page 34: Installation Du Tuyau D'échappement
CONFIGURATION ET UTILISATION INSTALLATION DE TUYAU D’ÉCHAPPEMENT Le tuyau d’échappement d’air et l’entrée du tuyau doivent être installés ou retirés du REFROIDIR, DÉSHUMIDIFIER, AUTO, CHALEUR et l’entrée du tuyau doivent être connecté au climatiseur portatif. VENTILATEUR débranchés du climatiseur portatif. 1. -
Page 35: Panneau De Contrôle
CONFIGURATION ET UTILISATION PANNEAU DE COMMANDE Indicateur De Mode Sélectionné Bouton De Sélection Sélection de mode Bouton Bouton Diminuer Bouton Augmenter Temp/Temps Temp/Temps toutes les fonctionnalités. FONCTIONNEMENT PAR LE PANNEAU DE COMMANDE Le Panneau De Contrôle vous permet de gérer toutes les fonctions principales de l’appareil, mais pour exploiter pleinement son potentiel, vous devez utiliser la télécommande. - Page 36 CONFIGURATION ET UTILISATION MODE FRAIS MODE DÉSHUMIDIFICATION Idéal pour le temps chaud et Idéal pour réduire l’humidité au humide lorsque vous avez printemps et en automne, pendant besoin de refroidir et de les périodes pluvieuses ou dans des Fig. 7 pièces humides, Fig.
- Page 37 CONFIGURATION ET UTILISATION MODE VENTILATEUR MODE CHALEUR Réglex la vitesse du ventilateur en Appuyez sur le bouton MODE jusqu’à ce que le voyant du mode mode de refroidissement. la température cible en appuyant sur le bouton jusqu’à ce que la peut pas étre sélectionné.
-
Page 38: Panneau De Contrôle Sur La Télécommande
CONFIGURATION ET UTILISATION PANNEAU DE COMMANDE SUR LA TÉLÉCOMMANDE Indicateur De Sommeil Indicateur Max Indicateur de mode Indicateur de ventilateur Indicateur de marche / Bouton arrêt de la minuterie d’alimentation Augmentation Bouton de mode Diminution Bouton de minuterie Bouton de vitesse Bouton du ventilateur de veille... - Page 39 CONFIGURATION ET UTILISATION FONCTIONNEMENT PAR LA TÉLÉCOMMANDE La première partie des commandes de la télécommande est la même que celles du panneau de contrôle de l’appareil. Fonctionnement depuis le Panneau De Commande pour allumer l’appareil et vitesse du ventilateur. La section suivante décrit les fonctions supplémentaires correspondant aux commandes de la partie inférieure de la télécommande.
- Page 40 SET UP & USE CONFIGURATION ET UTILISATION FONCTION MAX - Idéal pour l’été pour refroidir les pièces rapidement. - L’appareil fonctionne en mode froid à la vitesse du ventilateur automatique. Lorsque cette fonction est sélectionnée, il n’est pas possible de régler la température ou de changer la vitesse du ventilateur.
- Page 41 CONFIGURATION ET UTILISATION RÉGLAGE DE LA MINUTERIE - Cette minuterie peut être utilisée pour retarder le démarrage de l’appareil, ce qui évite de gaspiller de l’électricité en optimisant les périodes de fonctionnement. ARRET PROGRAMMÉE - Réglez l’heure à laquelle vous souhaitez que l’appareil s’arrête en utilisant les - Pendant les dix premières heures, vous pouvez sélectionner des demi- intervalles.
- Page 42 CONFIGURATION ET UTILISATION PROCÉDÉ DE DRAINAGE DE L’EAU que le réservoir d’eau ne se remplit presque jamais, donc le drainage de l’eau ne REMARQUE: Par mesure de sécurité, pour prévenir positivement les déversements d’eau, le climatiseur est équipé d’un dispositif de sécurité...
-
Page 43: Drainage D'eau
CONFIGURATION ET UTILISATION DRAINAGE CONTINU (FIG. 12 AND FIG. 13) utilisée pour éviter les problèmes de vidange manuelle. • Connectez une extrémité du tuyau de vidange sur la sortie de vidange et conduisez l’autre extrémité à un drain permanent. retirée de l’air s’écoule continuellement à travers le tuyau de vidange. REMARQUE: Assurez-vous que la hauteur d’une section du tuyau de vidange ne doit pas être supérieure à... -
Page 44: Nettoyage & Soins
CONFIGURATION ET UTILISATION NETTOYAGE Avant le nettoyage ou l’entretien, fermez l’appareil en appuyant sur bouton sur le panneau de commande ou le bouton sur la télécommande. Attendez quelques minutes puis débranchez de la prise électrique. NETTOYAGE DU CABINET avec un chiffon sec. NETTOYER LES FILTRES semaine de fonctionnement. -
Page 45: Avant D'appeler Pour Le Service
DÉPANNAGE ET GARANTIE AVANT D’APPELER POUR LE SERVICE A) Assurez-vous que le climatiseur est bien branché. Si ce n’est pas le cas, sécuritairement. ci semblent fonctionner correctement, testez la prise avec un autre appareil. SERVICE A LA CLIENTÈLE IMPORTANT NE PAS RETOURNER CE PRODUIT AU MAGASIN Si vous avez un problème avec ce produit, veuillez communiquer avec le W Appliance Co. -
Page 46: Dépannage
DÉPANNAGE ET GARANTIE Localisez votre problème en utilisant le tableau ci-dessous. Si le climatiseur ne fonctionne toujours pas correctement, contactez le service clientèle de W Appliance Co. ou le centre de service agréé le plus proche. Les clients ne doivent jamais dépanner les composants internes. -
Page 47: Garantie Limitée
DÉPANNAGE ET GARANTIE GARANTIE LIMITÉE Toute réparation, remplacement ou réparation 13. Perte de nourriture pour la perte en raison de la défaillance du produit ou le sous garantie, et toutes les questions sur ce retard dans le service, de réparation ou produit doivent être adressées à... - Page 48 Not all accessories shown in photography are included in this package. Imported by W Appliance, Inc., 1356 Broadway, New York, NY 10018 Les logos et les noms de produits BLACK & DECKER, BLACK+DECKER, BLACK & DECKER et BLACK+DECKER ainsi que les couleurs orange et noire sont des marques de commerce de The Black &...
Need help?
Do you have a question about the BPACT12H Series and is the answer not in the manual?
Questions and answers
What is the diameter of the exhaust hose for the Black and Decker BPACT12H?
The diameter of the exhaust hose for the Black+Decker BPACT12H is 5.9 inches.
This answer is automatically generated
Does this unit require the exhaust hose installation in heat mode or just a/c?
The Black+Decker BPACT12H Series unit requires exhaust hose installation for both heat mode and air conditioning mode.
This answer is automatically generated
The unit is showing Celsius temperature instead of Fahrenheit on the control panel. How do I switch it? Also, we lost the remote. Can we purchase a new one for our unit?