Table of Contents
Advertisement
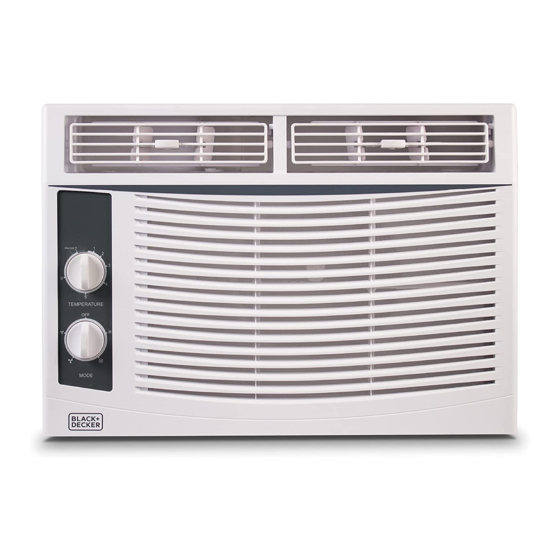
5,000 BTU MECHANICAL
WINDOW AIR CONDITIONER
INSTRUCTION MANUAL
CATALOG NUMBER
BWAC05MWT
Thank you for choosing BLACK+DECKER!
PLEASE READ BEFORE RETURNING THIS PRODUCT FOR
ANY REASON.
If you have a question or experience a problem with your BLACK+DECKER
purchase, go to www.blackanddecker.com/instantanswers
If you can't find the answer or do not have access to the Internet, call
844-299-0879 from 10:30 a.m. to 6:30 p.m. EST Mon. - Fri. to speak with an
agent. Please have the catalog number available when you call.
SAVE THIS MANUAL FOR FUTURE REFERENCE.
Advertisement
Table of Contents
Troubleshooting

Related Manuals for Black+Decker BWAC05MWT


Summary of Contents for Black+Decker BWAC05MWT
- Page 1 PLEASE READ BEFORE RETURNING THIS PRODUCT FOR ANY REASON. If you have a question or experience a problem with your BLACK+DECKER purchase, go to www.blackanddecker.com/instantanswers If you can’t find the answer or do not have access to the Internet, call 844-299-0879 from 10:30 a.m.
- Page 2 Page 2...
-
Page 3: Table Of Contents
Before You Call For Service ..........................20 Customer Service ..............................20 Troubleshooting ............................... 21-22 Limited Warranty ...................................23 PRODUCT REGISTRATION Thank you for purchasing our BLACK+DECKER product. This Model number easy-to-use manual will guide you in getting the best use of your air conditioner. Serial number Remember to record the model and serial numbers. -
Page 4: Safety Information
SAFETY INFORMATION DANGER WARNING CAUTION DANGER - Immediate hazards WARNING - Hazards or unsafe CAUTION - Hazards or unsafe which WILL result in severe practices which COULD result in practices which COULD result in personal injury or death severe personal injury or death minor personal injury IMPORTANT SAFETY INSTRUCTIONS WARNING... -
Page 5: Grounding Instructions
SAFETY INFORMATION GROUNDING INSTRUCTIONS ELECTRICAL REQUIREMENTS The electrical requirements are a 115 volt 60 Hz, AC only, 15 amp. It is recommended that a separate circuit serving only the product be provided. The product is equipped with a 3-wire cord having a 3-prong grounding plug. It must be plugged into a wall receptacle that is properly installed and grounded. -
Page 6: Power Supply Cord
NOTE: Neither BLACK+DECKER nor the dealer can accept any liability for damage to the product or personal injury resulting from failure to observe the electrical connection procedures. -
Page 7: Safety Guidelines
SAFETY INFORMATION SAFETY GUIDELINES To prevent injury to the user or other people and property damage, the following instructions must be followed. Incorrect operation due to ignoring of instructions may cause harm or damage. ALWAYS DO THIS NEVER DO THIS ENERGY SAVE •... -
Page 8: Power Cord Operation
SAFETY INFORMATION LCDI POWER CORD AND PLUG This air conditioner is equipped with an LCDI (Leakage Current Detection and Interruption) power cord that is required by UL. This power supply cord contains state-of-the-art electronics that sense leakage current. If the cord is damaged and leakage occurs, power will be disconnected from the unit. -
Page 9: Set Up & Use
SET UP & USE PARTS INCLUDED (appearance may vary) IMAGE PART QUANTITY Window Air Conditioner Top Mounting Rail Sponge Window Sash Seal Frame Lock Filler Panels (Marked Left & Right) Sash Lock Window Sash Seal 3/8” Screws 1/2” Screws 3/4” Screws Foam Top Window Gasket (For use as needed) Page 9... -
Page 10: Installation & Assembly
SET UP & USE INSTALLATION & ASSEMBLY Some assembly is required for your new air conditioner. Please read and follow these instructions carefully. Fig. 1 1. This air conditioner is designed to be installed in a standard double-hung window with a 22”... - Page 11 SET UP & USE TOP RAIL ASSEMBLY The top rail must be assembled prior to installing the air conditioner in the window. Tools Needed: Phillips screwdriver 1. Remove the air conditioner from the box and place on a hard flat surface. 2.
-
Page 12: How To Install
SET UP & USE HOW TO INSTALL NOTE: Top rail and sliding panels at each side are offset to provide the proper pitch to the rear of 5/16”. This is necessary for proper condensed water utilization and drainage. If you are not using the side panels for any reason, this pitch to the rear must still be maintained. - Page 13 SET UP & USE 3. Extend the side panels out against the window frame. (See Fig. 6) 4. Drive three 1/2” locking screws through filler panel frame holes into window sash on both the left and right side. (See Fig. 7 & 8) 5.
- Page 14 SET UP & USE IF A/C IS BLOCKED BY STORM WINDOW Fig. 12 Add wood or remove storm window before air conditioner is installed. (See Fig. 12) If storm window frame must remain, be sure the drain holes or slots are not caulked or painted shut.
-
Page 15: Air Conditioner Use
SET UP & USE AIR CONDITIONER USE Operating your air conditioner properly helps you obtain the best possible results. This section explains proper air conditioner operation. IMPORTANT: • If you turn off the air conditioner, wait at least 3 minutes before turning it back on. This prevents the air conditioner from blowing a fuse or tripping a circuit breaker. -
Page 16: Control Panel
SET UP & USE CONTROL PANEL 1. POWER: Turn on the unit by rotating the MODE dial to the desired setting. 2. COOLING MODE: For maximum cooling set the MODE dial to “ “. In HIGH COOL mode, the fan will automatically go to high. This will help circulate the cool air throughout the room. -
Page 17: Normal Operating Sounds
SET UP & USE NORMAL OPERATING SOUNDS • You may hear a pinging noise caused by water hitting the condenser, or rainy days, or when the humidity is high. This design feature helps remove moisture and improve efficiency. • You may hear the thermostat click when the compressor cycles on and off. •... -
Page 18: Cleaning & Care
SET UP & USE CARE AND CLEANING Clean your air conditioner to keep it looking new and to minimize dust build up. AIR FILTER CLEANING The air filter should be checked at least once every month to see if it needs cleaning. Trapped particles and dust can build up in the filter and may decrease airflow as well as cause the cooling coils to accumulate frost. - Page 19 SET UP & USE WEAR AND TEAR To minimize wear and tear on the air conditioner, always wait at least 3 minutes before changing modes. This will help prevent the compressor from overheating and the circuit breaker from tripping. CABINET CLEANING To clean the air conditioner cabinet: •...
-
Page 20: Troubleshooting & Warranty
TROUBLESHOOTING & WARRANTY BEFORE YOU CALL FOR SERVICE IF THE AIR CONDITIONER FAILS TO OPERATE: A) Check to make sure that the air conditioner is plugged in securely. If it is not, remove the plug from the outlet, wait 10 seconds and plug it in again securely. B) Check for a blown circuit fuse or a tripped main circuit breaker. -
Page 21: Troubleshooting
TROUBLESHOOTING & WARRANTY Troubleshoot your problem by using the chart below. If the air conditioner still does not work properly, contact W Appliance Co. customer service center. Customers must never troubleshoot internal components. TROUBLE POSSIBLE CAUSE POSSIBLE REMEDY The air conditioner is •... - Page 22 TROUBLESHOOTING & WARRANTY TROUBLE POSSIBLE CAUSE POSSIBLE REMEDY Water is dripping Hot and humid weather • This is normal. outside The air conditioner is not • For proper water drainage, make Water is dripping correctly tilted outside sure the air conditioner is slightly inside the room tilted downward from the front of the unit to the rear.
-
Page 23: Limited Warranty
TROUBLESHOOTING & WARRANTY LIMITED WARRANTY Any repair, replacement, or warranty service, REPAIR OR REPLACEMENT AS PROVIDED UNDER THIS WARRANTY IS THE EXCLUSIVE REMEDY OF and all questions about this product should be THE CUSTOMER; W Appliance Co. SHALL NOT BE directed to W Appliance Co. - Page 24 BLACK & DECKER, BLACK+DECKER, the BLACK & DECKER and BLACK+DECKER logos and product names and the orange and black color scheme are trademarks of The Black & Decker Corporation, used under license. All rights reserved. Product in this box may differ slightly from that pictured. Does not affect function.
Need help?
Do you have a question about the BWAC05MWT and is the answer not in the manual?
Questions and answers