
Related Manuals for Polaroid PLR-P3001-N


Summary of Contents for Polaroid PLR-P3001-N
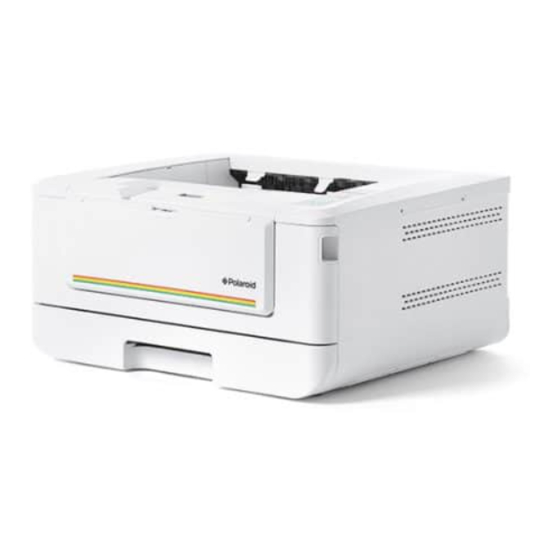
- Page 1 A4 Digital Printer PLR-P3001-N User's Guide Polaroid, Polaroid & Pixel, Polaroid Classic Border logo, and Polaroid Color Spectrum are trademarks of PLR IP Holdings, LLC, used under license. hts Reserved. © 2019 All Rig...
-
Page 2: Copyrights And Trademarks
U er’s Guide Notice Important Do not make copies of any item for which copying is prohibited by law. Copying the following items are normally prohibited by the local law: Bank bills, revenue stamps, bonds, stock certificates, bank drafts, checks. Copyrights and Trademarks Ethernet is a registered trademark of Xerox Corporation. -
Page 3: Safety Information
Safety Information When using this equipment, the following safety precautions should always be followed. Safety During Operation In this manual, the following important symbols are used: WARNING: Indicates potentially hazardous situations, which if instructions are not followed, could result in death or serious injury. CAUTION: Indicates a potentially hazardous situation which, if instructions are not followed, may result in minor or moderate injury or damage to property. - Page 4 User’s Guide The following symbols indicate that the related section includes information on actions which must be performed. Specifics of the required action are indicated inside the symbol. [Alert of required action] [Remove the power plug from the outlet] Installation and the Operating Environment Warning Do not install the equipment near direct sun light, heating or air conditioning Direct sunlight or high temperature may damage the machine.
- Page 5 Do not place the device in any position that may obstruct the output of the unit, as it may cause paper jams. Safety Information During Operpation Warning To prevent fires, do not use flammable sprays near the machine. Never attempt to open any fixed cover. Otherwise there is danger of electric shock, fire and laser beam and may cause blindness.
- Page 6 User’s Guide Take appropriate emergency measures when the following conditions occur When toner gets into your eyes, wash it off with water until your eyes are not painful. If the situation is serious, ask a doctor for treatment. When the toner gets on your skin, wash it off with soap and rinse it off. ...
- Page 7 About the Consumables Caution Do not unpack the consumables and store the machine’s consumables in any of these locations: Outdoors Near excessive dirt or dust, water, or heat sources In locations subject to shocks, vibrations, high temperature or humidity, ...
-
Page 8: Safety Instruction
User’s Guide Use only the USB cable that came with your device and avoid abrasions, cuts, fraying, crimping, and kinking. Using any other USB cable could cause fire, electrical shock, or injury. Do not store the cables in the following locations: Outdoors ... - Page 9 Overview 1. Overview Introduction Thank you for choosing Polaroid’s state-of-the-art printer which can be used for local and network printing up to A4 size. Features This product provides the following features to make your print out more efficient and effective.
- Page 10 User’s Guide Support A4 size: The product allows you to print up to A4 size. Print Multiple Pages on a Single Sheet: Prints two or four pages of the original on a single sheet of paper. A maximum of 16 pages can be printed on a single sheet of paper.
-
Page 11: External View
Overview External View The Front View 1. Output Tray 4. Manual Tray 2. Handle of the Front Cover 5. Paper Stopper 3. Main Paper Tray 6. Control Panel... -
Page 12: The Rear View
User’s Guide The Rear View 1. USB Port (Type A, to USB flash disk) 4. Power Receptacle 2. USB Port (Type B, to PC) 5. Rear cover 3. LAN Port 6. Handle of the Rear Cover... -
Page 13: Package Contents
Overview Package Contents Main unit Toner Cartridge Power Cable USB Cable... -
Page 14: The Control Panel
User’s Guide The Control Panel Cancel Button: Press to cancel a printing job. Press 3 seconds to Print the usage Power button: report. Short press to turn on the printer. Long press to turn off the printer. ... -
Page 15: Pre-Installation Information
Overview Preinstallation Information To use the product as a network device, the following network parameters have to be collected from your network administrator. See the next section (using the Menu to set the networking parameters) to set the network parameters. 1. -
Page 16: Installation
User’s Guide 2. Installation Operation Space Please reserve the following operation space. Measuring unit: mm Machine dimension: 404 x 380 x 204 mm (WxDxH) Removing the Packing Materials Remove the packing materials, including plastic bags and tapes for product protection. -
Page 17: Installing The Toner Cartridge
Installation Removing the Tapes of the Toner Cartridge Important! When you unpack the machine, a toner cartridge has been packed separately besides the machine. Please remove the package cushion and tapes on the toner cartridge before using it. Installing the Toner Cartridge Please follow these steps to install the toner cartridge:... - Page 18 User’s Guide Open the front door by pulling the handles on both sides as shown. Lift the handle of the drum unit up and then pull it out as shown. Drum unit...
- Page 19 Installation Remove label in the center and the protective tapes on both ends. Be careful not to touch the drum during the process. The printing quality will be affected if there is a fingerprint or other marks on the surface of the drum. Protective Tape Protective...
- Page 20 User’s Guide Press down the handle of the toner cartridge to fix the toner cartridge. Close the rear cover。...
-
Page 21: Installing The Paper Stopper
Installation Installing the Paper Stopper Gently lift the paper stopper and its extension to collect the paper. Paper Stopper... - Page 22 User’s Guide Loading The Main paper tray To insert paper to the main paper tray, Fan your paper first to ensure that the pages do not stick together. Align the edges of the documents by tapping the bottom of the stack against the table top.
- Page 23 Installation Lift the handle of the main paper tray and then pull out the main tray. Push the width guide tab ( ), and move the width guide ( )to the correct position for the paper size being loaded. ...
- Page 24 User’s Guide Push the length guide ( ), and slide the guide ( ) to the correct position for the paper size being loaded. If you want to load a sheet of paper larger than the length of A4, press down the first ...
- Page 25 Installation To move the tray back to the original A4 length, press down the second length adjustment latch , and at the same time slide the manual tray to the left Printing Side Facing Down Load the paper stack with the as illustrated.
- Page 26 User’s Guide Insert the tray to the printer. Paper sizes and weights used for Main paper tray Paper capacity 250 pages(70 g/m² plain paper) Paper size A4 (210 x 297 mm) A6 (105 x 148 mm) A5 (148 x 210 mm) B6 (125 x 176 mm) B5 (176 x 250 mm) Letter (216 x 279 mm)
- Page 27 Installation Note: To ensure the best quality printing and copying, please use the paper or media which we have recommended. Make sure to fan your paper before loading it to the paper tray. If there are instructions about the printing side on the package of your ...
- Page 28 User’s Guide Loading the Manual Tray To insert paper to the manual tray, Hold the handle of the manual tray, and pull it down to open the manual tray. Manual Tray Pull out the tray extension to fit your desired paper length.
- Page 29 Installation Fan your paper first to ensure that the pages do not stick together. Align the edges of the documents by tapping the bottom of the stack against the table top. Rotate the stack 90 degrees and repeat. Load the paper stack with the print side Facing UP as illusrated.
- Page 30 User’s Guide Paper size and weights used for Manual Tray 10 pages(70 g/m² plain paper) Paper capacity A4 (210 x 297 mm) Paper size A6 (105 x 148 mm) A5 (148 x 210 mm) B6 (125 x 176 mm) B5 (176 x 250 mm) Letter (216 x 279 mm) Legal (216 x 356 mm) Paper weight...
-
Page 31: Connecting To Power
Installation Connecting to Power Connect the of the power cable to the power jack of your product. Connect the other end to an appropriate power outlet. Turning On The Printer To turn on the printer, press the power button located on the control panel. Ready LED will be lit. -
Page 32: Connecting To The Network
User’s Guide Connecting to the Network Connect the printer to the network to use the network printing function. Connect one end of your network cable to an available port of your Ethernet Hub Connect the other end to the LAN port at the back of the product as shown. Note: To obtain the IP address, press and hold the Cancel button for 3 seconds. -
Page 33: Installing The Printer Driver (Windows)
Installation Installing the Printer Driver (Windows) System Requirement Windows 7 (32bit/64bit), Windows 8 (32bit/64bit), Windows 10 (32bit/64bit) For USB Interface Users Please follow these steps to install the printer driver if this machine is connected to your computer via a USB cable. Important! DO NOT connect the USB cable before installing the printer’s driver. - Page 34 When the Finish dialog box appears, click Finish to complete. If you have successfully installed the printer’s driver, you will find a printer “PLR-P3001-N” has been added in the “Printers and Faxes” option from the Control Panel.
-
Page 35: Uninstalling The Printer Driver
Installation Uninstalling the Printer Driver Make sure your USB cable is connected to your product. From the “Start” menu, select “All Programs”, the product model, and then “uninstall Driver”. For Network Interface Users Please follow these steps to install the scanner, printer, and fax drivers if this machine is connected to your computer via a network. - Page 36 USB cable. When the Finish dialog box appears, choose 「Finish」to complete. If you have successfully installed the printer’s driver, you will find a printer, 「PLR-P3001-N NetWork」, has been added in the 「Printers and Faxes」option from the Control Panel.
- Page 37 Make sure the product is connected to your computer via a USB cable. Start Network Setup Tool by choosing the Start button and then select All Programs>PLR-P3001-N PRINTER>Network Setup Tool in succession. The following Network Setup Tool screen will be prompted.
- Page 38 Network Setup Tool will be automatically closed. Uninstalling the Scanner Driver and Printer Driver From the 「Start」 menu, select 「All Programs」 , 「the PLR-P3001-N Printer」 , and then 「Uninstall Driver」. Or from the 「Start」menu, select 「Control Panel」, 「Add or Remove Programs」, 「the PLR-P3001-N Printer」, and then 「Remove」.
- Page 39 Installation Using the Optional Scan Module (CSA6) for ID Cards Simply loading your ID card to the scan module (CSA6), the copy can be started and in a second the front side and rear side of your ID card are printed in one side of a sheet. Knowing the Scan Module: Card Feeder USB Cable...
- Page 40 User’s Guide Installing the Scan Module: 1. Note two reserved holes on the side wall beneath the operational panel and fasten the scanning module with two fixing screws as shown. 2. Connect the USB cable to the USB port on rear side. Fixing Screws USB Port...
- Page 41 Installation Making ID Card Copy: 1. Insert your card FACE OUTWARD to the card feeder and make sure the bottom of card feeding first as illustrated. Card Feeder 2. In a second, the front side and the rear side of your ID card will be copied in one side of a sheet.
- Page 42 User’s Guide 3. Customizing the Product’s Settings This chapter is specifically targeted to the persons who are responsible for the administration of the product. It is recommended that the administrator read this chapter before installing the machine. The product’s settings can be customized via the product’s embedded web page. How to customize the product’s settings via these two methods will be described in the following sections.
- Page 43 Customizing the Product’s Settings Customize System’s Settings via the Embedded Web Page Note: Any update of the web page requires administrator’s login. Connect the Ethernet cable to the product. Open [Network Setup Tool] and click the [Wired(Ethernet] tab to obtain the IP address of this product.
-
Page 44: System Settings
User’s Guide Setting Items to be Customized Status Displays the status and basic information of the product. Item Description Information Display the following basic information of the product. Displays the machine status. Machine Status Host Name Displays the host name. Displays the machine’s series number. - Page 45 Customizing the Product’s Settings Management Factory Def. Reset all settings to factory default values. Choose to reset count for roller or pad Reset Count Tray 1 pad/ after replacement. Click [immediate] to Manual Tray Pad reset count. Choose to adjust the vertical V-Mag -0.4%/-0.2%/* magnification rate of the printer.
- Page 46 User’s Guide Network Displays the network information of the product. *Factory Default Item Description Option Host Name Host Name Dipslay the host name for the product. TCP/IP Settings DHCP: Enables DHCP *Off/On IP Address: Set up an IP Input the IP address of the product. address.
- Page 47 Customizing the Product’s Settings Network Security Setup Displays the network information of the product. *Factory Default Item Description Option Host Name Host Name Dipslay the host name for the product. Ethernet Settings DHCP: Enables DHCP *Off/On IP Address: Set up an IP Input the IP address of the product.
- Page 48 User’s Guide Manager Settings Enter the IP address of a specified server to send Manager Settings the system log file to for quick troubleshooting. Note: DHCP server: With DHCP (Dynamic Host Configuration Protocol), a host can automatically be given a unique IP address each time it connects to a network--making IP address management an easier task for network administrators.
- Page 49 Updating The Product’s Firmware Before updating the product’s firmware, you need to first download the latest firmware from our web site at www.Polaroid.com onto your computer. To update the product’s firmware, follow these steps: Refer to the preceding section, Knowing the Product’s Default IP Address, to get the product’s IP address from the DHCP server.
-
Page 50: Configuring Printer Driver
4. Configuring Printer Driver Displaying the Printer Driver Properties Dialog Box (Windows) To display the Printer Driver Properties dialog box, Click Start on the system tray and choose Printers and Faxes. Right-click the product’s printer name and choose Properties. The product’s Printer Properties dialog box appears. - Page 51 Configuring the Printer’s Driver Click Printing Preferences to prompt the following Printing Preferences dialog box. Picture Mode...
-
Page 52: Configuring Printer Driver Settings
User’s Guide Configuring Printer Driver Settings The Printing Preferences dialog box consists of the Basic tab, the Paper tab, the Layout tab, the Watermark tab, the Duplex tab, and the More tab. The contents of each tab will be explained in the following sections. The Basic Tab The Basic tab contains settings for Orientation, Copies, Effect, Density, Toner Save, and Invert. - Page 53 Configuring the Printer’s Driver Copies Choose the number of copies to be printed. You can enter up to 999. Collate: Click to print your document in the page order such as 1/2/3, 1/2/3, 1/2/3. N to 1: Click to reverse the printing order of your document. As a result, the last page of your document will be printed first and vice versa.
-
Page 54: The Paper Tab
User’s Guide The Paper Tab The Paper tab contains settings for Original Size, Tray, and Media Type. Paper Original Size: Choose the size of paper loaded in the designated tray. Choice: A4, A5, A6, B5, B6, Legal, Letter, User Define Tray: Choose the tray from which your paper should be fed. - Page 55 Configuring the Printer’s Driver The Layout Tab The Layout tab contains settings for N-up, and Output Paper Size. N-up N-up: Choose number of pages to be printed on a single sheet of paper. Choice: Off, 2up(2-in-1), 4-up(4-in-1), 9-up(9-in-1), 16-up(16-in-1) Border: Choose if you wish to add border around each page when printing more than one page on a single sheet of paper.
-
Page 56: Output Paper Size
User’s Guide N-up Choose the style you want when printing multi-page Style: document on a single sheet. Choice: Right, then Down/Down, then Right/Left, then Down/Down, then Left Right, then Down Down, then Left Down, then Right Left, then Down Output Paper Size User Define You can reduce or enlarge your printed image using Scale... - Page 57 Configuring the Printer’s Driver The Watermark Tab The Watermark tab allows you to add some text or image (such as CONFIDENTIAL, IMPORTANT, DRAFT, etc) for your document. First Page only Check to print watermark only on the first page. Clear the check box will print watermark on all pages.
- Page 58 User’s Guide Adding a new waterk text To add a new watermark text, Choose Text and then click the Add/New button. The following Watermark dialog box appears. Name Name your watermark text. This name will be shown in the Watermark text list. String Enter your watermark text, such as confidential, important, and so on.
- Page 59 Configuring the Printer’s Driver Angle Specify the angle of the watermark text from 0° to 360° Size Specify the size of your watermark text from 1 to 288. Shading Specify a relative density for the watermark text. Choice: Lightest, Light, Medium, Dark, Darkest. Click the OK button to save the settings.
- Page 60 User’s Guide Adding a new waterk image To add a new watermark image, Choose Image and then click the Add/New button. The following Watermark dialog box appears. Name Name your watermark image. This name will be shown in the Watermark image list. File Click the Browse button to locate your watermark image.
- Page 61 Configuring the Printer’s Driver Editing a current watermark image To edit a current watermark image, Choose the waternark name that you wish to edit from the Image list. Click the Edit button. The Watermark Edit dialog box appears. Change your settings for the selected watermark image and choose OK to complete.
- Page 62 User’s Guide The Duplex Tab The Duplex tab allows you to print your document on two sides of the paper. Choice: Flip Horizontal, Flip Vertical. Duplex Flip Horizontal Check to flip the duplex document on the left edge. Flip Vertical Check to flip the duplex document on the bottom edge.
- Page 63 Configuring the Printer’s Driver The More Tab On the More tab, a Wait Timeout option is provided to set the amount of time the printer waits for data to come from computer during a job. If the data stream pauses for longer than the specified number of seconds, the job is cancelled.
-
Page 64: Cancelling A Print Job
5. Printing Cancelling a print job You can stop a print request by using the control panel or by using the software program. For instructions about how to stop a print request from a computer on a network, see the online Help for the specific network software. Stopping the current print job from the control panel Press the Cancel button on the control panel. - Page 65 Printing Documents from a Mobile Device Windows 2000, Windows XP, and Windows Server 2003 (using the Classic Start menu view): Choose Start>Settings>Printers in succession. Windows Vista (using the Classic Start menu view): Choose Start>Settings>Printers in succession. Windows Vista (using the default Start menu view): Choose Start>Control Panel>Hardware and Sound>Printers in succession.
-
Page 66: Troubleshooting
6. Troubleshooting Monitoring Your Printer Using Printer Status Monitor The Printer Status Monitor allows you to monitor your printer’s status, get information on consumable parts, and alerts you when printer errors occur. Printer Status Monitor is available when the printer is connected directly to a host computer via the USB port or a network port. -
Page 67: Getting Printer Status Details
Troubleshooting Getting Printer Status Details You can monitor printer status and get information on consumable products using the Printer Status Monitor dialog box. a Port Name Port name for the specified printer. b Progress Bar The progress bar to access the latest data of the specified printer. - Page 68 User’s Guide k Consumables Click to show the information of the paper tray and the consumables parts such as Toner Usage Remain, EP (Drum Unit) Usage Remain. The Consumables window...
-
Page 69: Setting Monitoring Preferences
Troubleshooting Setting Monitoring Preferences To make specific monitoring settings, click the Setting tab on the Avision Status Monitor window. Displays the language of the window. Language Check Device Status Interval Define the interval to refresh the printer error status. Choice: 1, 5, 10 (minute), Custom (1 ~ 1400 minute) Display in Pop-up Window Check the [Pop-up Window] box to... - Page 70 User’s Guide Clearing A Warning or An Error If a problem occurs during operation, the Error LED will be flashing to indicate a warning or an error status. To solve the problem, please refer the following table for more detailed information. Warning Message Message Description or Solution...
- Page 71 Troubleshooting Error Message Possible Causes or Solution Error Message and Codes System error Restart PRINTER. If this error persists, call Service code: 100111 service personnel for help. An unexpected error from scanner parts occurs. Scan module error (000113) Restart PRINTER or call service to replace Restart PRINTER or call service.
- Page 72 User’s Guide Please load paper in manual tray Paper empty in the manual tray. (200080). Pick up error. Paper empty, paper jam, or Please check tray 1 (200003). pickup failed in tray 1. Tray 1 paper empty. Please load paper to tray1 (200081) IP conflict (500000).
- Page 73 Troubleshooting The Full page feature does not support N in 1 Full page not support N in 1 (2 in 1 or 4 in 1). The Custom Zoom feature does not support Custom zoom not support N in 1 N in 1 (2 in 1 or 4 in 1). Paper Jam ADF paper jam (002013).
- Page 74 User’s Guide Locations of the Jammed Paper Front Cover: Open the front cover Rear Cover: Open the rear cover by by pulling the handles of the front pulling the handle of the rear cover as cover on both sides as illustrated. shown.
- Page 75 Troubleshooting Fuser: The area around the fuser is hot. To avoid a burn injury, be careful not to touch the fuser until it cools down and follow these steps to remove the jammed paper: 1. Open the Front Cover and the 1.
- Page 76 User’s Guide Possible Causes or Solution Error Message and Codes System error Restart PRINTER. If this error persists, call service personnel Error (Number). for help. 300100 Printer API_NVRAM_RW_TEST_FAIL 300101 Printer API_NVRAM_WRITE_FAIL 300102 Printer API_NVRAM_READ_FAIL 300200 Printer Flash Error 300201 Printer FLASH_BLOCK_ERASE_FAILED 300202 Printer FLASH_CHIP_ERASE_FAILED 300203...
- Page 77 Troubleshooting Image Problem Troubleshooting Problem Image Example Solution Use paper of standard weight: If you are using thin paper, try to use paper of standard weight (80 Use paper with less moisture: Load Paper curls the paper to the paper tray immediately after removing them from the packaging.
- Page 78 User’s Guide Vertical black Please clean the EP charger according to lines the procedure described in this manual (p. 79). Dirty Check if toner is not leaked from the background(pa toner cartridge. If so, replace the toner rtial page) cartridge. The paper might not meet the Dirty printer’s specifications (for...
- Page 79 Troubleshooting Defective image Use a clean and soft cloth to wipe of regular the off the dust or particle on the interval drum unit. (See page 75) If the error occurs again, contact the service personnel. If you have observed a rougher texture on one side of your paper, try printing on the Loose toner...
-
Page 80: Technical Support
User’s Guide TECHNICAL SUPPORT If your problem still exists after trying the above solution, please contact our technical support. www.polaroidprinterasia.com... -
Page 81: Maintaining The Product
Maintaining the Product 7. Maintaining the Product Cleaning the Pad in the Cassette If the Pad in the Cassette is smeared with paper powder or dirt or every 30K copies, paper may not feed smoothly or noise occurs during paper feeding. Follow the procedure below to clean the Pad in the Cassette. -
Page 82: Cleaning The Drum Unit
User’s Guide Cleaning the Drum Unit If the drum unit is smeared with paper powder or dirt, the print out may appear defective image of regular interval. Follow the procedure below to clean the drum unit. Turn off the power and remove the power cord from the power outlet. Open the front cover by pulling the handles on both sides as shown. - Page 83 Maintaining the Product Drum unit and Toner Cartridge Remove the toner cartridge from the drum unit as shown. Drum Unit Toner Cartridge Clean the drum unit with a clean and soft cloth. Clean this area.
-
Page 84: Replacing The Toner Cartridge
3,000 pages. When the toner cartridge is running low, you will be prompted with a [Toner Low] message through the printer monitoring program – [Polaroid Status Monitor]. Buy a new toner cartridge and have it ready before you receive [Replace Toner] message. - Page 85 Maintaining the Product Lift the handle of the drum unit and toner cartridge assembly and gently remove the assembly. Drum unit and Toner Cartridge Remove the toner cartridge from the drum unit as shown. Drum unit Toner Cartridge Insert the protective cover to the used toner cartridge as illustrated and pack it with a plastic bag and return it to a dealer or service center to recycle it according to the relevant regulation.
- Page 86 User’s Guide Installing the Toner Cartridge Unpack the plastic bag, protective cover, and tape of the new toner cartridge. Tilt the toner cartridge up and down and then right and left 10 times to distribute the toner evenly inside the toner cartridge. Install the toner cartridge to the drum unit.
- Page 87 Maintaining the Product Note: Be sure to return the tab to the Home position (▲). The arrow on the tab must be aligned with the arrow on the drum unit. If it is not, printed pages may have a vertical stripe. Hold the handle of the toner cartridge assembly and insert the toner cartridge assembly to its original place.
-
Page 88: Replacing The Drum Unit
12,000 pages. When the drum unit is running low, you will be prompted with a [Drum Unit Low] message through the printer monitoring program – [Polaroid Status Monitor]. Buy a new toner cartridge and have it ready before you receive [Replace Drum Unit] message. - Page 89 Maintaining the Product Remove the toner cartridge from the drum unit as shown. Drum Unit Toner Cartridge...
- Page 90 User’s Guide Installing the Drum Unit Remove the protective film, and label of the new drum unit. During theprocess, be careful not to touch the surface of the drum (see below) as the fingerprint or other marks may deteriorate the print quality. Label Protective Film...
- Page 91 Maintaining the Product Note: If toner gets on your clothing or other fabric, wipe off the toner with a dry cloth. Wash the items in cold water and air dry. Do not dispose of the toner cartridge. Put the used toner cartridge ...
-
Page 92: Specifications
User’s Guide 8. Specifications All specifications are subject to change without notice. General Regulatory model number PLR-P3001-N Processor 300MHz Memory 256M Max media size Legal size Resolution 600 × 600 dpi Printing speed Up to 30 ppm (A4); Up to 32 ppm (Letter) First print out time <... - Page 93 Specifications Paper output capacity 150 pages Duplex printing unit Build-in A4, Letter, B5 Paper size Duplex print Paper weight 60~105 g/m² (16~28 lbs) USB2.0,10/100Mbps Ethernet Connectivity Printer language GDI/PCL Supported operation system Windows 7, Windows 8, Windows 10 Dimemsion (WxDxH) 404 x 380 x 204 mm (15.9 x 14.9 x 8 in.) Weight 8.5 kg (18.73 lb.)
Need help?
Do you have a question about the PLR-P3001-N and is the answer not in the manual?
Questions and answers