Table of Contents
Advertisement
Quick Links
Advertisement
Table of Contents
Troubleshooting

Related Manuals for Polaroid P800


Summary of Contents for Polaroid P800
- Page 2 You may also check with your local recycling facility to determine their data sanitization procedures during the recycling process. Polaroid, Polaroid & Pixel, Polaroid Classic Border Logo, and Polaroid Color Spectrum are trademarks of PLR IP Holdings, LLC, used under license. All other trademarks are the property of the respective owner, who has not sponsored, endorsed or approved this product.
-
Page 3: Compliance Statements
Compliance Statements Liability The WARNING and CAUTION labels have been placed on the equipment for your safety. Please do not attempt to operate or repair this equipment without adequate training. Any use, operation, or repair in contravention of this document is at your own risk. Safety The following basic safety tips are given to ensure safe installation, operation, and maintenance of the equipment. -
Page 4: Regulatory Compliance
Regulatory Compliance EMC Compliance Notice To ensure compliance of the printer to the radiated emissions requirements for class “A” Information Technology Equipment, be sure to use a shielded Ethernet cable when connecting to your network Notice for USA (FCC Notice) This equipment has been tested and found to comply with the limits for Class A computing devices, pursuant to Part 15 of FCC rules. - Page 5 Notice for Europe Contact your authorized service provider to view the EU Declaration of Conformity. WARNING: This is a class A product. This equipment is compliant with class A of either CISPR32 or CISPR22. In a domestic/residential environment this equipment may cause radio interference, in which case the user may be required to take adequate measures.
- Page 6 Korea Communications Commission (KCC) statement...
- Page 7 Revision Log Polaroid P800 ID Card Printer User’s Guide Revision Date Description of Changes May 2017 First release of this document.
-
Page 8: Table Of Contents
Contents Chapter 1: Introduction About this Manual Intended Audience Chapter 2: About the Printer About the Polaroid P800 ID Card Printer Printer Components Printer Left Side Printer Right Side Printer with Single Input Hopper Printer with Optional Multi-Hopper Print Ribbon Cartridge... - Page 9 Chapter 4: Printing Cards Before Starting to Print Print Cards Print from ID Software Print from Other Software Chapter 5: System Maintenance Maintain the Printer Clean the Printhead Run a Cleaning Card Single Hopper Optional Multi-Hopper Prepare the Printer for Cleaning Clean the Printer Clean the Multi-Hopper Rollers Prepare the Printer for Use...
- Page 10 Messages and Conditions Messages on the Printer LCD Printer Messages Laminator Messages Messages from the XPS Card Printer Driver on the PC Messages from Printer Manager Other Messages Respond to Messages Printer Messages Close and lock doors 100: Request not supported 101: Job could not complete 102: Card not in position 103: Printer problem...
- Page 11 Laminator Messages 177: Laminator not available 196: Laminator error critical 197: Laminator entry card problem 198: L1 area card problem 199: L2 area card problem 200: Laminator exit card problem 201: L1 supply problem 202: L1 supply out or missing 203: L1 supply type problem 204: L1 supply not supported 205: L1 supply not identified...
- Page 12 Appendix A: CLM Laminator ..........A-1 About the Laminator System .
-
Page 14: Chapter 1: Introduction
Chapter 1: Introduction About this Manual This manual provides user information for the Polaroid P800 ID Card Printer. The manual includes: An overview of printer components and options, and a description of the system label. How to use the printer, including how to power the printer on and off, how to use the ... -
Page 16: Chapter 2: About The Printer
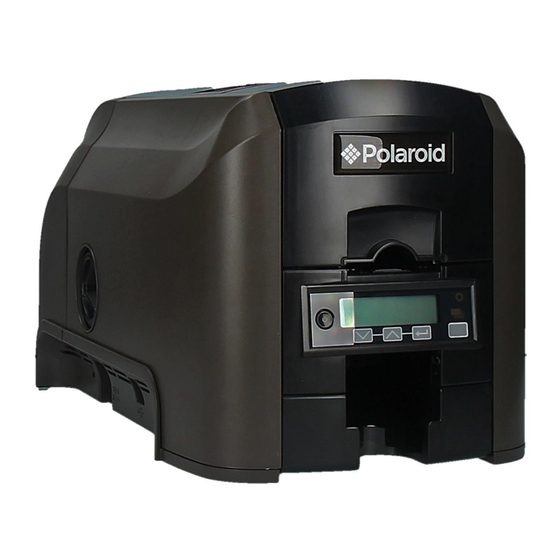
Chapter 2: About the Printer About the Polaroid P800 ID Card Printer The card printer applies images, text, and encoded data to plastic cards. It prints full- color and monochrome images, depending on the print ribbon installed. A busy issuance site might issue several thousand cards a month. During busy times, the site might use more than one printer to keep up with demand. -
Page 17: Printer Left Side
Printer Left Side Optional Multi-Hopper Single Hopper Configuration Label Printer Access Cover Lock Cable Lock Printer Manual Printer Receptacle Connections Advance Knob Connections Configuration The label shows the location and date of manufacture, the printer serial number, and lists the options installed. Label Manual Advance Knob The knob moves a card in the track to clear a card jam. -
Page 18: Printer Right Side
Printer Right Side Printer Supplies Printhead Access Door Reject Tray Printhead The printhead transfers images to cards using the print ribbon. Printer Supplies The door provides access to the printhead and ribbon Access Door on a printer with the optional multi-hopper. Reject Tray Unfinished cards or cards not processed properly are placed in the reject tray. -
Page 19: Printer With Single Input Hopper
Printer with Single Input Hopper Cover Latch Button Cover Ridges Card Input Hopper RibbonCartridge Handle Exception Slot Front Panel Output Hopper Cover Open the cover to access the printhead and ribbon. Latch Button Push the latch button to release the cover and open the printer. Press down on the ridges when closing the cover to make sure Cover Ridges that it latches completely on both sides. -
Page 20: Printer With Optional Multi-Hopper
Printer with Optional Multi-Hopper Latch Button Cover Print Ribbon Cartridge Multi-Hopper Cover Cover Ridges Exception Slot Output Hopper Card Hoppers H1 through H6 Open the cover to access the printhead and ribbon. Cover Push the latch button on top of the cover to release it and Latch Button access the printhead and ribbon. -
Page 21: Print Ribbon Cartridge
Print Ribbon Cartridge PrintRibbon Cartridge Ribbon Cartridge Print Ribbon Handle Replaceable Cleaning Sleeve Print Ribbon The cartridge holds the ribbon for printing. Cartridge Print Ribbon The ribbon applies images to cards. Replaceable The cleaning sleeve removes dust and other particles Cleaning Sleeve from cards to maintain print quality. -
Page 22: Printer With Optional Clm Laminator
Printer with Optional CLM Laminator Printer Laminator Laminator Access Door The optional laminator attaches to the printer and Laminator applies patch or topcoat overlay material to the card. Laminator Access Door Open the door to access the laminator cartridges. Appendix A: "CLM Laminator” Refer to for complete information about using a laminating system. - Page 23 Option Configuration Code H1=100 Card Input Hopper H3=Multi-Hopper M1=ISO Magnetic Stripe M2=JIS blank=no magnetic stripe option D1=Long Duplex Duplex blank=no duplex option Smart Card Sx=Smart Card option, where x indicates the type of smart card reader installed blank=no smart card option Lock L2=Multi-Hopper Lock...
-
Page 24: Chapter 3: Using The System
Chapter 3: Using the System This section provides information about how a card travels through the printer, printer controls, printing a test card, loading and replacing supplies, and cleaning the printer. How the Card Travels Card processing begins when you send the card to print from the PC. The hopper pick mechanism picks a card and moves the card into the printer for processing. -
Page 25: Card Printer System Overview
Card Printer System Overview The card printer is used with other equipment and software to create a card production system. The system produces cards for a specific purpose, and the cards must meet requirements. Equipment The system can include: A PC, with software to support the printer, such as: The XPS Card Printer Driver for Windows. -
Page 26: Printer Controls
Printer Controls The front panel of the printer provides the controls for operating the printer. The front panel controls are described in the following sections. LCD Panel Status Lights Ribbon Cards Power Button User Light & Down Up Enter User Button Arrow Arrow Power Button Use the P... -
Page 27: User Button And Light
User Button and Light The printer’s U button displays with a border of light that indicates the system status. Use the U button to: Suspend printer activity—press the U button when the LCD panel displays Ready. Clear a message—press the U button once. -
Page 28: Ribbon Light
Ribbon Light The ribbon light indicates the status of the print ribbon in the printer. Indicators include “Messages and Conditions” on page 65 the following. Refer to for a list of the LCD messages that correspond to the ribbon light. The print ribbon is okay. -
Page 29: Lcd Panel Menus
LCD Panel Menus The LCD panel shows the printer’s menu system and displays printer messages or conditions. “Respond to For a list of error messages and recovery information, refer to Messages” on page... - Page 30 When the printer is in the Ready status, the LCD displays the model number of the printer. If a supply with a region code has been installed in the printer, the region code also displays on the Ready panel. Printer without a region code Printer with a regioncode Press the U button to suspend the printer.
-
Page 31: Retrieve The Printer's Network Ip Address
Retrieve the Printer’s Network IP Address You need to know the printer IP address to perform some tasks. For example, the XPS Card Printer Driver asks you to enter the network IP address during installation. You also use the IP address when launching Printer Manager, the printer’s web interface, from a browser window. - Page 32 Press the down arrow key twice to display Network IPv4 on line 2. Press E to display the Network IPv4 menu. NTER Press the down arrow key until IP Address displays on line 2. Press E to display the IP address. Record the IP NTER address.
-
Page 33: Retrieve An Ipv6 Address
Retrieve an IPv6 Address A printer on an IPv6 network can be configured to use one or more of the following methods, depending on how the network is set up: Link Local IPv6 address: The printer and PC clients are restricted to the same ... - Page 34 Press the down arrow key until Network IPv6 displays on line 2. Press E to display the Network IPv6 NTER menu. Press the down arrow key until the address method used by your network displays on line 2. DHCP SLAAC ...
-
Page 35: Print A Test Card
A stateless (SLAAC) configuration (if enabled) can have multiple values depending on the router setup. The LCD displays up to four SLAAC addresses. An additional digit in line 1 indicates which address is being displayed. Record the address. Press the down arrow key until Exit displays on line 2. Press E . -
Page 36: Load And Replace Supplies
Load and Replace Supplies To prepare the printer to print cards, load blank card stock into the input hopper, and load print ribbon and a cleaning sleeve onto the print cartridge. If your system includes the optional laminator, also load overlay material into “Load Laminator Overlay the L1 and L2 (if equipped) laminators. -
Page 37: Optional Multi-Hopper
Optional Multi-Hopper Unlock the printer and open the multi- hopper cover. Load the cards into the hoppers. The input hoppers are labeled H1 through H6. You can load up to 100 cards into each hopper. Close the multi-hopper and lock the printer when you finish loading cards. -
Page 38: Load The Print Ribbon
Load the Print Ribbon Load the print ribbon when you install the printer and when the ribbon runs out. Unlock the printer, if necessary, and open the printer supplies access door on the optional multi-hopper. Open the printer cover. Remove the print ribbon cartridge. Load a full roll of print ribbon (the blue spool) onto the spindle closest to the cartridge handle until it clicks into place. -
Page 39: Load The Cleaning Sleeve
Load the Cleaning Sleeve Load a new cleaning sleeve when you load a new roll of print ribbon, when you notice debris on the printed cards, or when the cleaning sleeve is no longer sticky. Remove the cleaning roller spindle with the used cleaning sleeve from the ribbon cartridge. - Page 40 Close the printer cover. Press down on the ridges on the front of the cover to make sure that it latches completely on both sides. Close the supplies access door on the optional multi-hopper. Lock the printer, if necessary.
-
Page 42: Chapter 4: Printing Cards
Chapter 4: Printing Cards Before Starting to Print This section explains how to print a card. Make sure that: Cards are loaded in the printer or available to insert. “Load the Print Ribbon is loaded in the printer. For the steps to follow, refer to ... -
Page 43: Print Cards
Print Cards Make sure that cards are loaded in the printer or available to insert when prompted. “Load Cards” on page For the steps to follow, refer to Print from ID Software Select the template or design for the card. Select the printer, if you use more than one printer. - Page 44 Create the card design: Add graphics, such as a company logo or background. Add a photo. Add text information, such as name, address, or employee number. For information about additional card features, refer to “Elements of Card Design” in the printer’s Installation and Administrator’s Guide.
-
Page 46: Chapter 5: System Maintenance
Chapter 5: System Maintenance Maintain the Printer The printer performs best when it is cleaned on a regular basis. Follow the cleaning guidelines for your site to keep the printer in good working condition. Clean the printer when: There is debris on completed cards. ... -
Page 47: Clean The Printhead
Clean the Printhead Clean the printhead when: The printhead is replaced. There are unprinted lines on the finished card. This usually indicates dirt or contaminants on the printhead. The printhead is touched accidentally. Oils from hands can affect print quality and ... - Page 48 Replace the print ribbon cartridge. Avoid bumping the printhead when you install the print ribbon cartridge. Close the printer cover. Press down on the ridges on the front of the cover to make sure that it latches completely on both sides. Close the supplies access door on the optional multi-hopper and lock the printer, if necessary.
-
Page 49: Run A Cleaning Card
Run a Cleaning Card Run a cleaning card to clean debris from the inside of the printer and from the input hopper rollers. The cleaning card can remove most contaminants from the printer. Run a cleaning card after every 500 cards processed by the printer, or more often depending on your environment, or if print quality diminishes. - Page 50 Use the LCD menu system to start the cleaning cycle. Begin when the printer displays Ready and the button shows steady green. Press the button. Suspended displays on line 1 of the LCD panel. Press E to enter the menu system. NTER Maintenance displays on line 2 of the LCD panel.
- Page 51 Prepare the printer for use. Unlock the printer, if necessary. Replace the cards in the input hopper. Install a new cleaning sleeve on the ribbon cartridge and remove the protective “Load the Cleaning Sleeve” on page 26 cover. Refer to for the steps to follow.
-
Page 52: Optional Multi-Hopper
Optional Multi-Hopper Cleaning a printer equipped with the optional multi-hopper involves two steps: cleaning “Prepare the printer and cleaning the hopper rollers. To start the cleaning process, refer to Cleaning”. the Printer for Prepare the Printer for Cleaning Power on the printer. Unlock the printer and open the printer supplies access door. -
Page 53: Clean The Printer
Clean the Printer “Prepare the Make sure that you have prepared the printer for cleaning. Refer to Printer for Cleaning” on page Press the U button. Suspended displays on line 1 of the LCD panel. Press E NTER Maintenance displays on line 2 of the LCD panel. Press to enter the Maintenance menu. -
Page 54: Clean The Multi-Hopper Rollers
Clean the Multi-Hopper Rollers Access the LCD menu system and enter the Cleaning Card “Clean the Printer” on page menu, as described in Select the hoppers for cleaning. Press the down arrow key until Hopper displays on line2 of the LCD panel. Press E to enter the Hopper menu. - Page 55 Lock the printer. The printer returns to Ready and is available to print cards again. Discard the used cleaning cards and cleaning sleeve. & T INTS Use the cleaning cards one time only. Change the cleaning sleeve each time you clean the printer or change the print ...
-
Page 56: Chapter 6: Troubleshooting
Chapter 6: Troubleshooting This section helps you identify and fix basic issues that can occur during printing. Also refer to your printer’s Driver Guide for additional troubleshooting information. The section starts with an overview of card production and printer issues you may encounter: Locate a Problem Within the Card Production System on page 44 ... -
Page 57: Locate A Problem Within The Card Production System
Locate a Problem Within the Card Production System “Card Printer System Overview” on page For typical components of the system, refer to If any one of the following components does not work properly, printing cards can be affected. The XPS Card Printer Driver ... -
Page 58: Locate A Problem With Basic Printer Functions
Locate a Problem with Basic Printer Functions If the system is not working as expected, follow these steps in the order listed to isolate the source of the problem before you contact your service provider. Make sure that the power cord is plugged in and the printer is powered on. Does the printer power on and display Ready on the front panel within 1 minute? If the printer powers on correctly, continue to step 3. -
Page 59: Installation Problems
Print a card using your card production software. If the card prints, your software is working successfully with the printer. Troubleshoot the card design, if necessary. If the card does not print, check the following: In the application, is the correct printer selected in the Print Setup or Print ... -
Page 60: Usb Installation Troubleshooting
USB Installation Troubleshooting Problem Solution Reconnect the USB cable to the ports on the PC and The cable is loose. the printer. Power the printer off, and then back on. If the PC and printer still do not communicate, restart the The data cable Power off the printer. -
Page 61: Network Installation Troubleshooting
Network Installation Troubleshooting Problem Solution The network cable Reconnect the data cable to the network port and the is loose. printer. Restart the printer. The Status page of Follow your network troubleshooting procedures to Printer Properties isolate and test each component of the computer-to- shows the printer is not printer communication link. -
Page 62: The Card Printer Driver Does Not Detect The Network-Connected Printer
The Card Printer Driver does not detect the network- connected printer Problem Solution The Printer Make sure that you use the same type of data cable— Properties > Status USB or network—that was used when the printer was tab shows the printer installed. -
Page 63: Driver Status Or Windows Print Queue Does Not Provide Expected Data
Driver status or Windows print queue does not provide expected data Problem Solution The Card Printer Check the following: Driver sample card or Enable bidirectional support must be selected magnetic stripe test on the Printer Properties > Ports tab to allow cards do not print. -
Page 64: Printer Messages Do Not Display On The Pc
Printer Messages do not display on the PC Problem Solution A USB-connected Windows has a 15-character limit for the computer name. If printer issues a the computer name is longer than 15 characters, it treats the message on the LCD name as not valid and does not display the message. -
Page 65: Something Did Not Print
Something did not print Problem Probable Cause Solution The Disable Printing Nothing is printed on Open the Preferences > Layout > option in the Card the card. Advanced Printer Driver is set to tab and change Disable Printing to Off. All, Front, or Back. -
Page 66: Printing Includes Unexpected Data
Printing includes unexpected data Problem Probable Cause Solution Refer to “Magnetic Stripe Fonts” in The magnetic stripe Text that was font was not applied to the printer’s Driver Guide. intended for the magnetic stripe the text. printed on the card Refer to “Magnetic Stripe Escapes”... - Page 67 Problem Probable Cause Solution Printing is blurred. The cards have a Use cards that meet the requirements for the printer. Refer to “Cards” in the matte, not glossy, printer’s Installation and Administrator’s finish. Guide for specifications. “Run a The rollers are dirty. Run a cleaning card.
-
Page 68: The Printing Is Too Light
The printing is too light Problem Probable Cause Solution Photos look faded. The image capture Color settings might not be optimal. system needs Adjust color settings. Refer to the adjustment. documentation for the image capture system, “Color Printing” in the printer’s Installation and Administrator’s Guide, and “Color Adjustment Tab”... -
Page 69: The Monochrome Printing Has Flaws
The monochrome printing has flaws Problem Probable Cause Solution The monochrome (K) If the card does not include a bar code, Text has broken power setting is increase the monochrome intensity. If (partly printed) balanced to print both the card includes fine text and bar characters. -
Page 70: Magnetic Stripe Problems
Magnetic Stripe Problems To begin troubleshooting a magnetic stripe problem, first print a magnetic stripe test card from Printer Manager or the Card PrinterDriver. For the steps to follow, refer to the “Printer Manager” section of the printer’s Installation and Administrator’s Guide or “Print a Driver Sample Card”... - Page 71 Problem Solution The magnetic stripe Review the encoding format setting for the tracks in data was sent in an Printer Manager. Refer to the Printer Manager “Printer Setting Menu” in the Installation and encoding format not Administrator’s Guide. Make sure that the application supported by the track.
-
Page 72: Laminator Problems
Laminator Problems This section describes problems that might occur when you use a laminator to apply a patch or topcoat overlay to the card. Patch Appearance Problems Problem Probable Cause Solution Smart cards don’t The Debow card Make sure that the Debow card option work after the in the Card Printer Driver is not option is selected. - Page 73 Problem Probable Cause Solution “Run a There are scratches or The inside of the Clean the printer. Refer to particles under the printer is dirty. Cleaning Card” on page patch. Store and handle supplies carefully. The supplies have Keep supplies in the original debris on them.
-
Page 74: Topcoat Appearance Problems
Problem Probable Cause Solution patch shows The temperature for Decrease the laminator temperature opaque areas at the applying the overlay is setting. Refer to the Printer Manager “Laminate Type” section of the leading edge of the too high. printer’s Installationand card. - Page 75 Problem Probable Cause Solution “Clean There are The heated roller is dirty. Clean the laminator. Refer to the Laminator” on page A-12. If the repeating marks in problem continues to occur, contact the topcoat. your service provider. The holographic The temperature for Decrease the laminator temperature for topcoat shows applying the...
-
Page 76: Use Advanced Troubleshooting Tools
Problem Probable Cause Solution The hologram of the Card Printer Change the Laminate card setting to topcoat doesn’t apply the overlay. Refer to the printer’s Driver Laminate card appear on the card. setting is set to Do not Driver Guide for information about apply. -
Page 77: Card Jams
Card Jams A card jam occurs when the card does not reach the proper position for the next action, such as printing or ejecting the card. You usually can resolve the error by pressing the U button so that the printer displays Ready. -
Page 78: Repair A Broken Ribbon
Repair a Broken Ribbon A ribbon can break if the power applied by the printhead is too high. Do the following to repair a broken ribbon. Open the printer and remove the print ribbon cartridge. Do not remove the used ribbon from the take-up spool. -
Page 79: Printer Messages
Printer Messages LCD Message User Light Supply Card Light Light – Close and lock doors Color Cycle Request not supported Amber Flash Off Job could not complete Amber Flash Off Card not in position Amber Flash Printer problem Amber Flash Off Critical problem Amber Flash Amber Flash Amber Flash Magstripe data error... -
Page 80: Laminator Messages
LCD Message User Light Supply Card Light Light Insert new card side 1 up Amber Flash Off Insert same card side 2 up Amber Flash Off Option not installed Amber Flash Off Print while unlocked Amber Flash Off Failed to lock Amber Flash Off Insert new card side 2 up Amber Flash Off... - Page 81 Laminato r Light LCD Message User Light Supply Light Card Light L1 supply out or missing Green Flash Red Flash L1 supply type problem Green Flash Red Flash L1 supply not supported Green Flash Red Flash L1 supply not identified Green Flash Red Flash L2 supply problem...
-
Page 82: Messages From The Xps Card Printer Driver On The Pc
Messages from the XPS Card Printer Driver on the PC The Card Printer Driver displays the same messages as those on the printer LCD panel. The messages that display on the PC provide additional information about the condition that caused the message and contain recovery instructions. Click the appropriate button to clear the message. -
Page 83: Respond To Messages
Respond to Messages You can respond to printer messages using the printer front panel buttons or by clicking the appropriate response in the message displayed by the Card Printer Driver on the Printer Messages The following messages display on the printer LCD panel and in a message on the PC that issued the card print job when you use the Card Printer Driver. -
Page 84: 102: Card Not In Position
102: Card not in position The card is not positioned in the printer correctly. Open the printer and remove the ribbon cartridge. Turn the knob to remove the card. Replace the ribbon cartridge and close the printer. Press the U button on the printer to clear the message. -
Page 85: 106: Magstripe Data Not Found
106: Magstripe data not found The printer did not find magnetic stripe data on card. Make sure that you are using magnetic stripe cards that match the printer settings. Make sure that the cards are placed in the printer correctly. Press the U button on the printer to clear the message. -
Page 86: 109: Print Ribbon Problem
109: Print ribbon problem The print ribbon is not moving properly. Open the printer and remove the ribbon cartridge. Reposition, repair, or replace the ribbon and advance the repaired area one full turn. Replace the ribbon cartridge and close the printer. Press the U button on the printer to clear the message and send a new card to the printer. -
Page 87: 112: Card Hopper Empty
112: Card hopper empty The printer did not detect cards in the input hopper. Add cards to the input hopper. Press the U button on the printer to clear the message. On the PC, click OK, or click Cancel to cancel the card. 113: Close cover to continue The cover is open or the print ribbon cartridge is missing. -
Page 88: 116: Magstripe Not Available
116: Magstripe not available The printer does not have a magnetic stripe option. The card will be canceled. Remove magnetic stripe data from the card or use a printer that has a magnetic stripe option installed. Press the U button on the printer to clear the message. On the PC, click OK to clear the message. -
Page 89: 118: Print Ribbon Type Problem
118: Print ribbon type problem The printer cannot use the ribbon installed. The card will be canceled. Use ribbon designed for this printer. Press the U button on the printer, or click OK on the PC, to clear the message. &... -
Page 90: 121: Print Ribbon Not Identified
121: Print ribbon not identified The printer cannot use the ribbon installed. The card will be canceled. Use ribbon designed for this printer. Press the U button on the printer, or click OK on the PC, to clear the message. &... -
Page 91: 150: Print While Unlocked
150: Print while unlocked The printer is unlocked. The card will be canceled. Make sure that all access doors are closed securely and locked. Click OK on the PC to clear the message. 151: Failed to lock An attempt to lock the printer failed. The card will be canceled. Make sure that all access doors are closed securely. -
Page 92: 171: Insert Same Card Side 1 Up
171: Insert same card side 1 up Take the card from the printer and turn it over end to end so side 1 is facing up. Insert the card in the printer. If the card is not immediately picked, press the printer’s U button or click OK. -
Page 93: Laminator Messages
Laminator Messages The following messages display on the printer LCD panel when you are using a laminating system. They also display in a message on the PC that issued the card print job. 177: Laminator not available The printer and laminator cannot communicate. The card will be canceled. Make sure the data cable from the laminator to the printer is securely plugged in. -
Page 94: 199: L2 Area Card Problem
199: L2 area card problem The card is not where it should be in the laminator. Open the laminator and remove the L2 supply cartridge. Turn the knob to remove the card. Replace the supply cartridge and close the laminator. On the PC, click Retry, or click Cancel to cancel the card. -
Page 95: 204: L1 Supply Not Supported
204: L1 supply not supported The laminator cannot use the supply installed. Use supplies designed for this laminator. On the PC, click Retry, or click Cancel to cancel the card. 205: L1 supply not identified The laminator cannot use the supply installed. Use supplies designed for this laminator. -
Page 96: 209: L2 Supply Not Supported
209: L2 supply not supported The laminator cannot use the supply installed. Use supplies designed for this laminator. On the PC, click Retry, or click Cancel to cancel the card. 210: L2 supply not identified The laminator cannot use the supply installed. Use supplies designed for this laminator. -
Page 97: 215: L1 Heater Roller Problem
215: L1 heater roller problem The laminator has encountered a critical error. The card will be canceled. 1.Press the printer P button to power off the system. OWER 2.Request service. The system must remain powered off. On the PC, click OK to clear the message. 216: L2 heater roller problem The laminator has encountered a critical error. -
Page 98: 220: Impresser Heater Problem
220: Impresser heater problem The laminator has encountered a critical error. The card will be canceled. Press the printer P button to power off the system. OWER Request service. The system must remain powered off. On the PC, click OK to clear the message. 221: Bar code scanner problem The bar code scanner cannot read the bar code on the overlay. -
Page 99: Driver-Only Messages
Driver-Only Messages The following messages are issued by the Card Printer Driver and display on the PC that sent the card print job. These messages do not display on the printer LCD panel. 500: The printer is not available The computer cannot communicate with the printer. To complete the current card: Make sure that the printer is powered on and in the Ready state. -
Page 100: 505: Usb Communication Issue
505: USB communication issue An important driver component is not running. The card will be canceled. Restart the computer. The component should start automatically. If this message is displayed after restarting, notify your printer support contact. Click OK to clear the message. 506: A card is currently processing The printer is busy processing an interactive job. -
Page 102: Appendix A: Clm Laminator
About the Laminator System A laminator system consists of an Polaroid P800 ID card printer and a CLM laminator. The system can print cards and apply an overlay material on the front and back of the card for increased durability and security. -
Page 103: Outside The Laminator
Outside the Laminator Use the following information to become familiar with the laminator. Laminator Back and Left Side Printer Mounting Card Entry Pins Area Laminator Status Light Printer Mounting Pin Reject Tray Printer Mounting Lock Laminator Power Connection Printer Mounting Pins The pins align the printer with the laminator. -
Page 104: Laminator Status Light
Laminator Status Light The status light shows the status of the laminator: Ready Solid green Busy Blinking green Solid blue Idle/Sleeping Heating Blinking blue Error Blinking red Laminator Front and Right Side Impresser (if installed) Laminator Access DoorLock Card Output Laminator Access Hopper Door... -
Page 105: Inside The Laminator
Inside the Laminator The CLM laminator has one standard laminator, in the L1 position, with an optional second laminator in the L2 position. The laminators apply topcoat or patch overlay material to the card. Topcoat is a continuous film and patch is a die-cut polyester shape. Both laminators can apply “Laminator Overlay Materials”... -
Page 106: Laminator Configuration Label
Laminator Configuration Label The laminator configuration label is located inside the laminator on the laminator access door and beneath the L2 cartridge. The configuration label shows the following information: Laminator name Serial number Configuration Part number ConfigurationLabel ... -
Page 107: Laminator Setup
Laminator Setup The laminating system supports full-color print ribbons that do not have a topcoat (T) panel, including YMCK and YMCK-K ribbon. The topcoat or patch overlay applied by the laminators provides protection against wear and color fading, so the print ribbon topcoat panel is not needed. - Page 108 Both patch and topcoat overlays can be clear or can have a transparent holographic image on them. The holographic materials are called holographic topcoat or holographic patch and can be ordered with a custom image. Clear Patch Clear Topcoat Random Holographic Patch Random Holographic Topcoat In addition, both holographic topcoat and holographic patch can be designed with a registered image that is located in the same position on each card.
-
Page 109: Load Laminator Overlay Material
Load Laminator Overlay Material Load the overlay material in one laminator cartridge at a time. The L1 (green) and L2 (orange) cartridges fit only in their assigned locations inside the laminator. They are not interchangeable. Unlock and open the laminator access door. Remove the L1 (green) laminator cartridge from the printer. - Page 110 Load the new roll of laminator overlay material. Put the blue supply spool on the blue supply spindle of the cartridge (c). The overlay supply roll can go on only one way and only fits on the correct spindle. Put the empty silver take-up spool on the silver take-up spindle (d).
-
Page 111: Card Design
Card Design Set up your card design using your card production software or another application, such as Microsoft Word. You can specify your lamination preferences using the Card Printer Driver. Your card production software also may provide lamination settings. The Card Printer Driver allows you to specify both printer and lamination preferences. Refer to your printer’s Driver Guide for complete information about setting up printing preferences and lamination options. -
Page 112: Clear A Laminator Card Jam
Clear a Laminator Card Jam Open the laminator access door. Remove the L1 and L2 (if installed) laminator cartridges. Turn the manual advance knobs inside of the laminator until the card is accessible. Remove the card. Replace the laminator cartridges. Close the laminator access door. -
Page 113: Clean The Laminator
Clean the Laminator Clean the laminator when at least one laminator cartridge is loaded with holographic overlay material and any of the following are true: Particles appear on the laminated cards. Particles are visible inside the laminator. “Laminator Problems” on For examples of problems that require laminator cleaning, refer to page This procedure uses a double-sided, sticky cleaning card that removes holographic... - Page 114 Remove the protective paper from both sides of the double-sided, sticky laminator cleaning card and insert the card under the rollers of the card exit slot of the laminator. When it is in the correct location and pushed in far enough, the card stays in place.
- Page 115 Laminator displays on line 2. Press E NTER Start displays on line 2 of the LCD panel. PressE NTER to start the cleaning process. Insert cleaning card displays on the LCD panel. Press the U button to start the cleaning cycle. The laminator pulls the cleaning card from the card exit slot into the laminator and moves it back and forth through the L1 and L2 cartridge areas, the card entry area, and the exit rollers several times.
Need help?
Do you have a question about the P800 and is the answer not in the manual?
Questions and answers