Kenwood NX-5000 Initial Setup Manual
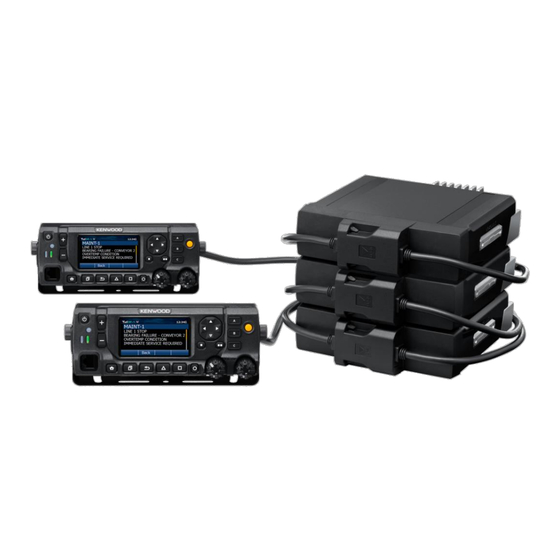
Multi rf deck / multi control head; remote configuration
Hide thumbs
Also See for NX-5000:
- User manual ,
- Common function reference (476 pages) ,
- Manual (264 pages)
Advertisement
Quick Links
Download this manual
See also:
User Manual
NX-5000 Remote Configuration [Initial Setup Instruction]
Multi RF Deck / Multi Control Head
The following sections provide a step-by-step instruction on the initial set-up and configuration for the NX-5xxx-series for multiple control
heads and multiple RF decks. This includes Single Head, Single Deck.
1. Configurations
Select the appropriate configuration for the application.
# of RF Deck
Single RF Deck
Dual RF Deck
Triple RF Deck
# of Control Head
Single Head
Dual Head
Single Head
Dual Head
Single Head
Dual Head
Six Remote Mount
Configuration
Designs
Page | 1
Advertisement

Related Manuals for Kenwood NX-5000


Summary of Contents for Kenwood NX-5000
- Page 1 NX-5000 Remote Configuration [Initial Setup Instruction] Multi RF Deck / Multi Control Head The following sections provide a step-by-step instruction on the initial set-up and configuration for the NX-5xxx-series for multiple control heads and multiple RF decks. This includes Single Head, Single Deck.
- Page 2 NX-5000 Remote Configuration [Initial Setup Instruction] 2. Firmware Update Firmware shall be updated to V1.62 or later for multi-control head / multi-deck support. The firmware shall be identical in each deck and control head for proper operation. During set-up, the firmware shall be updated in each RF deck individually due to architecture of the radio.
- Page 3 NX-5000 Remote Configuration [Initial Setup Instruction] 4) Insert the cable into the connector (CN2) of the KRK-15BM <Figure 3>. 5) Insert the flat cable into the connector (CN1) of the KRK-15BM. Note: Exercise care when inserting the flat cable into CN1.
- Page 4 Note: Connect cable KCT-71 to the top connector of KRK-15BM. 2. Write Firmware 1) Start up the KFL and open the Firmware for NX-5000 series (Ver.1.62 or later). Set the “COM Port.”. Set the “Baud Rate” to Auto. < Figure 8 >...
- Page 5 NX-5000 Remote Configuration [Initial Setup Instruction] 4) Click the “OK” button of the following window displayed after writing is finished. 5) Confirm the firmware checksum in the LCD display to insure that the appropriate firmware has been written. (If checksum is incorrect, then repeat from procedure 1).
- Page 6 NX-5000 Remote Configuration [Initial Setup Instruction] 3. Write FPU Data For Single RF Deck Configuration 1. Launch KPG-D1N 2. Create FPU Data file 1) If using an existing data file, open the file. 2) Open Product Information. 3) Select Control Head 1 and Control Head 2.
- Page 7 NX-5000 Remote Configuration [Initial Setup Instruction] 3. Write FPU Data file 1) Power on the radio. 2) Connect the radio to the PC with the KPG-46 Cable via Control Head 1. 3) Write the FPU Data to the radio by clicking the “Write” button of KPG-D1N.
- Page 8 NX-5000 Remote Configuration [Initial Setup Instruction] For Multi RF Deck Configuration 1. Launch KPG-D1N 2. Create FPU Data file for each RF Deck separately Note: Repeat this procedure for each RF Deck separately. 1) If applying existing data file to Multi RF Deck, open the data file.
- Page 9 NX-5000 Remote Configuration [Initial Setup Instruction] 3) Select Control Head 1 and Control Head 2. 4) Program additional settings. Note: At least one channel shall be programmed. 5) Save the data file. 3. Select FPU Data file for Multi RF Deck 1) Program >...
- Page 10 NX-5000 Remote Configuration [Initial Setup Instruction] 2) Assign all of the FPU Data saved for each RF Deck to RF Deck Data A/B/C by clicking each Select File button. Note: If following window is displayed when FPU Data is opened, press OK Button.
- Page 11 NX-5000 Remote Configuration [Initial Setup Instruction] 3) Select Master Operation Data* from the Deck Data. *Master Operation Data is the one used for Key Assignments and Emergency Profiles. Note: If editing Deck Data for Master Operation Data, perform the following procedure.
- Page 12 NX-5000 Remote Configuration [Initial Setup Instruction] 4. Write FPU Data file to each RF Deck separately Note: Repeat this procedure for each RF Deck separately. Note: Don’t edit any programming set at procedure 1) Connect Control Head 1 with one of the RF Decks using the KCT-71 cable.
- Page 13 NX-5000 Remote Configuration [Initial Setup Instruction] 5) Select the “FPU Data Select” of the RF Deck Selection tab to match the radio connected to the PC. Press OK. 6) Press Write Button. Page | 13...
- Page 14 NX-5000 Remote Configuration [Initial Setup Instruction] 7) Press OK Button . 8) Press “OK” after the Write Data operation has been completed. 9) Press “No” button. 10) Power off; disconnect the single remote configuration after the FPU Data write has been completed.
- Page 15 NX-5000 Remote Configuration [Initial Setup Instruction] 4. Assemble Remote Configuration 1. Set DIP switches of each RF Deck and Control Heads as shown in the provided diagrams on next page. [Deck No. reflects how they are displayed on the control head.] 2.
- Page 16 NX-5000 Remote Configuration [Initial Setup Instruction] Page | 16...
- Page 17 NX-5000 Remote Configuration [Initial Setup Instruction] Page | 17...
- Page 18 NX-5000 Remote Configuration [Initial Setup Instruction] Page | 18...
- Page 19 NX-5000 Remote Configuration [Initial Setup Instruction] Page | 19...
- Page 20 NX-5000 Remote Configuration [Initial Setup Instruction] Page | 20...
- Page 21 NX-5000 Remote Configuration [Initial Setup Instruction] 2. Pin position of KCT-72 KCH-20R Pin No. Color Name KCT-72 BLACK LIGHT GREEN LIGHT BLUE AUX_MIC YELLOW AUX_ME GRAY WHITE PURPLE PINK ORANGE BROWN KES-5 DARK GREEN * KES-5 cannot connect to KCH-19 because KCH-19 does not have speaker output port.
- Page 22 NX-5000 Remote Configuration [Initial Setup Instruction] 5. After Initial Setup After the initial set-up, as described in the previous sections, has been completed, firmware update and FPU programming may be performed via Control Head #1 without disassembling the configuration noted below.
Need help?
Do you have a question about the NX-5000 and is the answer not in the manual?
Questions and answers