Table of Contents
Advertisement
Quick Links
Advertisement
Table of Contents

Related Manuals for Kuppersbusch EKWE 320


Summary of Contents for Kuppersbusch EKWE 320
- Page 1 `‡†}‘{‡…z [‡†ŒŠ‡„ m†Œ ]co] KJH...
- Page 2 Service Manual: H1-58-01-04 Responsible: H.G.Streckert KÜPPERSBUSCH HAUSGERÄTE AG Email: georg.streckert@kueppersbusch.de Tel.: (0209) 401-724 Kundendienst Fax: (0209) 401-709 Postfach 100 132 Date: 13.04.2004 45801 Gelsenkirchen...
-
Page 3: Table Of Contents
H1-58-01-04 Contents Replacing the honeycomb control unit ESW 308.6 by the EKWE 320....... 4 Defect of the honeycomb control unit..............4 Replacement ......................4 How to proceed ..................... 5 Electrical connection ..................... 6 Connection of the honeycomb cooking zone to the honeycomb control unit and power module..........7 Cover panel for the honeycomb cooking zone in the lower cupboard.... -
Page 4: Replacing The Honeycomb Control Unit Esw 308.6 By The Ekwe 320
The plug can be replaced if the connection cable is long enough. It is recommended to deactivate the pot recognition by entering the code. When replacing change the pre-set code 88 in 66. or see Selection of the programme function p. 10 or User Manual EKWE 320 Only for internal use... -
Page 5: How To Proceed
H1-58-01-04 How to proceed In case of repairs replace the ceramic honeycomb as follows: Disconnect the appliance from the mains! Hold ready the replacement parts new honeycomb control unit and power module 091581 Adhesive cleaner 535885 PACTAN Primer 091580 PACTAN Adhesive 162712 Connection cable Undo and remove the casing cover with the power module and the control board from the casing. -
Page 6: Electrical Connection
During installation the honeycomb control unit must be dead. Only honeycomb cooking zones may be connected to the honeycomb control unit EKWE 320. Otherwise a dangerous situation may occur. The appliance has to be connected following the attached connection plan. -
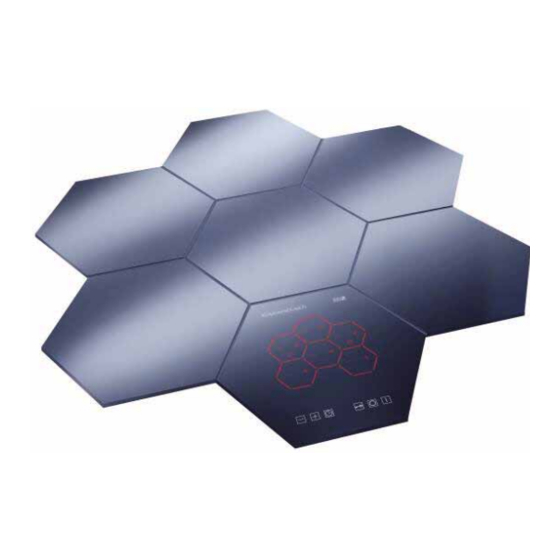
Page 7: Connection Of The Honeycomb Cooking Zone To The Honeycomb Control Unit And Power Module
H1-58-01-04 Connection of the honeycomb cooking zone to the honeycomb control unit and power module Trip line plugs of the honeycomb cooking zone are plugged into six sockets of the honeycomb control unit. For this the cables must point to the middle of the honeycomb control unit. Plugs for the power line in the honeycomb control unit have to be plugged into to the sockets of the power module. -
Page 8: Replacement Of The Power Connection Cable
H1-58-01-04 Replacement of the power connection cable The power connection cable with the spare part number 162712 can be fitted into all honeycomb cooking zones. All old connections must be removed, as these do no longer comply with the necessary regulations. Open the honeycomb cooking zones from below and disconnect the old connections. -
Page 9: Circuit Diagram Ekwe 320
H1-58-01-04 Circuit diagram EKWE 320... -
Page 10: Programming The Honeycomb Layout
H1-58-01-04 Programming the honeycomb layout As one honeycomb control unit can be used for all kinds of honeycomb layouts the control unit has to be programmed as to which honeycomb cooking zones have been installed in what kind of layout. Selection of the programme function Disconnect the honeycomb control unit from the power supply and switch it on again, as this programming function is only available after a failure of circuit. -
Page 11: Further Codes
H1-58-01-04 Further Codes For entering the code, see Programming the honeycomb layout. For fairs and expositions Demonstration mode off Demonstration mode on Caution! In the case of new deliveries the basic setting "demo mode on" may have been programmed In this case "demo mode on" must be changed to "demo mode OFF" with code 11 after the configurations have all been completed.
Need help?
Do you have a question about the EKWE 320 and is the answer not in the manual?
Questions and answers