Advertisement
Quick Links
E-210 LP • S-210 LP • E-310 LP • S-310 LP
E-210 NG • S-210 NG • E-310 NG • S-310 NG
ASSEMBLY GUIDE
G U Í A D E MO NTA J E | EN SE M B L E G U ID E
Descarga gratis la app BILT™ y sigue las instrucciones 3D paso a paso.
Téléchargez gratuitement l'application BILT™ pour obtenir les instructions étape par étape en 3D.
59503
01/01/18
enUS / esMX / frCA
Advertisement

Subscribe to Our Youtube Channel
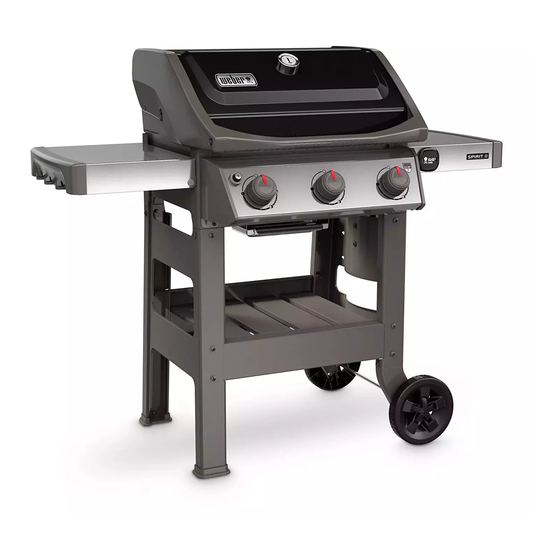
Summary of Contents for Weber SPIRIT II E-210 LP
- Page 1 E-210 LP • S-210 LP • E-310 LP • S-310 LP E-210 NG • S-210 NG • E-310 NG • S-310 NG ASSEMBLY GUIDE G U Í A D E MO NTA J E | EN SE M B L E G U ID E Descarga gratis la app BILT™...
- Page 2 m Assemble grill on a flat, level, and soft surface. m Do not use power tools for assembly. m Two people required for assembly. m There may be visual differences between illustrations and model purchased. m All packing material is recyclable. m Monte el asador sobre una superficie llana, nivelada y lisa.
- Page 3 • For Liquid Propane gas grills only. • Sólo para barbacoas de gas propano líquido. • Uniquement compatible avec les barbecues à gaz propane.
- Page 5 • For Liquid Propane gas grills only. • Sólo para barbacoas de gas propano líquido. • Uniquement compatible avec les barbecues à gaz propane.
- Page 6 • Download the free BILT app for 3D step-by-step instructions. • Descarga gratis la app BILT™ y sigue las instrucciones 3D paso a paso. • Téléchargez gratuitement l’application BILT™ pour obtenir les instructions étape par étape en 3D. m Do not use a steel hammer.
- Page 7 NO screw and washer. m NO INSTALE el tornillo con la arandela en este orificio. m Ne contient AUCUNE vis ou rondelle. WWW.WEBER.COM...
- Page 9 WWW.WEBER.COM...
- Page 10 m NO screw and washer. m NO INSTALE el tornillo con la arandela en este orificio. m Ne contient AUCUNE vis ou rondelle.
- Page 11 WWW.WEBER.COM...
- Page 13 WWW.WEBER.COM...
- Page 15 Wheels must be to the RIGHT. m Las ruedas deben quedar a la DERECHA. m Les roues doivent être à DROITE. WWW.WEBER.COM...
- Page 16 m Install top screw and washer ONLY. m Instale un tornillo con una arandela SÓLO en el orificio superior. m Installer UNIQUEMENT la vis et la rondelle du haut.
- Page 17 WWW.WEBER.COM...
- Page 18 m Save hardware. m Conserve las partes. m Sauvegarder le matériel. m Remove all packing material. m Retirar todo el material de embalaje. m Retirer l’emballage.
- Page 19 WWW.WEBER.COM...
- Page 21 WWW.WEBER.COM...
- Page 22 310 0...
- Page 23 WWW.WEBER.COM...
- Page 24 26 2 7 m Los cables deben pasarse ALREDEDOR del tubo de gas de m Wires must be routed AROUND acero y POR DETRÁS del mismo. and BEHIND the steel gas line. m Les câbles doivent passer AUTOUR et DERRIÈRE la conduite de gaz en acier.
- Page 25 WWW.WEBER.COM...
- Page 26 2- -...
- Page 27 DO NOT fully tighten nut. m NO APRIETE completamente la tuerca. m NE PAS SERRER complètement l'écrou. WWW.WEBER.COM...
- Page 29 CAREFULLY raise side table, then fully tighten nut. m CON CUIDADO, levante la mesa lateral y apriete completamente la tuerca. m Soulever la tablette latérale AVEC PRÉCAUTION, puis serrer complètement l’écrou. WWW.WEBER.COM...
- Page 30 • Refer to the Troubleshooting section of your Owner’s Guide for match lighting instructions. • Consulte la sección “Resolución de problemas” de la guía del propietario si desea obtener información acerca del encendido con cerillos. • Se reporter à la section Dépannage du manuel d’utilisation pour les instructions sur l’allumage avec des allumettes.
- Page 31 WWW.WEBER.COM...
- Page 33 WWW.WEBER.COM...
- Page 35 • Pour de l’information sur les raccords de l’alimentation en gaz et sur la vérification des fuites, reportez-vous à la section « Démarrage » de votre manuel du propriétaire. WWW.WEBER.COM...


Need help?
Do you have a question about the SPIRIT II E-210 LP and is the answer not in the manual?
Questions and answers