
Related Manuals for Van Guard 1320BR


Summary of Contents for Van Guard 1320BR
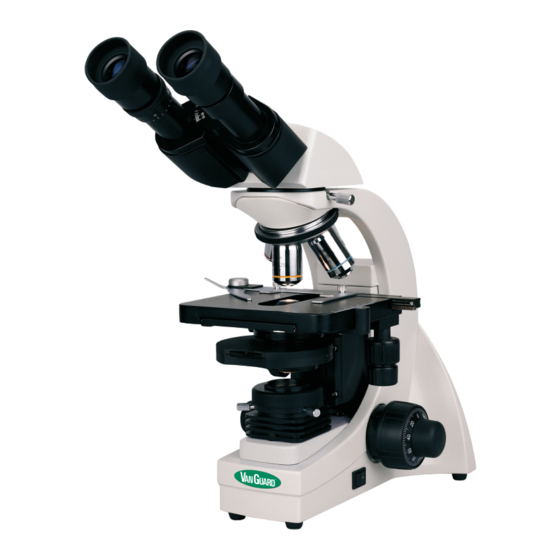
- Page 1 Operation Manual 1300 Series Covering Models: 1320BR, 1321BRi, 1323PHi 1330BR, 1331BRi, 1333PHi...
-
Page 2: Table Of Contents
Introduction Thank you for purchasing this VanGuard Microscope. With the user in mind, VanGuard Microscopes are built from modern designs and should provide a lifetime of reliable performance. We recommend you read this entire manual carefully before setting up and using the instrument. Warranty information and a registration card can be found at the following web address: www.veegee.com/pages/technical-support-service 1300 Series Compound Microscopes... -
Page 3: Environmental Conditions
Avoid high temperature or humidity, and dusty environments. • Temperature range: 50 - 104°F (10 - 40°C) • Humidity: 80% maximum, non-condensing Included Parts Model 1320BR Model 1321BRi Model 1323PHi Binocular Head (1 ea.) Binocular Head (1 ea.) Binocular Head (1 ea.) Stand (1 ea.) -
Page 4: Microscope Diagrams
Parts & Accessories Trinocular Port Dust Cover (Trinocular models only) Trinocular Port (Trinocular models only) Interpupillary Scale Interpupillary Adjustment Mechanism Condenser Set Screw Brightfield Abbe Condenser Aperature Iris (Brightfield models only) Diaphragm Adjustment Drop-In Lever Filter Holder Substage Adjustment Knob Collector Assembly Up-Stop... - Page 5 Parts & Accessories Eyepieces Diopter Adjustment Mechanism Head Assembly Prism Slider (Trinocular models only) Nosepiece Head Set Screw Objectives Stand Slide Slide Holder Holder Knobs Mechanical Mechanical Stage Stage X-Y Controls Phase Contrast Condenser (Phase models only) Focusing Tension Control Knob Phase Annulus Turret Kohler Iris...
-
Page 6: Optional Accessories
Parts & Accessories Optional Accessories: Digital Camera Systems: Part Number Description 1400-CDPC-3 USB Digital Camera Kit with Adapters and Microscopy Software, 3 Megapixels 1400-CDPC-5 USB Digital Camera Kit with Adapters and Microscopy Software, 5 Megapixels 1400-CDPC-10 USB Digital Camera Kit with Adapters and Microscopy Software, 10 Megapixels Cleaning Supplies &... -
Page 7: Setup
Setup Assembly All Models The next three pages are dedicated to setting up the microscope. The following “Operation” section explains the various features of the microscope and how to use them. Remove the microscope parts from the protective foam and plastic packaging. Check for all components and accessories (see list on page 3), then you can begin assembly. -
Page 8: Substage Adjustments
Setup Substage Adjustments All Models Centering: Although the condenser comes pre-centered you may find it necessary to check it occasionally. A simple method for centering is as follows: • Rotate the nosepiece until the 10X objective is in the light path. For phase contrast models set the phase annulus turret to the “0”... -
Page 9: Aligning The Phase Contrast Annulus Rings
Setup Aligning the Phase Contrast Annulus Rings Phase Contrast Models The phase annulus rings come pre-aligned therefore it is not necessary to adjust them before use. Should it be necessary in the future (due to replacement of phase condenser or objectives) follow these steps: Center the condenser following the steps in the “Substage Adjustments”... -
Page 10: Operation
Operation Variable Lighting Control and Power Switch All Models The rocker switch located on the right hand side of the microscope (figure 12) turns the power on or off. To turn the power on press the rocker on the end marked “|”. To turn the power off press the rocker on the end marked “O”. -
Page 11: Interpupillary & Diopter Adjustment
Operation Interpupillary and Diopter Adjustment All Models Interpupillary adjustment (the distance between the eyepieces) is made through a “folding” action. The Seidentopf design allows for a folding adjustment which is quickly and easily done for each user (figure 17). Diopter adjustment allows for proper optical correction based on each individual’s eyesight. -
Page 12: Using The Camera Port
Operation Using the Camera Port Trinocular Models Remove the trinocular port dust cap (figure 20a) from the trinocular port by unthreading. Figure 20 Carefully thread the camera port (figure 21a) into the trinocular port in a clockwise direction until tight. Assemble the adapters and connect to the camera using the instructions provided with the camera/adapter kit. -
Page 13: Oil Immersion Objectives
Operation Oil Immersion Objectives All Models The 100X objective that comes with this microscope must be used with immersion oil in order to maintain image quality. After use, the objective tip needs to be wiped clean so that no oil residue remains. Procedure for using immersion oil: Place one drop of immersion oil on the prepared slide. -
Page 14: Maintenance
Maintenance Replacing the Lamp All Models Before attempting to replace or remove the lamp, unplug the microscope from any power source and allow the bulb to cool completely. Fully raise the stage and substage assemblies. Be careful not to crash the objective into the stage or condenser lens. -
Page 15: Replacing The Fuse
Maintenance Replacing the Fuse All Models If the microscope is plugged in but the bulb is not turning on, the fuse could be blown. The instructions below detail how to check for a blown fuse. You can tell a fuse is blown if the wire inside the glass is broken, the glass is blackened, or by performing a continuity test. -
Page 16: Troubleshooting
Troubleshooting Symptom: No light visable from collector Step # Possible Cause How To Test Test Result? Solution For More Info Switched on Go to next step Light is not switched on Visually inspect Page 10 Not switched on Move power switch to on position Plugged in Go to next step Power cord not plugged in... -
Page 17: Troubleshooting
Troubleshooting Symptom: No image visable in eyepiece(s) or trinocular port Possible Cause How To Test Test Result? Solution For More Info Step # Switched on Go to next step Light is not switched on Visually inspect Page 10 Not switched on Move power switch to on position Not set too low Go to next step... -
Page 18: Warranty & Service Information
Warranty & Service 5 Year Limited Warranty If you experience problems setting up your microscope or have service related questions VanGuard microscopes are warranted by VEE GEE Scientific LLC please contact your dealer or VanGuard to be free from defects in material and workmanship for a period Microscopes directly at 1-800-423-8842. -
Page 19: Specifications
Specifications Viewing Head: Trinocular/Binocular Viewing Head Type: Seidentopf Head Rotation: 360° Head Inclination: 30° Sliding Prism: 80/20 Split [Trinocular Models] Interpupillary Adjustment: 55-75mm Dioptric Adjustment: -5 to +5 Eyepiece Magnification: 10X Extra-Widefield, High Eyepoint Eyepiece Field Diameter: 20mm Nosepiece: Quadruple Position/Reversed Brightfield Objectives: [0.10 NA, 28.0mm WD] [Achromatic or Plan Achromatic] 10X... - Page 20 veegee.com | 800-423-8842 sales@veegee.com | techsupport@veegee.com veegee.com/pages/technical-support-service VGMNL070219-1300BRIPHI Printed in the USA...
Need help?
Do you have a question about the 1320BR and is the answer not in the manual?
Questions and answers