Table of Contents
Advertisement
Quick Links
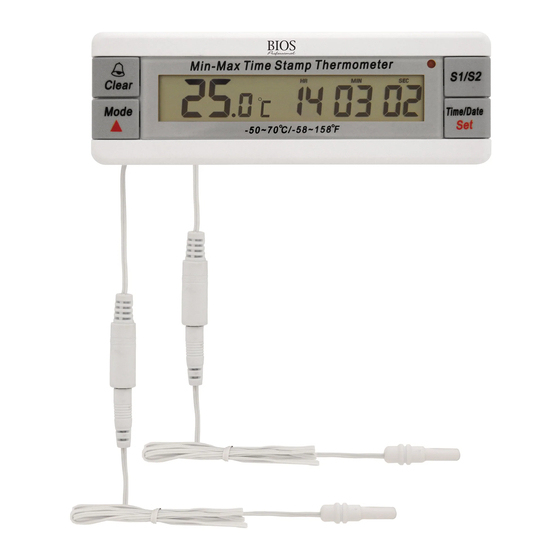
120SC
ADVANCED VACCINE FRIDGE THERMOMETER
FEATURES:
• Dual channel measurement
• Low/high alarm limit setting
• Minimum and maximum reading memories with real time and date stamp
• Flashing light alarm indicator
• °C/°F switchable
• Time and date display
• Low battery indicator
• Flip-out desk stand
• Magnetic attachment
SPECIFICATION
Measuring Range
Display Accuracy
Display Resolution
Display Reading Update
Alarm Limit Setting Resolution
Time Accuracy
Time Display Format
Date Display Format
Effective Calendar Period
Battery
Probe cord length
Display Size
Product Size
Accessories
INSTALLATION
1. Open battery cover.
2. Install batteries with correct polarity positioning.
3. Close battery cover.
4. Fully extend the probe wires.
5.
a) If using glycol tubes (available separately) then place glycol tubes in a vaccine box inside fridge.
b) If not using glycol tubes, please place sensors in a secure area inside the fridge away from the wall on the fridge.
6. Peel off LCD display protective sheet.
OPERATION
Select Temperature Unit
Slide the °C/°F switch on the back to select temperature unit.
Time And Date Display
Press TIME/DATE to switch the display to show the current time or date.
In date display mode, the display will automatically switch back to time display if there is no operation for 10 seconds.
Time Setting
1. In time display mode, press and hold SET for about 3 seconds to enter time setting and the hour (HR) digits will be flashing.
2. Press
to adjust the digits to the current hour.
3. Press SET once to confirm the hour setting and then the minute (MIN) digits will begin to flash.
4. Press
to adjust the digits to the current minute(s).
5. Press SET once to confirm the minute setting and then the second (SEC) digits will begin to flash.
6. Press
to adjust the digits to the current second.
7. Press SET again to finish time setting and return to normal display.
Date Setting
1. In date display mode, press and hold SET for about 3 seconds to enter date setting and the Year digits will be flashing.
2. Press
to adjust the digits to the last two digits of the current year.
3. Press SET once to confirm the year setting and then the month digits will begin to flash.
4. Press
to adjust the digits to the current month.
-50°C to 70°C (-58°F to 158°F)
± 1°C
0.1°
10 seconds
1°
± 3 seconds per day
24 hours
Day/month/year
2011-2099
1.5 volt, type AAA x 2 pieces
1,000 mm
90(W) x 16(H) mm
135(W) x 45(H) x 23(D) mm
1. 1.5 volt, type AAA battery x 2 pieces
2. Magnet on back of unit
3. Sensor holder with double sided tape x 2 pieces
Advertisement
Table of Contents

Related Manuals for Thermor BIOS 120SC


Summary of Contents for Thermor BIOS 120SC
- Page 1 120SC ADVANCED VACCINE FRIDGE THERMOMETER FEATURES: • Dual channel measurement • Low/high alarm limit setting • Minimum and maximum reading memories with real time and date stamp • Flashing light alarm indicator • °C/°F switchable • Time and date display • Low battery indicator • Flip-out desk stand • Magnetic attachment SPECIFICATION Measuring Range -50°C to 70°C (-58°F to 158°F) Display Accuracy ± 1°C Display Resolution 0.1° Display Reading Update 10 seconds Alarm Limit Setting Resolution 1°...
- Page 2 5. Press SET once to confirm the month setting and then the date digits will begin to flash. 6. Press to adjust the digits to the current date. 7. Press SET again to finish date setting and return to normal display. Minimum / Maximum Reading Memory 1. Press MODE once to display the minimum measured reading and the time display will show when this minimum reading was recorded. 2. Press TIME/DATE to see the date of when the minimum reading was recorded. 3. Press MODE once to display the maximum measured reading and the time display will show when this maximum reading was recorded. 4. Press TIME/DATE to see the date of when the maximum reading was recorded. 5. Press MODE three times to return to normal display. 6. To clear the minimum and maximum reading memories, press CLEAR once when the minimum or maximum readings are displayed. All readings for both channels and time stamps will be reset to current readings and time. 7. Clear the memory once before taking new minimum or maximum reading. Low / High Alarm Setting 1. Press MODE three times to enter low / high alarm setting and the LO icon will be displayed. 2. Press and hold SET for about 3 seconds and the LO digits will be flashing. 3. Press to input the desired low temperature limit. 4. Press SET to confirm low temperature alarm limit. The HI icon will be displayed and the digits will begin to flash. 5. Press to input the desired high temperature limit. 6. Press SET to confirm the high temperature alarm limit and finish the setting. 7. The alarm will sound when the temperature reading is lower or higher than the alarm limit set. Press any button to stop the alarm sound but the HI or LO icon will still flash until the reading is within the set limits. NOTE: If connectors are unplugged, the alarm will go off. Once re-connected, the alarm will stop. Alarm ON/Off Press to switch alarm OFF or ON. Alarm Indicator When the reading exceeds the alarm limit the red light will be on and continue to flash to indicate that an alarm has been triggered. Press and hold CLEAR for about 3 seconds to cancel the flashing red light.
Need help?
Do you have a question about the BIOS 120SC and is the answer not in the manual?
Questions and answers