Subscribe to Our Youtube Channel
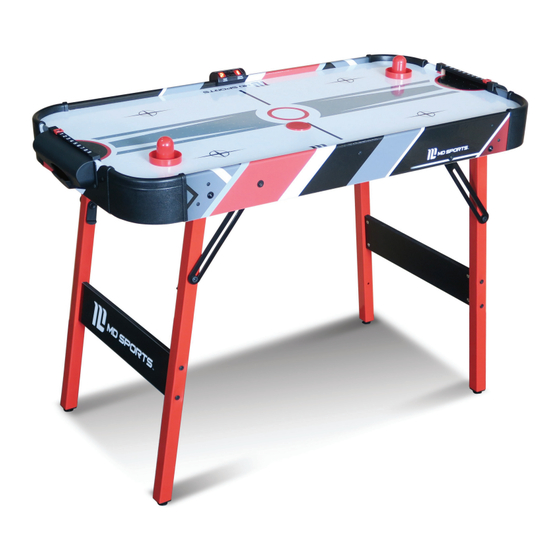
Summary of Contents for MD SPORTS Menards AWH042_028M
- Page 1 MODEL: AWH042_028M Menards ASSEMBLY INSTRUCTIONS MODEL: AWH042_028M ATTENTION DO NOT RETURN TO THE STORE Contact MD Sports Customer Service Toll Free:877- 885 -1635 * For additional resources and Frequently Asked Questions, please visit us at themdsports.com...
- Page 2 LIMITED 90 DAYS WARRANTY This product is covered by a limited warranty that is effective for 90 days from the date of purchase. If, during the limited warranty period, a part is found to be defective or breaks, we will offer replacement parts at no cost to you, the customer. The only exceptions to the warranty include mainframes, table tops, playing surfaces, batteries or tools.
-
Page 3: Tools Required
TOOLS REQUIRED Phillips Screwdriver - Not Included Power Tools - Set Low Torque Standard (Flat Head Screwdriver) - Not Included Allen Key - Included Wrench - Included High Torque over tightened CAUTION! Electric Screwdrivers may be helpful during assembly; however, please set a low torque and use extreme caution. -
Page 4: Important Safety Instructions
IMPORTANT SAFETY INSTRUCTIONS Read all instructions 1. Read all instructions - All the safety and operating instructions should be read carefully before this hockey game is played. 2. Caution - This is not a toy and is intended for use by or under the supervision of adults. Adults should review safety guidelines with children to avoid possible risk of electric shock or other injuries. - Page 5 AWH042_028M PARTS LIST FOR FIG. 1 FOR FIG. 1 FOR FIG. 1 FOR FIG. 6 Mainframe Leg - A Leg - B End Leg Panel FOR FIG. 7 FOR FIG. 2, 4 FOR FIG. 9 Round Puck Pusher Safety Support Leg Leveler FOR FIG.
- Page 6 ASSEMBLY INSTRUCTIONS: 1. Find a clean, level place to begin the assembly of your product. 2. Remove all the parts from the box and verify that you have all of the listed parts as shown on the parts list pages. Carefully cut or tear the four corners of the box so that the bottom of the box can be used as your work surface.
- Page 7 FIG. 2 Note: Only Leg - A and Leg - B (#2 and #3) will be installed with Buckle (#13). FIG. 3 AWH042_028M (Continued on the next page.) www.themdsports.com...
- Page 8 FIG. 4 FIG. 5 AWH042_028M (Continued on the next page.) www.themdsports.com...
- Page 9 FIG. 6 The Hole Note: Please note the hole and the hole alignment. FIG. 7 AWH042_028M (Continued on the next page.) www.themdsports.com...
- Page 10 FIG. 8 Scorer wire Note: Thread the wires from the Goal Boxes (#11) through the openings of the end aprons and supports of the playfield to the opening of the side apron and use the Velcro Straps to fix the Scorer Wires.
- Page 11 FIG. 9 will play. Note: Insert the Scorer Wires into the Electronic Scorer (#10). Note: Tear off the backside papers of the Felt Pads (#9) and stick them onto the bottom of the Pushers (#8). AWH042_028M (Continued on the next page.) www.themdsports.com...
- Page 12 THE LEGS CAN BE FOLDED TO PLAY ON DESK OR FLOOR: Step 1 Note: Two adults are required to turn this table over. Step 2 Note: Protect the Electronic Scorer properly. Note: Fold the Leg - A (#2) and Leg - B (#3) - Make sure that the Safety Support are unlocked in the correct position.
- Page 13 Note: Fold the Leg - C (#15) and Leg - D (#16) - Make sure that the Safety Support are unlocked in Step 3 the correct position. Step 4 Note: Two adults are required to turn this table over. AWH042_028M (Continued on the next page.) www.themdsports.com...
- Page 14 ELECTRONIC SCORER OPERATION: 1. Install Batteries: Battery Box: Remove the battery cover and insert 2 “AAA” Batteries into the battery box. ( 2 “AAA” Batteries not included.) When HOME / VISITOR indicates “0”, the game can start. 2. Reminding: a. Batteries must be installed according to the correct polarization (+ and -) required. b.


Need help?
Do you have a question about the Menards AWH042_028M and is the answer not in the manual?
Questions and answers