Advertisement
Available languages
Available languages
Quick Links
MAXIMA
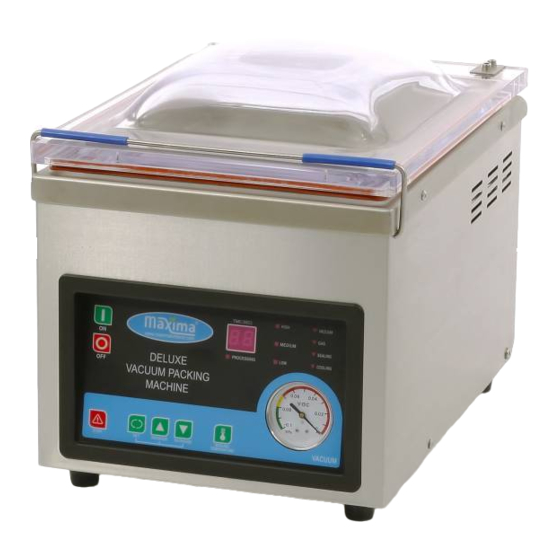
VACUUM PACKING MACHINES
USER MANUAL
GEBRUIKERSHANDLEIDING
BEFORE USING THIS PRODUCT YOU SHOULD READ THIS USER MANUAL PROPERLY
VOOR GEBRUIK DIENT U DEZE GEBRUIKERSHANDLEIDING UITVOERIG TE LEZEN
Spangenberg International B.V. – Rendementsweg 24P – 3641 SL Mijdrecht – Holland – T. +31 (0) 297 253 969 – F. +31 (0) 297 256 445
1
–
info@spangenberg.nl
www.spangenberg.nl
Advertisement

Related Manuals for Maxima MVAC 300


Summary of Contents for Maxima MVAC 300
- Page 1 MAXIMA VACUUM PACKING MACHINES USER MANUAL GEBRUIKERSHANDLEIDING BEFORE USING THIS PRODUCT YOU SHOULD READ THIS USER MANUAL PROPERLY VOOR GEBRUIK DIENT U DEZE GEBRUIKERSHANDLEIDING UITVOERIG TE LEZEN Spangenberg International B.V. – Rendementsweg 24P – 3641 SL Mijdrecht – Holland – T. +31 (0) 297 253 969 – F. +31 (0) 297 256 445 –...
- Page 2 English Introduction Thank you for purchasing this Maxima product. In order to obtain the maximum benefit and use of this product, please read these instructions completely before attempting to install or use this product. Your new Maxima product was manufactured with advanced production techniques. Every product is inspected and tested strictly to ensure safe and reliable operation before leaving the factory.
- Page 3 Read this instruction manual completely before attempting to install and operate this product. All installations and set ups must be done by authorized service agents, your dealer, or Maxima representatives. ...
- Page 4 heating process by pressing the SEALING TEMPERATURE key on the control panel. This is to prevent the heating process and to decrease wear and tear. Run the vacuum pump a few times, as described later in this manual, and the machine is ready to use. Control Panel Programming Please set every parameter first before operating the machine.
- Page 5 11. ATTENTION! DO NOT BLOCK THE AIR HOLE IN THE CHAMBER! Spangenberg International B.V. – Rendementsweg 24P – 3641 SL Mijdrecht – Holland – T. +31 (0) 297 253 969 – F. +31 (0) 297 256 445 – info@spangenberg.nl www.spangenberg.nl...
- Page 6 Operating Instructions 1. Open the cover, turn on the machine and select a suitable vacuum packing bag for the product. 2. Set the processing parameters and select the sealing temperature. 3. Place the vacuum bag in the chamber with the opening on top of the sealing bar. Hold the bag by using the clamp.
- Page 7 Refilling Pump 20 Replacing the Sealer In time, the sealer will be worn down simply through usage of the machine. The sealing tape on top of the sealer can be replaced as shown below. Of course it is also possible to replace the complete sealer, which is done in pretty much the same way.
- Page 8 Remove the plastic blocks on the sides of the sealer and then remove the tape. Release the metal strip and remove the strip completely (the tools to do this have been delivered with the machine). Cut a new heating wire at the right size, and replace the old one with it. Use the tools to place the heatin wire and lock it in place with the retaining bolt.
- Page 9 Cut the remaining sealing tape on the two sides enable to fold it. Put plastic parts on the two sides of sealing bar. Install the stailes steel base and pressing stick. Connect the cable of complete sealing bar to the pin, then put the sealing bar back to vacuum chamber to finish the installation. Cleaning and Maintenance ...
- Page 10 change the oil regularly. We recommend doing this minimal 2x per year. ATTENTION! Never hose down the machine! Storage Store in a cool and dry place. Warranty Thank you for using our products, our company will follow related provisions from our ’Algemene Voorwaarden’.
- Page 11 Deze machines zijn zeer breed toepasbaar. Vacumeer- en sealinstellingen kunnen worden aangepast naar uw wensen. Bij Maxima zijn wij erg trots op onze producten en zijn volledig gecommitteerd om u van de beste producten en service te voorzien. Uw tevredenheid is onze nummer 1 prioriteit.
- Page 12 Lees deze gebruikershandleiding volledig voordat u de machine gaat installeren en gebruiken. Alle installaties en inwerkstellingen moeten worden verricht door gecertificeerde onderhoudsbedrijven, uw wederverkoper of vertegenwoordigers van Maxima. De machine moet op een vlak oppervlak worden geplaatst met voldoende ruimte voor ventilatie en reiniging.
- Page 13 knop. Door het verwarmingsproces uit te schakelen vermindert u slijtage. Start de vacumeerpomp, zoals later beschreven in deze handleiding, een aantal maal en de machine is klaar voor gebruik. Besturingspaneel Instellen Voordat u het apparaat voor het eerst gebruikt dient u alle parameters in te stellen. 1.
- Page 14 Gebruiksinstructies 1. Open het deksel, zet de machine aan en kies uw vacumeerzak. 2. Programeer de instellingen naar uw wens. 3. Plaats de vacuumzak in de kamer met de opening bovenop de sealbalk. Houdt de zak op zijn plaats door de klem te gebruiken. 4.
- Page 15 Vervangen van het luchtfilter Vervangen sealstrip Na verloop van tijd kan er slijtage ontstaan aan de sealbalk. Deze teflon strip is los te vervangen volgens onderstaand stappenplan. Uiteraard is het ook mogelijk om een complete nieuwe sealbalk te plaatsen. Maak de contactpunten los doormiddel van de schroefjes te verwijderen Spangenberg International B.V.
- Page 16 Verwijder aan de onderzijde en zijkant de schroefjes uit de sealbalk. Volgens de afbeelding Verwijder de kunstsof blokjes aan de zijkant en verwijder vervolgens de teflon sealstrip Maak de stalen sealstrip los en haal deze eruit. (hiervoor is gereedschap meegeleverd) Knip een nieuwe sealstrip op lengte en plaats deze in de sealbalk Plaats de sealdraad, met het bijgeleverde gereedschap, zo strak mogelijk en draai deze vast met de borgbout...
- Page 17 Knip de teflon tape op lengte af en plak deze over de stalen sealstrip. Knip de uiteinden in en vouw deze naar binnen, zodat de kopse kant afgedicht is. Schuif de kunststof blokjes weer op de sealbalk Monteer de sealbalk aan de houder vast Monteer de beide contactpunten doormiddel van de schroefjes, en de sealbalk kan weer worden teruggeplaatst Spangenberg International B.V.
- Page 18 Reiniging en Onderhoud Verwijder altijd de stekker uit het stopcontact alvorens de machine wordt gereinigd. Let op! Dompel de machine nooit in water of een andere vloeistof. Reinig de machine met een vochtige doek (water met mild reinigingsmiddel). ...
- Page 19 Opslag Sla het apparaat op in een koele en droge omgeving. Garantie Hartelijk bedankt voor het gebruiken van onze producten, ons bedrijf hanteerd voorwaarden zoals vermeldt in onze ‘Algemene Voorwaarden. We geven een garantie van 12 maanden vanaf de aanschafdatum (factuurdatum). In de garantieperiode is ons bedrijf verantwoordelijk voor gratis onderdelen als een productiefout of kwaliteitsprobleem zich voordoet bij normaal gebruik.
Need help?
Do you have a question about the MVAC 300 and is the answer not in the manual?
Questions and answers