Advertisement
Quick Links
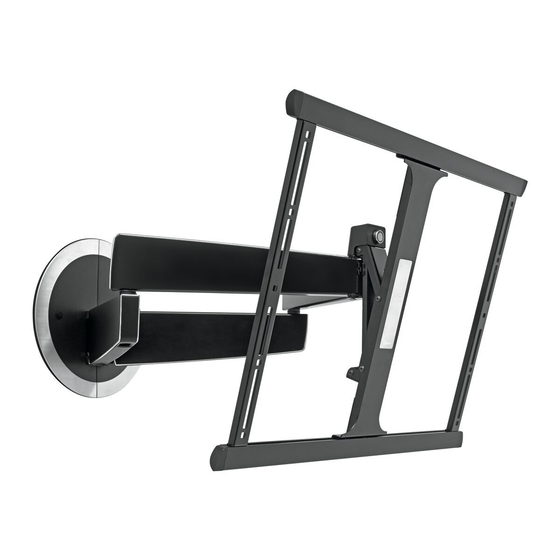
NEXT 7345
EN
Mounting instructions
DE
Montageanleitung
FR
Consignes d'installation
NL
Montagevoorschrift
ES
Instrucciones de montage
IT
Istruzioni di montaggio
PT
Manual de montagem
Οδηγίες συναρμογής
EL
SV
Montageföreskrifter
PL
Instrukcja montażu
RU
Инструкция по сборке и установке
CZE Návod k montáži
SK
Návod na montáž
HU Szerelési előírás
TR
Montaj kılavuzu
RO Instrucţiuni de montaj
UK
Вказівки по монтажі
BG Инструкции за монтаж
設置の説明書
JA
ZH
Need help?
X
X
Scan the QR-code to find
the installation movie on
YouTube:
More information on:
www.vogels.com
Advertisement

Related Manuals for vogel's NEXT 7345


Summary of Contents for vogel's NEXT 7345
- Page 1 Need help? Scan the QR-code to find the installation movie on NEXT 7345 YouTube: Mounting instructions Инструкция по сборке и установке Montageanleitung CZE Návod k montáži Consignes d’installation Návod na montáž Montagevoorschrift HU Szerelési előírás Instrucciones de montage Montaj kılavuzu Istruzioni di montaggio RO Instrucţiuni de montaj...
- Page 2 Important Before mounting the wall mount, first read the warnings at the back of the supplied parts list (separate card). DE - Wichtig Lesen Sie vor der Montage des Wandhalters zuerst die - Önemli Duvar montesini monte etmeden önce, (ayrı kart olarak) Warnhinweise auf der Rückseite der mitgelieferten Teileliste verilen parça listesinin arkasında bulunan uyarıları...
- Page 3 • Optional: use the cable holders to store excess cables. オプション : 余分なケーブルはケーブルホルダーを使って収納します。 - Optional: Verwenden Sie die Kabelsäule, um überlange Kabel zu verbergen. - Facultatif : utilisez les supports de câble pour ranger les câbles excédentaires. - 选装:使用理线架来整理和固定过长的缆线。 - Optioneel: gebruik de kabelhouders om overtollige kabels op te bergen. - Opcional: utilice las guías de cables para recoger la parte sobrante de los cables.
- Page 4 no. 3 Check the mounting hole pattern on the screen. If necessary, adapt the width of the frame (A). - Prüfen Sie das Lochmuster am Bildschirm. Passen Sie nötigenfalls die Breite des Rahmens (A) an. - Zkontrolujte montážní otvory na obrazovce. V případě nutnosti přizpůsobte šířku - Contrôlez le gabarit de montage de l’écran.
- Page 5 Optional Mount the frame (A) onto the screen. - Bringen Sie den Rahmen (A) am Bildschirm an. - Montez le cadre (A) sur l’écran. - Bevestig het frame (A) aan het scherm. - Monte el marco (A) sobre la pantalla. - Montare l’adattatore (A) sullo schermo.
- Page 6 2.5 cm Carrier 116 cm 7825 TV 40 " TV 65 " Dimensions are only applicable when Cable Column NEXT 7840 is installed. Determine where the wall mount (C) should be mounted. - Legen Sie fest, wo der Wandhalter (C) montiert werden soll. - Déterminez où...
- Page 7 Remove the covers (D). - Entfernen Sie die Abdeckungen (D). - Déposez les capots (D). - Verwijder de afdekkappen (D). - Retire las cubiertas embellecedoras (D). - Togliere i coperchi (D). - Retire as coberturas (D). - Αφαιρέστε τα καλύμματα (D). - Ta bort skydden (D).
- Page 8 ø 5mm 20mm/0.8" ø 13/64" 80mm/3.2" ø 10mm 20mm/0.8" ø 25/64" Use the drilling template to drill the holes. - Verwenden Sie die Bohrschablone zum Bohren der Löcher. - Utilisez le gabarit de perçage pour forer les trous. - Gebruik de sjabloon om de gaten op de juiste plaats te boren. - Utilice la plantilla para perforar los agujeros.
- Page 9 70mm/2.8" ø 6mm ø 15/64" Use the drilling template to drill the holes. Make sure to drill the smallest hole (X) in the middle of the stud. - Verwenden Sie die Bohrschablone zum Bohren der Löcher. Achten Sie darauf, - Pomocí vrtací šablony vyvrtejte otvory. Nezapomeňte vyvrtat das kleinste Loch (X) in der Mitte des Holzständers zu bohren.
- Page 10 Screw the wall mount (C) onto the wall. Make sure to start with the smallest hole (X). - Schrauben Sie den Wandhalter (C) an die Wand. - Nástěnnou jednotku (C) namontujte na stěnu. Achten Sie darauf, mit dem kleinsten Loch (X) zu beginnen. V každém případě...
- Page 11 Screw the wall mount (C) onto the wall. Make sure to start with the smallest hole (X). - Schrauben Sie den Wandhalter (C) an die Wand. - Nástěnnou jednotku (C) namontujte na stěnu. Achten Sie darauf, mit dem kleinsten Loch (X) zu beginnen. V každém případě...
- Page 12 Place the covers (D) back. - Bringen Sie die Abdeckungen (D) wieder an. - Remettez les capots (D) en place. - Plaats de afdekkappen (D) terug. - Vuelva a colocar las cubiertas embellecedoras (D). - Rimontare i coperchi (D). - Volte a colocar as coberturas (D). - Επανατοποθετήστε...
- Page 13 8.1 Loosen the upper thumbscrew; remove the lower thumbscrew. - Lösen Sie die obere Flügelschraube. Entfernen Sie die untere Flügelschraube. - Desserrez la molette supérieure ; déposez la molette inférieure. - Draai de bovenste duimschroef losser; verwijder de onderste duimschroef. - Afloje el tornillo de presión superior y quite el inferior.
- Page 14 30kg 66lbs MAX. MAX. 8.2 Hook the TV onto the wall mount (C). Hook the upper thumb screw into the V-shaped recess. - Haken Sie das Fernsehgerät am Wandhalter (C). - Zavěste televizor na nástěnnou jednotku (C). Haken Sie die obere Fügelschraube in den V-förmigen Rücksprung ein. Zahákněte horní...
- Page 15 8.3 Position the TV level. 8.4 Place the lower thumbscrew back; tighten both thumbscrews. - Richten Sie das Fernsehgerät aus. - Bringen Sie die untere Flügelschraube wieder an. Ziehen Sie beide Flügelschrauben fest. - Positionnez le téléviseur parfaitement de niveau. - Remettez la molette inférieure en place ;...
- Page 16 9.1 Pull the TV away from the wall. 9.2 Slide the covers (X) from both arms. Make sure that both arms are fully streched. - Ziehen Sie das Fernsehgerät von der Wand weg. Vergewissern Sie sich, dass beide Arme vollständig - Schieben Sie die Abdeckungen (X) von beiden ausgezogen sind.
- Page 17 - Χρησιμοποιήστε την ταινία velcro (Y) για να κεντράρετε τα καλώδια. Μοιράστε τα καλώδια στους δύο βραχίονες. Περάστε τα καλώδια μέσα από τα δεματικά καλωδίων (Z). Μην σφίξετε ακόμα τα δεματικά καλωδίων! - Använd kardborrebandet (Y) för att centrera kablarna. Dela upp kablarna mellan båda armarna.
- Page 18 9.4 Make sure that the TV can rotate freely with the cables attached. 9.5 If the TV can rotate freely, tighten the cable ties. - Vergewissern Sie sich, dass das Fernsehgerät bei angeschlossenen Kabeln frei bewegt - Wenn das Fernsehgerät frei bewegt werden kann, ziehen Sie die werden kann.
- Page 19 9.6 Cut the cable ties to the correct length. 9.7 Slide the covers back on both arms. - Schneiden Sie die Kabelbinder auf die richtige Länge ab. - Schieben Sie die Abdeckungen wieder auf beide Arme. - Coupez les serre-câbles à la longueur correcte. - Repositionnez les capots sur les deux bras.
- Page 20 no. 3 • For tilt correction, adjust screw X. DE - Stellen Sie zur Korrektur der Neigung die Schraube X ein. - Ajustez la vis X pour corriger l’inclinaison. - Pas zo nodig met schroef X de kantelhoek aan. - Para corregir la inclinación, ajuste el tornillo X. - Per correggere l’inclinazione, regolare la vite X.
- Page 21 • Remove the TV from the wall mount (C). DE - Nehmen Sie das Fernsehgerät vom Wandhalter (C). - Déposez le téléviseur du support mural (C). NL - Haal de tv van de wandsteun (C). - Retire el televisor del soporte de pared (C). - Rimuovere la TV dal supporto a parete (C).
- Page 22 EN Guarantee terms and conditions 1 Vogel’s garantiert: Treten innerhalb der Garantiefrist 2 S’il est fait appel à la garantie, le produit doit être Congratulations on the purchase of this Vogel’s product! des Produkts Mängel auf, welche die Folge von remis à...
- Page 23 3 De Vogel’s garantie vervalt: • Isi un fallo se debe a causas externas (ajenas al Termos e condições de garantia • Iindien het product niet volgens de gebruiksaanwijzing producto), como por ejemplo, la caída de un rayo, Felicitamo-lo pela aquisição deste produto da Vogel’s! is geboord, gemonteerd en gebruikt;...
- Page 24 Όροι και προϋποθέσεις εγγύησης 1 Under garantiperioden ska Vogel’s vid eget 3 Gwarancja firmy Vogel’s nie obowiązuje jeżeli: Συγχαρητήρια για την αγορά αυτού του προϊόντος της Vogel’s! gottfinnande utan kostnad ersätta eller reparera • Urządzenie nie zostało zainstalowane i używane Το...
- Page 25 • Если неисправность изделия возникла вследствие • pokud byl výrobek použit pro jiné zařízení než je HU Garanciális feltételek внешних причин (не зависящих от самого изделия), uvedeno na balení nebo uvnitř balení. Gratulálunk a Vogel’s termékének megvásárlásához! например из-за молнии, заливания водой, пожара, VOGEL’S, HONDSRUGLAAN 93, 5628 DB EINDHOVEN, Olyan termék van a tulajdonában, mely tartós истирания, воздействия...
- Page 26 Garanti şart ve koşullari 1 Vogel’s garantează că, dacă în perioada de 2 Якщо застосовано гарантію, то виріб необхідно Bu Vogel’s ürününü aldığınız için sizi tebrik ediyoruz! ve garanţie a produsului, apar defecţiuni datorită надіслати компанії Vogel’s разом з оригіналом detayına kadar iyi düşünülmüş...
- Page 27 • パッケージ、 または機器に書いてある使用方法以外の製品用 3 Гаранцията на Vogel’s престава да действа в に使用された場合。 следните случаи: • ако продуктът не е инсталиран и използван в съответствие с инструкциите за употреба; VOGEL’S 製品の送り先: VOGEL’S PRODUCTS BV, • ако продуктът е видоизменян или ремонти- ран от HONDSRUGLAAN 93, 5628 DB EINDHOVEN, друг, а...
- Page 28 www.vogels.com © Vogel’s Holding BV 2017 All rights reserved...
Need help?
Do you have a question about the NEXT 7345 and is the answer not in the manual?
Questions and answers