Table of Contents
Advertisement
Quick Links
Advertisement
Table of Contents

Related Manuals for Mikado VBar


Summary of Contents for Mikado VBar
- Page 1 Manual Version 3-Achser 3.6.16 USB...
-
Page 2: Table Of Contents
Its applications are diverse. When installing or operating V-Bar, you may have questions which are not answered by this manual. Purchase of this VBar System entitles you to technical support by the manufacturer. If you have any questions or comments, please contact: phone: +49 (0)331-237490 email: info@mikado-heli.de... -
Page 3: What Does The Vbar Do
The VBar is not an autopilot! An autopilot can steer or hold the heli in a given position. This is not what the VBar does. Rather, the VBar simulates the expected behavior of a conventional rotorhead (which includes a flybar). -
Page 4: Which Helicopters Are Suitable For The Vbar System
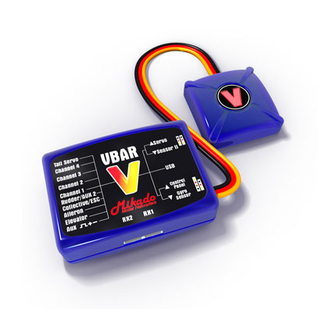
V-Bar must not lead to any restrictions concerning the safe operation of the model. Of course the VBar cannot be used in any helicopter carrying humans or animals, or in helicopters which could in any manner endanger persons, animals or things. - Page 5 - Central Unit The central unit houses the microprocessor and the power/voltage supply for the V-Bar. The supply voltage is 3.5 to 9 V. The essential criterion for positioning the central unit has to do with wiring. The receiver must be connected without pulling or bending the wires.
- Page 6 Otherwise you cannot use the VBar in this helicopter. For mounting the gyro sensor it is recommended that you use the piece of adhesive foam included with the VBar kit.
-
Page 7: How To Program Your Vbar
(Mikado item no. 4056) or the special VBar control panel (Mikado item no. 4145).You can switch among these options at any time, so you can program your VBar at home, at the flying field or anywhere you choose. -
Page 8: Were Can I Get Addtional Information On Vbar
6. Where can I get addtional information on the VBar? a) VBar Wiki The VBar Wiki is an information data base in which you will find most everything that might be of interest about the VBar. You will find the Wiki on www.vstabi.de. The Wiki is available in English and German. -
Page 9: Installation Of The Pc Software And Of The Usb Driver
7. Installation of the PC-Software and of the USB driver The CD contains the PC software and the software for the driver for the USB connection. The software runs with most Window versions. The minimum requirements are: - RAM: 256 MB minimum - CPU: 100 MHz minimum - Screen: at least 1024x768 px - Interface: USB 1.1 and up... - Page 10 Please confirm here the folder to which software will be installed. At this point you may choose to install the Easy Setup and the Overview Panel software. The Overview Panel shows you all paramaters thta can be adjusted.
- Page 11 A new folder is created. The copying process takes a few seconds. The options chosen are displayed. Click on „Install“ to begin installation:...
- Page 12 On successful installation, your desktop will show an icon for the VBar. By clicking on this icon you can start the software. You can also start the software using the Windows Start menu. After starting the program, the first screen shows the starting page for the pre-installed model set-ups.
- Page 13 "connected“. The VBar icon on your desktop The VBar is now connected and all VBar parameters are read out, so that they can be displayed on the screen. Whenever you make a change on one of the control bars, it will be transmitted to the central unit and stored automatically.
-
Page 14: Connection Diagram: Receiver - Vbar - Servos
On the left you will find the serial number of your V-Bar and the date it was manufactured. If you wish to update the software at a later point in time, you will need this serial number. 8. Connection Diagram: Receiver - VBar - Servos JR - Empfänger(Graupner) Heckrotor Servo... -
Page 15: Programming When Using Factory Stet-Ups
Prerequisites: You may begin with this procedure only after you have sucessfully installed and started the PC software on your computer. Subsequently you must connect the VBar with the receiver and the servos. Step 1 Click on "Start Setup“ in order to switch to the set-up menu... - Page 16 1) Press "load preset“. Choose your helicopter model. All relevant model-specifc parameters and set-up data will be loaded into the VBar. 2) TX calibration (very important!). This step is necessary to check the effective direction of the radio. If necessary you need to switch the effective direction of your radio.
- Page 17 4) Check the effective direction for cyclic, elevator and aileron here. Invert if necessary. 5) Swashplate Trimming: This step is to trim the swashplate. Note that at 0° pitch the stick is centered and the servo arms are in neutral. 6) Cyclic Travel Limitation: This lets you control the maximal cyclic travel.
- Page 18 There are three different options to adjust the flight characteristics of your helicopter: VBar Classic If you choose the VBar Classic mode, the helicopter will perform like a conventional helicopter with a flybar and paddles. In fast-forward flight the helicopter will pitch up slightly.
-
Page 19: Expert Menu
To get to the Expert menu click on the button „Expert Setup“ on the left bottom of the panel. The description for the set-up options of the Expert Setup Menu can be found in the VBar Wiki under www.vstabi.de - both in English and German. -
Page 20: Vbar Control Panel
VBar set- up. The software for the Easy Panel is installed together with the VBar software. There will be a separate icon for the Esay Panel on your desktop. A set-up which has been created by the Easy Panel is fully compatible with both the PC and the Control Panel software, so it can be further adjusted using either device. -
Page 21: Important Safety Guidelines
The helicopter is now programmed for its first flight with the VBar System. Pull the patch cable and save the data to your laptop. Before taking off, you must understand and comply with the following safety guidelines. 13. Important Safety Guidelines - Initializing After connecting the VBar, it initializes. - Page 22 - Settings The VBar is a system placed between the receiver and the controlling units of the helicopter. Thus the VBar is one of the actively controlling elements of the helicopter. If any parameter is set incorrectly, it is possible that this setting can no longer be overridden via a radio signal.
- Page 23 This pre-flight checking procedure takes only a few seconds and it makes apparent most of all possible severe setting errors. It is a procedure for ensuring that none of the settings have been lost. It is not a guarantee for correct settings. - Additional parameters If any additional parameters have been entered or parameter settings have been adjusted, it is necessary to apply special care.
-
Page 24: Rotorhead Settings
14. Rotorhead Settings If you do not want to use a Mikado rotor head in your helicopter, you need to check a few mechanical points in the rotor head, before using the VBar. 1) The blade holders must be installed such that the likages run exactly parallel to the center axis of the rotor shaft. -
Page 25: Additional Components
V-Bar rotorhead upgrade for LOGO 10/500, item no. 4052 Control Panel for VBar, item no. 4152 Patch cable (servo cable VBar to receiver 80 mm), item no. 4055 Patch cable (servo cable VBar to receiver 100 mm), item no. 4141 Patch cable (servo cable VBar to receiver 150 mm), item no. -
Page 26: Technichal Data
Supply Voltage...........3,5-9 V (1) Current Consumption.........max. 150mA Operating temperature .......-15° to 60° Celsius Processors..........2*DSP 32/60 Mhz (1) Absulute Grenzwerte, bei Überschreitung kann Schaden entstehen. Mikado Modellhubschrauber , Friedrich-Klausing-Str. 2, 14469 Potsdam Telefon 0331 237490, FAX 0331 2374911, email info@mikado-heli.de...
Need help?
Do you have a question about the VBar and is the answer not in the manual?
Questions and answers