Mikado VBar Control Device Manual
Hide thumbs
Also See for VBar Control:
- Owner's manual (36 pages) ,
- Manual (26 pages) ,
- Manual (34 pages)
Table of Contents
Advertisement
Quick Links
Advertisement
Table of Contents

Related Manuals for Mikado VBar Control


Summary of Contents for Mikado VBar Control
- Page 3 VBar Control Device Manual...
-
Page 5: Table Of Contents
Table of Contents Benefits at a glance How to use VBar Control as a USB game controller Software Highlights: Binding a VBar Control Receiver Hardware Highlights: Battery charging Introduction Tips for using your VBar Control transmitter 25 Welcome to VBar Control... -
Page 6: Benefits At A Glance
Several telemetry functions are available, such as voltages, current, rpm, speed, and power consumption of the batteries (may need additional hardware). ■ Storage of event log files like VBar event log, VBar Control event log, GPS way points, voltage/current logging etc. ■... -
Page 7: Hardware Highlights
Hardware Highlights: ■ 80 Channel 2.4 GHz FHSS bidirectional flight control, programming/setup and telemetry remote control system. ■ VBar Control Satellite connects directly to VBar flybarless controller via 2.4GHz VBar- Link protocol. ■ Unlimited model memory. ■ Virtually unlimited number of control channels. High range, low latency, antenna diversity both on transmitter and receiver. -
Page 8: Introduction
Mikado Model Helicopters wants to thank you for choosing this highly specialized yet ver- satile product. To make the best use of your VBar Control and to safely operate and fly your radio controlled models, please read this device manual carefully. For software and model... -
Page 9: What Is Vbar Control
VBar equipped models. Purpose, modifications and export regulations VBar Control is designated for use with model helicopters, in the future for use with model airplanes. VBar control is not designated for any other purpose than remote control of mod- els for recreation or hobby. -
Page 10: General Safety Precautions
General Safety Precautions Precautions for the use of the 2.4 GHz band VBar Control operates in the 2.4 GHz band which is in common use with e. g. industry, science and medical (ISM) applications. It is widely used for microwave ovens, short-range wireless communications like wifi, bluetooth, cordless appliances like headphones, or am- ateur radio. - Page 11 ☝ Attention VBar Control will warn if the battery level gets below 3.5 V. VBar Control will switch off automatically when the battery level gets below 3.2 V except when a model is connected (safety feature).
-
Page 12: Built-In Rechargeable Lithium Polymer Battery And Battery Charger
» Never keep the VBar Control in direct sunlight for extended time. Keep it in the shadow if it is not used. -
Page 13: Package Contents
Package Contents ■ VBar Control transmitter ■ Wall charger with connector for your area ■ USB lead ■ VBar Control Receiver (optional) ■ VBar Flybarless controller (optional) ■ Neck strap ■ This device manual ■ Software setup manual... -
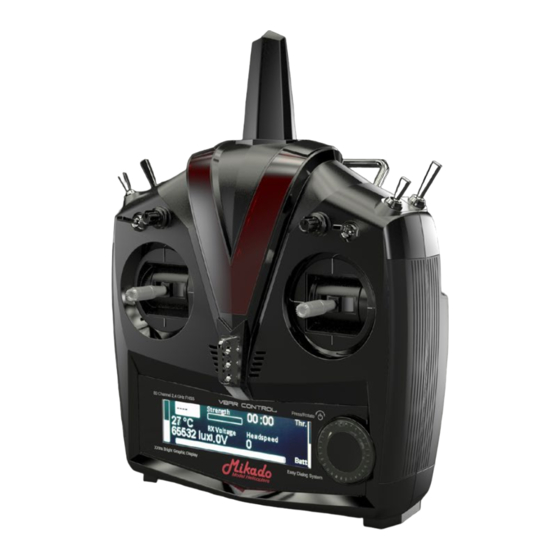
Page 14: Transmitter Controls And Features
Transmitter controls and features ■ Gimbals ■ Adjustable sticks ■ Switches 1-6 ■ Rotating knobs 1+2 ■ Easy Dialog System Dial (EDS) with LED ring ■ XXtra Bright Graphic Display ■ Ambient light sensor ■ 3-point-neck-strap attachment ■ Speaker ■ Rubber grip lining ■... - Page 15 Rotating knobs 1+2 Switches 1-3 Switches 4-6 Carrying handle ■ USB connector with protective rubber cover ■ Charging connector and Reset button with protective rubber cover ■ Transmitter battery (installed) ■ Stick tensioners ■ Collective stick brake & spring ■ Main board Transmitter battery (installed) Stick tensioners...
-
Page 16: Basic Transmitter Operation
Rotate or press the EDS Dial to access the menu. If you do not continue, it will close again after a few seconds to free the display. ■ Without a VBar Control Receiver connected, you can only access the transmitter setup functions. -
Page 17: Transmitter Setup
Transmitter Setup Bind a VBar Control Receiver to the VBar Control transmitter. Click for a list of available devices (10 digit serial number of connected VBar Flybarless controller or model name for already set-up models), select the one you want to bind. See ((Querverweis)) Application enable helps to enable or disable the Apps you want to use. - Page 18 Display Contrast sets the black/white contrast of the display. Minimum Brightness sets the low threshold of the ambient light sensor. The display will not go darker than the value set here. To save battery life, use the lowest convenient value. Sound volume for the EDS Dial feedback as well as for warnings and Speech Apps.
- Page 19 Assign and Calibrate here you can select the stick mode (mind that you have to change the hardware if you switch between throttle-left and throttle-right modes). In case you want to have the collective stick reversed, choose modes 5-8 instead.
- Page 20 You can calibrate the gimbals by selecting one control function at a time and ‘show’ the VBar Control the limits and the center position just by moving the stick. It will learn and store the values automatically. Collective Center Fine allows to set the zero collective position although the gimbal has no spring to center itself.
-
Page 21: Application Setup
Mandatory switches assigns three switches needed for basic flight operations and the directions according to your liking. Defaults are Motor–upper left, Bank switch (flight modes)–upper right, Buddy Box–lower right. The graphics show the actual assignment. Optional switches assigns Option 1-3 functions to switches according to your liking. You will then assign Option functions within additional apps. -
Page 22: How To Change The Stick Mode And Adjust The Stick Tension, How To Change The Stick Length
■ Remove the six screws M3x20 mm to take off the bottom case. ■ Flip the still-closed transmitter 90° to the left, carefully start opening VBar Control like a book. ■ Carefully disconnect the switch wire there and open the VBar Control fully like a book. - Page 23 ■ Carefully replace the bottom case, as not to squeeze and harm any wires. ■ Fasten the six screws and do not over-tighten them. ■ To change the stick length, carefully twist the upper half of the stick counter-clockwise to loosen the stick while holding the lower half.
-
Page 24: How To Use Vbar Control As A Usb Game Controller
■ Attention use the Simulator’s menus to adjust the Simulator to the VBar Control transmit- ter. Do not change settings (e. g. switches) in your VBar Control transmitter; this will af- fect use of your real-life models, too. Binding a VBar Control Receiver ■... -
Page 25: Battery Charging
The built-in battery will be charged every time it is connected to a personal computer, using the USB cable. A green light will come on in the EDS Dial when the VBar Control is connected to a live USB port. -
Page 26: Vbar Control Satellite Receiver
Coaxial antenna wire Antennae Control LEDs ■ The green LED signals the receiver is bound to and synced with VBar Control. ■ The red LED flashes when data are being sent, e. g. telemetry is active. VBar Control Receiver installation ■... - Page 27 Separate the antennae as far as possible from conductive or shielding materials/surfac- es. When installed inside a fuselage, try and place the antenna tips outside the fuselage. ■ Use of extension leads for positioning the VBar Control Receiver in scale fuselages is possible.
-
Page 28: Updating And Enhancing Your Vbar Control Transmitter
Check the display on your VBar Control transmitter and the VBar Control Manager prior to unplugging the USB cable. Please be patient especially if you did not connect your VBar Control transmitter to the internet for a prolonged time: the update process can take several minutes if many files have to be transferred and updated. -
Page 29: Registration, Update, Getting Additional Software Features (Vbar Control Apps)
Check the display on your VBar Control transmitter and the VBar Control Manager prior to unplugging the USB cable. Please be patient especially if you did not connect your VBar Control transmitter to the internet for a prolonged time: the update process can take several minutes if many files have to be transferred and updated. -
Page 30: Recycling Vbar Control And The Rechargeable Battery
Recycling VBar Control and the rechargeable battery Recycling the built-in rechargeable battery Spent Lithium Polymer batteries are not domestic waste. Discharge the battery, insulate the terminals with tape or similar, and bring it to a store/dealer that disposes of small re- chargeable batteries, or bring it to a collection point for harmful substances. -
Page 31: Data Sheets
Data sheets... -
Page 32: Getting Support And Service For Your Vbar Control
Please ask your local dealer/distributor for further details. Attention Make sure you save the files on your VBar Control to your computer in case of a warranty or general repair. The device could be reset and re-installed at the service shop, causing loss of all data saved on the internal memory. -
Page 33: Compliance Information For The U.s., Europe And Other Countries
Compliance Information for the U.S., Europe and other countries FCC Statement ☝ Attention This equipment has been tested and found to comply with the limits for a Class A digital device, pursuant to part 15 of the FCC Rules. These limits are designed to provide reasonable protection against harmful interference when the equipment is operated in a commercial environ- ment.
Need help?
Do you have a question about the VBar Control and is the answer not in the manual?
Questions and answers