Advertisement
Available languages
Available languages
Quick Links
Download this manual
See also:
User Manual
BDET1
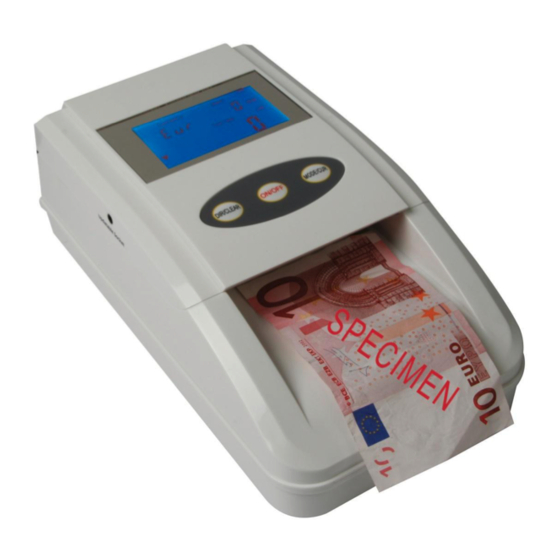
BANKNOTE DETECTOR FOR EURO/GBP
GELDTESTER VOOR EURO/GBP
DÉTECTEUR DE FAUX BILLETS EURO/GBP
DETECTOR DE BILLETES FALSOS EURO/GBP
GELDSCHEINPRÜFER FÜR EURO/GBP
2
5
8
11
14
Advertisement

Subscribe to Our Youtube Channel
Summary of Contents for Velleman BDET1
-
Page 1: Table Of Contents
BDET1 BANKNOTE DETECTOR FOR EURO/GBP GELDTESTER VOOR EURO/GBP DÉTECTEUR DE FAUX BILLETS EURO/GBP DETECTOR DE BILLETES FALSOS EURO/GBP GELDSCHEINPRÜFER FÜR EURO/GBP FIRMWARE UPDATE FIRMWARE-UPDATE MISE A JOUR DU MICROLOGICIEL ACTUALIZACIÓN DE FIRMWARE FIRMWAREUPDATE... -
Page 2: Firmware Update
To update the firmware, proceed as follows: 1. Download the Firmware H02 and Update Tool to your PC and extract the zip files. 2. Connect the PC and the BDET1 using the included upgrade cable (serial to stereo jack). See the pictures below. - Page 3 Caution! Do not disconnect the power cable or shut down the device, because this will damage the BDET1. When the new firmware is installed, the BDET1 reboots automatically and the display will show “H02” during start-up. V. 02 – 12/06/2013...
- Page 4 The information in this manual is subject to change without prior notice. © COPYRIGHT NOTICE The copyright to this manual is owned by Velleman nv. All worldwide rights reserved. No part of this manual may be copied, reproduced, translated or reduced to any electronic medium or otherwise without the prior written consent of the copyright holder.
-
Page 5: Firmware-Update
BDET1 FIRMWARE-UPDATE Met de firmware-update van uw BDET1, kunt u de echtheid van de nieuwe 5 euro biljetten controleren. Om de firmware te vernieuwen: 1. Download de "Firmware H02" en "Update Tool"-bestanden op uw pc en pak de zip-bestanden uit. - Page 6 Opgelet! Ontkoppel de voedingskabel niet of schakel het toestel niet uit. Dit zou de BDET1 kunnen beschadigen. Na het installeren van de nieuwe firmware, zal de BDET1 automatisch heropstarten en op de display verschijnt "H02" tijdens het opstarten. V. 02 – 12/06/2013...
- Page 7 BDET1 Uw firmware-update is nu voltooid en de BDET1 is gebruiksklaar. Gebruik dit toestel enkel met originele accessoires. Velleman nv is niet aansprakelijk voor schade of kwetsuren bij (verkeerd) gebruik van dit toestel. Voor meer informatie over dit product en de laatste versie van deze handleiding, zie www.velleman.eu.
-
Page 8: Mise A Jour Du Micrologiciel
1. Télécharger les applications "Firmware H02" et "Update Tool" sur votre PC et déballer les fichiers compressés en .ZIP. 2. Connecter le PC et le BDET1 avec le câble pour la mise à jour livré (sériel vers jack stéréo) Voir illustrations ci-dessous. - Page 9 Maintenant, le micrologiciel est chargé dans le BDET1. Attention ! Ne pas déconnecter le câble d'alimentation ou éteindre l'appareil. Cela risque d'endommager le BDET1. Après l'installation du nouveau micrologiciel, le BDET1 redémarra automatiquement, et "H02" s'affichera lors de la mise en service. V. 02 – 12/06/2013...
- Page 10 BDET1 Maintenant, la mise à jour de votre micrologiciel est complétée et le BDET1 est prêt à l'emploi. N’employer cet appareil qu’avec des accessoires d’origine. La SA Velleman ne peut, dans la mesure conforme au droit applicable être tenue responsable des dommages ou lésions (directs ou indirects) pouvant résulter de l’utilisation de cet appareil.
-
Page 11: Actualización De Firmware
Para actualizar el firmware, haga lo siguiente: 1. Descargue « H02 » y « Update Tool » y extraiga los archivos ZIP. 2. Conecte el PC y el BDET1 con el cable de actualización incluido (serie a jack estéreo). Véase las figuras a continuación. - Page 12 ¡Cuidado! No desconecte el cable de alimentación ni desactive el aparato porque esto dañara el BDET1. Después de haber instalado el nuevo firmware, el BDET1 se reinicializará automáticamente y « H02 » se visualizará durante la puesta en marcha. V. 02 – 12/06/2013...
- Page 13 BDET1 Ahora, la actualización está terminada y el BDET1 es listo para utilizar. Utilice este aparato sólo con los accesorios originales. Velleman NV no será responsable de daños ni lesiones causados por un uso (indebido) de este aparato. Para más información sobre este producto y la versión más reciente de este manual del usuario, visite nuestra página www.velleman.eu.
-
Page 14: Firmwareupdate
BDET1. Siehe folgende Abbildungen. 3. Halten Sie die linke und die rechte Taste gleichzeitig gedrückt (lassen Sie nicht los), und verbinden Sie inzwischen das Adapterkabel mit dem BDET1. Siehe folgende Abbildungen. A: Halten Sie die linke und die rechte Taste B: Verbinden Sie das Adapterkabel. - Page 15 Achtung! Trennen Sie das Stromversorgungskabel nicht vom Gerät oder schalten Sie es nicht aus, denn dies wird den BDET1 beschädigen. Ist die neue Firmware installiert, dann startet der BDET1 automatisch neu und erscheint « H02 » auf dem Display. V. 02 – 12/06/2013...
- Page 16 BDET1 Die Firmware ist nun aktualisiert und der BDET1 ist gebrauchsfertig. Verwenden Sie dieses Gerät nur mit originellen Zubehörteilen. Velleman NV übernimmt keine Haftung für Schaden oder Verletzungen bei (falscher) Anwendung dieses Gerätes. Für mehr Informationen zu diesem Produkt und die neueste Version dieser Bedienungsanleitung, siehe www.velleman.eu.


Need help?
Do you have a question about the BDET1 and is the answer not in the manual?
Questions and answers