Table of Contents
Advertisement
Quick Links
MODEL W1686
1HP OSCILLATING
SPINDLE SANDER
OWNER'S MANUAL
(FOR MACHINES MANUFACTURED SINCE 11/10)
177335
Phone: (360) 734-3482 • Online Technical Support: techsupport@woodstockint.com
COPYRIGHT © AUGUST, 2002 BY WOODSTOCK INTERNATIONAL, INC. REVISED JULY, 2018 (MN)
WARNING: NO PORTION OF THIS MANUAL MAY BE REPRODUCED IN ANY SHAPE OR FORM WITHOUT
THE WRITTEN APPROVAL OF WOODSTOCK INTERNATIONAL, INC.
V2.07.18
#4505DS Printed in Taiwan
Advertisement
Table of Contents

Subscribe to Our Youtube Channel
Related Manuals for Woodstock Shop Fox W1686


Summary of Contents for Woodstock Shop Fox W1686
- Page 1 MODEL W1686 1HP OSCILLATING SPINDLE SANDER OWNER'S MANUAL (FOR MACHINES MANUFACTURED SINCE 11/10) 177335 Phone: (360) 734-3482 • Online Technical Support: techsupport@woodstockint.com COPYRIGHT © AUGUST, 2002 BY WOODSTOCK INTERNATIONAL, INC. REVISED JULY, 2018 (MN) WARNING: NO PORTION OF THIS MANUAL MAY BE REPRODUCED IN ANY SHAPE OR FORM WITHOUT THE WRITTEN APPROVAL OF WOODSTOCK INTERNATIONAL, INC. V2.07.18 #4505DS Printed in Taiwan...
- Page 2 This manual provides critical safety instructions on the proper setup, operation, maintenance, and service of this machine/tool. Save this document, refer to it often, and use it to instruct other operators. Failure to read, understand and follow the instructions in this manual may result in fire or serious personal injury—including amputation, electrocution, or death.
-
Page 3: Table Of Contents
Contents INTRODUCTION........2 ACCESSORIES........28 Woodstock Technical Support ....2 Spindle Sander Accessories ....28 Machine Specifications ......3 MAINTENANCE........30 Identification ........5 General .......... 30 Controls & Components ......6 Cleaning & Protecting ......30 SAFETY..........7 Changing Gearbox Oil ......31 Standard Machinery Safety Instructions .. -
Page 4: Introduction
Woodstock International, Inc. is committed to customer satisfaction. Our intent with this manual is to include the basic information for safety, setup, operation, maintenance, and service of this product. -
Page 5: Machine Specifications
Model W1686 (For Machines Mfd. Since 11/10) Machine Specifications MODEL W1686 1 HP OSCILLATING SPINDLE SANDER Product Dimensions Weight......................287 lbs. Width (side‐to‐side) x Depth (front‐to‐back) x Height......25‐1/4 x 28‐3/4 x 44‐1/2 in. Footprint (Length x Width)................16 x 16 in. Shipping Dimensions Type....................... - Page 6 Model W1686 (For Machines Mfd. Since 11/10) Spindle Sander Info Sanding Drum Diameters......... 1/4, 3/8, 1/2, 5/8, 3/4, 1, 1‐1/2, 2, 3, 4 in. Sanding Drum Length................5, 6, 9 in. Spindle Speed..................1720 RPM Spindle Oscillation..................72 SPM Stroke Length..................1‐1/2 in. Table Length..................
-
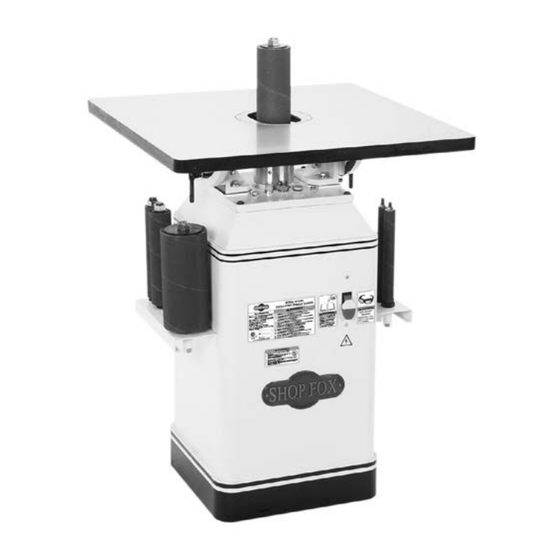
Page 7: Identification
Model W1686 (For Machines Mfd. Since 11/10) Identification Become familiar with the names and locations of the controls and features shown below to better understand the instructions in this manual. Table Insert Table Sanding Spindle Tilt Lock Oil Fill Plug Stop Bolt Lever ON/OFF... -
Page 8: Controls & Components
Model W1686 (For Machines Mfd. Since 11/10) Controls.&.Components Refer to Figures.1–4 and the following descriptions to become familiar with the basic controls and components of this machine. Understanding these items and how they work will help you understand the rest of the manual and stay safe when operating this machine. -
Page 9: Safety
Model W1686 (For Machines Mfd. Since 11/10) SAFETY SAFETY For.Your.Own.Safety, Read.Manual.Before.Operating.Machine The. purpose. of. safety. symbols. is. to. attract. your. attention. to. possible. hazardous. conditions.. This. manual.uses.a.series.of.symbols.and.signal.words.intended.to.convey.the.level.of.importance.of.the. safety.messages..The.progression.of.symbols.is.described.below..Remember.that.safety.messages.by. themselves. do. not. eliminate. danger. and. are. not. a. substitute. for. proper. accident. prevention. mea- sures—this.responsibility.is.ultimately.up.to.the.operator! Indicates.an.imminently.hazardous.situation.which,.if.not.avoided,. - Page 10 INTENDED.USAGE..Only use machine for its keep machine in good working condition. A intended purpose—never make modifications machine that is improperly maintained could without prior approval from Woodstock malfunction, leading to serious personal injury International. Modifying machine or using or death.
-
Page 11: Additional Safety For Spindle Sanders
Model W1686 (For Machines Mfd. Since 11/10) Additional.Safety.for.Spindle.Sanders Serious. injury. or. death. can. occur. from. fingers,. clothing,. jewelry. or. hair. getting. entangled. in. rotating.spindle.or.other.moving.components..Abrasion.injuries.can.occur.from.touching.rotating. sanding.drum.with.bare.skin..Workpieces.thrown.by.drum.can.strike.operator.or.bystanders.with. moderate. force,. causing. impact. injuries.. Long-term. respiratory. damage. can. occur. from. using. sander. without. proper. use. of. a. respirator.. To. reduce. the. risk. of. these. hazards,. operator. and. bystanders.MUST.completely.heed.the.hazards.and.warnings.below. -
Page 12: Electrical
Model W1686 (For Machines Mfd. Since 11/10) ELECTRICAL Circuit.Requirements This machine must be connected to the correct size and type of power supply circuit, or fire or electrical damage may occur. Read through this section to determine if an The machine must be properly set up adequate power supply circuit is available. -
Page 13: Grounding Requirements
Model W1686 (For Machines Mfd. Since 11/10) Grounding.Requirements This machine MUST be grounded. In the event of certain types of malfunctions or breakdowns, grounding provides a path of least resistance for electric current to travel—in The machine must be properly set up order to reduce the risk of electric shock. -
Page 14: Converting Voltage To 240V
Model W1686 (For Machines Mfd. Since 11/10) Converting.Voltage.to. 240V The voltage conversion MUST be performed by an electrician or qualified service personnel. The voltage conversion procedure consists of rewiring the motor and installing the correct plug. A wiring diagram is provided on Page 35 for your reference. -
Page 15: Setup
Model W1686 (For Machines Mfd. Since 11/10) SETUP Unpacking This machine has been carefully packaged for safe This machine presents transportation. If you notice the machine has been serious injury hazards damaged during shipping, please contact your authorized to untrained users. Read Shop Fox dealer immediately. -
Page 16: Hardware Recognition Chart
Model W1686 (For Machines Mfd. Since 11/10) Hardware.Recognition.Chart USE THIS CHART TO IDENTIFY HARDWARE DURING THE INVENTORY/ASSEMBLY ⁄ " ⁄ " ⁄ " PROCESS. ⁄ " ⁄ " ⁄ " ⁄ " ⁄ " ⁄ " ⁄ " ⁄ " 10mm 12mm ⁄... -
Page 17: Inventory
Model W1686 (For Machines Mfd. Since 11/10) Inventory The following is a list of items shipped with your machine. Before beginning setup, lay these items out and inventory them. Note: If you cannot find an item on this list, carefully check around/inside the machine and packaging materials. -
Page 18: Cleaning Machine
Model W1686 (For Machines Mfd. Since 11/10) Cleaning.Machine To prevent corrosion during shipment and storage of your machine, the factory has coated the bare metal surfaces of your machine with a heavy-duty rust prevention compound. Gasoline.and.petroleum. products.have.low.flash. If you are unprepared or impatient, this compound can points.and.can.explode. -
Page 19: Machine Placement
Model W1686 (For Machines Mfd. Since 11/10) Machine.Placement Weight.Load Physical.Environment Refer to the Machine.Specifications for the The physical environment where your machine is weight of your machine. Make sure that the operated is important for safe operation and the surface upon which the machine is placed will longevity of its components. -
Page 20: Assembly
Model W1686 (For Machines Mfd. Since 11/10) Assembly Before beginning the assembly process, refer to Items. Dust Needed.for.Setup and gather everything you need. Chute Ensure all parts have been properly cleaned of any heavy-duty rust-preventative applied at the factory (if applicable). - Page 21 Model W1686 (For Machines Mfd. Since 11/10) 4.. Insert one 3 x 20mm roll pin into non-threaded hole Roll Pin in each of three table inserts, as shown in Figure. 15. Make sure it does not extend through surface of table insert.
-
Page 22: Dust Collection
Model W1686 (For Machines Mfd. Since 11/10) Dust.Collection Recommended.CFM.at.Dust.Port:....400.CFM Do not confuse this CFM recommendation with the rating of the dust collector. To determine the CFM at the dust port, you must consider these variables: (1) CFM rating of the dust collector, (2) hose type and length between the dust collector and the machine, (3) number of branches or wyes, and (4) amount of other open lines throughout... -
Page 23: Check Gearbox Oil
Model W1686 (For Machines Mfd. Since 11/10) Check.Gearbox.Oil 2. Make sure all tools used during setup are cleared away from the machine. 3. Connect the machine to the power source. GEARBOXES MUST BE FILLED WITH OIL! 4. Verify that the machine is operating correctly by turning it ON. -
Page 24: Operations
Model W1686 (For Machines Mfd. Since 11/10) OPERATIONS General This machine will perform many types of operations that are beyond the scope of this manual. Many of these operations can be dangerous or deadly if performed incorrectly. The instructions in this section are written with the understanding that the operator has the necessary knowledge and skills to operate this machine. -
Page 25: Stock Inspection
Model W1686 (For Machines Mfd. Since 11/10) Stock.Inspection Sanding.Tips •. DO.NOT.sand.stock.that.contains.large. • Replace the sanding sleeve with a higher or.loose.knots..Injury to the operator or grit to achieve a finer finish. Avoid skipping damage to the workpiece can occur if a grits, as this will leave scratches in the knot becomes dislodged during the sanding wood. -
Page 26: Installing Sanding Spindles
Model W1686 (For Machines Mfd. Since 11/10) Installing.Sanding.Spindles The Model W1686 is supplied with ten rubber sanding spindles. Use the larger diameter spindles for sanding large sweeping curves and the smaller spindles for sanding more intricate curves. When not in use, the spindles are stored on racks located on each side of the machine base, as shown in Figure 20. -
Page 27: Replacing Sanding Sleeves
Model W1686 (For Machines Mfd. Since 11/10) To.remove.spindle,.do.these.steps: Spindle Wrench 1. DISCONNECT MACHINE FROM POWER! Retainer Nut 2. Use one of the supplied wrenches to hold the jam nuts stationary while you loosen the spindle retainer nut, and the spindle will back out as it un-threads (see Figure 23). -
Page 28: Installing Table Inserts
Model W1686 (For Machines Mfd. Since 11/10) Installing.Table.Inserts The Model W1686 is supplied with three different sized table inserts. The inserts are designed to reduce the gap between the spindle and the table opening. The hole in each insert is oblong to allow clearance when the table is tilted. -
Page 29: Bevel Sanding
Model W1686 (For Machines Mfd. Since 11/10) Bevel.Sanding The Model W1686 has a tilting table to allow bevel sanding at a variety of angles. Bevel sanding on a spindle sander is NOT an exact science. When the table is tilted to 45˚, the actual angle sanded on the edge of a workpiece will change if the workpiece is sanded at different positions around the spindle. -
Page 30: Accessories
Inc. Dealer. If you do not have a dealer in your area, these products are also available through online dealers. Please call or e-mail Woodstock International Inc. Customer Service to get a current listing of dealers at: 1-800-840-8420 or at sales@woodstockint.com. - Page 31 Model W1686 (For Machines Mfd. Since 11/10) The D4105.8".Digital.Calipers are constructed of stainless steel and feature an extra-large LCD readout. Accuracy: ±0.001"/0.02mm; resolution: 0.0005"/0.01mm; SAE and metric with digital display and automatic shutoff. The D4089.4.Pc..Machinist's.Square.Set is a handy collection to have around.
-
Page 32: Maintenance
Model W1686 (For Machines Mfd. Since 11/10) MAINTENANCE General For optimum performance from this machine, this maintenance schedule must be strictly followed. Ongoing To maintain a low risk of injury and proper machine operation, if you ever observe any of the items below, shut down the machine immediately and fix the problem before continuing operations: •... -
Page 33: Changing Gearbox Oil
Model W1686 (For Machines Mfd. Since 11/10) Changing.Gearbox.Oil The spindle gearbox contains 4.5 quarts of 90W gear oil. Replace the gear oil approximately every 1000 hours of use. Remove the fill cap first (see Figure 31), then drain the gear oil from the drain plug located inside the sander base at the bottom of the gearbox (see Figure.32). -
Page 34: Service
Model W1686 (For Machines Mfd. Since 11/10) SERVICE Troubleshooting The following troubleshooting tables cover common problems that may occur with this machine. If you need replacement parts or additional troubleshooting help, contact our Technical Support. Note: Before contacting Tech Support, find the machine serial number and manufacture date, and if available, your original purchase receipt. - Page 35 Model W1686 (For Machines Mfd. Since 11/10) Sanding.Operations PROBLEM POSSIBLE.CAUSE CORRECTIVE.ACTION 1. Replace damaged sanding sleeve (Page 25). Sanding grains eas- 1. Sanding sleeve has been stored in an incor- ily rub off sleeve. rect environment. Store sanding sleeve in a cool, dry area. 2.
-
Page 36: Electrical Safety Instructions
Model W1686 (For Machines Mfd. Since 11/10) Electrical.Safety.Instructions These pages are current at the time of printing. However, in the spirit of improvement, we may make changes to the electrical systems of future machines. Compare the manufacture date of your machine to the one stated in this manual, and study this section carefully. -
Page 37: Wiring Diagram
Model W1686 (For Machines Mfd. Since 11/10) Wiring.Diagram Ground This. motor. wiring. diagram. is. current.at.the.time.of.printing.. However,.always.use.the.diagram. on. the. inside. of. the. junction. box. cover. when. rewiring. your. motor! Read Page 34 STOP Figure.34. Motor wiring 240V. Before Wiring Start Capacitor Ground 300uF 125VAC... -
Page 38: Parts
177335 Serial Number 14. Do not allow children unsupervised access to the machine. Manufactured for Woodstock in Taiwan 15. Do not expose to dampness or use in a wet environment. 83V2 CHECK OIL LEVEL BEFORE STARTING THIS MACHINE! REFER TO OWNER’S MANUAL... - Page 39 Model 1686 (For Machines Mfd. Since 11/10) Main.Parts.List REF PART # DESCRIPTION PART # DESCRIPTION X1686002 CAP SCREW 5/16-18 X 1 X1686085 STRAIN RELIEF TYPE-3 M20-1.5 X1686005 SHOP FOX NAMEPLATE-MEDIUM X1686086 MOTOR 1HP 120V/240V 1PH X1686006 INSERT 4-1/4" X 6" 86-1 X1686086-1 MOTOR FAN COVER X1686007...
-
Page 40: Spindle & Base
Model W1686 (For Machines Mfd. Since 11/10) Spindle.&.Base REF PART # DESCRIPTION REF PART # DESCRIPTION X1686003 FLAT WASHER 3/8 X1686062 SPINDLE 3" X1686004 SPACER X1686062A SPINDLE 3" ASSEMBLY X1686036 ARBOR X1686063 SPINDLE 4" X1686037 SPINDLE 1/4" X1686063A SPINDLE 4" ASSEMBLY X1686038 SPINDLE 3/8"... - Page 41 Model W1686 (For Machines Mfd. Since 11/10)
- Page 42 Fold along dotted lIne place stamp Here Woodstock international inc. p.o. box 2309 bellingham, Wa 98227-2309 Fold along dotted lIne tape along edges--please do not staple...
-
Page 43: Warranty
Woodstock International, Inc. will repair, replace, or arrange for a dealer refund, at its expense and option, the Shop Fox machine or machine part proven to be defective for its designed and intended...
Need help?
Do you have a question about the Shop Fox W1686 and is the answer not in the manual?
Questions and answers