Table of Contents
Advertisement
Quick Links
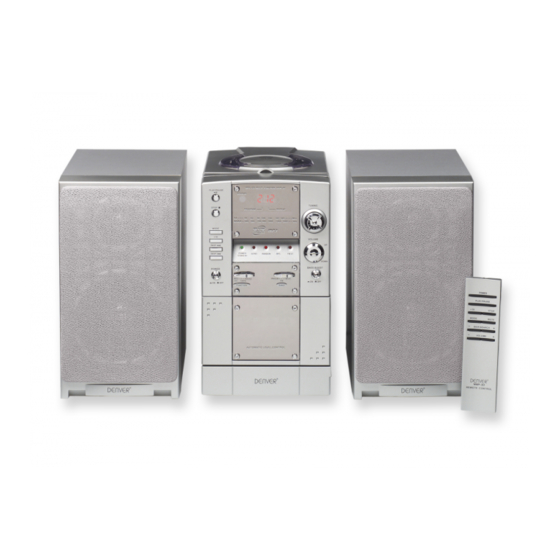
LOCATION OF CONTROLS
1. Power Button
2. Function Switch (CD,MP3 /
TAPE /RADIO)
3. Band Switch
4. Bass Boost Button
5. Volume Control Knob
6. Tuning Knob
7. CD/MP3 LED Display
8. Dial Pointer
9. CD/MP3 Play/Pause Button
10. CD/MP3 Stop Button
11. CD/MP3 MODE Button
12. CD/MP3 "+10" Button
13. CD/MP3 Skip/Search Forward
Button
14. CD/MP3 Skip/Search Backward
Button
15. Power/Standby LED Indicator
16. INTO LED Indicator
17. RANDOM LED Indicator
18. MP3 LED Indicator
19. FM Stereo LED Indicator
20. Cassette Compartment
21. Cassette Key Control Door
22. Mic Jack
23. Cassette Record Button
24. Cassette Play Button
25. Cassette Rewind Button
26. Cassette Fast Forward Button
27. Cassette Stop/Eject Button
28. Cassette Pause Button
29. Stereo Headphone Jack
30. CD Door
31. Speaker Terminal (L/R)
32. Remote Sensor
33. AC Power Cord
34. FM Antenna
35. Speaker Box Left
36. Speaker Box Right
37. Program LED Indicator
38. Repeat LED Indicator
English - 1
Advertisement
Table of Contents

Related Manuals for Denver MMP 351


Summary of Contents for Denver MMP 351
- Page 1 LOCATION OF CONTROLS 1. Power Button 19. FM Stereo LED Indicator 20. Cassette Compartment 2. Function Switch (CD,MP3 / 21. Cassette Key Control Door TAPE /RADIO) 22. Mic Jack 3. Band Switch 23. Cassette Record Button 4. Bass Boost Button 24.
-
Page 2: Radio Operation
AC OPERATION Before operating, please check carefully that the voltage indicated on your set corresponds to the voltage of your local area. 1. Plug the AC POWER CORD into a standard AC outlet. 2. Press the POWER button to start the unit. POWER/STANDBY LED indicator will light-up to indicate unit is connected to the power source properly. -
Page 3: Stereo Headphone Jack
STEREO HEADPHONE JACK For private listening, insert the plug of a pair of stereo headphone into the STEREO HEADPHONE JACK and adjust the VOLUME CONTROL knob accordingly. During the use of a headphone, the Speakers will be automatically disconnected. CASSETTE OPERATION Tape Playback 1. - Page 4 4. Press the RECORD button. The PLAY button is engaged simultaneously to start recording. With the built-in Automatic Level Control (ALC), the best recording quality is automatically adjusted. Changing the volume level will not affect the recording. Press the PAUSE button to release the pause function and start recording.
- Page 5 3. Although the sound stops, the disc will continue to spin. To re-start playing, press the CD/MP3 PLAY/PAUSE button once again. The music will start from the exact position where it was interrupted. 4. To stop the CD/MP3 playing, press the CD/MP3 STOP button once whether the CD/MP3 is in Play or Pause mode.
- Page 6 Repeat Play Mode For CD disc : While the CD disc is playing, Press the MODE button once : the REPEAT LED Indicator will light and flash continuously, this single CD track will be repeated. Press the MODE button twice : the REPEAT LED Indicator will stay lit. The whole disc will be played continuously.
- Page 7 To cancel the Random Play mode, simply press the CD/MP3 PLAY/PAUSE button once and the RANDOM LED Indicator will turn off automatically. Program Mode 1. During the CD/MP3 stop mode, press the MODE button once, the LED DISPLAY will show “ ”.
-
Page 8: Battery Replacement
BATTERY REPLACEMENT When batteries become weak, the operating distance of the Remote Controller is greatly reduced and you will need to replace batteries. USING THE REMOTE CONTROLLER CORRECTLY • Point the Remote Controller at the REMOTE SENSOR locates on the main unit. •... -
Page 9: Maintenance
TO PREVENT FIRE OR SHOCK HAZARD, DO NOT EXPOSE THE APPLIANCE TO RAIN OR MOISTURE. DO NOT REMOVE COVER, PILOT LAMPS SOLDERED IN PLACE. NO USER SERVICEABLE PARTS INSIDE. REFER SERVICING TO QUALIFIED SERVICE PERSONNEL. ALL RIGHTS RESERVED COPY RIGHT DENVER ELECTRONICS A/S www.denver-electronics.com English - 9...
Need help?
Do you have a question about the MMP 351 and is the answer not in the manual?
Questions and answers