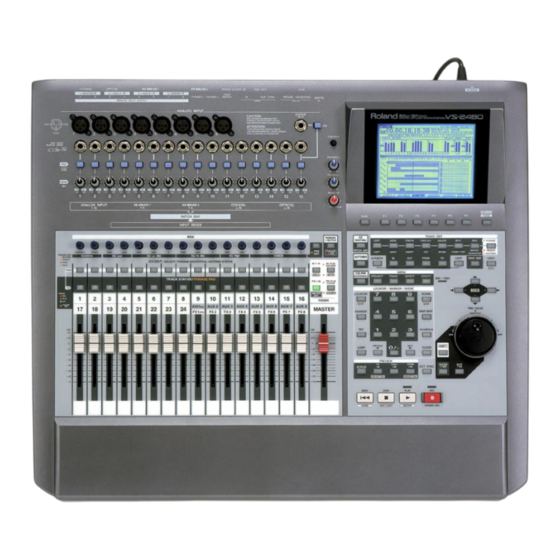
Roland VS-2480 Tip Sheet
Hide thumbs
Also See for VS-2480:
- Owner's manual (452 pages) ,
- Supplementary manual (132 pages) ,
- User manual (92 pages)

Related Manuals for Roland VS-2480


Summary of Contents for Roland VS-2480
- Page 1 ®ÂØÒňΠVS-2480 Tip Sheet © 2001 Roland Corporation US All rights reserved. No part of this publication may be reproduced in any form without the written permission of Roland Corporation US. www.rolandus.com...
- Page 2 ©2001 Roland Corporation US VS-2480 Tip Sheet...
-
Page 3: Table Of Contents
Connecting a PS/2 Mouse and PS/2 ASCII Keyboard Connecting a VGA Monitor ............................7 About VGA, Mouse and Keyboard Configuration Parameters ................8 Using a VGA Monitor with the VS-2480 Configuring Your Monitor .............................. 8 VGA Parameters................................. 8 Elements of the Info Display............................8 General Information Strip............................ - Page 4 Using an ASCII Keyboard Configuring Your Keyboard............................16 PS/2 KEYBOARD Parameters..........................16 What You Can Do With an ASCII Keyboard ......................16 Using Roland DS-90A or DS-50A Monitors Setting Up for DS-90A and DS-50A Digital Monitors....................17 Adjusting Your Listening Level Using the PAN/AUX SEND 1-8 Knobs Adjusting Stereo Positioning............................18...
- Page 5 Removing Input Signals from the MASTER Mix Configuring Aux Sends Configuring an Aux Send from a MASTER EDIT Screen................25 Configuring an Aux Send from a Channel View Screen.................. 25 Adding Effects to a Headphone Mix VS-2480 Tip Sheet ©2001 Roland Corporation US...
- Page 6 ©2001 Roland Corporation US VS-2480 Tip Sheet...
-
Page 7: Welcome
Connecting a PS/2 Mouse and PS/2 ASCII Keyboard A mouse and ASCII keyboard can make the operation of the VS-2480 even easier. The VS-2480 supports the use of a PS/2-type mouse and PS/2 keyboard—a PS/2 mouse is included with your VS-2480. -
Page 8: About Vga, Mouse And Keyboard Configuration Parameters
Shifts the image left or right V. POSITION Shifts the image up or down Elements of the Info Display Most of the VS-2480 Info Display’s screens are divided into four areas. General Information Strip PAN/AUX SEND 1-8 Strip Meters Strip Bottom Pane The Info Display also provides a date and time readout in its upper right-hand corner. -
Page 9: General Information Strip
Clipping indicators PAN/AUX SEND 1-8 knob settings The VS-2480’s PAN/AUX Send 1-8 knobs can perform a variety of functions, as described on Page 18. This strip shows their current settings. At the left of the strip, the currently selected channel group and channel are shown. To the right of the strip are input clipping indicators that show when a channel’s input signal level is too loud. -
Page 10: Controlling What's On The Info Display
Controlling What’s On the Info Display As you navigate the onboard LCD display of the VS-2480, the Info Display automatically switches between various screens. You can also manually switch to a few key screens, and you can lock the display so that it doesn’t change as you move from screen to screen on the VS-2480. -
Page 11: Using A Mouse With The Vs-2480
Using a Mouse with the VS-2480 A mouse can make many VS-2480 tasks easier to perform.You can use the mouse to set parameter values, use it during track editing operations, and more. The VS-2480 uses a two-button mouse, with the left button serving as a click button, and the right-hand button calling up special menus on various screens. -
Page 12: Display Pop-Up
2. Move the cursor to the desired channel and click. Track Editing with the Mouse A mouse can perform a wide range of VS-2480 editing operations. You can also use the mouse or the VS-2480’s buttons, or use them together. -
Page 13: Setting Region Edit Points By Dragging
Click ALL to checkmark all of the tracks, or click it again to un-check all of the tracks. 5. Click EXIT when you’re done—all audio that falls between the IN and OUT points on the selected tracks is now ready to be edited. VS-2480 Tip Sheet ©2001 Roland Corporation US... -
Page 14: Setting Region Edit Points Using The Position Line
Home screen View the Home screen from select P.LIST. the Wave Display Activate the VS-2480’s Scrub select SCRUB and left-click to checkmark it. feature Use Scrub to preview audio select SCRUB TO to preview the audio just before the... -
Page 15: Dragging Phrases And Regions
1. While holding down SHIFT, press AUTOMIX. 2. Press F1 (EDIT). Selected Automix Data Selected data in the Automix editing screen appears in Selected reverse: the data is white, and its background is dark. VS-2480 Tip Sheet ©2001 Roland Corporation US... -
Page 16: The Automix Pop-Up Menu
106/109 for Japan What You Can Do With an ASCII Keyboard You can use the keyboard to perform a variety of VS-2480 operations quickly and easily. You can use the keyboard’s: Letter and number keys enter names for projects, tracks, scenes, locators, etc. -
Page 17: Using Roland Ds-90A Or Ds-50A Monitors
OUT connector—”MONL/R” stands for “MONITOR Left/Right.” Adjusting Your Listening Level If you’re listening to the VS-2480 through monitor speakers, the MONITOR knob to the left of the display sets your listening level. You’ll generally want to keep this at the 0dB position (3 o’clock). -
Page 18: Using The Pan/Aux Send 1-8 Knobs
Start with the knob turned all the way counter-clockwise, and slowly turn it clockwise to reach the desired listening level. If you’ve connected a speaker system directly to the VS-2480 and would like separate control of your speakers and headphones, route the MASTER outputs to the desired PHONES jack on the EZ ROUTING OUTPUT ASSIGN screen (see Steps 1-3 in “Setting... -
Page 19: Setting Dynamics And Eq Parameters For One Channel
AUX send bus. This allows you to quickly set up how much signal you’d like to send to a particular effect or VS-2480 output from all of your channels without having to navigate to their individual AUX send settings. -
Page 20: Activating Knob Control Of Any Channel Parameter
USER parameter by performing Steps 7 and 8 above. Fader Control of Aux Sends or a USER Parameter As with the PAN/AUX SEND 1-8 knobs, the VS-2480 also allows you to use your channel faders for setting each input, track or FX channel’s: •... -
Page 21: About Vs-2480 Track Editing
About VS-2480 Track Editing Many of the VS-2480’s editing operations can be performed using a mouse. See “Track Editing with the Mouse” on Page 12. Regions and Phrases Edit region There are two basic types of track audio you can edit the on the VS-2480. -
Page 22: Setting In, Out From And To
IN, OUT, FROM or TO button. Edit Point Flags FROM On the VS-2480 display, each edit point is shown as a line with a flag at its top. Each point its own distinct flag. Since the FROM point is set to the same location as the IN point by default, you won’t always see its... -
Page 23: Track Edit Shortcut Buttons
ENTER/YES. 3. Press the desired TRACK EDIT button. 4. Press ENTER/YES. 5. When the VS-2480 asks if you’re sure you want to proceed—and the displayed settings are correct—press ENTER/YES. If you want to cancel, press EXIT/NO. Resetting Mixer Parameters You can quickly reset all mixer parameters to their default values. -
Page 24: Changing Channels
FADER buttons—they’ll tell you at a glance what they’re up to. Setting Channel Unity Gain and Panning The VS-2480 provides a quick shortcut for setting a channel’s fader to 0dB and its stereo pan to its center position. Before adjusting an input channel’s SENS knob when setting input levels, you’ll want to start by setting the input channel’s fader to its unity gain, 0dB setting. -
Page 25: Removing Input Signals From The Master Mix
Removing Input Signals from the MASTER Mix When you create a new project, the VS-2480’s input and track channels are routed into the main mix to help ensure that you can easily hear input or track signals. However, during recording, it’s a good idea to listen only to your tracks so that you can hear what’s actually being recorded. - Page 26 You can also set the send level using the PAN/AUX SEND 1-8 knobs—see “Sending Channel Signals to an Aux Bus” on Page 19. (You’ll still, however, need to activate the Aux send on this screen.) ©2001 Roland Corporation US VS-2480 Tip Sheet...
- Page 28 ®ÂØÒňΠP/N 11030...
Need help?
Do you have a question about the VS-2480 and is the answer not in the manual?
Questions and answers