
Related Manuals for Scharfen Display VA 2000


Summary of Contents for Scharfen Display VA 2000
- Page 1 Manual for Food Slicer Model VA 2000 Display Ruhrstr. 76 a D - 58452 Witten Hermann Scharfen Telefon 02302–28277-0 Telefax 02302 - 22941 GmbH & Co. Maschinenfabrik KG...
-
Page 2: Table Of Contents
Contents 1. General Information 1.1. Notes regarding the operating instructions 1.2. Notes regarding warranty 1.3. Notes regarding security 1.4. Dimensions of the machine and technical data 1.5. Description of the machine 1.5.1. General plan of the machine 1.6. Usage 2. Installation and initial operation 2.1. - Page 3 7. Sharpening the blade 7.1. Sharpening device 7.2. Mounting the sharpening device 7.3. Sharpening the blade 7.4. Removing the sharpening device 8. Maintenance 9. Trouble shooting 10. Waste disposal page 3...
-
Page 4: General Information
• constructional alteration • detaching security or protecting equipment • and in case of using non-original Scharfen spare parts any responsibility from our side is refused. In above cases the operator acts on his own risk and is responsible himself for damages which might occur. -
Page 5: Dimensions Of The Machine And Technical Data
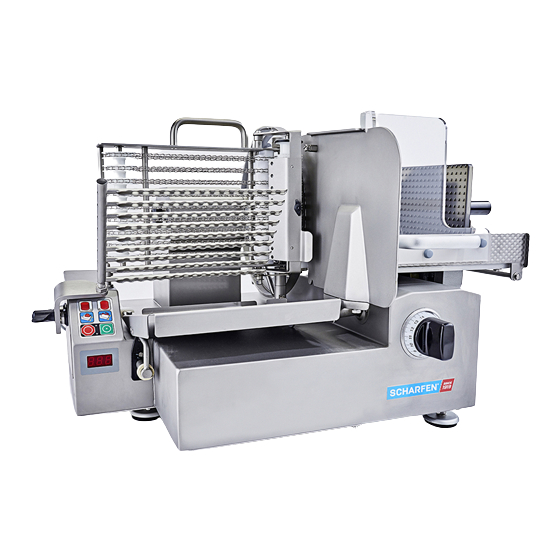
0,6 kW Manufacturer: Hermann Scharfen GmbH & Co. Maschinenfabrik KG Ruhrstr. 76a, D - 58452 Witten, Phone 02302/28277-0 1.5. Description of the machine This food slicer is fully automatic with integrated shingling and stacking device. -
Page 6: General Plan Of The Machine
All visible bearings as well as open sliding surfaces are lubricated only with lubricant suitable for food zones. For switching the machine on and off there is used a double red/green push button. Self-starting of the machine after a voltage drop is avoided by the electric control. There are internal fuses to protect the electronic control and the motors controlled electronically. -
Page 7: Installation And Initial Operation
The installation, introduction and initial operation has to be done by an authorised supplier or service technician. 2.1. Checking the contents of the carton The supplied carton has to have to following contents: • Scharfen food slicer model VA 2000 as well as the following equipment: • chain frame • stacking device •... -
Page 8: Electrical Installation
Place the receiving plate upon the machine. 2.3. Electrical installation Before you plug in the machine, you have to check if the current supply is the same as indicated on the rating plate. In case there are discrepancies you have to inform the supplier or technical service. Under no circumstances plug in the machine! The socket-outlet has to be equipped with earthing contact. -
Page 9: Thickness Of Slices
3.3. Thickness of slices The thickness of slices is infinitely variable from 0 to 10 mm. In order to adjust the thickness of the slices you have to turn the thickness knob. Turning to the right: thickness plate opens. Turning to the left: thickness plate closes. -
Page 10: Adjusting The Slicing Programme
Lay the food product against the back of the carriage. Adjust the adjusting bar according to the size of the food product. Disengage the end piece holder and adjust according to the size of the product. Place the end piece holder upon the food product. Push the comb of the end piece holder into the food product. -
Page 11: Slicing Functions
Move the carriage by hand forward and backward by using the handle in front of the carriage. It is necessary that the carriage is always pushed to the utmost end position, because only then the stacking procedure will be triggered off. Always use the handle in order to move the carriage. -
Page 12: Display Functions
4.3. Display functions Two basic programmes can be used in a very variable way. You have the possibility to cut up to 9 shingled portions (layers) on top of each other or to cut 2 stacks positioned on the receiving tray one behind the other. Furthermore there can be adjusted the number of slices required per portion. -
Page 13: Cleaning
Adjust the adjusting bar according to the size of the food product. Disengage the end piece holder and push it by hand behind the food product, until the food product is in close contact to the thickness plate. Adjust the thickness of slices with the thickness knob (max. 10 mm) Never try to hold the food product by hand, you may hurt yourself seriously! Always use the end piece holder. -
Page 14: Taking Off Parts Of The Carriage
Take off the receiving plate upwards. 6.4. Taking off parts of the carriage Lift up the end piece holder. Loosen the knurled knob of the comb of the end piece holder and take the comb off. Loosen the knurled knob of the plate of the end piece holder and take the plate off. Loosen the star knob of the adjustable bar and lift it up. -
Page 15: Reassembling The Parts
dry tefloned parts very carefully detached parts warm water, detergent, manually cleaning rag, cleaning wash up with clear water, acid free from chlorine brush blade warm water, detergent, manually cleaning rag or sponge wash up with clear water, acid free from chlorine sharpening stones warm water, detergent, manually cleaning brush... -
Page 16: Sharpening The Blade
Remove the beer mat or paper felt. • Open the thickness plate completely. Display shows ’OFF’ • Position the carriage in the centre. • Lift up end piece holder • Mount the sharpening device in such a way to the thickness plate that the cone of the sharpening device fits into the slit on the bottom of the thickness plate (direction of arrow) -
Page 17: Trouble Shooting
Oiling points: Guiding axle of end piece holder (1 time per week) Guiding axle of carriage (as required) Exchanging the blade Remove the blade guard as described in point 6.2. Attention! Risk of getting hurt! Upon request there will be supplied a knife removal device. The knife removal device has to be mounted on the blade.
Need help?
Do you have a question about the Display VA 2000 and is the answer not in the manual?
Questions and answers