Advertisement
Quick Links
Advertisement

Subscribe to Our Youtube Channel
Related Manuals for Davey Maverick


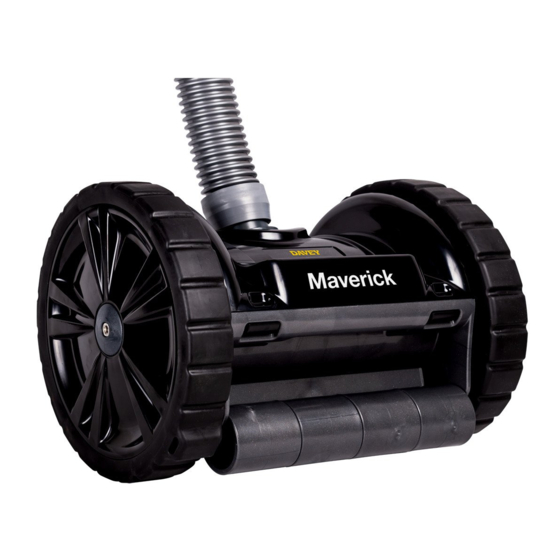
Summary of Contents for Davey Maverick
- Page 1 Maverick ™ Wheeled Suction Pool Cleaner Installation and Operating Instructions ATTENTION: Please refer to www.bit.ly/DWPMAVIOI for any product information updates, or simply scan this QR code. Please pass these instructions on to the operator of this equipment.
-
Page 2: Table Of Contents
Maverick ™ Wheeled Suction Pool Cleaner Congratulations on your purchase of a high quality, Davey Maverick. All components have been designed and manufactured to give trouble free, reliable operation. Contents: 1. PRIOR TO USING THE SYSTEM, YOU MUST ENSURE THAT ..............3 2. -
Page 3: Prior To Using The System, You Must Ensure That
Davey Maverick. Before installing the Davey Maverick in a gunite pool (framework that is sprayed over with a concrete and sand mixture), or a pool that is partially, or completely tiled. Repair loose tiles and tighten any loose light rings. - Page 4 3.2 Pool preparation Before installing the Davey Maverick, your pool should be clean and algae-free to not inhibit the cleaner’s traction. If necessary, make the following preparations before proceeding: • Chemically balance the pool water;...
- Page 5 Leader Hose • Note: The leader hose is 305mm (12 inches) in length and shorter than the other sections included in the hose set. The leader hose is also marked with a red sticker. Failure to use this Swivel leader hose section will hinder cleaner performance. Assembly •...
- Page 6 REBEL™ Suction Side Pool Cleaner Installation and User’s Guide • Turn the pool pump off. • Disconnect the Davey Maverick from the leader hose and connect the flow gauge in its place. REBEL™ Suction Side Pool Cleaner Installation and User’s Guide Note: Make sure the hose remains submerged to prevent suction of air.
-
Page 7: Advanced Settings
20 in (50.8 cm) After installation, turn the pool pump on. The Davey Maverick should be moving about the pool at a rate of 2.5-3.5 metres per minute. Be sure to check each of the following initial adjustments. 4.1 Hose length The pump must be on when you check the hose length. -
Page 8: Maintenance
• Place the Davey Maverick on a flat work surface. Open the buckle on the front of the Davey Maverick by pulling it out and down. Lift the front of the top cover up and then firmly pull it forward. This will separate the top cover from the Davey Maverick body and you will now be able to lift the top cover straight up from the Davey Maverick body, see Figure 5.1. - Page 9 • Place the top cover over the swivel assembly. • Place the tabs on the back side of the top cover into the slots on the back side of the Davey Maverick body (see Figure 5.3). Once these tabs are seated in the slots the front of the cover will fall into place.
- Page 10 5.2.2. To install the replacement tyre: • Place the Davey Maverick on a flat work surface and seat the top of the rubber tyre onto the top of the wheel. Be sure that the back lip of the tyre is resting flat on the inside edge of the wheel.
-
Page 11: Troubleshooting
6. TROUBLESHOOTING Because of the individual characteristics of your pool, some additional adjustments may be required to get the best performance from your Davey Maverick. Use the following information to resolve possible issues. PROBLEM CORRECTIVE ACTIONS Davey Maverick is not moving Check flow with flow gauge included or by calculating the Davey or is moving too slowly. - Page 12 Davey Maverick won’t climb the Check to be sure that the Davey Maverick tyres are not excessively pool walls worn, see section 5.2. Excessively worn tyres will not provide the grip necessary for your Davey Maverick to climb pool walls.
-
Page 13: Spare Parts
7. SPARE PARTS 7.1 Exploded diagram A: Includes… 18, 19, 20, 21, 22 and 23 B: Includes… 4, 5, 6, 7, 8 and bearings 7.2 Spare parts listing ITEM NOTES DESCRIPTION REQ’D PART NO. Top cover kit 403658 Buckle kit 403659 Wheel kit (pair) 403660... -
Page 14: Warranty
To the fullest extent permitted by law or statute, Davey shall not be liable for any loss of profits or any consequential, indirect or special loss, damage or injury of any kind whatsoever arising directly or indirectly from Davey products. This limitation does not apply to any liability of Davey for failure to comply with a consumer guarantee applicable to your Davey product under local laws and does not affect any rights or remedies that may be available to you under local laws. - Page 16 Website: daveywater.com Website: daveywater.com ® Davey is a trademark of Davey Water Products Pty Ltd. © Davey Water Products Pty Ltd 2020. DWP1734-1 * Installation and operating instructions are included with the product when purchased new. They may also be found on our website.
Need help?
Do you have a question about the Maverick and is the answer not in the manual?
Questions and answers