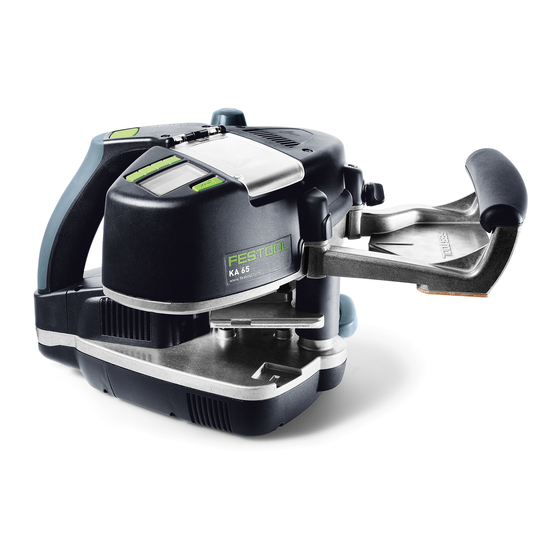
Festool KA 65 Instruction Manual
Edge bander
Hide thumbs
Also See for KA 65:
- Instruction manual (52 pages) ,
- Operating manual (124 pages) ,
- Original instructions manual (141 pages)
Table of Contents
Advertisement
Quick Links
Festool GmbH
Wertstraße 20
D-73240 Wendlingen
www.festoolusa.com
Instruction manual - Edge bander
Page 6
IMPORTANT: Read all instructions before using.
Guide d'utilisation - Plaqueuse de chant
Page 20
IMPORTANT: Lire toutes les instructions avant de démarrer les travaux.
Manual de instrucciones - Canteadora
Página 36
IMPORTANTE: Lea todas las instrucciones antes de usar.
Manual de instrucciones
KA 65
DISTRIBUTED BY:
Pro Wood Finishes
14622 Southlawn Lane
Rockville MD 20850
Ph: (301) 424-3033
Instruction manual
Guide d'utilisation
Advertisement
Table of Contents

Summary of Contents for Festool KA 65
- Page 1 Guide d’utilisation - Plaqueuse de chant Page 20 IMPORTANT: Lire toutes les instructions avant de démarrer les travaux. Manual de instrucciones - Canteadora Página 36 IMPORTANTE: Lea todas las instrucciones antes de usar. Instruction manual Guide d’utilisation Manual de instrucciones KA 65...
- Page 2 1-21 33,0 m 190 °C 1-20 MODE 1-19 1-18 1-16 1-17 1-15 1-14 1-13 1-11 1-12 1-10...
-
Page 3: Table Of Contents
Contents Operation..........Settings ..........About this manual ........ Working with the machine ....Symbols ..........Service and maintenance ....Safety instructions........ Accessories .......... Technical data........Environment......... Functional description......Troubleshooting ........Intended use ......... About this manual Save these instructions It is important for you to read and understand this manual. The information it contains relates to protecting your safety and preventing problems. -
Page 4: Safety Instructions
Tip or advice °C degree centigrade °F degree Fahrenheit Handling instruction Newton metre millimetre amps hour watt hour delay fuse with 4 amps Safety instructions General safety instructions Keep cord away from heat, oil, sharp edges or moving parts. Damaged or entangled cords in- WARNING! Read all safety warnings, in- crease the risk of electric shock. - Page 5 5 SERVICE – The Festool edge bander should always be a. Have your power tool serviced by a qualified re- mounted on work benches using the stationary...
-
Page 6: Technical Data
See Festool catalogue or turers or self-manufactured work benches. www.festool.com. – Always use original Festool accessories and ad- – Observe national safety regulations! hesive cartridges. Only products tested and ap- proved by Festool are harmless to health and... -
Page 7: Intended Use
The edge bander is suitable for: WARNING – Attaching edge bands made of wood, materials similar to wood and plastic using Festool adhe- The user bears the responsibility for damage and sives. accidents caused by improper use; this also in- cludes damage and wear caused by continuous use in industry. -
Page 8: Settings
The machine reduces the temperature in cooling mode and then switches off. Press the on/off switch [1-8] once and hold until the Festool logo appears on the display [1-20]. Display [1-20] lights up red, fan symbol is dis- played. The machine increases the temperature in heating mode until the setpoint temperature is reached Press the on/off switch [1-8] and hold >... - Page 9 Selecting the feed speed Remaining edge length 33,0 m Edge band length in relation to The feed speed can be adjusted and adapted to the the remaining quantity of adhe- contour of the workpiece at any time by pressing sive. the button [1-2].
-
Page 10: Working With The Machine
Remove the edge band Fault symbol An edge band was detected when Troubleshooting (chapter ). the machine was switched on. Request for removal of the edge Automatic calculation of currently detected edge band. Press the start button [1-1] height and hold until the edge band has passed through. - Page 11 pressure on the support base and against the CAUTION workpiece. Applying pressure in the feed direc- tion is not necessary. Hardened PU adhesive has settled inside the ma- The edge feed mechanism moves the machine chine. forwards automatically. Risk of damage to the machine – loss of warranty Once the edge band has passed through the Clean the system no more than six hours after feed completely, the mechanism stops automat-...
- Page 12 Refilling an adhesive cartridge [6] Approximately three adhesive cartridge are required to purge the machine completely. If necessary, press the refill button [1-21] for other adhesive cartridges and repeat the procedure. Press the refill button [6-1]. Adhesive feed [6-2] moves back. Open the flap [6-3].
-
Page 13: Service And Maintenance
wise until the central plate [1-12] rests against Insert the cartridge as normal and glue the edg- the bottom of the machine. Purge position is reached. The PU adhesive cartridge must be pressed completely through the system in order to Press the start button [1-1] and hold >... -
Page 14: Accessories
Place one Systainer on the top of the other (Fig. The order numbers of the accessories and tools can [8A]). be found in the Festool catalogue or on the Internet under "www.festoolusa.com". Turn the T-loc [8-1] to one of this posi- Systainer tions (Fig. -
Page 15: Environment
Environment Do not dispose of the device as domestic waste! an environmentally responsible recycling centre. Dispose of machines, accessories and packaging at Observe the respective national regulations. Troubleshooting Problem Possible causes Remedy Machine stops operating. Flap [1-18] is open. Close the flap [1-18]. The supply of adhesive stops if the flap is opened during opera- tion. - Page 16 Problem Possible causes Remedy The machine switches off. The machine is in cooling mode Press the start button [1-1] to < 50 °C switch on the machine again. Display lights up red. The machine switches to cool- Press the start button [1-1] to ing mode after an idling time of switch on the machine again.


Need help?
Do you have a question about the KA 65 and is the answer not in the manual?
Questions and answers