
Subscribe to Our Youtube Channel
Related Manuals for Black Box LR9501A


Summary of Contents for Black Box LR9501A
- Page 1 © Copyright 2002. Black Box Corporation. All rights reserved. 1000 Park Drive • Lawrence, PA 15055-1018 • 724-746-5500 • Fax 724-746-0746...
- Page 2 Order toll-free in the U.S.: Call 877-877-BBOX (outside U.S. call 724-746-5500) SUPPORT FREE technical support 24 hours a day, 7 days a week: Call 724-746-5500 or fax 724-746-0746 INFORMATION Mailing address: Black Box Corporation, 1000 Park Drive, Lawrence, PA 15055-1018 Web site: www.blackbox.com • E-mail: info@blackbox.com...
- Page 4 FCC AND IC RFI STATEMENTS FEDERAL COMMUNICATIONS COMMISSION INDUSTRY CANADA RADIO FREQUENCY INTERFERENCE STATEMENTS This equipment generates, uses, and can radiate radio-frequency energy, and if not installed and used properly, that is, in strict accordance with the manufacturer’s instructions, may cause interference to radio communication. It has been tested and found to comply with the limits for a Class A computing device in accordance with the specifications in Subpart B of Part 15 of FCC rules, which are designed to provide reasonable protection against such interference when the equipment is...
- Page 5 BROADBAND ROUTER NORMAS OFICIALES MEXICANAS (NOM) ELECTRICAL SAFETY STATEMENT INSTRUCCIONES DE SEGURIDAD 1. Todas las instrucciones de seguridad y operación deberán ser leídas antes de que el aparato eléctrico sea operado. 2. Las instrucciones de seguridad y operación deberán ser guardadas para referencia futura.
- Page 6 NOM STATEMENT 12. Precaución debe ser tomada de tal manera que la tierra fisica y la polarización del equipo no sea eliminada. 13. Los cables de la fuente de poder deben ser guiados de tal manera que no sean pisados ni pellizcados por objetos colocados sobre o contra ellos, poniendo particular atención a los contactos y receptáculos donde salen del aparato.
- Page 7 BROADBAND ROUTER TRADEMARKS Internet Explorer, Microsoft, Windows, and Windows NT are registered trademarks or trademarks of Microsoft Corporation in the United States and/or other countries. Linux is a registered trademark of Linus Torvalds. Mac and Macintosh are registered trademarks of Apple Computer, Inc. Netscape and Netscape Navigator are registered trademarks of Netscape Communications Corporation.
-
Page 8: Table Of Contents
CONTENTS Contents Chapter Page Quick-Start Guide ..........7 Specifications . - Page 9 A.1 Calling Black Box ........
-
Page 10: Quick-Start Guide
QUICK-START GUIDE Quick-Start Guide NOTE This quick-start guide covers only the most common situations. Please refer to the rest of this users’ manual if your network uses any of the following: (1) an existing router, (2) an existing DHCP server, or (3) PCs using fixed (static) IP addresses. - Page 11 BROADBAND ROUTER See Figure Q-1 below. Figure Q-1. Connecting a PC to the Broadband Router. 3. Connect your DSL/cable modem to the Broadband Router’s WAN port using the Ethernet cable that you unplugged in step 1. (See Figure Q-2 on the next page.) If no cable was supplied with your modem, use straight-through Ethernet cable.
- Page 12 QUICK-START GUIDE DSL/cable modem Power adapter Printer Figure Q-2. Connecting the modem, power adapter, and optional printer to the Broadband Router. 6. Power ON the Broadband Router. Step 2: Internet Connection Configuration If your Internet Service Provider (ISP) assigns your IP address properly for the Broadband Router to act as a plug-and-play device, it does not require additional configuration.
- Page 13 BROADBAND ROUTER If additional configuration is desired, select the Advanced Setup link from the left- side menu to configure firewall parameters, the DMZ host, virtual servers, and special applications that support multi-player online games. Step 3: Print Server Setup (Optional) 1.
- Page 14 QUICK-START GUIDE 6. On the Broadband Router Status page, check the Internet Connection Status section for the field labeled Cable/DSL. Make sure that the status says Connected. • If it says Connected, you have successfully obtained an IP address from your DSL service provider.
- Page 15 BROADBAND ROUTER 4. Select Dynamic IP Address and press Enter. 5. Enter the Host Name you were provided by @Home and press Enter. 6. Wait approximately ten seconds, then click the Status link in the left-side menu. 7. On the Broadband Router Status page, check the Internet Connection Status section for the field labeled Cable/DSL.
- Page 16 QUICK-START GUIDE • Upgrade the Broadband Router’s firmware to the latest version available. PC S —W ® 95/98/98SE/M ETUP INDOWS TCP/IP Setup 1. Right-click on the Network Neighborhood icon on your desktop. Select Properties. 2. Select the TCP/IP->Ethernet Adapter entry. 3.
-
Page 17: Specifications
BROADBAND ROUTER 1. Specifications WAN Interface: (1) RJ-45 10BASE-T port, (1) DB9 port for PSTN/ISDN connections LAN Interface: (4) RJ-45 10BASE-T/100BASE-TX ports Printer Interface: (1) DB25 parallel printer port Management: Web management interface Advanced Features: Dynamic IP Address Configuration—DHCP, DNS; Firewall— Client privileges, hacker prevention and logging, NAT;... -
Page 18: Introduction
CHAPTER 2: Introduction 2. Introduction 2.1 Description The Broadband Router is a gateway device designed to share Internet access, provide security, and to network multiple devices for a variety of users. The Broadband Router provides the following wide array of advanced features: •... -
Page 19: What You Need To Supply
BROADBAND ROUTER 2.3 What You Need to Supply Before proceeding with the Broadband Router’s installation, please be sure you have the following: • A computer with an Ethernet network card installed. • Your Windows CD (if your computer is running Windows 95, 98, or Me). •... -
Page 20: Hardware Setup
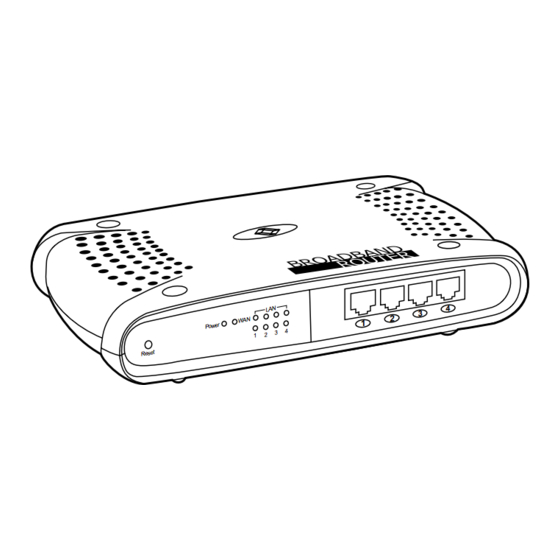
CHAPTER 3: Hardware Setup 3. Hardware Setup 1. Connecting computers: Connect computers directly to the Broadband Router on ports 1–4 on the front panel (see Figure 3-1). If you have more than four computers to plug in, connect the Router to a hub or a switch and connect additional computers to that device. - Page 21 BROADBAND ROUTER 3. Connecting a dial-up modem: If you use an external dial-up modem or ISDN modem, connect it to the COM port on the rear panel. 4. Connecting a printer: If you have a printer that you want to share between computers, connect it to the printer port on the rear panel using a standard parallel printer cable.
-
Page 22: Configuring Your Pc
CHAPTER 4: Configuring Your PC 4. Configuring Your PC This chapter provides configuration instructions for Windows 95, 98, Me, 2000, ® and Windows NT ® 4.0. Please be sure that you are following the proper instruction set for your operating system. 4.1 Configuring Your PC with Windows 95/98/Me You may find that the instructions here do not exactly match your version of Windows. - Page 23 BROADBAND ROUTER Follow these steps. 1. From the Windows desktop, select the Start button. Choose Settings, then Control Panel. Figure 4-1. Settings, Control Panel tab.
- Page 24 CHAPTER 4: Configuring Your PC 2. From Control Panel, double-click the Network icon. Control Panel File Edit View Favorites Help Back Back Forward Forward Map Drive Disconnect Copy Paste Address Control Panel Accessibility Add New Add/Remove Date/Time Display Options Hardware Programs Control Panels...
- Page 25 BROADBAND ROUTER 3. In the Network window, under the Configuration tab, double-click the TCP/IP entry that is listed with your network card. Figure 4-3. Network window, Configuration tab, TCP/IP entry.
- Page 26 CHAPTER 4: Configuring Your PC 4. Select the IP Address tab. Figure 4-4. TCP/IP Properties menu, IP Address tab. If Obtain an IP address automatically is already selected, your computer is already configured for DHCP. Record the IP address and subnet mask in the spaces provided on page 26 (under TCP/IP Configuration Setting).
- Page 27 BROADBAND ROUTER 5. Select the Gateway tab and record the numbers listed under Installed gateways. Then press OK. Figure 4-5. TCP/IP Properties menu, Gateway tab.
- Page 28 CHAPTER 4: Configuring Your PC 6. Select the DNS Configuration tab. Locate the DNS servers listed under DNS Server Search Order. Record the listed addresses on the next page (under TCP/IP Configuration Setting). Figure 4-6. TCP/IP Properties menu, DNS Configuration tab. 7.
-
Page 29: Step 2: Disable Proxy Server
BROADBAND ROUTER 8. Windows may need your Windows 95/98/Me CD to copy some files. After it finishes copying, it will prompt you to restart your system. Press Yes. Your computer will shut down and restart. Figure 4-7. System Settings Change screen. TCP/IP C ONFIGURATION ETTING... - Page 30 CHAPTER 4: Configuring Your PC Internet Explorer 1. Open Internet Explorer ® and press the Stop button. Select Tools, then Internet Options. Figure 4-8. Microsoft ® Internet Explorer screen, Internet Options tab. 2. In the Internet Options window, select the Connections tab. Press the LAN Settings button.
- Page 31 BROADBAND ROUTER 3. Clear all of the check boxes. Figure 4-10. Clearing the check boxes. 4. Click OK, and then click OK again to close the Internet Options window. Netscape Navigator 1. Open Netscape and press the Stop button. Select Edit, then Preferences. Figure 4-11.
- Page 32 CHAPTER 4: Configuring Your PC 2. In the Preferences window, under Category, double-click Advanced, then click on Proxies. Select Direct connection to the Internet. Press OK. Figure 4-12. Selecting Direct Connection to the Internet. 3. Repeat these steps for each Windows 95/98/Me computer connected to your Broadband Router.
-
Page 33: Step 3: Obtain Ip Settings From Your Broadband Router
BROADBAND ROUTER 4.1.3 S 3: O IP S BTAIN ETTINGS FROM ROADBAND OUTER Now that you have configured your computer to connect to your Broadband Router, it needs to obtain new network settings. By releasing any old IP settings and renewing them with settings from your Broadband Router, you will also verify that you have configured your computer correctly. -
Page 34: Configuring Your Pc With Windows 2000
CHAPTER 4: Configuring Your PC 3. From the drop-down menu, select your network card. Press Release, then Renew. Verify that your IP address is now 192.168.2.xxx, your subnet mask is 255.255.255.0 and your default gateway is 192.168. 2.1. These values confirm that your Broadband Router is functioning. - Page 35 BROADBAND ROUTER Follow these steps. 1. From the Windows desktop, select the Start button. Choose Settings, then Control Panel. Figure 4-16. Control panel.
- Page 36 CHAPTER 4: Configuring Your PC 2. Double-click the Network and Dial-Up Connections icon. Control Panel File Edit View Favorites Help Back Search Folders History Links Control Panel Address Add/Remove Accessibility Add/Remove Administrative Options Hardware Programs Tools Control Panel Use the settings in Control Panel to personalize yourcomputer.
- Page 37 BROADBAND ROUTER 4. Select Properties. Figure 4-19. Properties. 5. Double-click Internet Protocol (TCP/IP). Figure 4-20. Internet Protocol TCP/IP.
- Page 38 CHAPTER 4: Configuring Your PC 6. All the information that you need to record is on the Internet Protocol (TCP/IP) Properties dialog box. Use the spaces below (under TCP/IP Configuration Setting) to record the information. Figure 4-21. Internet Protocol (TCP/IP) Properties box. Obtain an IP address automatically and Obtain DNS server address automatically are already selected by default.
-
Page 39: Step 2: Disable Proxy Server
BROADBAND ROUTER 4.2.2 S 2: D ISABLE ROXY ERVER You will need to verify that the proxy feature of your Web browser (also known as “HTTP Proxy”) is disabled. This will enable your Web browser to view the configuration pages inside your Broadband Router. Determine whether you’re using Internet Explorer or Netscape Navigator, and follow the appropriate steps. - Page 40 CHAPTER 4: Configuring Your PC 2. In the Internet Options window, select the Connections tab. Press the LAN Settings button. Figure 4-23. Connections tab, LAN Settings button.
- Page 41 BROADBAND ROUTER 3. Clear all of the check boxes. Figure 4-24. Clearing the check boxes. 4. Click OK, and then click OK again to close the Internet Options window. Netscape Navigator 1. Open Netscape ® and press the Stop button. Select Edit, then Preferences. Figure 4-25.
-
Page 42: Step 3: Obtain Ip Settings From Your Broadband Router
CHAPTER 4: Configuring Your PC 2. In the Preferences window, under Category, double-click Advanced, then click on Proxies. Select Direct connection to the Internet. Press OK. Figure 4-26. Selecting Direct Connection to the Internet. 3. Repeat these steps for each Windows 2000 computer connected to your Broadband Router. - Page 43 BROADBAND ROUTER 1. From the Windows desktop, press the Start button, then Programs, then Accessories, then Command Prompt. Figure 4-27. Command Prompt. 2. In the Command Prompt window, type IPCONFIG /RELEASE. Press Enter. Figure 4-28. IPCONFIG/RELEASE option.
-
Page 44: Configuring Your Pc With Windows Nt 4.0
CHAPTER 4: Configuring Your PC 3. Type IPCONFIG /RENEW and press Enter. Verify that your IP address is now 192.168.2.xxx (2–255), your subnet mask is 255.255.255.0, and your default gateway is 192.168.2.1. These values confirm that your Broadband Router is functioning. - Page 45 BROADBAND ROUTER Follow these steps. 1. From the Windows desktop, select Start, then Settings, then Control Panel. Figure 4-30. Settings, Control Panel tab. 2. From the Control Panel, double-click the Network icon. Control Panel File Edit View Help Add/Remove Console Date/Time Display Devices...
- Page 46 CHAPTER 4: Configuring Your PC 3. Select the Protocols tab. Figure 4-32. Protocols tab. 4. Double-click TCP/IP Protocol.
- Page 47 BROADBAND ROUTER 5. Select the IP Address tab. Figure 4-33. TCP/IP Protocol, IP Address tab. 6. In the Adapter drop-down list, be sure your Ethernet adapter is selected. Obtain an IP address from a DHCP server should already be selected. Your computer is already configured for DHCP.
- Page 48 CHAPTER 4: Configuring Your PC 8. Select the DNS tab to see the primary and secondary DNS servers. Record these values in the appropriate spaces on the next page (under TCP/IP Configuration Setting). Figure 4-34. TCP/IP Properties screen, DNS tab. 9.
-
Page 49: Step 2: Disable Proxy Server
BROADBAND ROUTER TCP/IP Configuration Setting IP Address ____.____.____.____ Subnet Mask ____.____.____.____ Primary DNS Server ____.____.____.____ Secondary DNS Server ____.____.____.____ Default Gateway ____.____.____.____ Host Name ________________ 4.3.2 S 2: D ISABLE ROXY ERVER You will need to verify that the proxy feature of your Web browser (also known as “HTTP Proxy”) is disabled. - Page 50 CHAPTER 4: Configuring Your PC 2. In the Internet Options window, select the Connections tab. Press the LAN Settings button. Figure 4-36. Connections tab, LAN Settings button.
- Page 51 BROADBAND ROUTER 3. Clear all of the check boxes. Figure 4-37. Clearing the check boxes. 4. Click OK, and then click OK again to close the Internet Options window. Netscape Navigator 1. Open Netscape and press the Stop button. Select Edit, then Preferences. Figure 4-38.
-
Page 52: Step 3: Obtain Ip Settings From Your Broadband Router
CHAPTER 4: Configuring Your PC 2. In the Preferences window, under Category, double-click Advanced, then click on Proxies. Select Direct connection to the Internet. Press OK. Figure 4-39. Selecting Direct Connection to the Internet. 3. Repeat these steps for each Windows NT computer connected to your Broadband Router. - Page 53 BROADBAND ROUTER 1. From the Windows desktop, press the Start button, then Programs, then Command Prompt. Figure 4-40. Command Prompt. 2. In the Command Prompt window, type IPCONFIG/RELEASE. Press Enter. Figure 4-41. IPCONFIG/RELEASE option.
- Page 54 CHAPTER 4: Configuring Your PC 3. Type IPCONFIG/RENEW and press Enter. Verify that your IP address is now 192.168.2.xxx, your subnet mask is 255.255.255.0, and your default gateway is 192.168.2.1. These values confirm that your Broadband Router is functioning. 4. Type EXIT. Press Enter to close the Command Prompt window. Now that your computer is configured to connect to your Broadband Router, please go to Chapter 6.
-
Page 55: Configuring Your Macintosh Computer
BROADBAND ROUTER 5. Configuring Your Macintosh ® Computer You may find that the instructions here do not exactly match your screen. This is because these steps and screen shots were created using Mac OS 8.5. Mac OS 7.x and above are all very similar, but may not be identical to Mac OS 8.5. 5.1 Step 1: Configure TCP/IP Settings After you have completed the hardware setup (see Chapter 3), you need to configure your computer to connect to your Broadband Router. - Page 56 CHAPTER 5: Configuring Your Macintosh Computer 2. In the TCP/IP dialog box, make sure that Ethernet is selected in the Connect via field. Figure 5-2. TCP/IP screen. Using DHCP Server should already be selected in the Configure field. (If it’s not, select it now.) Your computer is already configured for DHCP.
-
Page 57: Step 2: Disable Proxy Server
BROADBAND ROUTER 4. Another box will appear asking whether you want to save your TCP/IP settings. Click Save. Figure 5-3. Save changes screen. TCP/IP Configuration Setting IP Address ____.____.____.____ Subnet Mask ____.____.____.____ Router Address ____.____.____.____ Name Server Address ____.____.____.____ 5.2 Step 2: Disable Proxy Server You will need to verify that the proxy feature of your Web browser (also known as “HTTP Proxy”) is disabled. - Page 58 CHAPTER 5: Configuring Your Macintosh Computer Internet Explorer 1. Open Internet Explorer and press the Stop button. Select Edit, then Preferences. Figure 5-4. Edit, Preferences. 2. In the Internet Explorer Preferences window, under Network, select Proxies. Figure 5-5. Preferences, Network, Proxies. 3.
- Page 59 BROADBAND ROUTER Netscape Navigator 1. Open Netscape and press the Stop button. Select Edit, then Preferences. Figure 5-6. Edit menu, Preferences option. 2. In the Preferences dialog box, in the left-hand column labeled Category, select Advanced. Under the Advanced category, select Proxies. Figure 5-7.
-
Page 60: Step 3: Obtain Ip Settings From Your Broadband Router
CHAPTER 5: Configuring Your Macintosh Computer 5.3 Step 3: Obtain IP Settings from Your Broadband Router Now that you have configured your computer to connect to your Broadband Router, it needs to obtain new network settings. By releasing any old IP settings and renewing them with settings from your Broadband Router, you will also verify that you have configured your computer correctly. - Page 61 BROADBAND ROUTER 2. In the TCP/IP window, your new settings will be shown. Verify that your IP address is now 192.168.2.xxx, your subnet mask is 255.255.255.0, and your Router Address is 192.168.2.1. These values confirm that your Broadband Router is functioning. Figure 5-9.
-
Page 62: Configuring Your Broadband Router
CHAPTER 6: Configuring Your Broadband Router 6. Configuring Your Broadband Router Now that you have successfully configured your computer and retrieved your new network settings from your Broadband Router, you are ready to configure the Router’s settings for your LAN. 1. - Page 63 BROADBAND ROUTER 3. The Broadband Router login screen will appear. Leave the Password field empty and press Login. There is no password by default. For security reasons, you should assign a password as soon as possible. Note that the password login is case-sensitive.
- Page 64 CHAPTER 6: Configuring Your Broadband Router 5. The Broadband Router’s automated setup process will take you through each step for setting up your Router. Press Enter to start the process. Figure 6-4. Setup screen. Using a password can protect your Broadband Router from unauthorized changes.
- Page 65 BROADBAND ROUTER 6. In the Change Password screen, enter your current password in the Current Password field. If you have not yet set a password, leave it blank. Choose a password for your Broadband Router and enter it in the next two fields, New Password and Re-Enter Password for Verification.
- Page 66 CHAPTER 6: Configuring Your Broadband Router 8. Select your time zone from the list and press Enter. Figure 6-6. Time Zone screen. 9. The LAN screen is where you configure the LAN (Local Area Network) settings of your Broadband Router. These settings will only be visible to your local network and not to the Internet.
- Page 67 BROADBAND ROUTER 10. In most applications, you should not change the IP address from the default (192.168.2.1). However, if you are installing your Broadband Router into an existing network, you may need to change it to match your current addressing scheme.
- Page 68 CHAPTER 6: Configuring Your Broadband Router 11. In most applications, you should leave the DHCP Server Enabled. If you prefer to handle all the IP addressing on your network yourself, select Disabled. Figure 6-8. DHCP Server screen. 12. There is usually no need to change the IP address pool. If you change the pool range, make sure the first three octets match the Broadband Router’s IP address (that is, 192.168.2.xxx through 192.168.2.yyy).
- Page 69 BROADBAND ROUTER 13. Press Enter when finished. The LAN side of your Broadband Router is now configured. But you must still configure it to connect to the Internet. There are four different general configurations for high-speed Internet connections. You need to know about your Internet connection to determine which configuration to use.
-
Page 70: Configuring Your Broadband Router For A Dynamic Ip Address
CHAPTER 6: Configuring Your Broadband Router 6.1 Configuring Your Broadband Router for a Dynamic IP Address 1. Select Dynamic IP Address, and press More Configuration. Figure 6-9. Dynamic IP Address, More Configuration option. - Page 71 BROADBAND ROUTER 2. If you have a host name provided by your ISP (for example, CX-1234-56789) enter it in the Host Name field. Figure 6-10. Host Name field. The @Home network usually requires your computer to have a Host Name to obtain an IP address from their network.
- Page 72 CHAPTER 6: Configuring Your Broadband Router 5. If you are connecting to the Internet with a dynamic IP address, you probably do not need to enter anything on the DNS Settings page. However, if there is a DNS server that you would rather use, enter the DNS server addresses in the spaces provided.
-
Page 73: Configuring Your Broadband Router For A Static Ip Address
BROADBAND ROUTER 6.2 Configuring Your Broadband Router for a Static IP Address 1. Select Static IP Address, and press More Configuration. Figure 6-12. Static IP Address, More Configuration. - Page 74 CHAPTER 6: Configuring Your Broadband Router 2. Enter the IP address, subnet mask, and gateway address (provided to you by your ISP) in the appropriate fields. You recorded these numbers earlier when you configured your computer to connect to the Broadband Router. Figure 6-13.
- Page 75 BROADBAND ROUTER 3. Press Enter when finished. 4. Enter the DNS server addresses in the spaces provided. Figure 6-14. DNS Addresses. A Domain Name Server (DNS) is like an index of names and Web addresses. If you type a Web address into your browser, such as www.blackbox.com, a DNS server will find that name in its index and find the matching IP address.
-
Page 76: Configuring Your Broadband Router For Pppoe
CHAPTER 6: Configuring Your Broadband Router 6.3 Configuring Your Broadband Router for PPPoE 1. Select PPP over Ethernet, and press More Configuration. Figure 6-15. PPP over Ethernet option. - Page 77 BROADBAND ROUTER 2. Enter the User Name and Password required by your ISP in the appropriate fields. Enter the password again for verification in the Please retype your password field. Figure 6-16. Enter user name and password. 3. If your ISP has provided you with a service name, enter it in the Service Name field.
- Page 78 CHAPTER 6: Configuring Your Broadband Router 5. If you are connecting to the Internet through PPPoE, you probably do not need to enter anything on the DNS settings page. However, if there is another DNS server that you would rather use, enter the DNS server addresses in the spaces provided.
-
Page 79: Configuring Your Broadband Router For Dial-Up On Demand
BROADBAND ROUTER 6.4 Configuring Your Broadband Router for Dial-Up on Demand 1. Select Dial-up on Demand, and press More Configuration. Figure 6-18. Dial-up on Demand, More Configuration. - Page 80 CHAPTER 6: Configuring Your Broadband Router 2. If the serial port is used for primary Internet access, then check the item Check if you only use a dial-up modem to connect to the Internet. (See Figure 6-19.) If not checked, then this connection will only be used for backup access if the primary WAN link fails.
- Page 81 BROADBAND ROUTER K0: Disables DTE/DCE flow control W: Write command to modem memory 5. In the Maximum Idle Time field, enter the maximum idle time for the Broadband Router (in seconds). 6. If you are assigned a dynamic IP address every time you dial up, select NO for Has your Internet Service Provider given you an IP address? However, if your ISP has assigned a fixed IP address for you to use, select YES for this item and enter the IP address and subnet mask.
-
Page 82: Configuring Your Computer For The Broadband Router
CHAPTER 7: Configuring Your Computer for Broadband Router Print Server 7. Configuring Your Computer for the Broadband Router Print Server If you are not connecting your printer to your Broadband Router, skip this chapter. NOTE The Broadband Router Print Server does not support Macintosh printing. - Page 83 BROADBAND ROUTER 2. Press Start and Run. Figure 7-1. Start, Run option. 3. Type D:\PrintSvr\Setup and press OK. Figure 7-2. Run screen.
- Page 84 CHAPTER 7: Configuring Your Computer for Broadband Router Print Server 4. InstallShield will guide you through the installation process. Press Next for each window. Figure 7-3. InstallShield Welcome screen. 5. Press Finish when complete. Figure 7-4. Add Printer Wizard screen.
-
Page 85: Step 2: Configuring The Broadband Router's
BROADBAND ROUTER 6. Windows must reboot for the changes to take place. When asked if you want to reboot now, select Yes and press OK. Figure 7-5. Reboot screen. 7.1.2 S 2: C ’ ONFIGURING THE ROADBAND OUTER RINT ERVER ONITOR Now that the software is installed, it must be configured to work properly. - Page 86 CHAPTER 7: Configuring Your Computer for Broadband Router Print Server 2. Double-click Add Printer. Figure 7-7. Printers screen, Add Printers option.
- Page 87 BROADBAND ROUTER 3. Follow the screen prompts to add your printer as a Local printer for Windows 95/98/Me/2000 (see Figure 7-8) or as a printer managed by My Computer for Windows NT (see Figure 7-9). Figure 7-8. Add Printer Wizard, Local Printer option. Figure 7-9.
- Page 88 CHAPTER 7: Configuring Your Computer for Broadband Router Print Server 4. From the list of manufacturers and printers in the next window, select the printer you have attached to the Broadband Router. Figure 7-10. Add Printer Wizard, Select the Printer Port option.
- Page 89 BROADBAND ROUTER 5. Select the Broadband Router’s Print Server Monitor (the default port name is BLACKBOX100) and press Configure Port. Figure 7-11. Configure Port option.
-
Page 90: Configure The Network Printer In Unix Systems
CHAPTER 7: Configuring Your Computer for Broadband Router Print Server 6. Enter the Broadband Router’s IP address in the IP address field (the default is 192.168.2.1) and press OK. Figure 7-12. Enter IP Address. 7. You will be asked if you want to print a test page. Select Yes to make sure that your printer is configured correctly. -
Page 91: Common Configurations For Popular Isps
BROADBAND ROUTER 8. Common Configurations for Popular ISPs WAN Types Characteristics Popular ISPs Dynamic IP Cable modem ISP, MediaOne, RoadRunner, (Clone MAC) non-hostname based. Optimum Online, Time Need to clone MAC in Warner, Charter, Adelphia the Router’s DHCP page. Dynamic IP Cable ISP, requires @Home Network, Cogoco, (Hostname) - Page 92 CHAPTER 8: Common Configurations for Popular ISPs WAN Types Characteristics Popular ISPs Static DSL modem, always on. CableSpeed, Cnet, Direct Link, (DSL) Need to enter all IP Drizzle, DSL Extreme, information from the ISP in Earthlink Wireless, Fast Point, the Router’s “Fixed IP” Flashcom, GTE-WhirlWind, section.
-
Page 93: Appendix. Troubleshooting
A.1 Calling Black Box If you determine that your Broadband Router is malfunctioning, do not attempt to alter or repair it. Contact Black Box at 724-746-5500. The problem might be solvable over the phone. Before you do, make a record of the history of the problem. We will be able to...
Need help?
Do you have a question about the LR9501A and is the answer not in the manual?
Questions and answers