Table of Contents
Advertisement
Quick Links
MARCH 2003
LR9601A
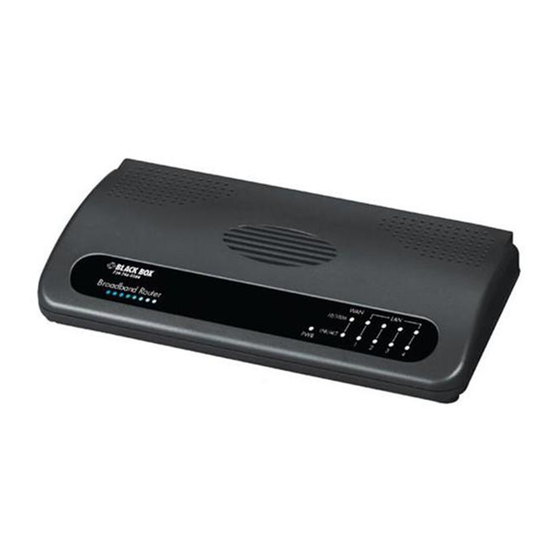
Broadband Router
CUSTOMER
Order toll-free in the U.S.: Call 877-877-BBOX (outside U.S. call 724-746-5500)
SUPPORT
FREE technical support 24 hours a day, 7 days a week: Call 724-746-5500 or fax 724-746-0746
INFORMATION
Mailing address: Black Box Corporation, 1000 Park Drive, Lawrence, PA 15055-1018
Web site: www.blackbox.com • E-mail: info@blackbox.com
Advertisement
Table of Contents

Subscribe to Our Youtube Channel
Related Manuals for Black Box LR9601A


Summary of Contents for Black Box LR9601A
-
Page 1: Broadband Router
Order toll-free in the U.S.: Call 877-877-BBOX (outside U.S. call 724-746-5500) SUPPORT FREE technical support 24 hours a day, 7 days a week: Call 724-746-5500 or fax 724-746-0746 INFORMATION Mailing address: Black Box Corporation, 1000 Park Drive, Lawrence, PA 15055-1018 Web site: www.blackbox.com • E-mail: info@blackbox.com... - Page 3 FCC AND IC RFI STATEMENTS/CE NOTICE FEDERAL COMMUNICATIONS COMMISSION INDUSTRY CANADA RADIO FREQUENCY INTERFERENCE STATEMENTS This equipment generates, uses, and can radiate radio-frequency energy, and if not installed and used properly, that is, in strict accordance with the manufacturer’s instructions, may cause interference to radio communication. It has been tested and found to comply with the limits for a Class A computing device in accordance with the specifications in Subpart B of Part 15 of FCC rules, which are designed to provide reasonable protection against such interference when the equipment is...
- Page 4 BROADBAND ROUTER NORMAS OFICIALES MEXICANAS (NOM) ELECTRICAL SAFETY STATEMENT INSTRUCCIONES DE SEGURIDAD 1. Todas las instrucciones de seguridad y operación deberán ser leídas antes de que el aparato eléctrico sea operado. 2. Las instrucciones de seguridad y operación deberán ser guardadas para referencia futura.
- Page 5 NOM STATEMENT 12. Precaución debe ser tomada de tal manera que la tierra fisica y la polarización del equipo no sea eliminada. 13. Los cables de la fuente de poder deben ser guiados de tal manera que no sean pisados ni pellizcados por objetos colocados sobre o contra ellos, poniendo particular atención a los contactos y receptáculos donde salen del aparato.
- Page 6 BROADBAND ROUTER TRADEMARKS USED IN THIS MANUAL Macintosh is a registered trademark of Apple Computer, Inc. Sun is a registered trademark of Sun Microsystems, Inc. Microsoft, Windows, and Windows NT are either registered trademarks or trademarks of Microsoft Corporation in the United States and/or other countries. Any other trademarks mentioned in this manual are acknowledged to be the property of the trademark owners.
-
Page 7: Table Of Contents
CONTENTS Contents Chapter Page Specifications ..........7 Introduction . - Page 8 B.1 Calling Black Box ........
-
Page 9: Specifications
CHAPTER 1: Specifications 1. Specifications Protocols Supported: TCP/IP, UDP, ICMP, PPPoE, PPTP, NAT/PAT, DHCP, L2TP, PPTP, IPSec passthrough Standards: IEEE 802.3 10BASE-T, IEEE 802.3u 100BASE-TX, PCI Bus 2.1/2.2 Connectors: LAN: (4) RJ-45; WAN: (1) RJ-45 MDI-II/MDI-X; Printer: (1) DB25 F Indicators: LEDs: (1) Power, (1) Printer, (1) WAN, (4) LAN Power: 120 VAC, 60 Hz, external Size: 1.4"H x 7.4"W x 3.9"D (3.6 x 18.8 x 9.9 cm) -
Page 10: Introduction
BROADBAND ROUTER 2. Introduction 2.1 Overview The Broadband Router is an incredibly fast router with 20-Mbps LAN-to-WAN throughput. It enables multiple users (up to 253!) to share one broadband Internet connection through an ADSL or cable modem. Simply configure your Internet connection settings in the Broadband Router. - Page 11 CHAPTER 2: Introduction Figure 2-1 shows a typical setup for a Local Area Network (LAN). AC power ADSL or Cable Modem Internet Switch/Hub Figure 2-1. Typical LAN setup. Figure 2-2 shows the Broadband Router’s back panel. It has a power connector, printer port, 4 LAN ports, a WAN port, and a reset button.
- Page 12 BROADBAND ROUTER WAN Port The WAN port connects to the segment that links your xDSL or cable modem to the Internet. If the modem port is an uplink port, use a crossover cable to link the WAN port to the modem. If the modem port is a regular port, use a straight- through cable to link the WAN port to the modem.
-
Page 13: What The Package Includes
• (1) Power adapter • (1) Print server driver disk • This users’ manual If anything is missing or damaged, please contact Black Box at 724-746-5500. 2.3 Minimum Requirements • (1) External xDSL (ADSL) or cable modem with an Ethernet port (RJ-45). -
Page 14: Getting Started
BROADBAND ROUTER 3. Getting Started Follow these instructions to start using the router and get connected to the Internet. 1. Set up your network as shown in Figure 2-1. 2. Set your LAN PC clients so that they can obtain an IP addresses automatically. Each LAN client requires an IP address. - Page 15 CHAPTER 3: Getting Started • DNS Configuration: Select Disable DNS. • Gateway: All fields are blank. • WINS Configuration: Select Disable WINS Resolution. • IP Address: Select Obtain IP Address Automatically. Figure 2-4. TCP/IP properties. 8. Reboot the PC. Your PC will now obtain an IP address automatically from your Broadband Router’s DHCP server.
- Page 16 BROADBAND ROUTER b. Windows 2000 1. Click the Start button and select Settings, then Control Panel. The Control Panel window will appear. 2. Double-click the Network and Dial-up Connections icon. In the Network and Dial-up Connection window, double-click the Local Area Connection icon.
- Page 17 CHAPTER 3: Getting Started 6. Click OK to confirm the setting. Your PC will now obtain an IP address automatically from your Broadband Router’s DHCP server. NOTE Make sure that the Broadband Router’s DHCP server is the only DHCP server available on your LAN. Once you’ve configured your PC to obtain an IP address automatically, proceed to step 3 on page 16.
- Page 18 BROADBAND ROUTER Figure 2-6. Microsoft TCP/IP properties, IP Address tab. 7. Click OK to confirm the setting. Your PC will now obtain an IP address automatically from your Broadband Router’s DHCP server. NOTE Make sure that the Broadband Router’s DHCP server is the only DHCP server available on your LAN.
- Page 19 CHAPTER 3: Getting Started NOTE Make sure that the Broadband Router’s DHCP server is the only DHCP server available on your LAN. If there is another DHCP on your network, then you’ll need to switch one of the DHCP servers off. 4.
- Page 20 BROADBAND ROUTER Figure 2-8. The Enter Your Password screen. 6. The Home page shown in Figure 2-9 will appear. The home page is divided into four sections: Quick Setup Wizard, General Setup, Status Information, and Tools. Setup Wizard (Chapter 4) If you want to use the Broadband Router only as an Internet Access device, then you only need to configure the screens in the Setup Wizard section.
- Page 21 CHAPTER 3: Getting Started Status Information (Chapter 6) Use the Status Information section for monitoring the router’s current status information. Tools (Chapter 7) If you want to reset the router (because of problems), save your configurations, or upgrade the firmware, go to Chapter 7. Address Figure 2-9.
- Page 22 BROADBAND ROUTER Menu Description Setup Wizard (Chapter 4) Select your Internet connection type. Then perform the configurations necessary to connect to your Internet Service Provider (ISP). General Setup (Chapter 5) This section contains configurations for the Broadband Router’s advanced functions such as Bridge, Address Mapping, Virtual Server, Access Control, Hacker Attack Prevention, DMZ, Special Applications, and other...
- Page 23 CHAPTER 3: Getting Started 7. Click on Quick Setup Wizard (see the Chapter 4) to start configuring settings required by your ISP so that you can access the Internet. The other sections (General Setup, Status Information, and Tools) do not need to be configured unless you wish to implement or monitor more advanced features or information.
-
Page 24: Quick Setup Wizard
BROADBAND ROUTER 4. Quick Setup Wizard 4.1 Setup The Quick Setup Wizard is designed to get you using the Broadband Router as quickly as possible. You are required to fill in only the information necessary to access the Internet. Once you click on the Quick Setup Wizard in the Home page, you should see the screen shown in Figure 4-1. -
Page 25: Step 2: Broadband Type
CHAPTER 4: Quick Setup Wizard Parameter Description Set Time Zone Select the time zone of the country you are currently in. The router will set its time based on your selection. Enable Daylight Savings The router can also take daylight savings into account. - Page 26 BROADBAND ROUTER Figure 4-2. Broadband type. Menu Type of Connection Cable Modem Your ISP will automatically give you an IP address. Fixed-IP xDSL Your ISP has given you an IP address already. PPPoE xDSL Your ISP requires you to use a Point-to-Point Protocol over Ethernet (PPPoE) connection.
-
Page 27: Cable Modem
CHAPTER 4: Quick Setup Wizard Click on one of the WAN types and then proceed to the manual’s relevant sub- section (4.1, 4.2, 4.3 or 4.4). Click on Back to return to the previous screen. 4.3.1 C ABLE ODEM Choose Cable Modem if your ISP will automatically give you an IP address. Some ISPs may also require you to fill in additional information, such as Host Name and MAC address (see Figure 4-3). -
Page 28: Fixed-Ip Xdsl
BROADBAND ROUTER Parameter Description Host Name If your ISP requires a Host Name, type in the Host Name provided by your ISP. Leave it blank if your ISP does not require a Host Name. MAC Address Your ISP may require a particular MAC address in order for you to connect to the Internet. - Page 29 CHAPTER 4: Quick Setup Wizard Figure 4-4. IP Address Info, Fixed-IP xDSL. Parameters Description This is the IP address that your ISP has given you. Gateway IP This is the ISP’s IP address gateway. This is the ISP’s DNS server IP address. Subnet Mask Enter the Subnet Mask provided by your ISP (for example, 255.255.255.0).
-
Page 30: Pppoe Xdsl
BROADBAND ROUTER Click OK when you have finished adding the information. You have completed the configuration for the Fixed-IP xDSL connection. You can start using the router now. If you wish to use some of the advanced features supported by this router, see Chapters 4, 5, and 6. - Page 31 CHAPTER 4: Quick Setup Wizard Parameter Description User Name Enter the User Name provided by your ISP for the PPPoE connection. Password Enter the password provided by your ISP for the PPPoE connection. Please retype Type in the password again to re-confirm. your password Service Name This is optional.
-
Page 32: Pptp Xdsl
BROADBAND ROUTER 4.3.4 PPTP Select PPTP xDSL if your ISP requires the PPTP protocol for connecting you to the Internet. Your ISP should provide all the information required in this section. See Figure 4-6. Figure 4-6. IP Address Info, PPTP. Parameter Description IP Address... - Page 33 CHAPTER 4: Quick Setup Wizard Parameter Description Default Gateway Enter the IP address of the ISP Gateway. User ID Enter the User Name provided by your ISP for the PPTP connection. This is sometimes called a Connection ID. Password Enter the password provided by your ISP for the PPTP connection.
-
Page 34: General Setup
BROADBAND ROUTER 5. General Setup Once you click on the General Setup button at the Home Page, you should see the screen shown in Figure 5-1. If you have already configured the Quick Setup Wizard, you do not need to configure anything in the General Setup screen for you to start using the Internet. - Page 35 CHAPTER 5: General Setup Below is a general description of the advanced functions available. Menu Description System This section allows you to set the Broadband Router’s system time zone, password, and remote management. This section allows you to select the connection method in order to establish a connection with your ISP.
-
Page 36: System
BROADBAND ROUTER 5.1 System The system screen allows you to specify a time zone, change the system password, and specify a remote management user for the Broadband Router. See Figure 5-2. Figure 5-2. System settings. Parameters Description System Settings Time Zone Select the time zone of the country you are currently in. -
Page 37: Time Zone
CHAPTER 5: General Setup Parameters Description Remote Management You can specify a Host IP address that can perform remote management functions. 5.1.1 T The Time Zone allows your router to reference or base its time on the settings configured here, which will affect functions such as Log entries and Firewall settings. - Page 38 BROADBAND ROUTER Parameter Description Set Time Zone Select the time zone of the country you are currently in. The router will set its time based on your selection. Enable Daylight Savings The router can also take daylight savings time into account.
-
Page 39: Password Settings
CHAPTER 5: General Setup 5.1.2 P ASSWORD ETTINGS You can change the password required to log into the Broadband Router’s system Web based management. By default, there is no password. Assign a password to the Administrator as soon as possible and store it in a safe place. Passwords can contain up to 12 alphanumeric characters and are case-sensitive. - Page 40 BROADBAND ROUTER Parameters Description New Password Enter your new password. Re-Enter Password Enter your new password again for verification for Verification purposes. NOTE If you forget your password, you’ll have to reset the router to the factory default (no password) with the Reset button (see the router’s back panel).
-
Page 41: Remote Management
CHAPTER 5: General Setup 5.1.3 R EMOTE ANAGEMENT The remote management function allows you to designate a host in the Internet. This lets you configure the Broadband Router from a remote site. Enter the designated host IP Address 1, 2 in the Host IP Address field. - Page 42 BROADBAND ROUTER Parameters Description Host Address This is the IP address of the host in the Internet that will have management/configuration access to the Broadband Router from a remote site. If you are at home and your home IP address has been designated as the Remote Management host IP address for this router (located in your company office), then you are able to configure this router from...
-
Page 43: Wan
CHAPTER 5: General Setup 5.2 WAN Use the WAN Settings screen if you have already configured the Quick Setup Wizard section and you would like to change your Internet connection type. The WAN Settings screen allows you to specify the type of WAN port connection you want to establish with your ISP. -
Page 44: Dynamic Ip
BROADBAND ROUTER Parameters Description Dynamic IP Your ISP will automatically give you an IP address. PPPoE Your ISP requires a PPPoE connection. PPTP Your ISP requires you to use a Point-to-Point Tunneling Protocol (PPTP) connection. Static IP Address Your ISP has given you an IP address already. Bridge The router can be used as a bridge between LANs. -
Page 45: Static Ip Address
CHAPTER 5: General Setup 5.2.4 S IP A TATIC DDRESS Select Static IP address if your ISP has given you a specific IP address for you to use. Your ISP should provide all the information required in this section. 5.2.5 B RIDGE The bridge mode screen allows you to set your Broadband Router to bridge mode and assign an IP address for management purposes. - Page 46 BROADBAND ROUTER Parameters Description IP Address Enter an IP address for the bridge mode. This IP address allows you to access the Web based management if you decide to switch back to the router mode. Subnet Mask This is the subnet mask for the bridge mode management.
-
Page 47: Dns
CHAPTER 5: General Setup 5.2.6 DNS A Domain Name System (DNS) server is an index of IP addresses and Web addresses. If you type a Web address into your browser, a DNS server will find that name in its index and the matching IP address. Most ISPs provide a DNS server for speed and convenience. -
Page 48: Ddns
BROADBAND ROUTER Parameters Description Secondary DNS Address (optional) This is an optional parameter. You can enter another DNS server’s IP address as a backup. The secondary DNS will be used if the above DNS fails. Click Apply at the bottom of the screen to save the configurations. You can now configure other advanced sections or start using the router (with the advanced settings in place). - Page 49 CHAPTER 5: General Setup Parameters Default Description Dynamic DNS Disable Enable or disable the DDNS function. Provider DynDNS Select a DDNS service provider. Domain Name Your static domain name that uses DDNS. Account/E-mail The account that your DDNS service provider assigned to you. Password/Key The password you set for the DDNS service account above.
-
Page 50: Lan
BROADBAND ROUTER 5.3 LAN The LAN Settings screen allows you to setup the LAN Interface IP, DHCP Server parameters, UPnP, and Print Server. See Figure 5-12. Figure 5-12. LAN Settings screen. -
Page 51: Interface
CHAPTER 5: General Setup 5.3.1 I NTERFACE The LAN Port screen allows you to specify a private IP address for your router’s LAN ports. See Figure 5-13. NOTE You cannot change the subnet mask. It will always be 255.255.255.0. 255.255.255.0 Figure 5-13. - Page 52 BROADBAND ROUTER Parameters Default Description DHCP Server Enabled You can enable or disable the DHCP server. By enabling the DHCP server, the router will automatically give your LAN clients an IP address. If the DHCP is not enabled, then you’ll have to manually set your LAN client’s IP addresses.
-
Page 53: Upnp
CHAPTER 5: General Setup 5.3.2 UP With UPnP, all PCs in your intranet will discover the router automatically. You do not have to do any configuration for your PC. You can access the Internet through this router easily. See Figure 5-14. Figure 5-14. -
Page 54: Print Server
BROADBAND ROUTER Parameters Default Description UPnP Feature Disable The NAT Traversal function provided by (continued) UPnP can let applications that support UPnP smoothly connect to Internet sites without any incompatibility problem due to the NAPT port translation. Click Apply to save the configurations. You can now configure other advanced sections or start using the router (with the advanced settings in place). - Page 55 CHAPTER 5: General Setup Figure 5-15. Printer Server screen. Parameter Description LPD Printing Support This allows you to enable/disable the LPD printing of the print server. Queue Name The queue name of the LPD print server. Click Apply to save the configurations. You can now configure other advanced sections or start using the router (with the advanced settings in place).
-
Page 56: Nat
BROADBAND ROUTER 5.4 NAT Network Address Translation (NAT) allows multiple users at your local site to access the Internet through a single Public IP address or multiple Public IP addresses. NAT provides firewall protection from hacker attacks and allows you to map private IP Addresses to public IP addresses for key services, such as Web sites and FTP. -
Page 57: Address Mapping
CHAPTER 5: General Setup Parameter Description Virtual Server You can have different services (for example, email, FTP, Web, etc.) going to different service servers/ clients in your LAN. The Virtual Server allows you to re-direct a particular service port number (from the Internet/WAN Port) to a particular LAN IP address and its service port number. - Page 58 BROADBAND ROUTER Figure 5-17. Address Mapping screen. Parameter Description Global IP This is the public/legal IP address that exists in the Internet that will be transformed to one or more private/virtual IP addresses (LAN PC clients). This means that the private IP address(es) selected will use the designated public IP address when accessing the Internet.
-
Page 59: Virtual Server
CHAPTER 5: General Setup Example: Address Mapping Figure 5-18 demonstrates how address mapping works. With the configuration shown below, LAN clients A and B will use the global/public IP address 10.1.1.10. LAN client C will use 10.1.1.20. Configuration Configuration Global IP: 10.1.1.10 Global IP: 10.1.1.20 192.168.2:2 192.168.2:4... - Page 60 BROADBAND ROUTER Figure 5-19. Virtual Server screen. Parameters Description Private IP This is the LAN client/host IP address that the Public Port number packet will be sent to. NOTE You need to give your LAN PC clients a fixed/static IP address for Virtual Server to work properly.
- Page 61 CHAPTER 5: General Setup Parameters Description Private Port This is the port number (of the above Private IP host) that the below Public Port number will be changed to when the packet enters your LAN (to the LAN Server/Client IP). Type Select the port number protocol type (TCP or UDP).
-
Page 62: Special Applications
BROADBAND ROUTER Configuration Private IP: 192.168.2.2 Private Port: 80 Type: TCP Public Port: 80 ADSL or Cable Modem LAN Web site server Internet Request 192.168.2.2 Internet Figure 5-20. Virtual Server example. 5.4.3 S PECIAL PPLICATIONS Some applications, such as Internet games and videoconferencing, Internet telephony and others, require multiple connections. - Page 63 CHAPTER 5: General Setup Figure 5-21. Special Applications screen. Parameters Description Trigger Port This is the outgoing (Outbound) port number for this particular application. NOTE The range of the Trigger Port is from 0 to 65535. Trigger Type Select whether the outbound port protocol is TCP or UDP.
- Page 64 BROADBAND ROUTER Parameters Description Public Port Enter the Incoming (Inbound) port or port range for this type of application (for example, 2300-2400, 47624). NOTE Individual port numbers are separated by a comma (for example, 47624, 5775, 6541, etc.). To add a port range, use a hyphen to separate the two- port-number range (for example, 2300-2400).
-
Page 65: Firewall
CHAPTER 5: General Setup Example: Trigger Port Trigger Type Public Port Public Type Comment 28800 2300-2400, MSN Game 47624 Zone 6112 6112 Battle.net In the example above, when you trigger port 28800 (outbound) for MSN Game Zone, then the router will allow incoming packets for ports 2300-2400 and 47624 to be directed to you. - Page 66 BROADBAND ROUTER Figure 5-22. Security Settings (Firewall) screen. Parameters Description Access Control Access Control allows you to specify which hosts can or cannot have access to certain Internet applications. URL Blocking URL Blocking allow you to specify which URLs can not be accessed by users.
-
Page 67: Access Control
CHAPTER 5: General Setup Parameters Description The DMZ function allows you to redirect all packets going to your WAN port IP address to a particular IP address in your LAN. 5.5.1 A CCESS ONTROL If you want to restrict users from accessing certain Internet applications/services (for example, Internet Web sites, email, FTP etc.), then this is the place to set that configuration. - Page 68 BROADBAND ROUTER Parameters Description Enable Filtering Function You must select whether to enable (Yes) or disable (No) the Access control function that you’ve configured in this screen. Add PC You can click Add PC to add an access control rule for users by IP addresses.
- Page 69 CHAPTER 5: General Setup Add PC Parameters Description Client PC Description The description for this client PC rule. Client PC IP Addresses Enter the IP address range that you wish to apply to this Access Control rule. This is the user’s IP address(es) for which you want to setup an Access Control rule.
-
Page 70: Url Blocking
BROADBAND ROUTER Example: Access Control In Figure 5-25, LAN client B cannot access any Web sites ever (Web sites use Port 80). However, LAN client A is unable to access Web sites (and any other service that uses ports between 80 and 999) between Saturday 8 am to Sunday 8 pm. Configuration Configuration IP: 192.168.2:2... -
Page 71: Schedule Rule
CHAPTER 5: General Setup Figure 5-26. URL Blocking screen. Parameters Description URL/Keyword Enter the full URL address or the keyword of the Web site you want to block. Click Apply to save the configurations. You can now configure other advanced sections or start using the router (with the advanced settings in place). - Page 72 BROADBAND ROUTER Figure 5-27. Schedule Rule screen. Parameters Description Edit Click Edit to modify the time range of the rule schedule. Delete Click Delete to delete the rule of schedule. Add Schedule Rule Click Add Schedule Rule to add a new schedule rule and enter the detail edit page to edit the time range of the schedule rule.
- Page 73 CHAPTER 5: General Setup Figure 5-28. Edit Schedule Rule screen. Edit Schedule Rule Parameters Description Name The name of the schedule rule. Comment You can enter a comment for the schedule rule. Activate Time Period You can enter the start time and end time of each day in a week for the schedule rule.
-
Page 74: Intrusion Detection
BROADBAND ROUTER 5.5.4 I NTRUSION ETECTION The Broadband Router’s firewall can block common hacker attacks, including Denial of Service, Ping of Death, and RIP defect. If Internet attacks occur, the router can also alert you by email. See Figures 5-29, 5-30, and 5-31. Figure 5-29. - Page 75 CHAPTER 5: General Setup Figure 5-30. Intrusion Detection screen #2.
- Page 76 BROADBAND ROUTER Figure 5-31. Intrusion Detection screen #3. Parameters Description Intrusion Detection Feature DoS Protection Protects from any Denial of Service Attacks. Discard Ping From WAN The router’s WAN port will not respond to any Ping requests. RIP defect Protection from RIP defect. Stateful Packet Inspection The router will analyze all packets of selected protocols according to the state of all sessions and...
- Page 77 CHAPTER 5: General Setup When hackers attempt to enter your network, we can alert you by e-mail. Email Address Enter the email address that you would like the alert warning to be sent to if an attack occurs. SMTP Server Address Enter the IP address of the above email address’...
-
Page 78: Dmz
BROADBAND ROUTER 5.5.5 DMZ If you have a local client PC that cannot run an Internet application (for example, Games) properly from behind the NAT firewall, then you can open the client up to unrestricted two-way Internet access by defining a DMZ host. The DMZ function allows you to re-direct all packets going to your WAN port IP address to a particular IP address in your LAN. - Page 79 CHAPTER 5: General Setup Parameters Description Enable DMZ Select Yes to enable DMZ. Select No to disable DMZ. NOTE If there is a conflict between the Virtual Server and the DMZ setting, then the Virtual Server function will have priority over the DMZ function. Public IP Address The IP address of the WAN port or any other Public IP addresses given to you by your ISP.
-
Page 80: Status Information
BROADBAND ROUTER 6. Status Information The Status Information section allows you to monitor the current status of your router. You can use the Status Information page to monitor the connection status of the Broadband Router’s WAN/LAN interfaces, the current firmware and hardware version numbers, any illegal attempts to access your network, and information on all DHCP client PCs currently connected to your network. -
Page 81: Status And Information
CHAPTER 6: Status Information 6.1 Status and Information The Status and Information section allows you to view the router’s system information. See Figure 6-1. Figure 6-1. Status and Information screen. Parameters Description Information You can see the router’s system information, such as the router’s LAN MAC Address, WAN MAC Address, Hardware Version, Boot Code Version, and Runtime Code Version. -
Page 82: Internet Connection
BROADBAND ROUTER 6.2 Internet Connection View the Broadband Router’s current Internet connection status and other related information. See Figure 6-2. Figure 6-2. Internet Connection screen. Parameters Description Internet Connection This page displays whether the WAN port is connected to a cable/DSL connection. It also displays the router’s WAN port’s WAN IP address, subnet mask, and ISP gateway as well as the primary DNS and secondary DNS being used. -
Page 83: Device Status
CHAPTER 6: Status Information NOTE When the WAN port is a Dynamic IP connection, the Release and Renew buttons will release the Broadband Router’s WAN IP address. Renew will get another IP address from the DHCP server. If the WAN port uses PPPoE, Release will disconnect the PPP session, and Renew will initialize another PPP session. -
Page 84: Security Log
BROADBAND ROUTER Parameters Description Device Status This page shows the Broadband Router’s current device settings. This page displays the Broadband Router LAN port’s current LAN IP Address and Subnet Mask. It also shows whether the DHCP Server and Firewall functions are enabled/disabled. The firewall status is shown as Enabled if the firewall is enabled (regardless of whether you’ve configured any of the firewall features). -
Page 85: Dhcp Client Log
CHAPTER 6: Status Information Parameters Description Security Log This page shows the router’s current security log. It displays any illegal attempts to access your network. The security log can be saved (Save) to a local file for further processing. It can also be cleared (Clear) or refreshed (Refresh) to get the most updated information. - Page 86 BROADBAND ROUTER Parameters Description DHCP Client Log This page shows all DHCP clients (LAN PCs) currently connected to your network. Numbers of DHCP Clients displays the number of LAN clients that are currently linked to the Broadband Router’s DHCP server. The DHCP Client Log displays the IP address and the MAC address of each LAN client.
-
Page 87: Tools
CHAPTER 7: Tools 7. Tools This page includes the basic configuration tools, such as Configuration Tools (save or restore configuration settings), Firmware Upgrade (upgrade system firmware), and Reset. See Figure 7-1. Figure 7-1. Tool Settings screen. Parameters Description Configuration Tools You can save the router’s current configuration, restore the router’s saved configuration files, and restore the router’s factory-default settings... -
Page 88: Configuration Tools
BROADBAND ROUTER Parameters Description Reset You can reset the router’s system if any problem exists. Select one of the Tools Settings selections and proceed to Section 7.1, 7.2, or 7.3. 7.1 Configuration Tools The Configuration Tools screen allows you to backup the router’s current configuration setting. - Page 89 CHAPTER 7: Tools Figure 7-2. Configuration Tools screen. Parameters Description Configuration Tools Use the Backup tool to save the Broadband Router’s current configuration to a file named backup_config.exe on your PC. You can then use the Restore tool to restore the saved configuration to the Broadband Router.
-
Page 90: Firmware Upgrade
BROADBAND ROUTER 7.2 Firmware Upgrade This page allows you to upgrade the router’s firmware. See Figure 7-3. Figure 7-3. Firmware Upgrade screen. Parameters Description Firmware Upgrade This tool allows you to upgrade the Broadband Router’s system firmware. To upgrade the firmware, you’ll need to download the firmware file to your local hard disk and enter that file name and path in the appropriate field on this page. -
Page 91: Reset
CHAPTER 7: Tools 7.3 Reset You can reset the router’s system if any problem exists. The reset function re-boots your router’s system. See Figure 7-4. Figure 7-4. Reset screen. Parameters Description Reset If the system stops responding correctly, or in some way stops functioning, you can perform a reset. -
Page 92: Print Server
BROADBAND ROUTER 8. Print Server 8.1 Install the Print Server Network Driver 1. Execute WEClient.exe and the PrintServer Network Driver Setup Program window will appear. See Figure 8-1. Figure 8-1. PrintServer Network Driver Setup Program window. - Page 93 CHAPTER 8: Print Server 2. Click Next and specify the destination folder where the utility will be installed. See Figure 8-2. Destination Folder Browse… D:\...\PrintServer Network driver Figure 8-2. Choose Destination Location window.
- Page 94 BROADBAND ROUTER 3. Click Next and specify the program folder where the program icons will be added. See Figure 8-3. Figure 8-3. Select Program Folder window.
- Page 95 CHAPTER 8: Print Server 4. Click Next to start installation. The PrintStir Utilities Installation window (not shown here) appears on your screen. 5. The program will finish installing all the utilities and drivers. So far you’ve only completed the installation phase and prepared to use the print server. Next, you’ll add a remote port for the print server.
- Page 96 BROADBAND ROUTER 7. After adding a remote port for the print server, you can see the remote port’s name in the remote port list. The remote port’s name consists of the print server name and the port number, which are separated by a hyphen. For example, if you assign “PtrSvr”...
-
Page 97: Add A Network Printer
CHAPTER 8: Print Server 8.2 Add a Network Printer After installing the print server client tool, you then need to add the network printer to your PC. 1. Click the Start button. Choose Setting and Printers. 2. Double click on Add Printer. See Figure 8-7. >>... - Page 98 BROADBAND ROUTER 3. Select Local Printer and click Next. See Figure 8-8. Figure 8-8. Add Printer Wizard.
- Page 99 CHAPTER 8: Print Server 4. Select the suitable printer manufacturer and model, then click Next. See Figure 8-9. Figure 8-9. Choosing a Printer. 5. Choose the print server’s remote port that was created in Section 8.1 and click Next. See Figure 8-10. Figure 8-10.
-
Page 100: Appendix A. How To Manually Find Your Pc's Ip And Mac Addresses
BROADBAND ROUTER Appendix A. How to Manually Find Your PC’s IP and MAC Addresses 1. In Windows, open the Command Prompt program. See Figure A-1. Add Printer Wizard Figure A-1. Command Prompt program window #1. 2. Type Ipconfig /all and press <Enter>. See Figure A-2. Figure A-2. - Page 101 APPENDIX A: How to Manually Find Your PC’s IP and MAC Addresses • Your PC’s IP address is the “IP address” (in this case, 192.168.1.77). • The router’s IP address is the “Default Gateway” (in this case, 192.168.1.254). • Your PC’s MAC Address is the “Physical Address” (in this case, 00-50-FC-FE-02- DB).
-
Page 102: Appendix B. Troubleshooting
B.1 Calling Black Box If you determine that your Broadband Router is malfunctioning, do not attempt to alter or repair the unit. It contains no user-serviceable parts. Contact Black Box at 724-746-5500. Before you do, make a record of the history of the problem. We will be able to... -
Page 103: Appendix C. Glossary
APPENDIX C: Glossary Appendix C. Glossary Bridge: A bridge is an intelligent, internetworking device that forwards or filters packets between different networks based on data link layer (MAC) address information. Default Gateway (Router): Every non-router IP device needs to configure a default gateway’s IP address. - Page 104 BROADBAND ROUTER A network mask is also a 32-bit binary pattern. It consists of consecutive leading 1’s followed by consecutive trailing 0’s, like this: 11111111.11111111.11111111.00000000. Therefore, sometimes a network mask can also be described simply as x number of leading 1’s. When both are represented side by side in their binary forms, all bits in the IP address that correspond to 1’s in the network mask become part of the IP network address, and the remaining bits correspond to the host ID.
- Page 105 APPENDIX C: Glossary Port: Network clients (LAN PC) use port numbers to distinguish one network application/protocol from another. Below is a list of common applications and protocol/port numbers: Application Protocol Port Number Telnet SMTP POP3 H.323 1720 SNMP SNMP Trap HTTP PPTP 1723...
- Page 106 BROADBAND ROUTER TCP/IP, UDP: Transmission Control Protocol/Internet Protocol (TCP/IP) and Unreliable Datagram Protocol (UDP). TCP/IP is the standard protocol for data transmission over the Internet. Both TCP and UDP are transport layer protocol. TCP performs proper error detection and error recovery, and thus is reliable. UDP, on the other hand, is not reliable.
- Page 107 © Copyright 2003. Black Box Corporation. All rights reserved. 1000 Park Drive • Lawrence, PA 15055-1018 • 724-746-5500 • Fax 724-746-0746...
Need help?
Do you have a question about the LR9601A and is the answer not in the manual?
Questions and answers