Digi IX14 User Manual
Hide thumbs
Also See for IX14:
- User manual (828 pages) ,
- User manual (74 pages) ,
- User manual (529 pages)
Table of Contents
Advertisement
Quick Links
Advertisement
Table of Contents

Related Manuals for Digi IX14


Summary of Contents for Digi IX14
- Page 1 IX14 User Guide...
- Page 2 Information in this document is subject to change without notice and does not represent a commitment on the part of Digi International. Digi provides this document “as is,” without warranty of any kind, expressed or implied, including, but not limited to, the implied warranties of fitness or merchantability for a particular purpose.
- Page 3 Feedback To provide feedback on this document, email your comments to techcomm@digi.com Include the document title and part number (IX14 User Guide, 90002291 ) in the subject line of your email. IX14 User Guide...
-
Page 4: Table Of Contents
Step 4: Sign up for Digi Remote Manager Step 5: Access the IX14 local web interface Step 6: Configure cellular connection using the web interface Step 7: Add your IX14 to your Digi Remote Manager account Next steps Hardware setup... - Page 5 Terminal Access Controller Access-Control System Plus (TACACS+) TACACS+ user configuration TACACS+ server failover and fallback to local authentication Configure your IX14 device to use a TACACS+ server Remote Authentication Dial-In User Service (RADIUS) RADIUS user configuration RADIUS server failover and fallback to local configuration...
- Page 6 Create a new binding System administration Review device status Configure system information Update system firmware Manage firmware updates using Digi Remote Manager Certificate management for firmware images Update the system firmware from the WebUI Update cellular module firmware Reboot your IX14 device...
- Page 7 Configure Digi Remote Manager Collect device health data and set the sample interval Log into Digi Remote Manager Use Digi Remote Manager to view and manage your device Add a device to Digi Remote Manager View Digi Remote Manager configuration and connection status...
- Page 8 Upload and download files Upload or download files using the Secure Copy command Upload or download files using SFTP Digi IX14 regulatory and safety statements RF exposure statement Federal Communication (FCC) Part 15 Class B Radio Frequency Interference (RFI) (FCC 15.105)
- Page 9 IX14 User Guide...
- Page 10 IX14 User Guide...
-
Page 11: What's New In Digi Ix14 Version 19.8
What's new in Digi IX14 version 19.8 Digi IX14 firmware version 19.8 release. IX14 User Guide... -
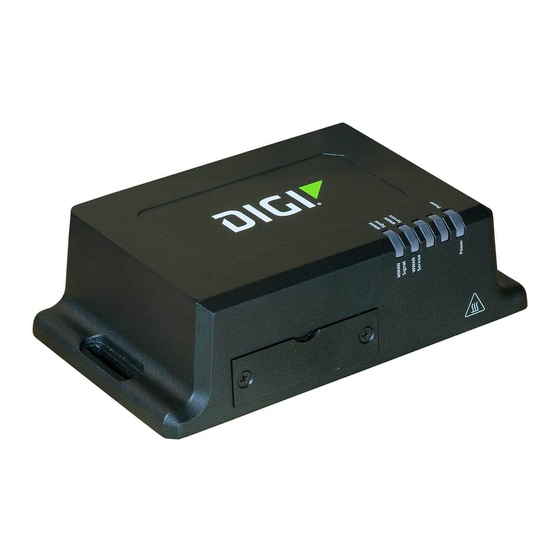
Page 12: Digi Ix14 Hardware Reference
Digi IX14 hardware reference IX14 features and specifications IX14 is a compact LTE CAT1 machine-to-machine (M2M) router suitable for a broad range of applications in rugged industrial environments. Key features include: Industrial grade components (operating temperatures from -29° F to +165° F/-34° C to +74° C) -
Page 13: Ix14 Power Supply Requirements
IX14 is intended to be powered by a certified power supply with output rated at either 12 VDC/0.75 A or 24 VDC/0.375 A minimum. If the IX14 is operated in an ambient temperature range from +0 C to +40 C, use the Digi power supply accessory kits 76002078 or 76002080 to meet the temperature criteria. -
Page 14: Digi Ix14 Serial Connector Pinout
100 Mbps connection; Off for no connection Solid green Valid link detected; Flashing for Ethernet activity Digi IX14 serial connector pinout The IX14 is a DTE device. The pinout for the DB9 serial connector is as follows: DTE signal Signal name RS232 signal... -
Page 15: Ix14 Antennas
Part numbers and accessories for details. IX14 antennas IX14 obtained complete certification by using the antenna described here. Use an antenna that matches these specifications to maintain the product certification. You can use antennas of the same type but operating with a lower gain. -
Page 16: Ix14 Quick Start
Quick start with Digi Remote Manager mobile app. Quick start with IX14 local WebUI If you do not have a smart phone or tablet, access the IX14 local WebUI to manually set up your IX14. Go to Quick start with IX14 local WebUI. -
Page 17: Quick Start With Digi Remote Manager Mobile App
The following steps guide you through IX14 setup using the Digi Remote Manager mobile app. Note If you do not have a smart phone or tablet, access the IX14 local WebUI to manually set up your IX14. Go to Quick start with IX14 local WebUI. -
Page 18: Step 3: Connect Hardware
Name), and SIM pin (if any) for each card. Laptop or personal computer Use an Ethernet cable to connect the IX14 WAN/ETH1 port to a laptop or PC to access the local web interface via a browser. Step 3: Connect hardware a. -
Page 19: Step 4: Quick Setup Using The Digi Remote Manager Mobile App
Quick start with Digi Remote Manager mobile app Step 4: Quick setup using the Digi Remote Manager mobile app Power LED is solid blue when the IX14 is ready. Step 4: Quick setup using the Digi Remote Manager mobile app Use the Digi Remote Manager mobile app to: Register your device in your Digi Remote Manager account using the QR code on the IX14 label. -
Page 20: Quick Start With Ix14 Local Webui
The following steps guide you through the IX14 setup using the IX14 local WebUI. Note If you have a smart phone or tablet, you can use the Digi Remote Manager mobile app to quickly set up your IX14. Go to Quick start with Digi Remote Manager mobile app. -
Page 21: Step 3: Connect Hardware
Quick start with IX14 local WebUI Step 3: Connect hardware Ethernet cable Use an Ethernet cable to connect the IX14 WAN/ETH1 port to a laptop or PC to access the local web interface via a browser or connect to a WAN. Phillips-head screwdriver Use a #1 Phillips-head screwdriver to remove and replace the SIM door when installing SIM cards. -
Page 22: Step 4: Sign Up For Digi Remote Manager
Click on the link in the email to log into Digi Remote Manager. Step 5: Access the IX14 local web interface a. If you have not already done so, use an Ethernet cable to connect your IX14 WAN/ETH1 port to your b. Open a browser and go to 192.168.2.1. -
Page 23: Step 6: Configure Cellular Connection Using The Web Interface
Click Add. b. Click OK. Digi Remote Manager adds your IX14 to your account and it appears in the Device Management view. IX14 User Guide... -
Page 24: Next Steps
Congratulations! You have completed the Quick start. To manage and configure your IX14 remotely using Digi Remote Manager, see Configure Digi Remote Manager. To manage and configure your IX14 locally using the local web interface, see Using the web interface. IX14 User Guide... -
Page 25: Hardware Setup
Hardware setup Install SIM cards Attach and position antennas Connect the WAN/ETH1 port Connect the serial port Power on the IX14 IX14 User Guide... -
Page 26: Install Sim Cards
1. On the IX14 front panel, use a #1 Phillips-head screwdriver to remove the SIM door. 2. If the IX14 device is used in an environment with high vibration levels, SIM card contact fretting may cause unexpected SIM card failures. To protect the SIM cards, Digi strongly recommends that you apply a thin layer of dielectric grease to the SIM contacts prior to installing the SIM cards. -
Page 27: Connect The Wan/Eth1 Port
Connect the WAN/ETH1 port Connect the WAN/ETH1 port Use an Ethernet cable to connect the IX14 to your local laptop or PC or to your local network (LAN). If you connect directly to your PC, the factory default IP address is 192.168.2.1 If you connect to a LAN that has a DHCP server, reboot the device after you connect and wait for the DHCP server to assign an IP address to the device. -
Page 28: Configuration And Management
Configuration and management Review IX14 default settings Reset default password for root Configuration Options Using the Digi Remote Manager Access the Digi Remote Manager Using the web interface Using the command line Access the command line interface Log in to the command line interface... -
Page 29: Review Ix14 Default Settings
Command line 1. Log into the IX14 command line as a user with Admin access. Depending on your device configuration, you may be presented with an Access selection menu. Type admin to access the Admin CLI. -
Page 30: Configuration Options
With the Remote Manager, you can configure your IX14 device and use the configuration as a basis for a profile which can be applied to other similar devices. See... -
Page 31: Using The Digi Remote Manager
Using the Digi Remote Manager Using the Digi Remote Manager By default, your IX14 device is configured to use Digi Remote Manager as its central management server. No configuration changes are required to begin using the Remote Manager. For information about configuring central management for your IX14 device, see... -
Page 32: Using The Command Line
Log in to the command line interface Command line 1. Connect to the IX14 device by using a serial connection, SSH or telnet, or the Terminal in the WebUI or the Console in the Digi Remote Manager. See Access the command line interface for more information. -
Page 33: Exit The Command Line Interface
2: Serial: port2 (9600,8,1,none,none) q: Quit Select access or quit [admin] : Type a or admin to access the IX14 command line. You will now be connected to the Admin CLI: Connecting now, 'exit' to disconnect from Admin CLI ... >... -
Page 34: Initial Configuration
Initial configuration Configure cellular modem APNs Change the default LAN subnet Change the LAN address type Configure SIM PIN Configure system settings Enable or disable Bluetooth service IX14 User Guide... -
Page 35: Configure Cellular Modem Apns
Configure cellular modem APNs Configure cellular modem APNs The IX14 device uses a preconfigured list of Access Point Names (APNs) when attempting to connect to a cellular carrier for the first time. After the device has successfully connected, it will remember the correct APN. - Page 36 The default is none. 7. (Optional) To configure the device to bypass its preconfigured APN list and only use the configured APNs: (config network interface modem modem apn 1)> ..apn_lock true (config network interface modem modem apn 1)> IX14 User Guide...
-
Page 37: Change The Default Lan Subnet
Change the default LAN subnet You can change the IX14 default LAN subnet—192.168.2.1/24—to any range of private IPs. The local DHCP server range will also change to the range of the LAN subnet. To change the LAN subnet: ... -
Page 38: Change The Lan Address Type
Command line 1. Log into the IX14 command line as a user with Admin access. Depending on your device configuration, you may be presented with an Access selection menu. Type admin to access the Admin CLI. -
Page 39: Configure Sim Pin
Command line 1. Log into the IX14 command line as a user with Admin access. Depending on your device configuration, you may be presented with an Access selection menu. Type admin to access the Admin CLI. - Page 40 Command line 1. Log into the IX14 command line as a user with Admin access. Depending on your device configuration, you may be presented with an Access selection menu. Type admin to access the Admin CLI.
- Page 41 (config)> system location "9350 Excelsior Blvd., Suite 700, Hopkins, MN" (config)> (Optional) Set the banner for the device. This is displayed when users access terminal services on the device. (config)> system banner "Welcome to the Digi IX14." (config)> 4. Configure scheduled tasks: Set the reboot time: (config)>...
- Page 42 5. If you want to add custom scripts, see Schedule system maintenance tasks for more information. 6. (Optional) Set the timezone for the location of your IX14 device. The default is UTC. (config)> system time timezone value (config)> Where value is the timezone using the format specified with the following command: (config)>...
- Page 43 Disable status events related to modem information, or change the status interval for modem status event logging from the default of 5 minutes: (config)> system log event modem status false (config)> system log event modem status_interval value (config)> Disable error and informational logging of active recovery tests: IX14 User Guide...
- Page 44 Disable status events related to network statistics, or change the status interval for network statistics event logging from the default of 30 minutes: (config)> system log event network status false (config)> system log event network status_interval value (config)> IX14 User Guide...
- Page 45 (config system log remote 1)> info true (config system log remote 1)> To send status events: (config system log remote 1)> status true (config system log remote 1)> 11. Save the configuration and apply the change: (config)> save Configuration saved. > IX14 User Guide...
-
Page 46: Enable Or Disable Bluetooth Service
Command line 1. Log into the IX14 command line as a user with Admin access. Depending on your device configuration, you may be presented with an Access selection menu. Type admin to access the Admin CLI. - Page 47 Depending on your device configuration, you may be presented with an Access selection menu. Type quit to disconnect from the device. Note You will not see the IX14 Bluetooth service listed on your smart phone or tablet. IX14 User Guide...
-
Page 48: User Authentication
User authentication About IX14 user authentication Configure user authentication methods Configure authentication groups Local users Terminal Access Controller Access-Control System Plus (TACACS+) Remote Authentication Dial-In User Service (RADIUS) Set the idle timeout for IX14 users Example user configuration IX14 User Guide... -
Page 49: About Ix14 User Authentication
You can modify the released groups and create additional groups as needed for your site. A user can be assigned to more than one group. Users: Local users for the IX14. By default, there is one local user named root that belongs to both the admin and serial groups. -
Page 50: Change The Predefined Authentication Method
Command line 1. Log into the IX14 command line as a user with Admin access. Depending on your device configuration, you may be presented with an Access selection menu. Type admin to access the Admin CLI. -
Page 51: Add A New Authentication Method
This procedure describes how to add methods to various places in the list. 1. Log into the IX14 command line as a user with Admin access. Depending on your device configuration, you may be presented with an Access selection menu. Type admin to access the Admin CLI. - Page 52 4. Save the configuration and apply the change: (config)> save Configuration saved. > 5. Type exit to exit the Admin CLI. Depending on your device configuration, you may be presented with an Access selection menu. Type quit to disconnect from the device. IX14 User Guide...
-
Page 53: Delete An Authentication Method
Command line 1. Log into the IX14 command line as a user with Admin access. Depending on your device configuration, you may be presented with an Access selection menu. Type admin to access the Admin CLI. -
Page 54: Rearrange The Position Of Authentication Methods
RADIUS is first and Local users is second: WebUI 1. Log into the IX14 WebUI as a user with Admin access. 2. On the menu, click Configuration. The System Configuration pane is displayed. 3. Click to expand the first Method. - Page 55 Command line 1. Log into the IX14 command line as a user with Admin access. Depending on your device configuration, you may be presented with an Access selection menu. Type admin to access the Admin CLI.
- Page 56 User authentication Configure user authentication methods 7. Type exit to exit the Admin CLI. Depending on your device configuration, you may be presented with an Access selection menu. Type quit to disconnect from the device. IX14 User Guide...
-
Page 57: Configure Authentication Groups
Shell access: Users with Shell access have the ability to access the shell when logging into the IX14 via telnet, ssh, or the serial console. Serial access: Users with Serial access have the ability to log into the IX14 device by using the serial console. - Page 58 Command line 1. Log into the IX14 command line as a user with Admin access. Depending on your device configuration, you may be presented with an Access selection menu. Type admin to access the Admin CLI.
- Page 59 1 device_type tun diffie 1 enable true metric 0 port 1194 no server_address server_cert 1 server_first_ip 80 server_key 1 server_last_ip 99 zone external (config)> IX14 User Guide...
- Page 60 8. Save the configuration and apply the change: (config)> save Configuration saved. > 9. Type exit to exit the Admin CLI. Depending on your device configuration, you may be presented with an Access selection menu. Type quit to disconnect from the device. IX14 User Guide...
-
Page 61: Change The Access Rights For A Predefined Group
Command line 1. Log into the IX14 command line as a user with Admin access. Depending on your device configuration, you may be presented with an Access selection menu. Type admin to access the Admin CLI. -
Page 62: Delete An Authentication Group
Delete an authentication group To delete an authentication group from your IX14: WebUI 1. Log into the IX14 WebUI as a user with Admin access. 2. On the menu, click Configuration. The System Configuration pane is displayed. 3. Click Authentication > Groups. - Page 63 Configure authentication groups Command line 1. Log into the IX14 command line as a user with Admin access. Depending on your device configuration, you may be presented with an Access selection menu. Type admin to access the Admin CLI.
-
Page 64: Local Users
TACACS+ or RADIUS. Local user authentication is enabled by default, with one preconfiged default user. Default user At manufacturing time, each IX14 device comes with a default user configured as follows: Username: root. Password: The default password is displayed on the label on the bottom of the device. -
Page 65: Configure A Local User
Local users Command line 1. Log into the IX14 command line as a user with Admin access. Depending on your device configuration, you may be presented with an Access selection menu. Type admin to access the Admin CLI. 2. At the command line, type config to enter configuration mode: >... - Page 66 One-time use eight-digit emergency scratch codes. To configure a local user: WebUI 1. Log into the IX14 WebUI as a user with Admin access. 2. On the menu, click Configuration. The System Configuration pane is displayed. 3. Click Authentication > Users.
- Page 67 Scratch codes are emergency codes that may be used once, at any time. To add a scratch code: i. Click Scratch codes. ii. Click Add. iii. For Code, enter the scratch code. The code must be eight digits, with a minimum of 10000000. iv. Click Add again to add additional scratch codes. IX14 User Guide...
- Page 68 Command line 1. Log into the IX14 command line as a user with Admin access. Depending on your device configuration, you may be presented with an Access selection menu. Type admin to access the Admin CLI.
- Page 69 For time-based verification only, configure the code refresh interval. This is the amount of time that a code will remain valid. (config auth user new_user 2fa)> refresh_interval value where value is any number of weeks, days, hours, minutes, or seconds, and takes the format number{w|d|h|m|s}. IX14 User Guide...
- Page 70 Where code is an digit number, with a minimum of 10000000. iii. To add additional scratch codes, use the add end code command again. 8. Save the configuration and apply the change: (config)> save Configuration saved. > IX14 User Guide...
-
Page 71: Delete A Local User
Command line 1. Log into the IX14 command line as a user with Admin access. Depending on your device configuration, you may be presented with an Access selection menu. Type admin to access the Admin CLI. - Page 72 4. Save the configuration and apply the change: (config)> save Configuration saved. > 5. Type exit to exit the Admin CLI. Depending on your device configuration, you may be presented with an Access selection menu. Type quit to disconnect from the device. IX14 User Guide...
-
Page 73: Terminal Access Controller Access-Control System Plus (Tacacs+)
When you are using TACACS+ authentication, you can have both local users and TACACS+ users able to log in to the device. To use TACACS+ authentication, you must set up a TACACS+ server that is accessible by the IX14 device prior to configuration. The process of setting up a TACACS+ server varies by the server environment. -
Page 74: Tacacs+ Server Failover And Fallback To Local Authentication
/etc/init.d/tacacs_plus restart TACACS+ server failover and fallback to local authentication In addition to the primary TACACS+ server, you can also configure your IX14 device to use backup TACACS+ servers. Backup TACACS+ servers are used for authentication requests when the primary TACACS+ server is unavailable. - Page 75 = testing123 8. (Optional) For Group attribute, type the name of the attribute used in the TACACS+ server's configuration to identify the IX14 authentication group or groups that the user is a member of. For example, in TACACS+ user configuration, the group attribute in the sample tac_plus.conf file is...
- Page 76 For example, in TACACS+ user configuration, the value of the service attribute in the sample tac_plus.conf file is system, which is also the default setting in the IX14 configuration. (config)> auth tacacs+ service service-name (config)> 10. (Optional) Repeat the above steps to add additional TACACS+ servers.
- Page 77 12. Save the configuration and apply the change: (config)> save Configuration saved. > 13. Type exit to exit the Admin CLI. Depending on your device configuration, you may be presented with an Access selection menu. Type quit to disconnect from the device. IX14 User Guide...
-
Page 78: Remote Authentication Dial-In User Service (Radius)
To use RADIUS authentication, you must set up a RADIUS server that is accessible by the IX14 device prior to configuration. The process of setting up a RADIUS server varies by the server environment. An example of a RADIUS server is FreeRADIUS. -
Page 79: Radius Server Failover And Fallback To Local Configuration
/etc/init.d/freeradius restart RADIUS server failover and fallback to local configuration In addition to the primary RADIUS server, you can also configure your IX14 device to use backup RADIUS servers. Backup RADIUS servers are used for authentication requests when the primary RADIUS server is unavailable. - Page 80 NAS or any arbitrary string. If not set, the default value is used: If you are accessing the IX14 device by using the WebUI, the default value is for NAS ID is httpd. If you are accessing the IX14 device by using ssh, the default value is sshd.
- Page 81 NAS or any arbitrary string. If not set, the default value is used: If you are accessing the IX14 device by using the WebUI, the default value is for NAS ID is httpd. If you are accessing the IX14 device by using ssh, the default value is sshd.
-
Page 82: Set The Idle Timeout For Ix14 Users
Command line 1. Log into the IX14 command line as a user with Admin access. Depending on your device configuration, you may be presented with an Access selection menu. Type admin to access the Admin CLI. - Page 83 User authentication Set the idle timeout for IX14 users For example, to set idle_timeout to ten minutes, enter either 10m or 600s: (config)> auth idle_timeout 600s (config)> 4. Save the configuration and apply the change: (config)> save Configuration saved. >...
-
Page 84: Example User Configuration
Command line 1. Log into the IX14 command line as a user with Admin access. Depending on your device configuration, you may be presented with an Access selection menu. Type admin to access the Admin CLI. -
Page 85: Example 2: Radius, Tacacs+, And Local Authentication For One User
Goal: To create a user with administrator rights who is authenticated by using all three authentication methods. In this example, when the user attempts to log in to the IX14 device, user authentication will occur in the following order: IX14 User Guide... - Page 86 In this example: The user's username is admin1. The user's password is password1. The authentication group on the IX14 device, admin, is identified in the Unix-FTP-Group- Names parameter. c. Save and close the users file. 2. Configure a user on the TACACS+ server: a.
- Page 87 Add a RADIUS user to the users file: admin1 Cleartext-Password := "password1" Unix-FTP-Group-Names := "admin" In this example: The user's username is admin1. The user's password is password1. The authentication group on the IX14 device, admin, is identified in the Unix-FTP-Group- Names parameter. IX14 User Guide...
- Page 88 In this example: The user's username is admin1. The user's password is password1. The authentication group on the IX14 device, admin, is identified in the groupname parameter. c. Save and close the tac_plus.conf file. 3. Log into the IX14 command line as a user with Admin access.
- Page 89 (config auth user adminuser)> save Configuration saved. > 9. Type exit to exit the Admin CLI. Depending on your device configuration, you may be presented with an Access selection menu. Type quit to disconnect from the device. IX14 User Guide...
-
Page 90: Firewall
Show port forwarding rules Delete a port forwarding rule Configure packet filtering Enable or disable a packet filtering rule Show packet filtering rules Delete a packet filtering rule Configure custom firewall rules Configure Quality of Service options IX14 User Guide... -
Page 91: Firewall Configuration
IPsec: The default zone for IPsec tunnels. Dynamic routes: Used for routes learned using routing services. Port forwarding: A list of rules that allow network connections to the IX14 to be forwarded to other servers by translating the destination address. -
Page 92: Configure The Firewall Zone For A Network Interface
Command line 1. Log into the IX14 command line as a user with Admin access. Depending on your device configuration, you may be presented with an Access selection menu. Type admin to access the Admin CLI. -
Page 93: Show Firewall Zones
Command line 1. Log into the IX14 command line as a user with Admin access. Depending on your device configuration, you may be presented with an Access selection menu. Type admin to access the Admin CLI. - Page 94 4. Type cancel to exit configuration mode: (config)> cancel > 5. Type exit to exit the Admin CLI. Depending on your device configuration, you may be presented with an Access selection menu. Type quit to disconnect from the device. IX14 User Guide...
-
Page 95: Delete A Custom Firewall Zone
Command line 1. Log into the IX14 command line as a user with Admin access. Depending on your device configuration, you may be presented with an Access selection menu. Type admin to access the Admin CLI. -
Page 96: Configure Port Forwarding
LAN. To configure a port forwarding rule: WebUI 1. Log into the IX14 WebUI as a user with Admin access. 2. On the menu, click Configuration. The System Configuration pane is displayed. 3. Click Firewall > Port forwarding. - Page 97 Configure port forwarding Command line 1. Log into the IX14 command line as a user with Admin access. Depending on your device configuration, you may be presented with an Access selection menu. Type admin to access the Admin CLI.
- Page 98 (config firewall dnat 0 acl)> Repeat for each appropriate IP address. To specify the firewall zone for white listing: (config firewall dnat 0 acl)> add zone end zone Repeat for each appropriate zone. To view a list of available zones: IX14 User Guide...
-
Page 99: Enable Or Disable A Port Forwarding Rule
To enable or disable a port forwarding rule: WebUI 1. Log into the IX14 WebUI as a user with Admin access. 2. On the menu, click Configuration. The System Configuration pane is displayed. 3. Click Firewall > Port forwarding. - Page 100 Enable or disable a port forwarding rule Command line 1. Log into the IX14 command line as a user with Admin access. Depending on your device configuration, you may be presented with an Access selection menu. Type admin to access the Admin CLI.
-
Page 101: Show Port Forwarding Rules
4. Click to expand each port forwarding rule to view the rule. Command line 1. Log into the IX14 command line as a user with Admin access. Depending on your device configuration, you may be presented with an Access selection menu. Type admin to access the Admin CLI. -
Page 102: Delete A Port Forwarding Rule
Delete a port forwarding rule To delete a port forwarding rule: WebUI 1. Log into the IX14 WebUI as a user with Admin access. 2. On the menu, click Configuration. The System Configuration pane is displayed. 3. Click Firewall > Port forwarding. - Page 103 Delete a port forwarding rule Command line 1. Log into the IX14 command line as a user with Admin access. Depending on your device configuration, you may be presented with an Access selection menu. Type admin to access the Admin CLI.
-
Page 104: Configure Packet Filtering
By default, one packet filtering rule, Allow all outgoing traffic, is enabled and monitors traffic going to and from the IX14 device. The predefined settings are intended to block unauthorized inbound traffic while providing an unrestricted flow of outgoing data. You can modify the default packet filtering rule and create additional rules to define how the device accepts or rejects traffic that is forwarded through the device. - Page 105 Configure packet filtering Command line 1. Log into the IX14 command line as a user with Admin access. Depending on your device configuration, you may be presented with an Access selection menu. Type admin to access the Admin CLI.
- Page 106 (config firewall filter 1)> where value is one of: ipv4 ipv6 The default is any. 9. Set the protocol. (config firewall filter 1)> protocol value (config firewall filter 1)> where value is one of: icmp icmpv6 The default is any. IX14 User Guide...
-
Page 107: Enable Or Disable A Packet Filtering Rule
Command line 1. Log into the IX14 command line as a user with Admin access. Depending on your device configuration, you may be presented with an Access selection menu. Type admin to access the Admin CLI. -
Page 108: Show Packet Filtering Rules
4. Click to expand each packet filtering rule to view the rule. Command line 1. Log into the IX14 command line as a user with Admin access. Depending on your device configuration, you may be presented with an Access selection menu. Type admin to access the Admin CLI. -
Page 109: Delete A Packet Filtering Rule
Delete a packet filtering rule To delete a packet filtering rule: WebUI 1. Log into the IX14 WebUI as a user with Admin access. 2. On the menu, click Configuration. The System Configuration pane is displayed. 3. Click Firewall > Packet filtering. - Page 110 Delete a packet filtering rule Command line 1. Log into the IX14 command line as a user with Admin access. Depending on your device configuration, you may be presented with an Access selection menu. Type admin to access the Admin CLI.
-
Page 111: Configure Custom Firewall Rules
Command line 1. Log into the IX14 command line as a user with Admin access. Depending on your device configuration, you may be presented with an Access selection menu. Type admin to access the Admin CLI. -
Page 112: Configure Quality Of Service Options
Command line 1. Log into the IX14 command line as a user with Admin access. Depending on your device configuration, you may be presented with an Access selection menu. Type admin to access the Admin CLI. - Page 113 5. Save the configuration and apply the change: (config)> save Configuration saved. > 6. Type exit to exit the Admin CLI. Depending on your device configuration, you may be presented with an Access selection menu. Type quit to disconnect from the device. IX14 User Guide...
-
Page 114: Create A New Binding
Command line 1. Log into the IX14 command line as a user with Admin access. Depending on your device configuration, you may be presented with an Access selection menu. Type admin to access the Admin CLI. - Page 115 7. Save the configuration and apply the change: (config)> save Configuration saved. > 8. Type exit to exit the Admin CLI. Depending on your device configuration, you may be presented with an Access selection menu. Type quit to disconnect from the device. IX14 User Guide...
-
Page 116: System Administration
System administration Review device status Configure system information Update system firmware Update cellular module firmware Reboot your IX14 device Reset the device to factory defaults Configuration files Schedule system maintenance tasks Create a Virtual LAN (VLAN) route Example: Configure VPN access with IPSec tunnels... -
Page 117: Review Device Status
Show basic system information: 1. Log into the IX14 command line as a user with Admin access. Depending on your device configuration, you may be presented with an Access selection menu. Type admin to access the Admin CLI. -
Page 118: Configure System Information
Disk /var Usage : 1.132MB/262.144MB(0%) > Configure system information You can configure information related to your IX14 device, such as providing a name and location for the device. Configuration items A name for the device. The name of a contact for the device. -
Page 119: Update System Firmware
For example, IX14-19.8.1.30.bin. Manage firmware updates using Digi Remote Manager If you have a network of many devices, you can use Digi Remote Manager Profiles to manage firmware updates. Profiles ensure all your devices are running the correct firmware version and that... -
Page 120: Certificate Management For Firmware Images
Update the system firmware from the WebUI WebUI 1. Download the IX14 operating system firmware from the Digi Support FTP site to your local machine. 2. Log into the IX14 WebUI as a user with Admin access. 3. On the main menu, click System. - Page 121 > reboot Rebooting system > 7. Once the device has rebooted, log into the IX14's command line as a user with Admin access and verify the running firmware version by entering the show system command. > show system...
-
Page 122: Update Cellular Module Firmware
6. Click Upload & Install Firmware. Reboot your IX14 device You can reboot the IX14 device immediately or schedule a reboot for a specific time every day. Note You may want to save your configuration settings to a file before rebooting. See... -
Page 123: Schedule Reboots Of Your Device
Command line 1. Log into the IX14 command line as a user with Admin access. Depending on your device configuration, you may be presented with an Access selection menu. Type admin to access the Admin CLI. -
Page 124: Reset The Device To Factory Defaults
4. Click OK to confirm. Command line 1. Log into the IX14 command line as a user with Admin access. Depending on your device configuration, you may be presented with an Access selection menu. Type admin to access the Admin CLI. - Page 125 System administration Reset the device to factory defaults 1. Log into the IX14 command line as a user with Admin access. Depending on your device configuration, you may be presented with an Access selection menu. Type admin to access the Admin CLI.
-
Page 126: Configuration Files
Save configuration changes When you make changes to the IX14 configuration, the changes are not automatically saved. You must explicitly save configuration changes, which also applies to changes. If you do not save configuration changes, the system discards the changes. -
Page 127: Save Configuration To A File
System administration Configuration files Save configuration to a file You can save your IX14 device's configuration to a file and use this file to restore the configuration, either to the same device or to similar devices. WebUI This procedure creates a binary archive file containing the device's configuration, certificates and keys, and other information. -
Page 128: Restore The Device Configuration
> scp host 192.168.4.1 user admin remote /home/admin/bin/ local /etc/config/backup-archive-0040FF800120-19.05.17-19.01.17.bin to remote Restore the device configuration You can restore a configuration file to your IX14 device by using a backup from the device, or a backup from a similar device. ... - Page 129 3. Enter the following: > system restore path [passphrase passphrase] where path is the location on the IX14's filesystem where the configuration backup file should be saved. passphrase (optional) is the passphrase to restore the configuration backup, if a passphrase was used when the backup was created.
-
Page 130: Schedule System Maintenance Tasks
Custom scripts that should be run as part of the configuration check. WebUI 1. Log into the IX14 WebUI as a user with Admin access. 2. On the menu, click Configuration. The System Configuration pane is displayed. 3. Click System > Scheduled tasks > System maintenance. - Page 131 If neither option is selected, only the script's exit code is written to the system log. h. For Maximum memory, enter the maximum amount of memory available to be used by the script and its subprocesses, using the format number{b|bytes|KB|k|MB|MB|M|GB|G|TB|T}. IX14 User Guide...
- Page 132 Command line 1. Log into the IX14 command line as a user with Admin access. Depending on your device configuration, you may be presented with an Access selection menu. Type admin to access the Admin CLI.
- Page 133 The script will run once each time the device boots. If boot is selected, set the action that will be taken when the script completes: (config system schedule script 0)> exit_action action (config system schedule script 0)> where action is one of the following: IX14 User Guide...
- Page 134 To log the script's output to the system log: (config system schedule script 0)> syslog_stdout true (config system schedule script 0)> To log script errors to the system log: (config system schedule script 0)> syslog_stderr true (config system schedule script 0)> IX14 User Guide...
-
Page 135: Create A Virtual Lan (Vlan) Route
The VLAN ID. The TCP header uses the VLAN ID to identify the destination VLAN for the packet. To create a VLAN: WebUI 1. Log into the IX14 WebUI as a user with Admin access. 2. On the menu, click Configuration. The System Configuration pane is displayed. 3. Click Network > Virtual LAN. - Page 136 Command line 1. Log into the IX14 command line as a user with Admin access. Depending on your device configuration, you may be presented with an Access selection menu. Type admin to access the Admin CLI.
-
Page 137: Example: Configure Vpn Access With Ipsec Tunnels
Rule to allow return traffic from the remote network through the IPsec tunnel back to the local LAN devices. The sample configuration shows a IX14 with a tunnel to a VPN server at 12.13.14.15 through its cellular modem. The client laptop connected to the IX14 WAN/ETH1 Ethernet port can then use the IPsec tunnel to access any IP address in the 10.255.0.0/16 range behind the IPsec server. -
Page 138: Task Two: Configure The Firewall
6. Click Save to save the configuration and apply the change. The Save button is located at the bottom of the WebUI page. You may need to scroll to the bottom of the page to locate it. Command line IX14 User Guide... - Page 139 System administration Example: Configure VPN access with IPSec tunnels 1. Log into the IX14 command line as a user with Admin access. Depending on your device configuration, you may be presented with an Access selection menu. Type admin to access the Admin CLI.
- Page 140 (config vpn ipsec tunnel my_tunnel ike)> add phase2_proposal end (config vpn ipsec tunnel my_tunnel ike phase2_proposal 0)> cipher aes128 (config vpn ipsec tunnel my_tunnel ike phase2_proposal 0)> dhgroup modp768 (config vpn ipsec tunnel my_tunnel ike phase2_proposal 0)> IX14 User Guide...
- Page 141 (config firewall filter 1)> src_zone ipsec (config firewall filter 1)> e. Set the destination zone to internal: (config firewall filter 1)> dst_zone internal (config firewall filter 1)> 12. Save the configuration and apply the change: (config)> save Configuration saved. > IX14 User Guide...
- Page 142 System administration Example: Configure VPN access with IPSec tunnels 13. Type exit to exit the Admin CLI. Depending on your device configuration, you may be presented with an Access selection menu. Type quit to disconnect from the device. IX14 User Guide...
-
Page 143: Serial Port
IX14 devices have a single serial port that provides access to the command-line interface. Use an RS-232 serial cable to establish a serial connection from your IX14 to your local laptop or PC. Use a terminal emulator program to establish the serial connection. The terminal emulator's serial connection must be configured to match the configuration of the IX14 device's serial port. - Page 144 Command line 1. Log into the IX14 command line as a user with Admin access. Depending on your device configuration, you may be presented with an Access selection menu. Type admin to access the Admin CLI.
-
Page 145: Show Serial Status And Statistics
3. Click Serial. Command line 1. Log into the IX14 command line as a user with Admin access. Depending on your device configuration, you may be presented with an Access selection menu. Type admin to access the Admin CLI. - Page 146 System administration Serial port 3. Type exit to exit the Admin CLI. Depending on your device configuration, you may be presented with an Access selection menu. Type quit to disconnect from the device. IX14 User Guide...
-
Page 147: Services
Use SSH with key authentication Configure telnet access Configure DNS Simple Network Management Protocol (SNMP) System time Configure the system time Network Time Protocol Configure the device as an NTP server Configure a multicast route Enable service discovery (mDNS) IX14 User Guide... -
Page 148: Allow Remote Access For Web Administration And Ssh
Allow remote access for web administration and SSH Allow remote access for web administration and SSH By default, only devices connected to the IX14's LAN have access to the device via web administration and SSH. To enable these services for access from remote devices: The IX14 device must have a publicly reachable IP address. -
Page 149: Configure The Web Administration Service
By default, the web administration service is enabled and uses the standard HTTPS port, 443. The default access control for the service uses the Internal firewall zone, which means that only devices connected to the IX14's LAN can access the WebUI. If this configuration is sufficient for your needs, no further configuration is required. See Allow remote access for web administration and SSH information about configuring the web administration service to allow access from remote devices. - Page 150 Command line 1. Log into the IX14 command line as a user with Admin access. Depending on your device configuration, you may be presented with an Access selection menu. Type admin to access the Admin CLI.
- Page 151 No limit to IPv6 addresses that can access the web administration service. d. Click Add again to list additional IP addresses or networks. To limit access to hosts connected through a specified interface on the IX14 device: a. Click Interfaces.
- Page 152 Command line 1. Log into the IX14 command line as a user with Admin access. Depending on your device configuration, you may be presented with an Access selection menu. Type admin to access the Admin CLI.
- Page 153 No limit to IPv6 addresses that can access the web administratrion service. Repeat this step to list additional IP addresses or networks. To limit access to hosts connected through a specified interface on the IX14 device: (config)> add service web_admin acl interface end value (config)>...
- Page 154 (config)> service web_admin legacy_encryption true (config)> 8. (Optional) Disable legacy port redirection. Legacy port redirection is used to redirect client HTTP requests to the HTTPS service. Legacy port redirection is enabled by default, and normally these settings should not be changed. IX14 User Guide...
-
Page 155: Configure Ssh Access
Configure SSH access The IX14's default configuration has SSH access enabled, and allows SSH access to the device from authorized users within the Internal firewall zone. If this configuration is sufficient for your needs, no further configuration is required. See Allow remote access for web administration and SSH information about configuring the SSH service to allow access from remote devices. - Page 156 Configure the service WebUI 1. Log into the IX14 WebUI as a user with Admin access. 2. On the menu, click Configuration. The System Configuration pane is displayed. 3. Click Services > SSH.
- Page 157 No limit to IPv6 addresses that can access the SSH service. d. Click Add again to list additional IP addresses or networks. To limit access to hosts connected through a specified interface on the IX14 device: a. Click Interfaces.
- Page 158 No limit to IPv6 addresses that can access the SSH service. Repeat this step to list additional IP addresses or networks. To limit access to hosts connected through a specified interface on the IX14 device: (config)> add service ssh acl interface end value (config)>...
- Page 159 6. (Optional) Set the port number for this service. The default setting of 22 normally should not be changed. (config)> service ssh port 24 (config)> 7. Save the configuration and apply the change: (config)> save Configuration saved. > IX14 User Guide...
-
Page 160: Use Ssh With Key Authentication
SSH public key for the user Additional configuration items If you want to access the IX14 device using SSH over a WAN interface, configure the access control list for the SSH service to allow SSH access for the External firewall zone. - Page 161 These instructions assume an existing user named temp_user. 1. Log into the IX14 command line as a user with Admin access. Depending on your device configuration, you may be presented with an Access selection menu. Type admin to access the Admin CLI.
-
Page 162: Configure Telnet Access
Command line 1. Log into the IX14 command line as a user with Admin access. Depending on your device configuration, you may be presented with an Access selection menu. Type admin to access the Admin CLI. - Page 163 No limit to IPv6 addresses that can access the telnet service. d. Click Add again to list additional IP addresses or networks. To limit access to hosts connected through a specified interface on the IX14 device: a. Click Interfaces.
- Page 164 Command line 1. Log into the IX14 command line as a user with Admin access. Depending on your device configuration, you may be presented with an Access selection menu. Type admin to access the Admin CLI.
- Page 165 Services Configure telnet access To limit access to hosts connected through a specified interface on the IX14 device: (config)> add service telnet acl interface end value (config)> Where value is an interface defined on your device. Display a list of available interfaces: Use network interface ? to display interface information: (config)>...
-
Page 166: Configure Dns
Configure DNS The IX14 device includes a caching DNS server which forwards queries to the DNS servers that are associated with the network interfaces, and caches the results. This server is used within the device, and cannot be disabled. - Page 167 No limit to IPv6 addresses that can access the DNS service. d. Click Add again to list additional IP addresses or networks. To limit access to hosts connected through a specified interface on the IX14 device: a. Click Interfaces.
- Page 168 Command line 1. Log into the IX14 command line as a user with Admin access. Depending on your device configuration, you may be presented with an Access selection menu. Type admin to access the Admin CLI.
- Page 169 No limit to IPv6 addresses that can access the DNS service. Repeat this step to list additional IP addresses or networks. To limit access to hosts connected through a specified interface on the IX14 device: (config)> add service dns acl interface end value (config)>...
- Page 170 By default, localhost rebinding is enabled by default if rebind protection is enabled. This is useful for Real-time Black List (RBL) servers. To disable: (config)> service dns rebind_localhost_ok false (config)> 8. (Optional) Add additional DNS servers a. Add a DNS server: (config)> add service dns server end (config service dns server 0)> IX14 User Guide...
- Page 171 10. Save the configuration and apply the change: (config)> save Configuration saved. > 11. Type exit to exit the Admin CLI. Depending on your device configuration, you may be presented with an Access selection menu. Type quit to disconnect from the device. IX14 User Guide...
-
Page 172: Simple Network Management Protocol (Snmp)
By default, the IX14 device automatically blocks SNMP packets from being received over WAN and LAN interfaces. As a result, if you want a IX14 device to receive SNMP packets, you must configure the SNMP access control list to allow the device to receive the packets. - Page 173 No limit to IPv6 addresses that can access the SNMP agent. d. Click Add again to list additional IP addresses or networks. To limit access to hosts connected through a specified interface on the IX14 device: a. Click Interfaces.
- Page 174 No limit to IPv6 addresses that can access the SNMP service. Repeat this step to list additional IP addresses or networks. To limit access to hosts connected through a specified interface on the IX14 device: (config)> add service snmp acl interface end value (config)>...
- Page 175 (config)> service snmp port port (config)> 8. (Optional) Configure Multicast DNS (mDNS) mDNS is a protocol that resolves host names in small networks that do not have a DNS server. For the SNMP agent, mDNS is disabled by default. To enable: IX14 User Guide...
-
Page 176: Use The Snmp Service
3. Under the SNMP MIBS, click Download MIBs. System time By default, the IX14 device synchronizes the system time by periodically connecting to the Digi NTP server, time.devicecloud.com. In this mode, the device queries the time server based on following events and schedule: At boot time. -
Page 177: Configure The System Time
The IX14 device can also be configured to use Network Time Protocol (NTP). In this configuration, the device serves as an NTP server, providing NTP services to downstream devices. See Network Time Protocol for more information about NTP server support. - Page 178 2. At the command line, type config to enter configuration mode: > config (config)> 3. (Optional) Set the timezone for the location of your IX14 device. The default is UTC. (config)> system time timezone value (config)> Where value is the timezone using the format specified with the following command: (config)>...
-
Page 179: Network Time Protocol
Network Time Protocol (NTP) enables devices connected on local and worldwide networks to synchronize their internal software and hardware clocks to the same time source. The IX14 device can be configured as an NTP server, allowing downstream hosts that are attached to the device's Local Area Networks to synchronize with the device. - Page 180 3. Click Services > NTP. 4. Enable the IX14 device's NTP service by clicking Enable. 5. (Optional) Configure the access control list to limit downstream access to the IX14 device's NTP service. To limit access to specified IPv4 addresses and networks: a.
- Page 181 Command line 1. Log into the IX14 command line as a user with Admin access. Depending on your device configuration, you may be presented with an Access selection menu. Type admin to access the Admin CLI.
- Page 182 Configure the system time for more information about NTP client configuration. 5. (Optional) Configure the access control list to limit downstream access to the IX14 device's NTP service. To limit access to specified IPv4 addresses and networks: (config)> add service ntp acl address end value (config)>...
- Page 183 Services Configure the device as an NTP server To limit access to hosts connected through a specified interface on the IX14 device: (config)> add service ntp acl interface end value (config)> Where value is an interface defined on your device.
-
Page 184: Configure A Multicast Route
By default, the access control list for the NTP service is empty, which means that all downstream hosts connected to the IX14 device can use the NTP service. 6. (Optional) Set the timezone for the location of your IX14 device. The default is UTC. (config)> system time timezone value (config)>... - Page 185 7. Type the Source port. Ensure the port is not used by another protocol. 8. Select a Source interface where multicast packets will arrive. 9. Select a Destination interface that the IX14 device will use to send mutlicast packets. 10. Click Save to save the configuration and apply the change.
-
Page 186: Enable Service Discovery (Mdns)
Loopback modem Modem (config service multicast test)> 8. Set the destination interface that the IX14 device will use to send mutlicast packets. (config service multicast test)> interface interface (config service multicast test)> Display a list of available interfaces: Use network interface ? to display interface information: (config)>... - Page 187 No limit to IPv6 addresses that can access the mDNS service. d. Click Add again to list additional IP addresses or networks. To limit access to hosts connected through a specified interface on the IX14 device: a. Click Interfaces.
- Page 188 No limit to IPv6 addresses that can access the mDNS service. Repeat this step to list additional IP addresses or networks. To limit access to hosts connected through a specified interface on the IX14 device: (config)> add service mdns acl interface end value (config)>...
- Page 189 5. Save the configuration and apply the change: (config)> save Configuration saved. > 6. Type exit to exit the Admin CLI. Depending on your device configuration, you may be presented with an Access selection menu. Type quit to disconnect from the device. IX14 User Guide...
-
Page 190: Applications
Applications The IX14 supports Python 3.6 and provides you with the ability to run Python applications on the device interactively or from a file. You can also specify Python applications and other scripts to be run each time the device system restarts, at specific intervals, or at a specified time. -
Page 191: Configure Applications To Run Automatically
The uploaded file is uploaded to the /etc/config/scripts directory. Command line 1. Log into the IX14 command line as a user with Admin access. Depending on your device configuration, you may be presented with an Access selection menu. Type admin to access the Admin CLI. -
Page 192: Task Two: Configure The Application To Run Automatically
IX14 device. local-path is the location on the IX14 device where the file will be copied. For example: To upload a Python application from a remote host with an IP address of 192.168.4.1 to the /etc/config/scripts directory on the IX14 device, issue the following command: >... - Page 193 Command line 1. Log into the IX14 command line as a user with Admin access. Depending on your device configuration, you may be presented with an Access selection menu. Type admin to access the Admin CLI.
- Page 194 For example, to set the interval to ten minutes, enter either 10m or 600s: (config system schedule script 0)> on_interval 600s (config system schedule script 0)> IX14 User Guide...
- Page 195 10. To run the script only once at the specified time: (config system schedule script 0)> once true (config system schedule script 0)> If once is enabled, rebooting the device will cause the script to run again. The only way to re-run the script is to: IX14 User Guide...
-
Page 196: Run A Python Application At The Shell Prompt
The uploaded file is uploaded to the /etc/config/scripts directory. Command line a. Log into the IX14 command line as a user with Admin access. Depending on your device configuration, you may be presented with an Access selection menu. Type admin to access the Admin CLI. -
Page 197: Start An Interactive Python Session
IX14 device. local-path is the location on the IX14 device where the file will be copied. For example: To upload a Python application from a remote host with an IP address of 192.168.4.1 to the /etc/config/scripts directory on the IX14 device, issue the following command: >... - Page 198 >>> help("digidevice") Help on package digidevice: NAME digidevice - Digi device python extensions DESCRIPTION This module includes various extensions that allow Python to interact with additional features offered by the device. 4. Use Ctrl-D to exit the Python session. You can also exit the session using exit() or quit().
-
Page 199: Digidevice Module
Use digidevice.cli to execute CLI commands Use digidevice.datapoint to upload custom datapoints to Remote Manager Use digidevice.config for device configuration Use Python to respond to DRM SCI requests Use digidevice runtime to access the runtime database IX14 User Guide... -
Page 200: Use Digidevice.cli To Execute Cli Commands
1. Log into the IX14 command line as a user with shell access. Depending on your device configuration, you may be presented with an Access selection menu. Type shell to access the device shell. -
Page 201: Use Digidevice.datapoint To Upload Custom Datapoints To Remote Manager
Applications Digidevice module 1. Log into the IX14 command line as a user with shell access. Depending on your device configuration, you may be presented with an Access selection menu. Type shell to access the device shell. 2. At the shell prompt, use the python command with no parameters to enter an interactive Python... - Page 202 Help for using Python to upload custom datapoints to Remote Manager Get help for uploading datapoints to your Digi Remote Manager account by accessing help for datapoint.upload: 1. Log into the IX14 command line as a user with shell access.
-
Page 203: Use Digidevice.config For Device Configuration
Read the device configuration Use the get() method to read the device configuration: 1. Log into the IX14 command line as a user with shell access. Depending on your device configuration, you may be presented with an Access selection menu. Type shell to access the device shell. - Page 204 Modify the device configuration Use the set() and commit() methods to modify the device configuration: 1. Log into the IX14 command line as a user with shell access. Depending on your device configuration, you may be presented with an Access selection menu. Type shell to access the device shell.
-
Page 205: Use Python To Respond To Drm Sci Requests
DRM's Server Command Interface (SCI), a web service that allows users to access information and perform commands that relate to their devices. Use DRM's SCI interface to create SCI requests that are sent to your IX14 device, and use the device_ request module to send responses to those requests to DRM. - Page 206 3. Click Examples > SCI > Data Service > Send Request. Code similar to the following will be displayed in the HTTP message body text box: <sci_request version="1.0"> <data_service> <targets> <device id="00000000-00000000-0000FFFF-A83CF6A3"/> </targets> <requests> <device_request target_name="myTarget"> my payload string </device_request> </requests> </data_service> </sci_request> IX14 User Guide...
- Page 207 # Do not let the process finish so that it handles device requests while True: time.sleep(10) 2. Upload the showsystem.py application to the /etc/config/scripts directory on two or more Digi devices. In this example, we will upload it to two devices, and use the same request in DRM to query both devices.
- Page 208 Command line i. Log into the IX14 command line as a user with Admin access. Depending on your device configuration, you may be presented with an Access selection menu. Type admin to access the Admin CLI.
- Page 209 > reboot To run the application from the shell prompt: i. Log into the IX14 command line as a user with shell access. Depending on your device configuration, you may be presented with an Access selection menu. Type shell to access the device shell.
- Page 210 <device_request target_name="showSystem"> 8. Click Send. You should receive a response similar to the following: <sci_reply version="1.0"> <data_service> <device id="00000000-00000000-0000FFFF-A83CF6A3"/> <requests> <device_request target_name="showSystem" status="0">Model : Digi IX14 Serial Number : IX14-000068 Hostname : IX14 : 0040D0133536 Hardware Version : 50001959-01 A Firmware Version : 19.8.1.30...
- Page 211 </sci_request> Help for using Python to respond to DRM SCI requests Get help for respond to Digi Remote Manager (DRM) Server Command Interface (SCI) requests by accessing help for digidevice.device_request: 1. Log into the IX14 command line as a user with shell access.
-
Page 212: Use Digidevice Runtime To Access The Runtime Database
Read from the runtime database Use the keys() and get() methods to read the device configuration: 1. Log into the IX14 command line as a user with shell access. Depending on your device configuration, you may be presented with an Access selection menu. Type shell to access the device shell. - Page 213 Modify the runtime database Use the set() method to modify the runtime database: 1. Log into the IX14 command line as a user with shell access. Depending on your device configuration, you may be presented with an Access selection menu. Type shell to access the device shell.
- Page 214 Get help for reading and modifying the device runtime database by accessing help for digidevice.runt: 1. Log into the IX14 command line as a user with shell access. Depending on your device configuration, you may be presented with an Access selection menu. Type shell to access the device shell.
- Page 215 Applications Digidevice module 5. Use Ctrl-D to exit the Python session. You can also exit the session using exit() or quit(). IX14 User Guide...
-
Page 216: Central Management With Digi Remote Manager
Configure Digi Remote Manager Collect device health data and set the sample interval Log into Digi Remote Manager Use Digi Remote Manager to view and manage your device Add a device to Digi Remote Manager View Digi Remote Manager configuration and connection status... -
Page 217: Digi Remote Manager Support
DRM servers also provide a data storage facility. To use Digi Remote Manager, you must set up a DRM account. To set up a DRM account and learn more about Digi Remote Manager, go to www.digi.com/products/cloud/digi-remote-manager. - Page 218 (config)> cloud drm drm_url url (config)> 3. (Optional) Set the amount of time that the IX14 device should wait before reattempting to connect to the Digi Remote Manager server after being disconnected. The minimum value is ten seconds. The default is 30 seconds.
-
Page 219: Collect Device Health Data And Set The Sample Interval
Collect device health data and set the sample interval You can enable or disable the collection of device health data to upload to Digi Remote Manager, and configure the interval between health sample uploads. By default, device health data upload is enabled, and the health sample interval is set to 60 minutes. -
Page 220: Log Into Digi Remote Manager
Log into Digi Remote Manager Command line 1. Log into the IX14 command line as a user with Admin access. Depending on your device configuration, you may be presented with an Access selection menu. Type admin to access the Admin CLI. -
Page 221: Use Digi Remote Manager To View And Manage Your Device
Use Digi Remote Manager to view and manage your device To view and manage your device: 1. If you have not already done so, connect to your Digi Remote Manager account. 2. Click Device Management to display a list of your devices. -
Page 222: Add A Device To Digi Remote Manager
6. Click Add. 7. Click OK. Digi Remote Manager adds your IX14 device to your account and it appears in the Device Management view. View Digi Remote Manager configuration and connection status To view the current Digi Remote Manager configuration: ... -
Page 223: Use The Digi Remote Manager Mobile App
2. Follow the prompts to complete your IX14 registration. Digi Remote Manager registers your IX14 and adds it to your Digi Remote Manager device list. You can now manage the device remotely using Digi Remote Manager. IX14 User Guide... -
Page 224: Configure Multiple Devices Using Profiles
Digi recommends you take advantage of Digi Remote Manager profiles to manage multiple IX14 routers. Typically, if you want to provision multiple IX14 routers: 1. Using the IX14 local WebUI, configure one IX14 router to use as the model configuration for all subsequent IX14s you need to manage. -
Page 225: Monitoring
Monitoring Enable IntelliFlow Configure NetFlow Probe IX14 User Guide... -
Page 226: Enable Intelliflow
IntelliFlow keeps track of network data usage and traffic information and displays the information in a series of charts available in the local WebUI. To use IntelliFlow, the IX14 must be powered on and you must have access to the local WebUI. Once you enable IntelliFlow, the Dashboard option appears in the main navigation menu. -
Page 227: System Resources Chart
System resources chart To generate a System resources chart: WebUI 1. Log into the IX14 WebUI as a user with Admin access. 2. If you have not already done so, enable IntelliFlow. See Enable IntelliFlow. 3. From the menu, click Dashboard. -
Page 228: Top Data Users Chart
Top data users chart To generate a Top data users chart: WebUI 1. Log into the IX14 WebUI as a user with Admin access. 2. If you have not already done so, enable IntelliFlow. See Enable IntelliFlow. 3. From the menu, click Dashboard. -
Page 229: Top Servers Accessed Chart
Top servers accessed chart To generate a Top servers accessed chart: WebUI 1. Log into the IX14 WebUI as a user with Admin access. 2. If you have not already done so, enable IntelliFlow. See Enable IntelliFlow. 3. From the menu, click Dashboard. -
Page 230: Port Usage Chart
Port usage chart To generate a Port usage chart: WebUI 1. Log into the IX14 WebUI as a user with Admin access. 2. If you have not already done so, enable IntelliFlow. See Enable IntelliFlow. 3. From the menu, click Dashboard. -
Page 231: Export Chart To Png
1. When a chart is displayed, click (Chart menu). 2. Select Print chart. 3. Fill in print options and click Print. Configure NetFlow Probe NetFlow probe is used to probe network traffic on the IX14 device and export statistics to NetFlow collectors. Required configuration items Enable NetFlow. - Page 232 Command line 1. Log into the IX14 command line as a user with Admin access. Depending on your device configuration, you may be presented with an Access selection menu. Type admin to access the Admin CLI.
- Page 233 6. Set the number of seconds that a flow can be inactive before sent to a collector: (config)> monitoring netflow inactive_timeout value (config)> where value is any is any number between 1 and 15. The default is 15. IX14 User Guide...
- Page 234 (config monitoring netflow collector 0)> save Configuration saved. > 11. Type exit to exit the Admin CLI. Depending on your device configuration, you may be presented with an Access selection menu. Type quit to disconnect from the device. IX14 User Guide...
-
Page 235: Diagnostics
Generate a support report View event and system logs Configure syslog servers Configure options for the event and system logs Analyze network traffic Use the ping command to troubleshoot network connections Use the traceroute command to diagnose IP routing problems IX14 User Guide... -
Page 236: Generate A Support Report
Attach the support report to any support requests. Command line 1. Log into the IX14 command line as a user with Admin access. Depending on your device configuration, you may be presented with an Access selection menu. Type admin to access the Admin CLI. -
Page 237: View Event And System Logs
2. On the main menu, click Events to display the Event Viewer. Command line 1. Log into the IX14 command line as a user with Admin access. Depending on your device configuration, you may be presented with an Access selection menu. Type admin to access the Admin CLI. - Page 238 4. Use the pull-down filter to select the type of events you want to include in the log. Command line 1. Log into the IX14 command line as a user with Admin access. Depending on your device configuration, you may be presented with an Access selection menu. Type admin to access the Admin CLI.
-
Page 239: Configure Syslog Servers
Command line 1. Log into the IX14 command line as a user with Admin access. Depending on your device configuration, you may be presented with an Access selection menu. Type admin to access the Admin CLI. -
Page 240: Configure Options For The Event And System Logs
30 minutes. All event categories are enabled. To change or disable the heartbeat interval, or to disable event categories, and to perform other log configuration: IX14 User Guide... - Page 241 Select the event categories that will be sent to the server. 7. Enable Preserve system logs to save the current session's system log after a reboot. By default, the IX14 device erases system logs each time the device is powered off or rebooted. Note You should only enable Preserve system logs temporarily to debug issues.
- Page 242 To disable the heartbeat interval, set the value to 0s 4. Enable preserve system logs functionality to save the current session's system log after a reboot. By default, the IX14 device erases system logs each time the device is powered off or rebooted. Note You should only enable Preserve system logs temporarily to debug issues.
- Page 243 For example, to set the status interval to ten minutes, enter either 10m or 600s: (config)> system log event dhcpserver status_interval 600s (config)> IX14 User Guide...
- Page 244 7. Save the configuration and apply the change: (config)> save Configuration saved. > 8. Type exit to exit the Admin CLI. Depending on your device configuration, you may be presented with an Access selection menu. Type quit to disconnect from the device. IX14 User Guide...
-
Page 245: Analyze Network Traffic
To start capturing packets: Command line 1. Log into the IX14 command line as a user with Admin access. Depending on your device configuration, you may be presented with an Access selection menu. Type admin to access the Admin CLI. -
Page 246: Define Filters For Capturing Data Traffic
# analyzer filter ip host 192.168.1.1 Capture traffic from IP host 192.168.1.1: # analyzer filter ip src host 192.168.1.1 Capture traffic to IP host 192.168.1.1: # analyzer filter ip dst host 192.168.1.1 Capture traffic for a particular IP protocol: IX14 User Guide... -
Page 247: Show Captured Traffic Data
A hexadecimal dump of the packet of up to 256 bytes Decoded information of the packet The output indents captured packets as a visual cue for sent and received packets. In addition, you can use the following controls to view the paged output: IX14 User Guide... -
Page 248: Save Captured Data Traffic To A File
Data traffic is captured to RAM and when the device reboots, the data is lost. To retain the captured data, first save the data to a file and then upload the file to a PC. To save captured traffic data to a file, use the analyzer save command. For example: IX14 User Guide... -
Page 249: Download Captured Data To Your Pc
IX14 device. For example: To download the traffic saved in the file /etc/config/analyzer/eth0.pcpng to a PC with the IP 192.168.210.2, for a user named maria, to the /home/maria directory:... -
Page 250: Use The Ping Command To Troubleshoot Network Connections
Ping to check internet connection To check your internet connection: 1. Log into the IX14 command line as a user with Admin access. Depending on your device configuration, you may be presented with an Access selection menu. Type admin to access the Admin CLI. - Page 251 Max wait for a response to a probe. (Default: 5) Example This example shows using traceroute to verify that the IX14 device can route to host 8.8.8.8 (www.google.com) through the default gateway. The command output shows that 15 routing hops were required to reach the host: 1.
-
Page 252: File System
File system File system Display directory contents Create a directory Display file contents Copy a file or directory Move or rename a file or directory Delete a file or directory Upload and download files IX14 User Guide... -
Page 253: File System
File system File system The IX14 local file system has approximately 100 MB of space available for storing files, such as Python programs, alternative configuration files and firmware versions, and release files, such as cellular module images. The writable directories within the filesystem are:... -
Page 254: Display File Contents
File system Display file contents 1. Log into the IX14 command line as a user with Admin access. Depending on your device configuration, you may be presented with an Access selection menu. Type admin to access the Admin CLI. 2. At the Admin CLI prompt, type mkdir /path/dir_name. For example, to create a directory named temp in /etc/config: >... -
Page 255: Copy A File Or Directory
Command line 1. Log into the IX14 command line as a user with Admin access. Depending on your device configuration, you may be presented with an Access selection menu. Type admin to access the Admin CLI. -
Page 256: Delete A File Or Directory
To move test.py from /etc/config/scripts to /opt: 1. Log into the IX14 command line as a user with Admin access. Depending on your device configuration, you may be presented with an Access selection menu. Type admin to access the Admin CLI. -
Page 257: Upload And Download Files
Upload or download files using the Secure Copy command Copy a file from a remote host to the IX14 device To copy a file from a remote host to the IX14 device, issue the command as follows: > scp host hostname-or-ip user username remote remote-path local local-path to... -
Page 258: Upload Or Download Files Using Sftp
IX14 device. For example: To copy a support report from the IX14 device to a remote host at the IP address of 192.168.4.1: 1. Use the system support-report command to generate the report: >... - Page 259 Transfer a file from the IX14 device to a remote host This example downloads a file named test.py from the IX14 device at the IP address of 192.168.2.1 with a username of ahmed to the local directory on the remote host: $ sftp ahmed@192.168.2.1...
-
Page 260: Digi Ix14 Regulatory And Safety Statements
WARNING! This device must be powered off where blasting in progress, where explosive atmospheres are present, or near medical or life support equipment. CAUTION! Do not use an antenna not supplied by Digi. If a different antenna is required, consult Digi for antenna recommendations for your environment. -
Page 261: Rf Exposure Statement
Radio Frequency Interference (RFI) (FCC 15.105) The Digi IX14 has been tested and found to comply with the limits for a Class B digital device, pursuant to Part 15 of the FCC Rules. These limits are designed to provide reasonable protection against harmful interference in a residential installation. - Page 262 Digi IX14 regulatory and safety statements European Community - CE Mark Declaration of Conformity (DoC) Directive (Radio Equipment Directive). Furthermore, the manufacturer must maintain a copy of the (product name) user manual documentation and ensure the final product does not exceed the specified power ratings, antenna specifications, and/or installation requirements as specified in the user manual.
-
Page 263: Maximum Transmit Power For Radio Frequencies
Digi IX14 regulatory and safety statements Maximum transmit power for radio frequencies Maximum transmit power for radio frequencies The following tables show the maximum transmit power for frequency bands. Cellular frequency bands Frequency bands Maximum transmit power Cellular LTE 700 MHz... -
Page 264: Rohs Compliance Statement
RoHS compliance statement RoHS compliance statement All Digi International Inc. products that are compliant with the RoHS Directive (EU Directive 2002/95/EC and subsequent amendments) are marked as RoHS COMPLIANT. RoHS COMPLIANT means that the substances restricted by the EU Directive 2002/95/EC and subsequent amendments... -
Page 265: Special Safety Notes For Wireless Routers
Special safety notes for wireless routers Digi International products are designed to the highest standards of safety and international standards compliance for the markets in which they are sold. However, cellular-based products contain radio devices which require specific consideration. Take the time to read and understand the following guidance. -
Page 266: Product Disposal Instructions
At the end of its life this product MUST NOT be mixed with other commercial waste for disposal. Check with the terms and conditions of your supplier for disposal information. Digi International Ltd WEEE Registration number: WEE/HF1515VU IX14 User Guide... - Page 267 Certifications This product complies with the requirements of the following Electromagnetic Compatibility standards. There are no user-serviceable parts inside the product. Contact your Digi representative for repair information. Certification category Standards EN 300 328 v1.8.1 Electromagnetic Compatibility (EMC) compliance standards EN 301-489-17 V3.1.12017...
-
Page 268: Command Line Interface
Display help for commands and parameters Auto-complete commands and parameters Available commands Use the scp command Display status and statistics using the show command Device configuration using the command line interface Execute configuration commands at the root Admin CLI prompt Configuration mode IX14 User Guide... -
Page 269: Access The Command Line Interface
Log in to the command line interface Command line 1. Connect to the IX14 device by using a serial connection, SSH or telnet, or the Terminal in the WebUI or the Console in the Digi Remote Manager. See Access the command line interface for more information. -
Page 270: Exit The Command Line Interface
2. At the main menu, click Terminal. The device console appears. IX14 login: 3. Log into the IX14 command line as a user with Admin access. Depending on your device configuration, you may be presented with an Access selection menu. Type admin to access the Admin CLI. -
Page 271: Display Help For Commands And Parameters
Display help for commands and parameters The help command When executed from the root command prompt, help displays information about autocomplete operations, how to move the cursor on the IX14 command line, and other keyboard shortcuts: > help Commands ------------------------------------------------------------------------------- Show commands help <Tab>... -
Page 272: Display Help For Individual Commands
2. To display a syntax diagram and parameter information about a specific command: > show arp ? Syntax: arp [ipv4] [ipv6] [verbose] Parameters ------------------------------------------------------------------------------- ipv4 Display IPv4 routes. ipv6 Display IPv6 routes. verbose Display more information. > show arp IX14 User Guide... -
Page 273: Use The Tab Key Or The Space Bar To Display Abbreviated Help
Parameter values, where the value is one of an enumeration or an on|off type; for example: (config)> serial port1 enable t<Tab> auto-completes to (config)> serial port1 enable true Auto-complete does not function for: Parameter values that are string types. Integer values. File names. Select parameters passed to commands that perform an action. IX14 User Guide... -
Page 274: Available Commands
Pings a remote host using Internet Control Message Protocol (ICMP) Echo Request messages. reboot Reboots the IX14 device. Removes a file. Uses the secure copy protocol (SCP) to transfer files between the IX14 device and a remote host. Use the scp command for information about using the scp command. show Displays information about the device and the device's configuration. -
Page 275: Use The Scp Command
The hostname or IP address of the remote host. The username and password of the user on the remote host. Whether the file is being copied to the IX14 device from a remote host, or to the remote host from the IX14 device. -
Page 276: Display Status And Statistics Using The Show Command
IX14 device. For example: To copy a support report from the IX14 device to a remote host at the IP address of 192.168.4.1: 1. Use the system support-report command to generate the report: >... -
Page 277: Show System
"445" > show system show system command displays system information and statistics for the device, including CPU usage. > show system Model : Digi IX14 Serial Number : IX14-000068 Hostname : TIX14 : 0040D0133536 Hardware Version : 50001947-01 1P Firmware Version : 19.8.1.30... -
Page 278: Device Configuration Using The Command Line Interface
For example, to disable the SSH service from the root prompt, enter the following command: > config service ssh enable false > The IX14 device's ssh service is now disabled. Note When the config command is executed at the root prompt, certain configuration actions that are available in configuration mode cannot be performed. - Page 279 Private key port Port Additional Configuration -------------------------------------------------------------------------- Access control list mdns > config service ssh 4. Lastly, display the allowed values and other information for the enable parameter: > config service ssh enable ? Enable: Enable the service. IX14 User Guide...
-
Page 280: Configuration Mode
1. At the config prompt, enter service to move to the service node: (config)> service (config service)> 2. Enter ssh to move to the ssh node: (config service)> ssh (config service ssh)> 3. Enter enable false to disable the ssh service: (config service ssh)> enable false (config service ssh)> IX14 User Guide... -
Page 281: Save Changes And Exit Configuration Mode
Discards unsaved configuration changes and exits configuration mode. save Saves configuration changes and exits configuration mode. validate Validates configuration changes. Reverts the configuration to default revert settings. See The revert command more information. show Displays configuration settings. IX14 User Guide... -
Page 282: Display Command Line Help In Configuration Mode
2. You can then display help for the additional configuration commands. For example, to display help for the config service command, use one of the following methods: At the config prompt, enter service ?: (config)> service ? IX14 User Guide... - Page 283 Enter service to move to the service node: (config)> service (config service)> b. Enter ssh to move to the ssh node: (config service)> ssh (config service ssh)> c. Enter ? to display help for the ssh node: (config service ssh)> ? IX14 User Guide...
- Page 284 (config service ssh)> Either of these methods will display the following information: (config)> service ssh enable ? Enable: Enable the service. Format: true, false, yes, no, 1, 0 Default value: true Current value: true (config)> service ssh enable IX14 User Guide...
-
Page 285: Move Within The Configuration Schema
While in configuration mode, you can use the add, del, and move action commands to manage elements in a list. When working with lists, these actions require an index number to identify the list item that will be acted on. IX14 User Guide... - Page 286 (config)> add auth user new-user group end admin (config)> 3. Use the show command again to verify that the admin group has been added to the user's configuration: (config)> show auth user new-user group 0 admin (config)> IX14 User Guide...
- Page 287 2. To configure the device to use TACACS+ authentication first to authenticate a user, use the move index_number_1 index_number_2 command: (config)> move auth method 1 0 (config)> 3. Use the show command again to verify the change: (config)> show auth method 0 tacacs+ 1 local 2 radius (config)> IX14 User Guide...
-
Page 288: The Revert Command
Configuration mode The revert command The revert command is used to revert changes to the IX14 device's configuration and restore default configuration settings. The behavior of the revert command varies depending on where in the configuration hierarchy the command is executed, and whether the optional path parameter is used. -
Page 289: Enter Strings In Configuration Commands
For string parameters, if the string value contains a space, the value must be enclosed in quotation marks. For example, to assign a descriptive name for the device using the system command, enter: (config)> system description "Digi IX14" IX14 User Guide... -
Page 290: Example: Create A New User By Using The Command Line
Configuration mode Example: Create a new user by using the command line In this example, you will use the IX14 command line to create a new user, provide a password for the user, and assign the user to authentication groups. - Page 291 (config auth user user1)> save Configuration saved. > 8. Type exit to exit the Admin CLI. Depending on your device configuration, you may be presented with an Access selection menu. Type quit to disconnect from the device. IX14 User Guide...
-
Page 292: Command Line Reference
IX14 User Guide... - Page 293 The path and filename of the source file to be copied. Syntax: string destination The destination path to copy the source file or directory to. Syntax: string force Do not ask to overwrite the destination file if it exists. Default: false IX14 User Guide...
- Page 294 List a directory. Syntax ls path [show-hidden] Parameters path The directory path to be listed. Syntax: string show-hidden Show hidden files and directories. Hidden filenames begin with '.'. Default: false IX14 User Guide...
-
Page 295: Mkdir
Create a directory. Parent directories are created as needed. Syntax mkdir path Parameters path The path of the directory to be created. Syntax: string IX14 User Guide... -
Page 296: Modem At
[imei string] [name string] Parameters The at command string to be sent to the modem. Syntax: string imei The IMEI of the modem. Syntax: [string] name The configured name of the modem. Syntax: [network-modem] IX14 User Guide... -
Page 297: Modem At-Interactive
Start an AT command session on the modem's AT serial port. Syntax modem at-interactive [imei string] [name string] Parameters imei The IMEI of the modem. Syntax: [string] name The configured name of the modem. Syntax: [network-modem] IX14 User Guide... -
Page 298: Modem Pin Change
[imei string] [name string] Parameters old-pin The existing PIN code. Syntax: string new-pin The new PIN code. Syntax: string imei The IMEI of the modem. Syntax: [string] name The configured name of the modem. Syntax: [network-modem] IX14 User Guide... -
Page 299: Modem Pin Disable
PIN code may PUK lock the SIM. Syntax modem pin disable pin [imei string] [name string] Parameters The SIM's PIN code. Syntax: string imei The IMEI of the modem. Syntax: [string] name The configured name of the modem. Syntax: [network-modem] IX14 User Guide... -
Page 300: Modem Pin Enable
Enable the PIN lock on the SIM card that is active in the modem. The SIM card will need to be unlocked before each use. Warning: Attempting to use an incorrect PIN code may PUK lock the SIM. Syntax modem pin enable PIN [imei STRING] [name STRING] Parameters Syntax: string imei Syntax: [string] name Syntax: [network-modem] IX14 User Guide... -
Page 301: Modem Pin Status
Print the PIN lock status and the number of PIN enable/disable/unlock attempts remaining. The SIM will be PUK locked when there are no remaining retries Syntax modem pin status [name STRING] [imei STRING] Parameters name Syntax: [network-modem] imei Syntax: [string] IX14 User Guide... -
Page 302: Modem Pin Unlock
SIM card automatically before use. WARNING! Attempting to use an incorrect PIN code may PUK lock the SIM. Syntax modem pin unlock PIN [imei STRING] [name STRING] Parameters Syntax: string imei Syntax: [string] name Syntax: [network-modem] IX14 User Guide... -
Page 303: Modem Puk Status
Print the PUK status and the number of PUK unlock attempts remaining. Syntax modem puk status [name STRING] [imei STRING] Parameters name Syntax: [network-modem] imei Syntax: [string] IX14 User Guide... -
Page 304: Modem Puk Unlock
Unlock the SIM with a PUK code from the SIM provider. Syntax modem puk unlock PUK NEW-PIN [imei STRING] [name STRING] Parameters Syntax: string new-pin Syntax: string imei Syntax: [string] name Syntax: [network-modem] IX14 User Guide... -
Page 305: Modem Reset
Reset the modem hardware (reboot it). This can be useful if the modem has stopped responding to the network or is behaving inconsistently. Syntax modem reset [name STRING] [imei STRING] Parameters name Syntax: [network-modem] imei Syntax: [string] IX14 User Guide... -
Page 306: Modem Sim-Slot
Show or change the modem's active SIM slot. This applies only to modems with multiple SIM slots. Syntax modem sim-slot slot (1|2|show) [imei STRING] [name STRING] Parameters slot Syntax: (1|2|show) imei Syntax: [string] name Syntax: [network-modem] IX14 User Guide... -
Page 307: More
View a file. Syntax more PATH Parameters path Syntax: string IX14 User Guide... - Page 308 SOURCE DESTINATION [force] Parameters source Syntax: string destination The destination path to move the source file or directory to. Syntax: string force Do not ask to overwrite the destination file if it exists. Syntax: boolean Default: false IX14 User Guide...
-
Page 309: Ping
Syntax: [network-interface] ipv6 Use the host's IPv6 address if a hostname is given as the 'host' argument. Syntax: boolean Default: false size The number of bytes sent in the ICMP ping request. Syntax: integer Minimum: 0 Default: 56 IX14 User Guide... -
Page 310: Reboot
Reboot the system. Syntax reboot IX14 User Guide... - Page 311 Remove a file or directory. Syntax rm PATH [force] Parameters path Syntax: string force Force the file to be removed without asking. Syntax: boolean Default: false IX14 User Guide...
-
Page 312: Scp
The SSH port to use to connect to the remote host. Syntax: integer Minimum: 1 Maximum: 65535 Default: 22 Copy the file from the local device to the remote host, or from the remote host to the local device. Syntax: (remote|local) IX14 User Guide... -
Page 313: Show Arp
Display IPv4 routes. If no IP version is specififed IPv4 & IPV6 will be displayed Syntax: boolean Default: false ipv6 Display IPv6 routes. If no IP version is specififed IPv4 & IPV6 will be displayed Syntax: boolean Default: false verbose Display more information (less concise, more detail). Syntax: boolean Default: false IX14 User Guide... -
Page 314: Show Cloud
Show Digi Remote Manager status and statistics. Syntax show cloud IX14 User Guide... -
Page 315: Show Config
Show changes made to default configuration. Syntax show config IX14 User Guide... -
Page 316: Show Dhcp-Lease
Show DHCP leases. Syntax show dhcp-lease [all] [verbose] Parameters Show all leases (active and inactive (not in etc/config/dhcp.*lease)). Syntax: boolean Default: false verbose Display more information (less concise, more detail). Syntax: boolean Default: false IX14 User Guide... -
Page 317: Show Event
Show event list (high level). Syntax show event [table (status|error|info)] [number INTEGER] Parameters table Type of event log to be displayed (status, error, info). Syntax: [(status|error|info)] number Number of lines to retrieve from log. Syntax: integer Minimum: 1 Default: 20 IX14 User Guide... -
Page 318: Show Ipsec
Syntax show ipsec [tunnel STRING] [all] Parameters tunnel Display more details and config data for a specific IPsec tunnel. Syntax: [vpn-ipsec-tunnel] Display all tunnel including disabled tunnel. Syntax: boolean Default: false show log [number INTEGER] [filter (critical|warning|debug|info)] IX14 User Guide... -
Page 319: Show Log
To retrieve more messages of the filtered type, increase the number of messages retrieved by using the number parameter. Syntax: [(critical|warning|debug|info)] IX14 User Guide... -
Page 320: Show Manufacture
Show manufacturer information. Syntax show manufacture IX14 User Guide... -
Page 321: Show Modem
Show modem status & statistics. Syntax show modem [name STRING] [imei STRING] [verbose] Parameters name Syntax: [network-modem] imei Syntax: [string] verbose Display more information (less concise, more detail). Syntax: boolean Default: false IX14 User Guide... -
Page 322: Show Network
Parameters interface Display more details and config data for a specific network interface. Syntax: [network-interface] Display all interfaces including disabled interfaces. Syntax: boolean Default: false verbose Display more information (less concise, more detail). Syntax: boolean Default: false IX14 User Guide... -
Page 323: Show Openvpn Client
Show OpenVPN client status & statistics. Syntax show openvpn client [name STRING] [all] Parameters name Display more details and config data for a specific OpenVPN client. Syntax: [vpn-openvpn-client] Display all clients including disabled clients. Syntax: boolean Default: false IX14 User Guide... -
Page 324: Show Openvpn Server
Show OpenVPN server status & statistics. Syntax show openvpn server [name STRING] [all] Parameters name Display more details and config data for a specific OpenVPN server. Syntax: [vpn-openvpn-server] Display all servers including disabled servers. Syntax: boolean Default: false IX14 User Guide... -
Page 325: Show Route
Show IP routing information. Syntax show route [ipv4] [ipv6] [verbose] Parameters ipv4 Display IPv4 routes. Syntax: boolean Default: false ipv6 Display IPv6 routes. Syntax: boolean Default: false verbose Display more information (less concise, more detail). Syntax: boolean Default: false IX14 User Guide... -
Page 326: Show Serial
Show serial status & statistics. Syntax show serial [port STRING] Parameters port Display more details and config data for a specific serial port. Syntax: [serial] IX14 User Guide... -
Page 327: Show System
Show system status & statistics. Syntax show system [verbose] Parameters verbose Display more information (disk usage, etc). Syntax: boolean Default: false IX14 User Guide... -
Page 328: Show Version
Show firmware version. Syntax show version [verbose] Parameters verbose Display more information (build date). Syntax: boolean Default: false IX14 User Guide... -
Page 329: Show Wifi Ap
Display details for Wi-Fi access points. Syntax show wifi ap [name STRING] [all] Parameters name Display more details for a specific Wi-Fi access point. Syntax: [network-wireless-ap] Display all Wi-Fi access points including disabled Wi-Fi access points. Syntax: boolean Default: false IX14 User Guide... -
Page 330: Show Wifi Client
Display details for Wi-Fi client mode connections. Syntax show wifi client [name STRING] [all] Parameters name Display more details for a specific Wi-Fi client mode connection. Syntax: [network-wireless-client] Display all Wi-Fi clients including disabled Wi-Fi client mode connections. Syntax: boolean Default: false IX14 User Guide... -
Page 331: System Backup
The type of backup file to create. Archives are full backups including generated SSH keys and dynamic DHCP lease information. CLI configuration backups are a list of CLI commands used to build the device's configuration. Syntax: (cli-config|archive) Default: archive IX14 User Guide... -
Page 332: System Factory-Erase
Erase the device to restore to factory defaults. All configuration and automatically generated keys will be erased. Syntax system factory-erase IX14 User Guide... -
Page 333: System Restore
Restore the device's configuration from a backup archive or CLI commands file. Syntax system restore PATH [passphrase STRING] Parameters path Syntax: string passphrase Syntax: [string] IX14 User Guide... -
Page 334: System Support-Report
Save a support report to a file and include with support requests. Syntax system support-report PATH Parameters path Syntax: string IX14 User Guide... -
Page 335: Traceroute
Specifies with what TTL to start. Syntax: integer Minimum: 1 Default: 1 gateway Tells traceroute to add an IP source routing option to the outgoing packet that tells the network to route the packet through the specified gateway Syntax: [{IPv4_address|IPv6_address}] IX14 User Guide... - Page 336 Syntax: integer Minimum: 0 Default: 0 port Specifies the destination port base traceroute will use (the destination port number will be incremented by each probe). A value of -1 specifies that no specific port will be used. IX14 User Guide...
- Page 337 For IPv6, set the Traffic Control value. A value of -1 specifies that no value will be used. Syntax: integer Minimum: -1 Default: -1 verbose Verbose output. Syntax: boolean Default: false waittime Determines how long to wait for a response to a probe. Syntax: integer Minimum: 1 Default: 5 IX14 User Guide...
-
Page 338: Update Firmware
Command line reference update firmware Update device firmware Syntax update firmware FILE Parameters file Syntax: string IX14 User Guide...
Need help?
Do you have a question about the IX14 and is the answer not in the manual?
Questions and answers