Table of Contents
Advertisement
Quick Links
Advertisement
Table of Contents

Related Manuals for Midtronics MAR-800P


Summary of Contents for Midtronics MAR-800P
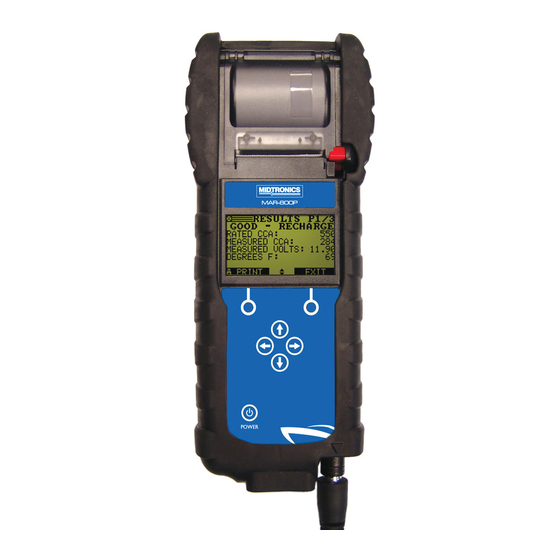
- Page 1 MAR 800P Marine Battery & Electrical Diagnostic Analyzer INSTRUCTION MANUAL...
- Page 2 This page intentionally left blank.
-
Page 3: Table Of Contents
MAR-800P Contents Chapter 1: Before You Begin Chapter 6: Generate Pair Starting the tester for the first time Pair Test Result Safety Chapter 7: Drain Test General Precautions Chapter 8: QC Mode Chapter 2: Overview Stock Control Connections and Data Ports... -
Page 4: Chapter 1: Before You Begin
Chapter 1: Before You Begin MAR-800P Chapter 1: Before You Begin Starting the tester for the fi rst time When the tester is fi rst used the operator is asked to enter a Risk of explosive gases. couple of items such as language, date and time. Changes... -
Page 5: Chapter 2: Overview
MAR-800P Chapter 2: Overview Chapter 2: Overview Connections and Data Ports Integrated thermal printer Integrated thermal printer Release lever for the paper compartment door Paper slot Paper slot ... -
Page 6: Connecting The Battery Test Cable
Chapter 2: Overview MAR-800P Connecting the Battery Test Cable Data Entry Methods To perform a particular test or function, the tester will ask for diff erent types of information. This means that the methods you use to enter information will change depending on To prevent damage to the analyzer’s circuitry, do not... -
Page 7: Display And Keypad
MAR-800P Chapter 2: Overview Display and Keypad Menu Screen Arrows The keypad and display work together to help you quickly When displayed in menu screens, the menu screen arrows find and use the right tools at the right time. The display also... -
Page 8: Menu Structure
Chapter 2: Overview MAR-800P Menu Structure Utility Menu The Utility Menu lets you customize your analyzer for your This section will help you get to your destination while letting needs. you know what test leads you may need when you arrive. -
Page 9: Chapter 3: Test Preparation
MAR-800P Chapter 3: Test Preparation Chapter 3: Test Preparation Inspecting the Battery Setting User Preferences Before starting the test visually inspect the battery for: Before starting your test you may want to customize the use of your analyzer by setting preferences in the Utility Menu. The •... -
Page 10: Chapter 4: Battery Test
Chapter 4: Battery Test MAR-800P Chapter 4: Battery Test The tester guides you through the steps of selecting your Select the rating units. battery test parameters and interpreting the results. Before you start the test, review the instructions in Chapter 3: Test Preparation. -
Page 11: In Vessel
MAR-800P Chapter 4: Battery Test In Vessel If you select JIS, the analyzer asks for the JIS part number. The tester prompts you to isolate the battery. This means Scroll to the part number. To increase your scrolling speed, ensuring there is no interference when you perform the test. -
Page 12: Additional Test Requirements And Messages
Chapter 4: Battery Test MAR-800P Additional Test Requirements and Messages Battery Test Results For a more decisive result the tester may ask for additional After the test the tester will display the battery decisions with information or probe deeper into the battery’s condition. The UP/DOWN the complete results in a series of screens. -
Page 13: New Battery Test Result
MAR-800P Chapter 4: Battery Test New Battery Test Result Decision Recommended Action Pack Test Result GOOD BATTERY Return the battery to service Decision Recommended Action CYCLING REQUIRED Battery needs to be cycled for optimal performance. GOOD PACK Return the pack to service CHECK PACK Follow the tester’s advise and... -
Page 14: Chapter 5: System Test
Chapter 5: System Test MAR-800P Chapter 5: System Test Starter System Test Results Before starting the test, inspect the alternator drive belt. A belt that is glazed or worn, or lacks the proper tension, will prevent The results include the battery analysis. Use the UP () or the engine from achieving the rpm levels needed for the test. -
Page 15: Alternator Test
MAR-800P Chapter 5: System Test Alternator Test Drain Test Press the NEXT soft key to initiate the drain test. The tester starts checking for alternator output. Press NEXT and measure the drain current with the exter- TESTING ALTERNATOR WITH LOADS OFF: The analyzer will next test the engine at idle for comparison to other read- nal amp-meter. -
Page 16: Alternator Decisions
Chapter 5: System Test MAR-800P Alternator Decisions Decision Action NO PROBLEMS The system is showing normal output from the alternator. No problem detected. NO VOLTAGE The alternator is not providing charging current to the battery. √ Check the belts to ensure the alternator is rotating with the engine running. Replace broken or slipping belts and retest. -
Page 17: Chapter 6: Generate Pair
MAR-800P Chapter 6: Generate Pair Chapter 6: Generate Pair With generate pair you can test whether two batteries can be Hold the bottom of the tester five centimeters above used together. the battery case so that the IR temperature sensor on its underside can approximate the battery temperature. -
Page 18: Chapter 7: Drain Test
Chapter 7: Drain Test MAR-800P Chapter 7: Drain Test With the drain test you can check the amount of current that is lost as a result of leakage. Measure the drain current with the external amp-meter. Enter the drain current and press NEXT to start the drain test. -
Page 19: Chapter 8: Qc Mode
MAR-800P Chapter 8: QC Mode Chapter 8: QC Mode Compound Test The tester has the ability to test multiple batteries one after the other without having to input the battery rating / settings. The first screen shows you the amount of tests performed. -
Page 20: Chapter 9: Print/View
Chapter 9: Print/View MAR-800P Chapter 9: Print/View From the MAIN MENU select the Print/View Menu using the UP, DOWN, LEFT and RIGHT ARROW keys. The Print/View Menu enables you to view and print the results of the last test performed. Print/View also allows you to view and print test decision totals. -
Page 21: Chapter 10: Version Info
MAR-800P Chapter 10: Version Info Chapter 10: Version Info From the MAIN MENU select Version Info using the UP, DOWN, LEFT and RIGHT ARROW keys. Version info displays the build, the software version, the database version, the serial number and the total tests performed. -
Page 22: Chapter 11: Utility Menu
Chapter 11: Utility Menu MAR-800P Chapter 11: Utility Menu Display The Utility Menu allows you to easily set up your analyzer: The LCD OPTIONS utility enables you to adjust the contrast of Config tester the text on the display and the backlight time. -
Page 23: Shop Info
6–PHONE NUMBER action. 7–FAX NUMBER FIRMWARE (use this option when new software becomes available from Midtronics) 8–WEBSITE.COM SAVE CONFIG (the tester will store the workshop address To create or overwrite a header: to the data card, file name is CONFIG.CSV) -
Page 24: Chapter 12: Tester Internal Batteries
Chapter 12: Tester Internal Batteries MAR-800P Chapter 12: Tester Internal Batteries Troubleshooting The Tester uses 6 AA, 1.5-volt batteries (alkaline recommended) to allow testing of batteries down to 1 volt and supply power If you have problems with the display or printer try these while the menu is active. -
Page 25: Patents & Limited Warranty
MAR-800P Patents & Limited Warranty Patents The EXP series is made by Midtronics, Inc., and is protected by one or more U.S. and foreign patents. For specific patent information, contact Midtronics, Inc. at +1 630 323-2800. Limited Warranty This analyzer is warranted to be free of defects in materials and workmanship for a period of two years from date of purchase.
Need help?
Do you have a question about the MAR-800P and is the answer not in the manual?
Questions and answers