
Related Manuals for Crosley C200


Summary of Contents for Crosley C200
- Page 1 C200A C200 Turntable Instruction Manual Questions, problems, missing parts? Before returning to the store, call Customer Service 8 a.m. – 6 p.m., EST, Monday – Friday 1-888-CROSLEY www.crosleyradio.com...
-
Page 2: Safety Instructions
English Safety Instructions Read and understand this entire manual before using this product. Keep these instructions for future reference. Read Instructions - All the safety and operating instructions should be read before the product is operated. Retain instructions - The safety and operating instructions should be retained for future reference. Heed Warnings - All warnings on the product and in the operating Instructions should be adhered Follow Instructions - All operating and use instructions should be followed. - Page 3 English If the product has been dropped or damaged in any way. This indicates a need for service. f. When the product exhibits a distinct change in performance Replacement Parts - When replacement parts are required, be sure the service technician has used replacement parts specified by the manufacturer or have the same characteristics as the original part.
- Page 4 English WARNING: To reduce the risk of fire or electric shock, do not expose this appliance to rain or moisture. CAUTION: Use of controls or adjustments or performance of procedures other than those specified may result in hazardous radiation exposure...
-
Page 5: Specifications
Turntable Platter Turntable slip mat Headshell 45 RPM adapter Tonearm Counterweight Please contact Crosley customer service if there is any accessory missing from the package. Retain the original packaging materials for exchange or return purposes. Specifications Power... -
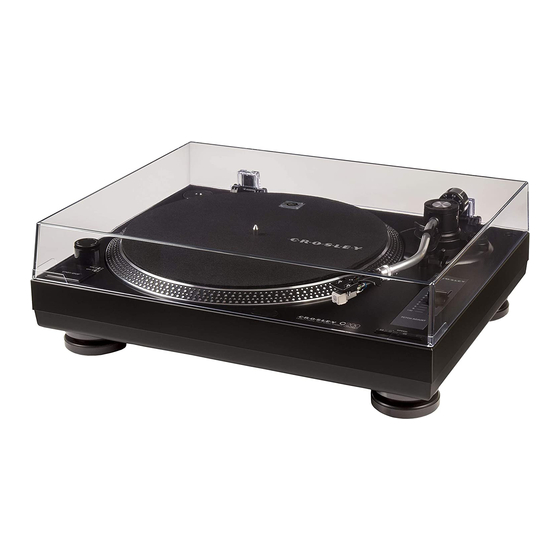
Page 6: Product Description
English Product Description 1. 45 RPM Adapter 13. Cue Lever 2. Turntable Platter 14. Tonearm Rest 3. Turntable Spindle 15. Hold Down Clip 4. Strobe Dots 16. Tonearm 5. Power Knob 17. Pitch Control 6. Start/Stop Button 18. Headshell Locking Ring 7. -
Page 7: Initial Setup
English Initial Setup Essential Setup 1. Place the unit on a flat and level surface. The selected location should be stable and free from vibration. 2. Install the turntable lid to the hinges. 3. Remove the tie-wrap that is holding the tonearm. 4. - Page 8 English Phono/Line Switch For increased flexibility of use, this unit has a built-in stereo phono pre-amplifier. If you prefer to use the phono input of your stereo system or your standalone phono pre-amplifier, set the Phono/Line switch to the PHONO position. Otherwise, please set it to LINE position and make connection to the AUX input or other high-level input on your stereo system.
-
Page 9: Turntable Operation
English Turntable Operation 1. Turn the Power Knob clockwise to turn on the power. 2. Set the Speed Switch accordingly. 3. Place the record on the turntable. Use the 45 RPM Adapter if necessary. 4. Remove the stylus protector from the stylus assembly. Note: To avoid stylus damage, make certain the included stylus guard is in place whenever the turntable is being moved or cleaned. -
Page 10: Needle Replacement
English Pitch Control Adjustment There are two sets of strobe dots at the edge of the platter, upper set for AC frequency 50Hz and bottom set for AC frequency 60Hz. When the platter is spinning, observe the strobe dots on the edge of the platter. -
Page 11: Cartridge Replacement
Note: Do not use cleanser other that contains alcohol, benzene or any other harsh chemicals, which might damage the paint and finish of the turntable. ** Crosley offers a product line of different cleaning accessories. Please ask your retailer or check out our website www.crosleyradio.com for... -
Page 12: Troubleshooting
English Troubleshooting There is no power No power at the power outlet. To help save power consumption, some models will comply with ERP energy saving standard. When there is no audio input for 20 minutes, their powers will automatically cut-off. To turn power back on and resume playing, turn off the power and turn it on again.
Need help?
Do you have a question about the C200 and is the answer not in the manual?
Questions and answers