Advertisement
Available languages
Available languages
Quick Links
Download this manual
See also:
User Manual
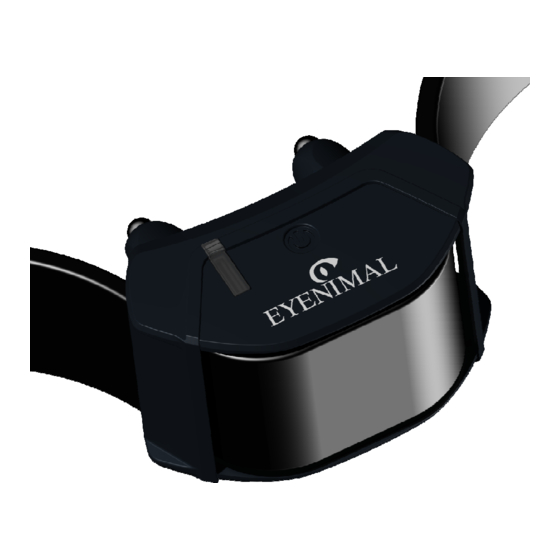
SMALL
BARK
CONTROL
C o l l i e r
a n t i - a b o i e m e n t
m i n i a t u r i s é
FR - Guide d'utilisation
EN - User's guide
SP - Manual de instrucciones
D - Gebrauchsanleitung
IT - Manuale istruzioni
NL – Gebruikershandleinding
1/28
Advertisement

Related Manuals for EYENIMAL Small Bark Control


Summary of Contents for EYENIMAL Small Bark Control
- Page 1 SMALL BARK CONTROL C o l l i e r a n t i - a b o i e m e n t m i n i a t u r i s é FR - Guide d’utilisation EN - User’s guide SP - Manual de instrucciones D - Gebrauchsanleitung IT - Manuale istruzioni...
- Page 2 NUM’AXES déclare que / declares that le collier de régulation des aboiements / bark limiter collar EYENIMAL Small Bark Control est conforme aux normes suivantes / complies with standards below: NUM’AXES Z.A.C. des Aulnaies – 745 rue de la Bergeresse – BP 30157 45161 OLIVET CEDEX –...
- Page 3 Composition du produit ● un collier EYENIMAL Small Bark Control équipé d’une sangle nylon, d’électrodes courtes et d’une batterie rechargeable une base de recharge un bloc d’alimentation une clé magnétique (aimant) un jeu d’électrodes longues...
- Page 4 − Déconnectez le collier de la base − Déconnectez le chargeur de la prise secteur murale Une charge complète prend environ 5 heures. Fig. 2 Mise en/hors service du collier ● Mise en service : mettez la clé magnétique en contact avec le symbole situé...
- Page 5 Changement des électrodes ● Deux jeux d’électrodes de longueurs différentes sont livrés d’origine. La longueur des électrodes doit être suffisante pour faire un bon contact avec la peau du chien et que le collier fonctionne correctement (bonne détection des aboiements et bonne transmission des stimulations).
- Page 6 8. Photos et dessins non contractuels. Enregistrement de votre produit ● Vous pouvez enregistrer votre produit sur notre site internet www.eyenimal.com. Accessoires ● Vous pouvez vous procurer les accessoires (chargeur, sangle, électrodes, clé magnétique…) à tout moment auprès de NUM’AXES ou de votre distributeur.
- Page 7 Charge of the battery ● WARNING: it is necessary to fully charge the battery of your EYENIMAL Small Bark Control collar before the first use. To charge the battery of your EYENIMAL Small Bark Control collar, your collar must be turned off.
- Page 8 A full charge takes approximately 5 hours. Diagram 2 Activate/Deactivate the collar ● Activate: move the magnetic key towards the collar so that it comes into contact with the symbol, hold for 1 second (See Diagram 3). A Beep sound will be emitted and the indicator light will flash in green (1 flash every 5 seconds) indicating that the collar has been switched on.
- Page 9 ● − The EYENIMAL Small Bark Control collar is showerproof only: it is only designed to remain a short time in the rain. − The dog should not wear any medal, metallic collar, or any other kind of collar together with the EYENIMAL Small Bark Control collar.
- Page 10 7. Photos and drawings are not contractual. Register your product ● Your product can be registered on our website at www.eyenimal.com Spare parts ● You can purchase spare parts (charger, strap, contact points, magnetic key…) from your supplier at any time.
- Page 11 Le avisamos que algunos ladridos pueden revelar un trastorno del comportamiento. El collar le permitirá resolver los problemas ocasionados por los ladridos excesivos. Composición del producto ● un collar EYENIMAL Small Bark Control equipado con una correa de nylon, electrodos cortos y una batería recargable una base de carga un cargador de batería una llave magnética (imán) un juego de electrodos largos una lámpara de prueba...
- Page 12 La carga completa tarda aproximadamente 5 horas. Fig. 2 Puesta en/fuera de servicio del collar ● Puesta en servicio: acerque, durante 1 segundo, la llave magnética a la marca situada en frente del collar (véase Fig. 3). Se emite una señal sonora y la luz indicadora verde se enciende: el collar está en servicio. Puesta fuera de servicio: acerque, durante 1 segundo, la llave magnética a la marca situada en frente del collar (véase Fig.
- Page 13 Precauciones de uso ● − El collar EYENIMAL Small Bark Control es estanco al chorreo, pero no a la inmersión. − Con el fin de evitar las activaciones intempestivas, no es conveniente utilizar una medalla metálica u otro collar cuando su perro lleve su collar EYENIMAL Small Bark Control.
- Page 14 6. La información de esta guía puede ser objeto de modificaciones sin previo aviso. 7. Fotos y dibujos no contractuales. Inscriba su producto ● Puede inscribir su producto en nuestro sitio web www.eyenimal.com. Accesorios ● Puede encargar a su distribuidor, en cualquier momento, los accesorios (correa, cargador …).
- Page 15 Beeinträchtigungen Ihrer Umgebung zu reduzieren, die wegen des übermäßigen und andauernden Bellens auftauchen. Lieferumfang des Gerätes ● Ein EYENIMAL Small Bark Control Halsband mit einem Nylon-Band, kurzen Kontakten und einer wiederaufladbaren Batterie Ein Ladegerät Ein Einstell-Schraubendreher Einen Magnetschlüssel (Magnet) Einen paar lange Kontakte...
- Page 16 Zum Einschalten: Halten Sie den Magnetschlüssel eine Sekunde lang an die Markierung des Halsbandes (Siehe Abb. 3). Es ertönt ein Piepton und die LED am Halsband leuchtet auf, und blinkt grün (1 Aufblinken alle 5 Sekunden) : das EYENIMAL Small Bark Control Halsband ist nun eingeschaltet.
- Page 17 Justierung des Halsbandes ● Justierung und Anlegen des Halsbandes ist sehr wichtig. Von diesen hängen die richtige Funktionierung das Halsband (Erkennung des Bellens oder Übertragung der Stimulationen). Das Halsband muss so stramm am Hundehals sitzen, dass jederzeit gewährleistet ist, dass beide Kontakte die Haut des Hundes berühren.
- Page 18 Die in dieser Gebrauchsanleitung angegebenen Informationen können ohne Voranmeldung geändert werden. Die Photos und Zeichnungen können von den Produkten abweichen. Registrieren Ihres Produktes ● Ihr Produkt kann auf unserer Website unter www.eyenimal.com registriert werden Zubehöre ● Zubehör (Ladegerät, Leine, Kontakte, Magnetschalter…) können Sie jederzeit bei NUM’AXES oder Ihrem NUM’AXES -Vertreiber erwerben.
-
Page 19: Manuale Istruzioni
Il collare anti abbaio, correttamente utilizzato, vi permetterà di educare il vostro cane e risolvere i problemi causati dall’eccessivo abbaiare. Composizione del prodotto ● collare EYENIMAL Small Bark Control con cinghia nylon equipaggiato con elettrodi corti e una batteria ricaricabile carica batteria - alimentatore caricabatteria chiave magnetica... - Page 20 Fig. 2 Accensione/Spegnimento del collare ● Accensione: portare a contatto la chiave magnetica con l’indicatore situato sulla parte anteriore del collare per circa 1 secondo (cfr. Fig. 3). Il collare emette un segnale sonoro e il LED indicatore si illumina di colore verde e comincia a lampeggiare. Il collare è acceso.
- Page 21 Aggiustamento e posizionamento del collare ● L’aggiustamento e il posizionamento del collare sono molto importanti. Da queste regolazioni dipende il corretto rilevamento dei latrati e la buona trasmissione delle stimolazioni. Gli elettrodi del collare devono essere posizionati sotto il collo del cane. Si deve assicurare un buon contatto tra gli elettrodi del collare e la pelle del cane: −...
- Page 22 In caso di rottamazione, il prodotto deve essere consegnato presso un punto di raccolta adeguato per il trattamento, la valorizzazione e il riciclaggio degli scarti elettronici o riconsegnato al vostro rivenditore. In questo modo contribuite alla conservazione delle risorse naturali e alla protezione della salute umana. www.eyenimal.com contact@eyenimal.com 22/28...
- Page 23 HANDLEIDING Dank u voor het kiezen van een product uit het EYENIMAL-assortiment. Voordat u uw product gebruikt vragen wij u om de instructies in deze handleiding zorgvuldig te lezen en ze te bewaren voor toekomstig gebruik. Belangrijke product- en veiligheidsinformatie...
- Page 24 Fig. 2 In- en uitschakelen van de halsband ● Inbedrijfstelling : plaats de magnetische sleutel in contact met het symbool op de halsband gedurende 1 seconde (zie Fig. 3). 1 korte piep en 1 groen knipperlicht geven de inbedrijfstelling weer. Het indicatielampje knippert elke 5 seconden groen wanneer de halsband is ingeschakeld.
- Page 25 Als uw hond lang haar heeft en de in de fabriek gemonteerde korte elektroden ontoereikend zijn, dan kunt u ze vervangen door de lange elektroden die meegeleverd zijn met de accessoires. U kunt de halsband handmatig zonder gereedschap aanspannen. Afstelling van de halsband ●...
- Page 26 6. De informatie in deze handleiding kan zonder voorafgaande kennisgeving worden gewijzigd. 7. Niet-contractuele foto's en tekeningen. Registratie van uw product ● U kunt uw product registreren op onze website www.eyenimal.com. Accessoires ● U kunt op elk moment accessoires (lader, riem, elektroden, magnetische sleutel...) kopen bij NUM'AXES of bij uw leverancier.
- Page 27 27/28...
- Page 28 28/28...
Need help?
Do you have a question about the Small Bark Control and is the answer not in the manual?
Questions and answers