
Related Manuals for StarTech.com RK616WALM


Summary of Contents for StarTech.com RK616WALM
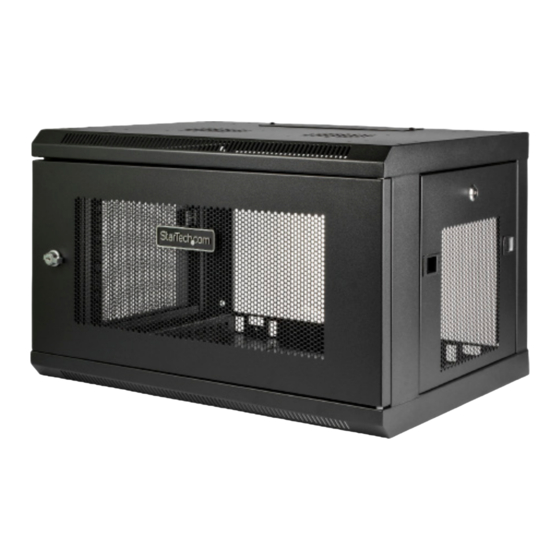
- Page 1 6U Wall-Mount Rack Enclosure Actual product may vary from photos User Manual SKU#: RK616WALM For the latest information and specifications visit www.startech.com/RK616WALM Manual Revision: 05/10/2019...
- Page 2 This manual may make reference to trademarks, registered trademarks, and other protected names and/or symbols of third-party companies not related in any way to StarTech.com. Where they occur these references are for illustrative purposes only and do not represent an endorsement of a product or service by StarTech.com, or an endorsement of the product(s) to which this manual...
-
Page 3: Warning Statements
Läs hela manualen och se till att du förstår instruktionerna innan du börjar montera och använda produkten. Eftersom väggstrukturer varierar är det viktigt att kontrollera att väggstrukturen och monteringsutrustningen som du använder klarar av den monterade To view manuals, videos, drivers, downloads, technical drawings, and more visit www.startech.com/support... - Page 4 Kantelgevaar! Wanneer meerdere componenten uit deze behuizing steken, bestaat de kans dat deze zal kantelen. Om dit risico te voorkomen, mag niet meer dan één component uit de behuizing steken. To view manuals, videos, drivers, downloads, technical drawings, and more visit www.startech.com/support...
- Page 5 壁面の構造は建物によって異なります。 壁面の構造や使用する取り付け金具 が設置する装置を適切に支えられるかどうか、 必ず確認してください。 この注 意を怠ると、 怪我をする恐れや器物破損の恐れがあります。 設置する装置の少 なく とも4倍の重量に耐えられる壁面構造が必要となります。 本製品は、 非常に重いエンクロージャです。 絶対に一人で持ち上げたり動かし たり しないで下さい。 転倒注意 ! 本製品から複数のコンポーネントが突き出した状態にしておく とエ ンクロージャが転倒する恐れがあります。 転倒リスクを回避するために、 エンク ロージャからはコンポーネントが突き出ないようにして下さい。 本製品の上に何も載せないで下さい。 複数のエンクロージャを重ねて設置し ないで下さい。 液体物をエンクロージャに近づけないようにして下さい。 エンクロージャ自身と中に積載する装置の総重量に耐えられるエリアに設置 して下さい。 To view manuals, videos, drivers, downloads, technical drawings, and more visit www.startech.com/support...
- Page 6 Quando si caricano le apparecchiature all’interno del prodotto, partire da quelle più pesanti collocandole nella parte inferiore del prodotto. Continuare To view manuals, videos, drivers, downloads, technical drawings, and more visit www.startech.com/support...
- Page 7 Continuez de charger les équipements dans un ordre de poids décroissant, de sorte que les équipements les plus légers soient installés dans les parties supérieures du produit, et les éléments plus lourds dans les parties inférieures. To view manuals, videos, drivers, downloads, technical drawings, and more visit www.startech.com/support...
- Page 8 Las estructuras de una pared pueden variar, por lo que es importante determinar con certeza el tipo de estructura de la pared y el hardware de To view manuals, videos, drivers, downloads, technical drawings, and more visit www.startech.com/support...
- Page 9 Verletzungen und/oder zur Beschädigung des Produkts kommen. Die Wandkonstruktion sollte mindestens das vierfache Gewicht der montierten Geräte tragen können. Dieses Gehäuse ist extrem schwer. Versuchen Sie niemals, dieses Gehäuse ohne To view manuals, videos, drivers, downloads, technical drawings, and more visit www.startech.com/support...
- Page 10 Sie die Geräte anschließend in absteigender Reihenfolge nach ihrem Gewicht, sodass leichtere Geräte in den oberen Abschnitten dieses Produkts installiert werden und die schwereren Geräte sich unten befinden. To view manuals, videos, drivers, downloads, technical drawings, and more visit www.startech.com/support...
-
Page 11: Table Of Contents
Reversing the Front Door ..............17 Adjust the Depth of the Mounting Rails ..........18 Use the Mounting Rail Tapped Holes ..........19 Mount the Enclosure to the Wall ............20 Installing Equipment ................21 To view manuals, videos, drivers, downloads, technical drawings, and more visit www.startech.com/support... -
Page 12: Product Diagram
Product Diagram Front Door Cable Access Openings (x 2) Side Panels (x 2) Mounting Plate Vents Top Panel Cable Access Covers (x 2) Bottom Panel To view manuals, videos, drivers, downloads, technical drawings, and more visit www.startech.com/support... -
Page 13: Product Information
• wall you’re using Note: The images in this manual depict RK920WALM. This product features a different rack height and depth, and has two posts instead of four. To view manuals, videos, drivers, downloads, technical drawings, and more visit www.startech.com/support... -
Page 14: Grounding The Wall-Mount Enclosure
Grounding Point on the Wall-Mount Enclosure. Installing the Grounding Wire Route the Grounding Wire under the frame of the Wall- Mount Enclosure and connect the Grounding Wire to your facility’s earth ground connection. To view manuals, videos, drivers, downloads, technical drawings, and more visit www.startech.com/support... -
Page 15: Locking Or Unlocking The Front Door
If the Side Panels are locked, use one of the provided Side Panel Keys to unlock the Side Panels. Pull the two Tabs on the Side Panel towards the center of the panel. Side Panel Tabs To view manuals, videos, drivers, downloads, technical drawings, and more visit www.startech.com/support... -
Page 16: Replacing The Side Panels
Both the top and bottom panels of the enclosure have cable access covers that you can remove to access and manage your cables. Use a Phillips Head Screwdriver to remove the four Screws securing the Cable Access Cover. To view manuals, videos, drivers, downloads, technical drawings, and more visit www.startech.com/support... -
Page 17: Replacing The Cable Access Cover
Use a Phillips Head Screwdriver to insert the four Screws through the Cable Access Cover and into the Wall-Mount Enclosure. Tighten the Screws, being careful not to over-tighten. To view manuals, videos, drivers, downloads, technical drawings, and more visit www.startech.com/support... -
Page 18: Reversing The Front Door
Flip the Front Door so that the Levers are located on the opposite side. Position the Front Door so that the top and bottom Levers are aligned with the washers located in the hinge area of the Wall-Mount Enclosure. To view manuals, videos, drivers, downloads, technical drawings, and more visit www.startech.com/support... -
Page 19: Adjust The Depth Of The Mounting Rails
Slide the Mounting Rail to the depth of the Cage Nuts and use a Phillips Head Screwdriver to install and tighten the Screws that you removed in step 1. To view manuals, videos, drivers, downloads, technical drawings, and more visit www.startech.com/support... -
Page 20: Use The Mounting Rail Tapped Holes
Cage Nut located in the upper and lower corners of the Mounting Rails. Change the location of the Mounting Rails so that the sides of the Mounting Rails with the Tapped Holes are facing the Front Door. To view manuals, videos, drivers, downloads, technical drawings, and more visit www.startech.com/support... -
Page 21: Mount The Enclosure To The Wall
The Wall-Mount Enclosure weighs 32 lb. (14 kg) and can hold up to 198 lb. (90 kg) in weight. To view manuals, videos, drivers, downloads, technical drawings, and more visit www.startech.com/support... -
Page 22: Installing Equipment
Decide where in the Wall-Mount Enclosure you want to install the equipment and insert the Cage Nuts in the Mounting Rails. To view manuals, videos, drivers, downloads, technical drawings, and more visit www.startech.com/support... - Page 23 Line up the Mounting Holes on the equipment with the Cage Nuts. Insert the Screws through the Mounting Holes on the equipment and into the Cage Nuts. Tighten the Screws being careful not to over-tighten. To view manuals, videos, drivers, downloads, technical drawings, and more visit www.startech.com/support...
- Page 24 Limitation of Liability In no event shall the liability of StarTech.com Ltd. and StarTech.com USA LLP (or their officers, directors, employees or agents) for any damages (whether direct or indirect, special, punitive, incidental, consequential, or otherwise), loss of profits, loss of business, or any pecuniary loss, arising out of or related to the use of the product exceed the actual price paid for the product.
- Page 25 StarTech.com is an ISO 9001 Registered manufacturer of connectivity and technology parts. StarTech.com was founded in 1985 and has operations in the United States, Canada, the United Kingdom and Taiwan servicing a worldwide market.
Need help?
Do you have a question about the RK616WALM and is the answer not in the manual?
Questions and answers