
Related Manuals for StarTech.com RK9WALM


Summary of Contents for StarTech.com RK9WALM
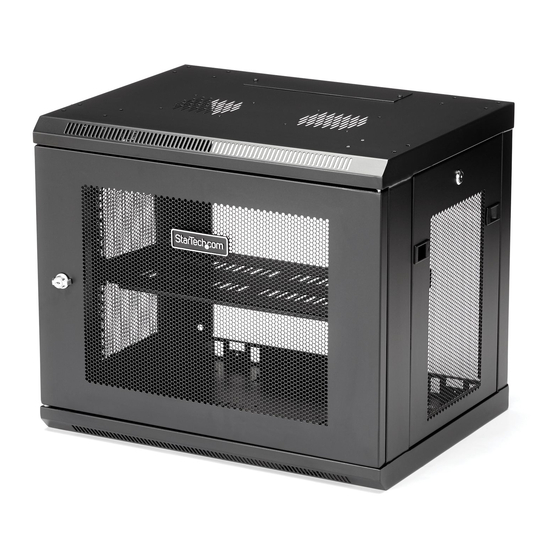
- Page 1 9U Wall-Mount Rack Enclosure Actual product may vary from photos User Manual SKU#: RK9WALM For the latest information and specifications visit www.startech.com/RK9WALM Manual Revision: 09/24/2018...
-
Page 2: Compliance Statements
StarTech.com. Where they occur these references are for illustrative purposes only and do not represent an endorsement of a product or service by StarTech.com, or an endorsement of the product(s) to which this manual applies by the third-party company in question. Regardless of any direct acknowledgement elsewhere in the body of this document, StarTech.com hereby... - Page 3 • Kablar (inklusive elkablar och laddningskablar) ska dras och placeras på så sätt att risk för snubblingsolyckor och andra olyckor kan undvikas. To view manuals, videos, drivers, downloads, technical drawings, and more visit www.startech.com/support...
-
Page 4: Warning Statements
• Se till att du installerar skåpet på en plats som kan hantera den kombinerade vikten av skåpet och utrustningen som du tänker placera inuti. • Produkten behöver en jordad anslutning. Använd inte produkten utan en jordad anslutning. To view manuals, videos, drivers, downloads, technical drawings, and more visit www.startech.com/support... - Page 5 • Vergewissern Sie sich, dass der Untergrund, auf dem das Gehäuse aufgestellt wird, in der Lage ist, das Gesamtgewicht des Gehäuses und der Geräte, die Sie darin platzieren möchten, zu tragen. To view manuals, videos, drivers, downloads, technical drawings, and more visit www.startech.com/support...
- Page 6 • Manter líquidos afastados desta caixa. • Certifique-se de que instala a caixa numa área que pode suportar o peso combinado da caixa e o equipamento que pretende colocar dentro da caixa. To view manuals, videos, drivers, downloads, technical drawings, and more visit www.startech.com/support...
- Page 7 • Zorg dat u de behuizing installeert op een plaats die geschikt is voor het gecombineerde gewicht van de behuizing en de apparatuur die u in de behuizing wilt plaatsen. To view manuals, videos, drivers, downloads, technical drawings, and more visit www.startech.com/support...
- Page 8 必ず取扱説明書に従って本製品の組み立てを行って下さい。 本製品で定められた最大積載重量を超えないようにして下さい。 最大積載重量をオーバーした場合、 怪 我をする恐れや器物破損の恐れがあります。 本製品は、 モニター1台あたり363kgまで支持できます。 本製品は、 室内での使用を想定しています。 戸外では使用しないで下さい。 本製品は、 非常に重いエンクロージャです。 絶対に一人で持ち上げたり動かしたり しないで下さい。 転倒注意 ! 本製品から複数のコンポーネントが突き出した状態にしておく とエンクロージャが転倒する 恐れがあります。 転倒リスクを回避するために、 エンクロージャからはコンポーネントが突き出ないよう にして下さい。 本製品の上に何も載せないで下さい。 複数のエンクロージャを重ねて設置しないで下さい。 液体物をエンクロージャに近づけないようにして下さい。 エンクロージャ自身と中に積載する装置の総重量に耐えられるエリアに設置して下さい。 この製品にはアースが必要です。 アース接続をしていない状態で本製品を使用しないでください。 To view manuals, videos, drivers, downloads, technical drawings, and more visit www.startech.com/support...
-
Page 9: Table Of Contents
Reverse the front door ................16 Adjust the Depth of the Mounting Rails ..........17 Use the Mounting Rail Tapped Holes ..........18 Mounting the Enclosure to the Wall ............20 Installing Equipment ................21 To view manuals, videos, drivers, downloads, technical drawings, and more visit www.startech.com/support... -
Page 10: Product Diagram
Product Diagram Actual product may vary from photos Number Description Number Description Front Door Cable Access Opening Side Panel Mounting Plate Vents Top Panel Cable Access Bottom Panel Cover To view manuals, videos, drivers, downloads, technical drawings, and more visit www.startech.com/support... -
Page 11: Product Information
Use an M6 screw to attach a grounding wire to the front or rear grounding point on the enclosure. Route the wire under the frame of the enclosure and connect the wire to your facility’s earth ground connection. To view manuals, videos, drivers, downloads, technical drawings, and more visit www.startech.com/support... - Page 12 Grounding Wire Grounding Wire To view manuals, videos, drivers, downloads, technical drawings, and more visit www.startech.com/support...
-
Page 13: Lock Or Unlock The Front Door
If the side panels are locked, use the provided side panel keys to unlock the panels. Pull the two tabs on the side panel towards the center of the panel. Removing Side Panel To view manuals, videos, drivers, downloads, technical drawings, and more visit www.startech.com/support... -
Page 14: Replacing Side Panels
Place one of the side panels in the groove at the bottom of the enclosure. Pull the two tabs on the side panel towards the center of the panel To view manuals, videos, drivers, downloads, technical drawings, and more visit www.startech.com/support... -
Page 15: Access Your Cables
To take off a cable access cover, use a Phillips type screwdriver to remove the two screws on both ends of the cable access cover. Pull the cable access cover away from the enclosure. To view manuals, videos, drivers, downloads, technical drawings, and more visit www.startech.com/support... -
Page 16: Replacing The Cable Access Door
Place the cover over the cable access opening and use a • Phillips type screwdriver to insert the screws through the cover and into the enclosure. Tighten the screws. To view manuals, videos, drivers, downloads, technical drawings, and more visit www.startech.com/support... -
Page 17: Reverse The Front Door
In the bottom corner of the inside of the front door, pull the lever up and remove the front door from the enclosure. Removing the Front Door To view manuals, videos, drivers, downloads, technical drawings, and more visit www.startech.com/support... -
Page 18: Adjust The Depth Of The Mounting Rails
Slide the mounting rail to the depth of the cage nuts and use a Phillips type screwdriver to install and tighten the screws that you removed in step 1. To view manuals, videos, drivers, downloads, technical drawings, and more visit www.startech.com/support... -
Page 19: Use The Mounting Rail Tapped Holes
Use a Phillips type screwdriver to remove the screws and cage nuts from the mounting rails. To view manuals, videos, drivers, downloads, technical drawings, and more visit www.startech.com/support... - Page 20 To reattach the mounting rails to the enclosure, use a Phillips type screwdriver to install and tighten the screws that you removed in step 1. Using the Tapped Holes To view manuals, videos, drivers, downloads, technical drawings, and more visit www.startech.com/support...
-
Page 21: Mounting The Enclosure To The Wall
The wall structure should be capable of supporting at least four times the weight of the mounted equipment. The RK9WALM weighs 17.5 kg (38.5 lb.) and can hold up to 90 kg (198 lb.) in weight. Note: If you lack the necessary expertise to attach this product to the wall that you’re using, contact a construction... -
Page 22: Installing Equipment
Line up the mounting holes on the equipment with the cage nuts. Insert the screws through the mounting holes on the equipment and into the cage nuts. To view manuals, videos, drivers, downloads, technical drawings, and more visit www.startech.com/support... - Page 23 Limitation of Liability In no event shall the liability of StarTech.com Ltd. and StarTech.com USA LLP (or their officers, directors, employees or agents) for any damages (whether direct or indirect, special, punitive, incidental, consequential, or otherwise), loss of profits, loss of business, or any pecuniary loss, arising out of or related to the use of the product exceed the actual price paid for the product.
- Page 24 Hard-to-find made easy. At StarTech.com, that isn’t a slogan. It’s a promise. StarTech.com is your one-stop source for every connectivity part you need. From the latest technology to legacy products — and all the parts that bridge the old and new — we can help you find the parts that connect your solutions.
Need help?
Do you have a question about the RK9WALM and is the answer not in the manual?
Questions and answers