Advertisement
Quick Links
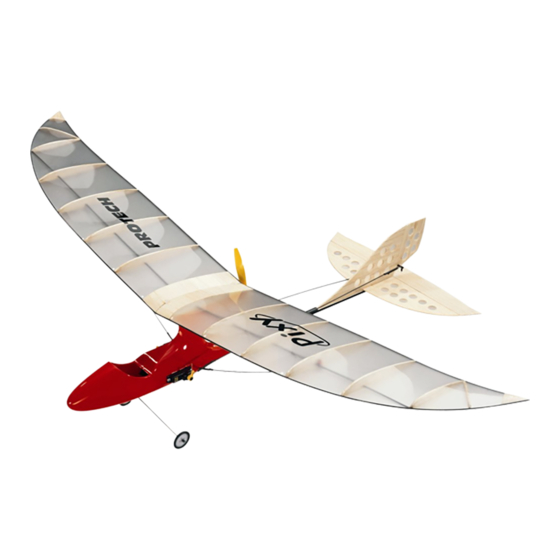
T0380
INSTRUCTION MANUAL • GEBRUIKSAANWIJZING • ANLEITUNG • INSTRUCTIONS DE MONTAGE
WARNING !
This R/C kit and the model you
will build is not a toy.
2
7,7 dm
LET OP !
Deze bouwdoos van een ra-
diobestuurd vliegtuig is geen
speelgoed.
195 g.
ACHTUNG !
Eines Dieser Bausatz
ferngesteuretes Modells
ist kein Spielzeug.
ATTENTION !
Ce planeur R/C à assembler n'est
pas un jouet.
Advertisement

Subscribe to Our Youtube Channel
Related Manuals for protech Pixy


Summary of Contents for protech Pixy
- Page 1 T0380 INSTRUCTION MANUAL • GEBRUIKSAANWIJZING • ANLEITUNG • INSTRUCTIONS DE MONTAGE WARNING ! This R/C kit and the model you will build is not a toy. 7,7 dm LET OP ! Deze bouwdoos van een ra- diobestuurd vliegtuig is geen speelgoed.
- Page 2 Specifi cations / Specifi caties / Technische Daten / Spécifi cations Length: 526 mm Lengte: 526 mm Länge: 526 mm Longueur: 526 mm Spanwijdte: 830 mm Wing span: 830 mm Spannweite: 830 mm Envergure: 830 mm Wing area: 7,7 dm Vleugelopp.: 7,7 dm Tragfl...
- Page 3 Tools & items / Gereedschap & benodigdheden / Werkzeuge und erforderliches / Outils et équipements MICRO SERVOS Micro Receiver #PRO5.40 or #PRO5.35 Powerpack 9,6V-110mAh #S1801 PROTECH Micro servo #B109 Weight: Torque: 15Ncm Speed: 0,16s / 60° Dimension: 24x27x9mm Electronic speedcontroler...
-
Page 4: Important Safety Notes
Important Safety Notes. Be sure to read right through the instructions covering assembly and operation of your model before you at tempt to operate it for the fi rst time. You alone are respon- sible for the safe operation of your radio-con trol led model. Young people should only be permitted to build and fl y these mod els under the instruction and su per vi sion of an adult who is aware of the hazards involved in this activity. -
Page 5: Wichtige Sicherheitshinweise
Wichtige Sicherheitshinweise Vor dem Versuch der ersten Inbetriebnahme muß die gesamte Betriebs- und Montageanleitung sorgfältig gelesen werden. Sie alleine sind verantwortlich für den sicheren Betrieb Ihres RC-Flugmodells. Bei Jugendlichen muß der Bau und Betrieb von einem Erwachsenen, der mit den Gegebenheiten und möglichen Gefahren eines RC-Flugmodells vertraut ist, verantwortlich überwacht werden. - Page 6 Assembling of the wing / Monteren van de vleugel / Montieren von die Fläche / Assemblage de l'aile Fig. 1 Fig. 2 Glue the 2 wing parts with cyano- Verkleben Sie die 2 Flachen mit Verlijm de 2 vleugeldelen met Assemblez les 2 panneaux d'aile acrylate.
- Page 7 Assembly of the tail / Montage van de staart / Montierung von des Heckes / Assemblage de l'empennage Fig. 8 Fig. 6 Fig. 7 Fig. 9 Cut a hole through the rudder to Schneiden Sie ein Loch in dem Snij een gat in het richtingsroer Faites un trou dans la gouverne fi...
- Page 8 Installing the servos / Montage van de servo's / Montieren von Servos / Installation des servos Fig.14 Fig.15 Fig.16 Fig. 18 Fig. 17 Fig. 19 Fig. 20 Fig. 21 Draw the outlines of the servo on Markieren Sie die Kontur des Teken de omtrek van de servo Dessinez le contour du servo sur both sides of the fuselage.
- Page 9 Fixing the wing / Bevestigen van de vleugel / Befestigung des Flugel / Fixation de l'aile Fig. 23 Fig. 22 Fig. 24 Fig. 26 Fig. 25 Fig. 27 Fig. 28 Glue the wingsupport on the top Verkleben Sie den Verstärker für Verlijm het bevestigingsblokje Installez et collez la plaque de in the back of the fuselage.
- Page 10 Installing the motor / Plaatsen van de motor / Montierung des Motor / Installation du moteur Fig. 29 Fig. 30 Fig. 31 Fig. 32 Drill a hole in the fuselage to pass Bohren Sie ein Loch im Rumpf Boor een gaatje in de romp om Percez un trou sur le côté...
- Page 11 Mounting the steering rods / Monteren van de stuurstangen / Montierung des Gestänge / Installation des commandes de gouverne Fig. 36 Fig. 37 Fig. 38 Fig. 39 Fig. 40 Fig. 41 Devied the tube in 2 equal parts. Verteil den Schlauch in 2 Gleiche Snij het kunststof slangetje in 2 Coupez en 2 parties égales le Slide the each part on a carbon...
- Page 12 Installing the landinggear / Installeren van het landingsgestel / Montierung des Fahrwerk / Installation du train d'attérissage Fig. 42 Fig. 43 Fig.44 Fig. 45 Cut a right-angled hole in the Mach ein rechtwinkliches Loch Maak op de onderzijde van de Faîtes un trou rectangulaire (à...
- Page 13 Mounting the struts / Monteren van de vleugelstruts / Montierung des Tragfl ügelstreben / Installation des haubans Fig. 46 Fig. 47 Fig. 48 Fig. 49 Fig.50 Fig. 51 Center of gravity Zwaartepunt Schwerpunkt Fig. 52 Fig. 53 Centre de gravité Drill a hole (with equal diameter Bohr ein Loch (Diameter gleich Boor een gaatje (met een...
- Page 14 Installing receiver and battery / Installeren van ontvanger en batterij Montierung des Empfänger und Akku / Installation du récepteur et de l'accu Fig. 54 Fig. 55 Fig.56 Connect the servos and controller Befestigen Sie die Servos und Verbind de servos en de regelaar Raccordez les servos et le to the receiver.
- Page 15 Parts list / Onderdelenlijst Benötigtes / Pièces détachées T0380.1 Motor Pixy T0380.15 Landing gear Pixy T0380.2 Wing set Pixy T0380.3 Fuselage Pixy T0380.4 Tail set Pixy T0380.5 Prop Pixy T0380.PS Powerset Pixy Slow & parkfl yers T0343 Wing span: 1000 mm...
- Page 16 All you need is inside … The PROTECH CATALOG 144 Full colour pages Ask your local R/C model shop ® is a registreded trademark PROTECH P.O.-Box 60 • B-2250 Olen Tel.: +32 (0)14 25 92 83 Fax: +32 (0)14 25 92 89 info@protech.be...
Need help?
Do you have a question about the Pixy and is the answer not in the manual?
Questions and answers