Sportplus SP-ALB-011 Operating Instructions Manual
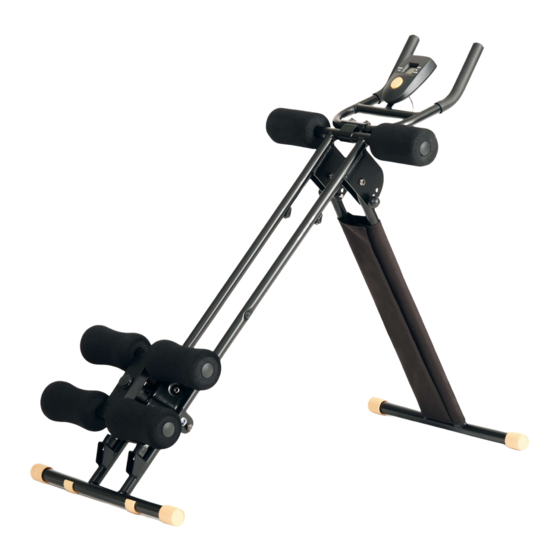
Ab plank
Hide thumbs
Also See for SP-ALB-011:
- Operating instructions manual (76 pages) ,
- Operating instructions manual (92 pages)
Table of Contents
Advertisement
Quick Links
Advertisement
Table of Contents

Related Manuals for Sportplus SP-ALB-011


Summary of Contents for Sportplus SP-ALB-011
- Page 1 OPERATING INSTRUCTIONS AB Plank SP-ALB-011...
-
Page 2: Table Of Contents
Dear customer, Congratulations for choosing a SportPlus product. We have every expectation that you will be fully satisfied with your new purchase. To guarantee optimal function of this product, please adhere to the following instructions: • Before using this product for the first time, please read the manual carefully! •... -
Page 3: Safety Instructions
SAFETY INSTRUCTIONS INTENDED PURPOSE • This product is intended for household use and is not suitable for medicinal, therapeutic or commercial purposes. • The maximum permissible weight of a person using this product is 100 kg. • When used regularly, the product strengthens and tightens the muscles in your belly, butt and thighs. - Page 4 CAUTION - PRODUCT DAMAGE • Do not alter the product in any way and use only original replacement parts. Have all repairs carried out in a professional workshop or from similarly qualified persons - improper repairs can lead to serious risks for the user. Use the product exclusively for the intended purpose as described in this user manual.
-
Page 5: Exploded Diagram
EXPLODED DIAGRAM... -
Page 6: Components List
COMPONENTS LIST Parts Quantity End plug Skid Nut (M8) Bearing Metal sleeve Castor Retainer for rubber buffer End cap Protective cap Foam pad Shaft Computer cable sleeve Foam pad (main frame) Safety pin φ8*55 Hex screw (M8*40) Rubber buffer (large) Computer sensor sleeve End cap (main frame) Handle... -
Page 7: Assembly Instructions
ASSEMBLY INSTRUCTIONS STEP 1: • Fully unfold the main frame (24) and the front frame (30). Insert both pins (14) into the appropriate holes to secure the product. STEP 2: • Fasten the handlebar (19) to the main frame (24). Secure using 2 sets of hex screws (22) and curved washers (21). - Page 8 STEP 3: • Place the foam pads (10) onto the skid (2). Attach the larger foam pads (13) to the main frame (24). STEP 4: • Connect the computer (26) to the computer cable (23). Then mount the computer to the handlebar (19).
-
Page 9: Operating The Computer
OPERATING THE COMPUTER MODE button: • Mode: Select the desired function • Reset: Reset time, training steps, calories (press and hold for 3 seconds) FUNCTIONS: AUTO ON/OFF • The computer turns on automatically when any button is pressed or when the built-in sensor detects use of the product. -
Page 10: Training
TRAINING TRAINING TIPS All recommendations in this manual are only intended for healthy persons and not for persons with heart/cardiovascular problems! All tips are intended only as rough suggestions for a training program. If necessary, consult your physician for tips that meet your personal requirements. - Page 11 2. FREQUENCY Most experts recommend a combination of health-conscious nutrition, which must be adapted according to the training goal, and physical exercise three to five times per week. A normal adult should train twice per week to retain his/her current level of fitness. In order to improve his/her condition and to change body weight, a person requires minimum 3 training sessions per week.
-
Page 12: Skid
TRAINING EXERCISES STARTING POSITION Grasp the handlebar (19) with both hands. Rest your elbows and knees on the corresponding foam pads (13, 10). Your body posture should be straight. LIFT YOUR BODY Now use your hands to lift your entire body weight upward, similar to a pull-up. -
Page 13: Maintenance, Cleaning And Care
MAINTENANCE, CLEANING AND CARE • After assembly and before using your home trainer, always make sure that all bolts/ nuts are fully and correctly tightened. • The safety level of the product can be maintained only when it is regularly checked for damage and wear. -
Page 14: Notes On Disposal
TRANSPORT • Remove both pins (14) from the holes to unlock the product. • Now collapse the main frame (24) and front frame (30) together. • During transport, make sure to prevent collision with sharp objects. NOTES ON DISPOSAL Environmental protection: Packaging materials are raw materials and can be recycled. -
Page 15: 10. Complaints & Warranty
Availability: Monday to Friday from 9:00 am to 6:00 pm Service hotline: +442033184415* Email: Service@SportPlus.org URL: http://www.SportPlus.org National fixed-line network, call charges depend on your phone company/your phone contract. Please have the following information at hand when you call. - Page 16 WARRANTY TERMS SportPlus guarantees that the product this warranty applies to was manufactured using high-quality materials and has been inspected with the utmost attention. The operation and assembly of the product according to the user manual is a precondition of this warranty. The warranty can be voided due to improper use and/or improper transport of the product.
- Page 17 Servicehotline: +44 - 203 318 4415 (Call charges depend on your phone company / your phone contract.) E-Mail: service@sportplus.org URL: http://www.sportplus.org Latupo GmbH Waterloohain 9 22769 Hamburg Germany...
Need help?
Do you have a question about the SP-ALB-011 and is the answer not in the manual?
Questions and answers