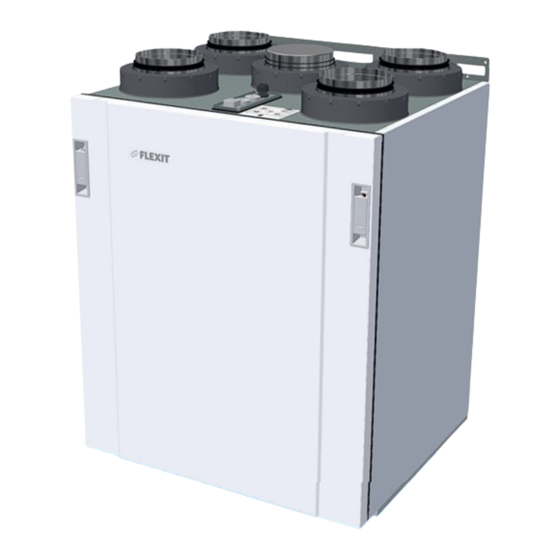
Summary of Contents for Flexit Nordic S2
- Page 1 117201EN-03 2022-12 Nordic S2 Flexit ART.NO. 800110, 800111, 800112, 800113 USER MANUAL Air handling unit...
- Page 2 N O R D I C S 2...
-
Page 3: Table Of Contents
Contents Automatic control......................6 Functional description of balanced ventilation ............7 2.1. Fans (M1, M2) ......................... 7 2.2. Filters (FI1, FI2) ........................ 7 2.3. Rotor (HR-R) ........................7 2.4. Heating element (EB) ....................7 2.5. Temperature sensors (B1, B4) ..................7 2.6. For use with dampers .................... - Page 4 N O R D I C S 2 Symbols used These products bear a number of symbols used for labelling the actual product and in installation and user documentation. Supply air Extract air Extract air from kitchen DANGER: DANGER! DO NOT ELECTRICITY TOUCH Exhaust air...
- Page 5 SAFETY INSTRUCTIONS • To avoid the risk of fire, electric • This unit is only designed for shock or injury, read all the safety ventilation air in homes and instructions and warning texts commercial buildings. before using the unit. • To maintain a good indoor •...
-
Page 6: Automatic Control
For more information on the automatic control system, User manual Flexit GO • Flexit GO app • NordicPanel control panel (accessory) To control the ventilation unit via a smartphone/tablet, See manual (120018). download the app from Google Play or the App Store. -
Page 7: Functional Description Of Balanced Ventilation
2. Functional description of balanced ventilation 2.1. FANS (M1, M2) 2.6. FOR USE WITH DAMPERS The fans ensure that air enters and leaves the building. 2.6.1. Damper (DA1) They can be individually adjusted for optimal operation. There is a closing air damper in the exhaust air duct to prevent cold draughts. -
Page 8: Operating The Door
N O R D I C S 2 3. Operating the door 1. Turn the screw in the lock 90°. 2. Flip up the lock handle 3. The lock handle needs to be lifted right up to release. Therefore press the lock handle right up while opening the door. -
Page 9: If A Door Needs To Be Removed
3.1. IF A DOOR NEEDS TO BE REMOVED If there is limited space in front of the unit, the lock screw on the underside of the unit can be unscrewed (see Fig. 2) and the door pushed out sideways (see Fig. 3). In this case it can be open less than 40º. -
Page 10: Cleaning And Maintenance
N O R D I C S 2 4. Cleaning and maintenance To avoid accidental swapping of the fans, it is recommended that only one fan is switched off at a time. Before opening the door: Switch off the heat, let the fans continue To take out the fans: unplug the unit and wait 2 minutes 1. - Page 11 4.2. CHANGING THE FILTERS • Reduced performance of the unit • The unit becoming dirty • Humidity damage indoor air quality it is important to change them when • Reduced indoor air quality they are dirty. the degree of contamination of the air where they are at least once a year, preferably in the autumn (after 1.
- Page 12 It is important to use a Flexit original filter. the ventilation unit may not work as intended. Flexit therefore accepts no liability for any operating faults Clogged filters may reduce heat recovery in the ventilation unit and cause humidity damage.
-
Page 13: Changing The Brush Strips
4.3. CHANGING THE BRUSH STRIPS The brush strips become worn over time. If they do not lie tightly against the rotary exchanger, it may be necessary to change them. Alternatively, they may be moved closer to the rotor, the circuit board. Proceed as follows: 3. - Page 14 N O R D I C S 2 etc. There are 4 brush strips on the rotor, 2 on each can be removed. side. Use a broad screwdriver, so you can get a good and continue to the other. Lift it carefully, bit by bit. 9.
-
Page 15: Cleaning The Rotor
4.4. CLEANING THE ROTOR It is important to screw the profile on the right way so that the seal Further cleaning is possible by removing the rotor, spraying it with a grease solvent and then blowing it sits tightly against the partition clean from the opposite side. -
Page 16: Maintenance Table
N O R D I C S 2 5. Maintenance table Component Action Interval Filter Filters must be changed at least once a year. It is best to change them twice a year, before and after 6-12 months Fans The fan in a unit connected to a kitchen hood should be inspected once a year. 12 months 3 years The fans should be cleaned as needed. -
Page 17: Troubleshooting
6. Troubleshooting Type of fault Remedial action Cold draughts Check which supply temperature has been selected. See control panel. Check that the rotor rotates. Check that heating comes on. Fans not working Check that power is connected to the unit. Check that the overheating thermostat has not cut out. -
Page 18: Complaints
N O R D I C S 2 7. Complaints Warranty claims will only be valid if the instructions in the manuals have been followed. Complaints about this product may be raised in accordance with the applicable terms of sale, provided that the product has been used and maintained correctly. - Page 19 N O R D I C S 2...
- Page 20 The product is listed in the database for building products that can be used in Nordic Swan Ecolabelled buildings. Flexit participates in the ECP programme for RAHU. FLEXIT AS, Moseveien 8, 1870 Ørje, Norway www.flexit.com...


Need help?
Do you have a question about the Nordic S2 and is the answer not in the manual?
Questions and answers