Table of Contents
Advertisement
Advertisement
Table of Contents

Related Manuals for Dell Wyse 5470


Summary of Contents for Dell Wyse 5470
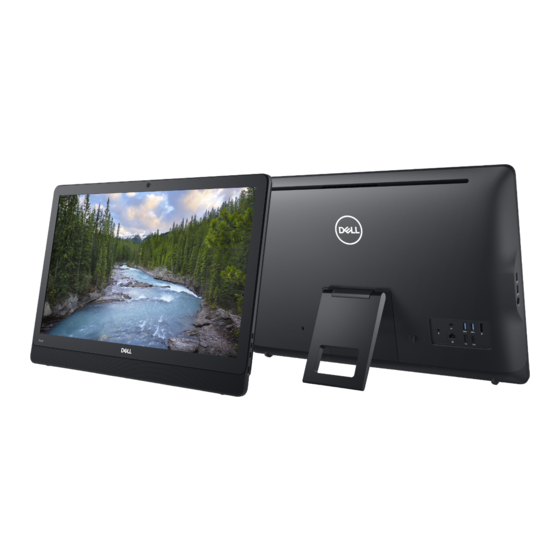
- Page 1 Wyse 5470 All-in-One Thin Client Service Manual...
- Page 2 A WARNING indicates a potential for property damage, personal injury, or death. © 2018 - 2019 Dell Inc. or its subsidiaries. All rights reserved. Dell, EMC, and other trademarks are trademarks of Dell Inc. or its subsidiaries. Other trademarks may be trademarks of their respective owners.
-
Page 3: Table Of Contents
Contents 1 Working on your thin client......................5 Safety instructions................................5 Before working on your thin client............................5 Safety precautions................................6 Electrostatic discharge—ESD protection.......................... 6 ESD field service kit ................................7 Transporting sensitive components............................ 7 After working on your thin client............................8 2 Removing and installing components..................... - Page 4 Virtualization support screen options..........................51 Maintenance screen options..............................52 System Logs screen option..............................52 Advanced configurations..............................52 4 Troubleshooting your system...................... 53 Enhanced Pre-Boot System Assessment diagnostics....................53 Running the ePSA diagnostics.............................53 Power behavior..................................54 Power state and LED status..............................55 5 Getting help..........................56 Contacting Dell..................................56 Contents...
-
Page 5: Working On Your Thin Client
Damage due to servicing that is not authorized by Dell is not covered by your warranty. Read and follow the safety instructions that ship with the product. -
Page 6: Safety Precautions
Due to the increased density of semiconductors used in recent Dell products, the sensitivity to static damage is now higher than in previous Dell products. For this reason, some previously approved methods of handling parts are no longer applicable. -
Page 7: Esd Field Service Kit
Transporting sensitive components When transporting ESD sensitive components such as replacement parts or parts to be returned to Dell, it is critical to place these parts in anti-static bags for safe transport. -
Page 8: After Working On Your Thin Client
4. Keep the load close. The closer it is to your spine, the less force it exerts on your back. 5. Keep your back upright, whether lifting or setting down the load. Do not add the weight of your body to the load. Avoid twisting your body and back. -
Page 9: Removing And Installing Components
Recommended tools The procedures in this document require the following tools: • Phillips head screwdrivers: #0, #1, and #2 • Plastic scribe Screw list Table 1. Wyse 5470 All-in-One Component Screw type Quantity Screw image Cable cover M3x9 System board shield... -
Page 10: Stand
Component Screw type Quantity Screw image Input and Output bracket M3x5 System board M3x5 Speakers M3 4+7.1 XZN Power button board M3x5 Microphone M2x2.5 Input and Output board shield M3x5 Input and Output board M2.5x3.5 Headset port M3x5 Antennas M2x2.5 Display panel M3x5 Middle frame... - Page 11 Removing and installing components...
-
Page 12: Installing The Easel Stand
Steps 1. Pry up the stand cover off the back cover using a plastic scribe. 2. Slide and remove the stand cover from the back cover. 3. Remove the two screws (M4x8) that secure the easel stand to the stand bracket and lift the stand off the back cover. Installing the easel stand Prerequisites If you are replacing a component, remove the existing component before performing the installation procedure. - Page 13 Removing and installing components...
-
Page 14: Back Cover
Steps 1. Align the screw holes on the stand bracket to the screw holes on the easel stand. 2. Tighten the two screws (M4x8) that secure the easel stand to the chassis. 3. Slide and place the stand cover on the stand bracket. Back cover Removing the back cover Prerequisites... -
Page 15: Installing The Back Cover
Steps 1. Using a scribe, pry the back cover from the chassis. 2. Ensure all the notches are unlocked using the scribe around the thin client. 3. Lift the back cover away from the chassis of the thin client. Installing the back cover Prerequisites If you are replacing a component, remove the existing component before performing the installation procedure. -
Page 16: Vesa-Mount Bracket
Steps 1. Place the back cover on to the system chassis. 2. Align the notches on the back cover with the slots on the chassis. 3. Press the back cover to the system chassis and ensure all the locks are secured in position. Next steps 1. -
Page 17: Installing The Vesa-Mount Bracket
Steps 1. Remove the four screws (M3x5) that secure the VESA-mount bracket to the middle cover. 2. Lift the VESA-mount bracket off the middle cover. 3. Note the speaker cable routing on the VESA-mount bracket and remove it from the routing guides. Installing the VESA-mount bracket Prerequisites If you are replacing a component, remove the existing component before performing the installation procedure. -
Page 18: On-Screen Display Board
Steps 1. Align the screw holes on the VESA-mount bracket with the screw holes on the middle frame. 2. Replace the four screws (M3x5) that secure the vesa-mount bracket to the middle frame. 3. Route the speaker cable through the routing guides on the VESA-mount bracket. Next steps 1. -
Page 19: Installing The Osd Board
Steps 1. Open the latch and disconnect the cable from the system board. 2. Peel off the OSD cable from the middle frame. 3. Move the securing clip away from the control-buttons board and lift the OSD board out of the slot. Installing the OSD board Prerequisites If you are replacing a component, remove the existing component before performing the installation procedure. -
Page 20: Solid-State Drive
Steps 1. Move the securing clip away and place the OSD board until it locks in to the display bezel. 2. Adhere the tape that secures the OSD board cable to the middle frame. 3. Connect the cable to the connector on the system board. 4. -
Page 21: Installing The Solid-State Drive
Steps 1. Remove the screw (M2x3.5) that secures the solid-state drive card to the system board. 2. Slide and remove the solid-state drive off the solid-state drive slot on the system board. Installing the solid-state drive Prerequisites If you are replacing a component, remove the existing component before performing the installation procedure. About this task The following image indicates the location of the solid-state drive and provides a visual representation of the installation procedure. -
Page 22: Memory Module
Steps 1. Align the notch on the solid-state drive with the tab on the solid-state drive slot and slide the solid-state drive into the solid-state drive slot on the system board. 2. Replace the screw (M2x3.5) that secures the solid-state drive to the system board. Next steps 1. -
Page 23: Installing The Memory Modules
Steps 1. Using your fingertips, carefully spread apart the securing clips at each end of the memory-module slot until the memory module pops 2. Slide and remove the memory module from the memory-module slot. Installing the memory modules Prerequisites If you are replacing a component, remove the existing component before performing the installation procedure. About this task The following image indicates the location of the memory modules and provides a visual representation of the installation procedure. -
Page 24: Wireless Card
Steps 1. Align the notch on the memory module with the tab on the memory-module slot. 2. Slide the memory module firmly into the slot at an angle and press the memory module down until it clicks into place. Next steps 1. -
Page 25: Installing The Wireless Card
Steps 1. Remove the screw (M2x3.5) that secures the wireless-card bracket and the wireless card to the system board. 2. Slide the wireless-card bracket off the wireless card. 3. Disconnect the antenna cables from the wireless card. 4. Slide the wireless card out of the wireless card slot. Installing the wireless card Prerequisites If you are replacing a component, remove the existing component before performing the installation procedure. -
Page 26: Heat Sink
Steps 1. Align the notch on the wireless card with the tab on the wireless-card slot and slide the card into the slot. 2. Connect the antenna cables to the wireless card. 3. Slide the wireless-card bracket over the wireless card. 4. -
Page 27: Installing The Heat Sink
Steps 1. In sequential order (as indicated on the heat sink), loosen the four captive screws (M3x7) that secure the heat sink to the system board. 2. Lift the heat sink off the system board. Installing the heat sink Prerequisites If you are replacing a component, remove the existing component before performing the installation procedure. -
Page 28: Coin-Cell Battery
Steps 1. Align the captive screws on the heat sink with the screw holes on the system board. 2. In sequential order (as indicated on the heat sink), tighten the four captive screws (M3x7) that secure the heat sink to the system board. -
Page 29: Installing The Coin-Cell Battery
Steps 1. Pry open the coin-cell battery using a scribe. 2. Remove the coin-cell battery from the holder. Installing the coin-cell battery Prerequisites If you are replacing a component, remove the existing component before performing the installation procedure. About this task The following image indicates the location of the coin-cell battery and provides a visual representation of the installation procedure: Removing and installing components... -
Page 30: Camera
Steps Place the coin-cell battery in the holder and press until it snaps in to the place. Next steps 1. Install the back cover. 2. Install the stand. 3. Follow the procedure in After working on your thin client. Camera Removing the camera Prerequisites 1. -
Page 31: Installing The Camera
Steps 1. Note the antenna, microphone, and camera-cable routing and remove the cables from the routing guides on the display bezel and middle cover. 2. Using your fingertips, press the securing clip and lift the camera assembly. 3. Disconnect the camera cable from the camera. 4. -
Page 32: System Board
Steps 1. Connect the camera cable to the connector port on the system board. 2. Connect the camera assembly to the tabs on the display bezel. 3. Press the camera assembly into the slot on the display bezel until the securing clip locks in place. 4. -
Page 33: Installing The System Board
Steps 1. Disconnect the camera cable, speaker cable, OSD board cable, and converter cable from the system board. 2. Remove the heat sink from the system board. 3. Peel the tape from the middle frame that secures the OSD board cable to the system board. 4. - Page 34 Steps 1. Slide the system board into the slots on to the middle frame. 2. Align the screw holes on the system board with the screw holes on the chassis. 3. Replace the four screws (M3x5) on to the system board. 4.
-
Page 35: Speakers
Speakers Removing the speakers Prerequisites 1. Follow the procedure in Before working on your thin client. 2. Remove the stand. 3. Remove the back cover. About this task The following image indicates the location of speakers and provides a visual representation of the removal procedure: Steps 1. -
Page 36: Middle Frame
Steps 1. Using the alignment posts, place the speakers on the display assembly. 2. Route the speaker cable through the routing guide on the display bezel. 3. Adhere the tape of the speaker cable to the VESA-mount bracket and the routing guide. 4. -
Page 37: Installing The Middle Frame
Steps 1. Note the routing of the antenna, camera, and microphone cables and remove the cables from the routing guides on the middle frame. 2. Disconnect the converter board cable from the display panel and remove it off the middle frame. 3. - Page 38 Steps 1. Align the slots on the middle frame with the slots on the chassis. 2. Slide the display cable through the slot on the middle frame. 3. Place the middle frame on the display assembly and press down until the tabs lock in place. 4.
-
Page 39: Rubber Feet
Rubber feet Removing the rubber feet Prerequisites 1. Follow the procedure in Before working on your thin client. 2. Remove the stand. 3. Remove the back cover. 4. Remove the VESA-mount. 5. Remove the solid-state drive. 6. Remove the wireless card. -
Page 40: Display Panel
About this task The following image indicates the location of the rubber feet and provides a visual representation of the installation procedure: Steps 1. Align the screw holes on the rubber foot with the screw holes on the display bezel. 2. -
Page 41: Installing The Display Panel
6. Remove the on-screen display board. 7. Remove the camera. 8. Remove the WLAN card. 9. Remove the memory module. 10. Remove the solid-state drive. 11. Remove the heat sink. 12. Remove the middle frame. About this task The following image indicates the location of display panel and provides a visual representation of the removal procedure. Steps After performing the preceding steps, you are left with the display panel assembly. - Page 42 About this task The following image indicates the location of display panel and provides a visual representation of the installation procedure. Steps Place the display panel assembly on a flat surface. Next steps 1. Install the middle frame. 2. Install the camera. 3.
-
Page 43: System Setup
Accessing thin client BIOS settings About this task This section describes about the Wyse 5470 AIO UEFI BIOS settings. While starting a thin client, a Dell logo is displayed for a short period. Steps 1. During start-up, press the F2 key. and enter the default password Fireport. -
Page 44: Boot Sequence
Boot Sequence Boot Sequence enables you to bypass the System Setup defined boot device order and boot directly to a specific device. During the Power-on Self-Test (POST), when the Dell logo is displayed you can: • Access System Setup by pressing the F2 key •... -
Page 45: System Configuration Screen Options
Option Description Boot Sequence This option enables you to change the order in which the system boots an operating system. • Default Boot Sequence • Windows Boot Manager • UEFI: Hard Drive, Partition 4 • Boot List Option: You can add a boot option, delete an existing boot option, and view the boot options. -
Page 46: Video Screen Option
Option Description USB Configuration This is an optional feature. This field configures the integrated USB controller. If Boot Support is enabled, the system is allowed to boot any type of USB Mass Storage Devices such as hard drives and USB keys. If the USB port is enabled, the device attached to this port is enabled and available for the operating system. -
Page 47: Security Screen Options
Security screen options Table 6. Security screen options Option Description Admin Password This option enables you to set, change, or delete the administrator password. NOTE: • You must set the administrator password before you set the system or hard drive password. Also, deleting the administrator password automatically deletes the system password and the hard drive password. -
Page 48: Secure Boot Screen Options
Option Description Password Change This option enables you to enable the disable permission to the system and hard drive passwords when the administrator password is set. By default, the Allow Non-Admin Password Changes option is selected. UEFI Capsule Firmware Updates This option enables you to enable or disable UEFI Capsule Firmware. -
Page 49: Intel Software Guard Extensions Screen Options
Options Description Expert Key Management This option enables you to manipulate the security key databases only if the system is in Custom Mode. The Enable Custom Mode option is disabled by default. The options include: • • • • If you enable the Custom Mode, the relevant options for PK, KEK, db, and dbx is displayed. -
Page 50: Power Management Screen Options
Option Description Intel SpeedStep This option enables you to enables or disables the Intel SpeedStep feature. The option is: Enable Intel SpeedStep This option is enabled by default. C-States Control This option enables you to enables or disables the additional processor sleep states. -
Page 51: Post Behavior Screen Options
Option Description Block Sleep The Block Sleep option blocks you from entering to sleep mode in the operating system environment. Block Sleep—This option is disabled by default. POST behavior screen options Table 11. POST behavior options Option Description Adapter Warnings This option enables or disables the system setup (BIOS) warning messages when you use certain power adapters. -
Page 52: Maintenance Screen Options
Option Description VT for Direct I/O This option specifies whether a virtual machine monitor can utilize the additional hardware capabilities provided by Intel Virtualization Technology for Direct I/O. This option is not enabled by default. Maintenance screen options Table 14. Maintenance options Option Description Service Tag... -
Page 53: Troubleshooting Your System
Troubleshooting your system You can troubleshoot the thin client by using indicators such as diagnostic lights and error messages during the operation of the device. Additionally, you can use Enhanced Pre-Boot System Assessment (ePSA) diagnostics to carry out complete diagnosis and troubleshooting of thin clients. -
Page 54: Power Behavior
6. To run a diagnostic test on a specific device, press Esc and click Yes to stop the diagnostic test. 7. Select the device from the left pane, and click Run Tests. If there are any issues, error codes are displayed. Note the error code and validation number, and contact Dell. Power behavior Table 17. -
Page 55: Power State And Led Status
AC adapter originally shipped. The system is unable to boot. Please connect a Dell xxxxxxW AC adapter or greater for best system performance. Press any key to shut down. Power state and LED status Table 18. -
Page 56: Getting Help
About this task Dell provides several online and telephone-based support and service options. Availability varies by country and product, and some services may not be available in your area. To contact Dell for sales, technical support, or customer service issues: Steps 1.
Need help?
Do you have a question about the Wyse 5470 and is the answer not in the manual?
Questions and answers