Table of Contents
Advertisement
Quick Links
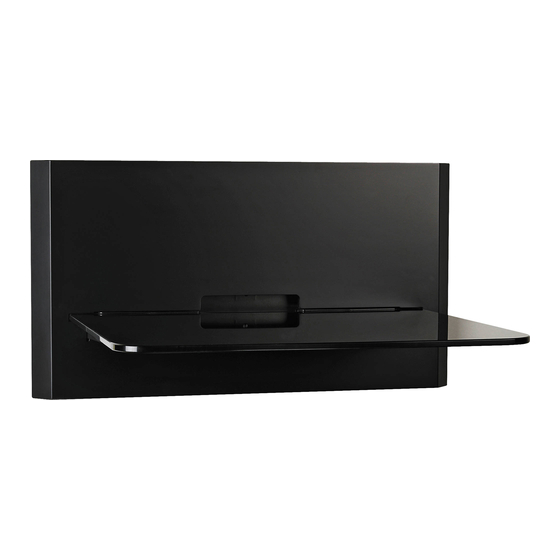
BLADE1
SINGLE SHELF MODULAR WALL FURNITURE
CAUTION: DO NOT EXCEED
MAXIMUM LISTED WEIGHT
CAPACITY. SERIOUS INJURY OR
PROPERTY DAMAGE MAY OCCUR!
SINGLE STUD INSTALLATION
25 lbs
11.3 kg
DOUBLE STUD INSTALLATION
SOLID CONCRETE INSTALLATION
OM # OM1100441
PN # BLADE1 = L27-OM1100441-CON-081711vB
VERSION
MANUAL DE INSTRUCCIONES
РУКОВОДСТВО ПО ЭКСПЛУАТАЦИИ
Reduce.Reuse.Recycle
35 lbs
15.8 kg
B
INSTRUCTION MANUAL
MANUEL D'INSTRUCTIONS
BENUTZERHANDBUCH
INSTRUCTIEHANDLEIDING
MANUALE DI ISTRUZIONI
INSTRUKCJA OBSŁUGI
NÁVOD K OBSLUZE
KEZELÉSI KÉZIKÖNYV
ΕΓΧΕΙΡΙΔΙΟ ΟΔΗΓΙΩΝ
MANUAL DE INSTRUÇÕES
BRUGERVEJLEDNING
ASENNUSOPAS
MONTERINGSANVISNING
MANUAL CU INSTRUCŢIUNI
РЪКОВОДСТВО ЗА РАБОТА
JUHEND
LIETOŠANAS PAMĀCĪBA
NAUDOJIMO INSTRUKCIJA
NAVODILA
NÁVOD NA OBSLUHU
TALİMAT KILAVUZU
BRUKSANVISNING
آﺘﻴﺐ اﻟﺘﻌﻠﻴﻤﺎت
说明手册
取扱説明書
P1
Advertisement
Table of Contents

Related Manuals for Omnimount BLADE1


Summary of Contents for Omnimount BLADE1
- Page 1 BLADE1 OM # OM1100441 PN # BLADE1 = L27-OM1100441-CON-081711vB SINGLE SHELF MODULAR WALL FURNITURE VERSION INSTRUCTION MANUAL MANUAL DE INSTRUCCIONES MANUEL D’INSTRUCTIONS BENUTZERHANDBUCH INSTRUCTIEHANDLEIDING MANUALE DI ISTRUZIONI INSTRUKCJA OBSŁUGI NÁVOD K OBSLUZE KEZELÉSI KÉZIKÖNYV ΕΓΧΕΙΡΙΔΙΟ ΟΔΗΓΙΩΝ MANUAL DE INSTRUÇÕES BRUGERVEJLEDNING...
- Page 2 ESPAÑOL Descargo de responsabilidad. OmniMount Systems, Inc. ha puesto el máximo esfuerzo para que este manual sea preciso y completo. No obstante, no garantiza que la información aquí incluida cubra todos los detalles, condiciones o variantes. Tampoco prevé todas las posibles contingencias relacionadas con la instalación o el uso de este producto. La información que contiene este documento queda sujeta a cambio sin aviso previo o compromiso alguno.
-
Page 3: Maximum Weight Capacity
WEIGHT CAPACITY MAXIMUM WEIGHT CAPACITY POUNDS (LBS) / KILOGRAMS (KG) MAXIMUM SCREEN SIZE SINGLE STUD 25 (LBS) / 11.3 (KG) DOUBLE STUD 35 (LBS) / 15.8 (KG) SOLID CONCRETE 35 (LBS) / 15.8 (KG) DOUBLE STUD INSTALLATION SINGLE STUD INSTALLATION SOLID CONCRETE INSTALLATION CAUTION! 25 lbs... - Page 4 HARDWARE CAUTION! PH#3 ONLY Screws / Hardware for Product ( OM1100441vA Pouch Location Part # Description WASHER NYLOCK NUT STANDOFF (For double installation only) M5 PHILLIPS SCREW (For double installation only) M4 PHILLIPS SCREW COVER SCREW OPEN WRENCH ALLEN WRENCH Screws / Hardware for Wall Mounting ( Wall Kit 12-3vB Pouch Location...
- Page 5 STEP - 1 Install screws Coloque los tornillos Installez les vis Drehen Sie die Schrauben ein Installeer de schroeven Installare le viti Załóż śruby Nainstalujte šrouby Helyezze be a csavarokat. Τοποθετήστε τους κοχλίες Montar parafusos Isæt skruerne Asenna ruuvit Montera skruvar Montaţi şuruburile Поставяне...
- Page 6 STEP - 3 Install screws Coloque los tornillos Installez les vis Drehen Sie die Schrauben ein Installeer de schroeven Installare le viti Załóż śruby Nainstalujte šrouby Helyezze be a csavarokat. Τοποθετήστε τους κοχλίες Montar parafusos Isæt skruerne Asenna ruuvit Montera skruvar Montaţi şuruburile Поставяне...
-
Page 7: Single Stud Installation
SINGLE WALL SHELF INSTALLATION OPTIONS PAGE 13-14 PAGE 15-16 PAGE 17 Single stud installation Double stud installation Solid Concrete Instalación en panel simple Instalación en panel doble Concreto sólido Installation sur un seul poteau Installation sur deux poteaux Béton massif Montage an Einzelbalken Montage an Doppelbalken Beton... - Page 8 STEP – 4: OPTION A Find stud and mark edge and center locations Ubique el panel y marque las ubicaciones de los bordes y el centro. Repérez l'emplacement d'une poutre, puis marquez l'emplacement des bords et du centre de cette poutre. Suchen Sie einen Balken und markieren Sie Seiten und Mitte.
-
Page 9: Install Shelves
STEP – 5: OPTION A Install shelves Coloque los estantes Installez les tablettes Montieren Sie die Böden Plaats de schappen Montare i ripiani Zamontuj półki Nainstalujte police Szerelje fel a polcokat. Εγκαταστήστε τα ράφια Montar prateleiras Installér hylder Asenna hyllyt Montera hyllor Instalaţi poliţele Поставяне... - Page 10 STEP – 4: OPTION B Find stud and mark edge and center locations Ubique el panel y marque las ubicaciones de los bordes y el centro. Repérez l'emplacement d'une poutre, puis marquez l'emplacement des bords et du centre de cette poutre. Suchen Sie einen Balken und markieren Sie Seiten und Mitte.
- Page 11 STEP – 5: OPTION B Install shelves Coloque los estantes Installez les tablettes Montieren Sie die Böden Plaats de schappen Montare i ripiani Zamontuj półki Nainstalujte police Szerelje fel a polcokat. Εγκαταστήστε τα ράφια Montar prateleiras Installér hylder Asenna hyllyt Montera hyllor Instalaţi poliţele Поставяне...
- Page 12 STEP – 5: OPTION C Install shelves Coloque los estantes Installez les tablettes Montieren Sie die Böden Plaats de schappen Montare i ripiani Zamontuj półki Nainstalujte police Szerelje fel a polcokat. Εγκαταστήστε τα ράφια Montar prateleiras Installér hylder Asenna hyllyt Montera hyllor Instalaţi poliţele Поставяне...
- Page 13 STEP - 6 STEP - 7...
-
Page 14: Route Cables
STEP - 8 Partially install Instalación parcial Installez partiellement Montieren Sie teilweise Installeer gedeeltelijk Installare parzialmente Częściowo zainstaluj Částečně nainstalujte Részlegesen szerelje fel. Μερική εγκατάσταση Instalar parcialmente Installér delvist Asenna osaksi Ofullständig installation Instalare parţială Частично инсталиран Paigaldage osaliselt Daļēja uzstādīšana Sumontuokite iš... -
Page 15: Installation Complete
INSTALLATION COMPLETE For multiple shelf installation, please continue with this installation guide. *Additional Blade 1 sold separately DOUBLE SHELF INSTALLATION* Not included Optional No se incluye Opcional Non inclus Optionnel Nicht im Lieferumfang enthalten Optional Niet inbegrepen Optioneel Non incluso Opzionale Nie należy do zestawu Opcjonalne... - Page 16 DOUBLE SHELF INSTALLATION* STEP - 10 – Assemble Arme Assemblez Montieren Zet in elkaar Assemblare Złóż Smontujte Szerelje össze Συναρμολογήστε Montar Saml Kokoa Montera Asamblaţi Монтаж Pange kokku Montāža Surinkti Montaža Zostavte Сборка Monte Edin Montere ﺗﺠﻤﻴﻊ 装配 組み立てる *Additional Blade 1 sold separately...
- Page 17 DOUBLE SHELF INSTALLATION* STEP - 11 – Install screws Coloque los tornillos Installez les vis Drehen Sie die Schrauben ein Installeer de schroeven Installare le viti Załóż śruby Nainstalujte šrouby Helyezze be a csavarokat. Τοποθετήστε τους κοχλίες Montar parafusos Isæt skruerne Asenna ruuvit Montera skruvar Montaţi şuruburile...
- Page 18 DOUBLE WALL SHELF INSTALLATION OPTIONS PAGE 24 PAGE 25 PAGE 26-27 Single stud installation Double stud installation Solid Concrete Instalación en panel simple Instalación en panel doble Concreto sólido Installation sur un seul poteau Installation sur deux poteaux Béton massif Montage an Einzelbalken Montage an Doppelbalken Beton...
- Page 19 DOUBLE SHELF INSTALLATION* STEP – 12: OPTION A - Drill pilot hole Realice el agujero piloto Percez le trou de guidage Bohren Sie die Vorbohrung Boor een montagegat Trapanare il foro pilota Wywierć otwór pilotowy Vyvrtejte vodicí otvor Fúrja ki a vezetőlyukat. Ανοίξτε...
- Page 20 DOUBLE SHELF INSTALLATION* STEP – 12: OPTION B - Drill pilot hole Realice el agujero piloto Percez le trou de guidage Bohren Sie die Vorbohrung Boor een montagegat Trapanare il foro pilota Wywierć otwór pilotowy Vyvrtejte vodicí otvor Fúrja ki a vezetőlyukat. Ανοίξτε...
- Page 21 DOUBLE SHELF INSTALLATION* STEP – 12: OPTION C - Drill pilot hole Realice el agujero piloto Percez le trou de guidage Bohren Sie die Vorbohrung Boor een montagegat Trapanare il foro pilota Wywierć otwór pilotowy Vyvrtejte vodicí otvor Fúrja ki a vezetőlyukat. Ανοίξτε...
- Page 22 DOUBLE SHELF INSTALLATION* STEP – 14: OPTION C - DOUBLE SHELF INSTALLATION* STEP – 15: OPTION C - Tighten Fasteners Ajuste el sujetador Serrez l'attache Ziehen Sie die Befestigung fest Draai de bevestiging vast Serrare il dispositivo di fissaggio Zaciśnij łącznik Utáhněte upevnění...
- Page 23 DOUBLE SHELF INSTALLATION* STEP – 16: DOUBLE SHELF INSTALLATION* STEP – 17: Assemble Arme Assemblez Montieren Zet in elkaar Assemblare Złóż Smontujte Szerelje össze Συναρμολογήστε Montar Saml Kokoa Montera Asamblaţi Монтаж Pange kokku Montāža Surinkti Montaža Zostavte Сборка Monte Edin Montere ﺗﺠﻤﻴﻊ...
- Page 24 DOUBLE SHELF INSTALLATION* STEP – 18: Do not over-tighten No ajuste demasiado los tornillos Évitez tout serrage excessif Nicht zu fest anziehen Maak niet te vast Non stringere eccessivamente Nie dokręcaj zbyt mocno Nedotahujte příliš silně Ne szorítsa meg túl erősen. Μη...
- Page 25 DOUBLE SHELF INSTALLATION* STEP – 20: Route Cables Tienda los cables Installez les câbles Verlegen Sie die Kabel Plaats de kabels Inserire i cavi Poprowadź kable Natáhněte kabely Vezesse el a kábeleket. Δρομολόγηση καλωδίων Dispor os cabos Føringskabler Reititä kaapelit Lägg kablar Direcţionaţi cablurile Маршрутни...
-
Page 26: International Warranty Information
Esta garantía se aplica a los residentes de los Estados Unidos que realizaron la compra en un distribuidor autorizado de OmniMount. Esta garantía cubre los productos OmniMount de los defectos de materiales y de mano de obra por un periodo de 5 años. OmniMount, a su exclusivo criterio, reparará o reemplazará el producto o componente defectuoso. En caso de que no se sigan las instrucciones de Omnimount para el cuidado del producto la garantía quedará... - Page 27 .اﻻﺗﺼﺎل ﻟﻠﻤﺴﺎﻋﺪة، ﻓﺎﻟﺮﺟﺎء ﺑﺤﺎﺟﺔ آﻨﺖ إذا 您需要帮助吗?请致电 ご質問がある場合は、お電話ください OmniMount Systems, Inc. 8201 South 48th Street Phoenix, AZ 85044-5355 1-800-MOUNT-IT (1-800-668-6848) www.omnimount.com All trademarks are the property of their respective companies. OmniMount is a registered trademark of OmniMount Systems, Inc. © 2010...
Need help?
Do you have a question about the BLADE1 and is the answer not in the manual?
Questions and answers