Table of Contents
Advertisement
Advertisement
Table of Contents

Related Manuals for Webfleet LINK 710


Summary of Contents for Webfleet LINK 710
- Page 1 LINK 710 Installation Guide...
-
Page 2: Table Of Contents
Activating the LINK 710........ - Page 3 Restarting your LINK 710..........Resetting your LINK 710 to factory settings....... 23 Technical data.
-
Page 4: Read Me First
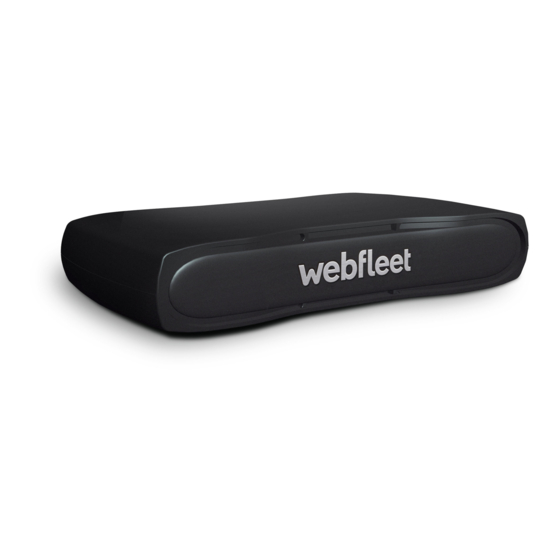
Congratulations You have chosen the LINK 710, a core hardware component from WEBFLEET. With WEBFLEET you are always connected to your vehicles out on the road in a smart and easy way. LINK 710 is a GPS receiver and mobile network module in one unit, always providing the vehicle’s current position. -
Page 5: What's In The Box
What’s in the box LINK 710 ▪ 1. Yellow LED - connection status indicator. 2. Green LED - system status indicator. 3. Reset button. 4. Service/Update Mini-USB-cable connector. 5. 1-Wire-Interface. 6. I/O-cable connector. 7. Power/CAN connector. 8. CAN DIP switch (sealed). -
Page 6: What You Need For The Installation
▪ A device with internet connection and software to scan and read QR codes. ▪ The QR code of the LINK 710, which is printed on a sticker on the bottom of the ▪ device. The login credentials to the LINK Toolkit app. -
Page 7: Safety First
Repairs must be carried out by authorised and qualified personnel only. Never replace damaged parts of the unit yourself. Send the defective unit to Webfleet Solutions for repair. Only the qualified staff of Webfleet Solutions are authorised to repair or... - Page 8 Damage to the device Short-circuits inside the unit can be caused by contact with water or other liquids. The unit may be damaged by contact with water. Use and store the unit in an area protected from water.
-
Page 9: Connection Overview
Connection overview Connection overview: Power/CAN cable * Make sure this wire is fused with max. 10A. ** Twisted pair. Loose ends of CAN L/CAN H wires must be protected against short circuits. Separate by using a heat shrink tube. *** Only one of the CAN2 ports can be used. -
Page 10: Connection Overview: 12 Pin Io Cable
Connection overview: 12 PIN IO cable ** Twisted pair. Loose ends of CAN L/CAN H wires must be protected against short circuits. Separate by using a heat shrink tube. Connection overview: 1 wire... -
Page 11: Connecting To The Can Bus
Connecting to the CAN bus Please refer to the Webfleet Solutions tooling for the CAN configuration of your specific vehicle. Important! If you need to alter the setting of the CAN DIP switch, re-cover the switches using the red seal, taking care to close the rubber cover completely. -
Page 12: Connecting To Power
Connecting to power Note: If want to connect the LINK CAN Sensor 100 to your LINK 710, please use the Data/Power Cable supplied with the LINK CAN Sensor 100. Connect the LINK 710 to the vehicle power supply with the standard vehicle voltage (12 V/24 V). -
Page 13: Choosing The Correct Position
Choosing the correct position First you need to choose the correct position in which to install your LINK 710. Take the following into consideration: Do not expose the LINK 710 to direct sunlight and/or high temperature for long ▪ periods to ensure proper operation. - Page 14 Do not mount the device close to other electrical components in the car like built-in alarms, gateway, control units, navigation units or to toll collect devices where it could cause or receive interferences. Before installing the device, please consider the safety instructions and choose the correct position.
-
Page 15: Mounting The Link 710
Before installing the device, please consider the safety instructions and choose the correct position. The LINK 710 can be attached with the two adhesive strips or the two tapping screws. -
Page 16: Attaching The Holder Using The Adhesive Strip
You can attach the holder to the top or to the bottom side of the LINK 710. Attaching the holder using the adhesive strip You can use the adhesive strip to fix the LINK 710 to your vehicle. Follow the safety instructions in this document. -
Page 17: Mounting The External Gps Antenna
4. Carefully place the LINK 710 in the holder until it clicks into place. Mounting the external GPS antenna If you install the LINK 710 in a position where it has poor GPS reception, you need to use the external GPS antenna accessory from Webfleet Solutions, Art. no 9UKE.001.00, which comes with an integrated magnet and an adhesive pad. - Page 18 Extreme temperature changes or differences can affect the adhesive property of the pad. To mount your external GPS antenna, do the following: 1. Remove the rubber cap from the GPS antenna connector. 2. Insert the plug of the GPS antenna into the GPS antenna connector on the LINK 710.
-
Page 19: Testing Operation
For this test, you may need to move the vehicle to a location with a clear view of the sky, to make sure that you have adequate GPS and mobile network reception. For this test put your LINK 710 device in the position where you want to fix it. 1. Turn on the ignition. -
Page 20: Activating The Link 710
A device with internet connection and software to scan and read QR codes. ▪ The login credentials to the LINK Toolkit app. ▪ The QR code of the LINK 710, which is printed on a sticker on the bottom of the ▪ device. -
Page 21: Diagnostics
Activate device. ▪ Application is running, device is activated. You can monitor the connection of your LINK 710 to the mobile network by looking at the yellow connection LED and referring to the table below. YELLOW LED mode Not connected - No mobile network coverage. -
Page 22: Support
If for longer than ten minutes, please contact ▪ the Webfleet Solutions support team at www.webfleet.com/support. Connected. Support If you cannot find the answer to your question with the help of the tables above, please contact the Webfleet Solutions support team at www.webfleet.com/support. -
Page 23: Resetting The Link 710
If your LINK 710 does not operate properly or signals a system error you may need to restart or reset the unit. Only restart or reset the LINK 710 after you have made sure you have carried out all previously described steps without success. Restarting your LINK 710 To restart your LINK 710, press the reset button with a thin pointed object until it clicks and keep it pressed down for 1 to 2 seconds. -
Page 24: Technical Data
Operating voltage* 9 - 30 V to be fused with max. 10A Ignition to be fused with max. 10A * Internally fused with 2A, fuse is not resettable or replaceable, fuse must be replaced by Webfleet Solutions only Temperature Operation: -30 °C to +70 °C / -22 °F to +158 °F... - Page 25 Digital output 4 output switchable to ground (open drain) CAN bus The three LINK 710 CAN bus interfaces are listen only CAN interfaces by default. In this mode, the CAN interfaces cannot block the connected CAN network. It is possible to switch every CAN Interface between listen only and full functionality by a DIP switch.
- Page 26 5 PE power supply for external capacitive CAN sensors: For Webfleet Solutions accessories only. Please contact Webfleet Solutions Customer Support. CAN3 is equipped with a switchable 120 Ohm load resistor. CAN2 Low speed CAN port can be used alternatively as dedicated 5V output port for contactless CAN sensor support.
-
Page 27: Appendix: Using The I/O Connector
Separate by using a heat shrink tube. Wiring digital inputs The digital inputs of the LINK 710 operate according to the principle of a voltage detector. Voltages below 2 Volts are definitively interpreted as being low and voltages higher than 3 Volts are definitively interpreted as being high. The maximum permissible input voltage is 30 Volts. -
Page 28: Wiring The Digital Output
Wiring the digital output The digital output OUT of the LINK 710 is an open drain output linking to ground. The connected load must be connected between vehicle voltage and OUT. Loads requiring more than 0.35 A must be controlled with relays. If the load requires more than the maximum output voltage use a 12 V/24 V relay, depending on the operating voltage. -
Page 29: Using The In And Out For Changing The Logbook Mode - 710
Using the IN and OUT for changing the logbook mode - 710 You can change the logbook mode using the IN/OUT of your LINK 710. Connect a normally open momentary push button switch and an indicator light to the IN/OUT. -
Page 30: Using The Input In For Idle Time Reporting
If the switch is off (connected to GND), the logbook mode is set to Business trip. Using the input IN for idle time reporting Your LINK 710 can report idle times to WEBFLEET when the engine is running for longer than five minutes and the vehicle is not moving. This requires configuration in WEBFLEET. -
Page 31: Addendum
Webfleet Solutions does not guarantee the error-free operation of this device nor the accuracy of route suggestions provided and shall not be liable for any penalties arising from your failure to comply with applicable laws and regulations. -
Page 32: Prohibited Uses
Bluetooth : 2.5 mW, 4dBm. ▪ Hereby, Webfleet Solutions declares that the radio equipment type telematics black box is in compliance with Directive 2014/53/EU. The full text of the EU declaration of conformity is available at the following internet address: https://www.webfleet.com/... -
Page 33: Operating Temperature
Operating temperature This device will remain fully operational within the following temperature range: LINK 710: -30 °C to +70 °C / -22 °F to +158 °F Prolonged exposure to higher or lower temperatures can cause damage to your device and is therefore advised against. -
Page 34: Exposure Limits
WEBFLEET If your vehicle is configured to connect to WEBFLEET services, it will collect information for the purposes of the WEBFLEET service while the vehicle is in use in association with other WEBFLEET equipment installed in the vehicle. The following information is continuously collected: vehicle location, g-force/acceleration data, and engine-related data such as fuel consumption, valve positions, engine speed, and odometer value. -
Page 35: Model Numbers
Fixings ▪ Basic installation guide ▪ Accessories not supplied with this device To access all the features of your LINK 710 one or more of the following accessories are required. PRO or TomTom PRO Driver Terminal ▪ LINK 105 ▪... -
Page 36: Copyright Notices
Bluetooth® The Bluetooth® word mark and logos are registered trademarks owned by Bluetooth SIG, Inc. and any use of such marks by Webfleet Solutions is under licence. Other trademarks and trade names are those of their respective owners. Copyright (c) 2018 - Tcl/Tk - Regents of the University of California, Sun Microsystems, Inc., Scriptics Corporation,... -
Page 37: Webfleet Solutions Limited Warranty
HOW TO MAKE A WARRANTY CLAIM 3 In order to make a claim of a Defect, you must contact Webfleet Solutions during the Warranty Period via www.webfleet.com to explain the Defect and to obtain an RMA number (Return Materials Authorization) if necessary. You must return the Hardware during the Warranty Period, along with the RMA number provided by Webfleet Solutions and an explanation of the Defect, to the address provided to you by Webfleet Solutions. - Page 38 8 This Limited Warranty cannot be transferred to any other person. LIMITATION OF LIABILITY 9 Neither Webfleet Solutions nor its suppliers shall be liable to you or to any third party for any damages either direct, indirect, incidental, consequential or otherwise (including in each case,...
Need help?
Do you have a question about the LINK 710 and is the answer not in the manual?
Questions and answers