Table of Contents
Advertisement
Quick Links
Advertisement
Table of Contents

Related Manuals for GE KTC-XP1


Summary of Contents for GE KTC-XP1
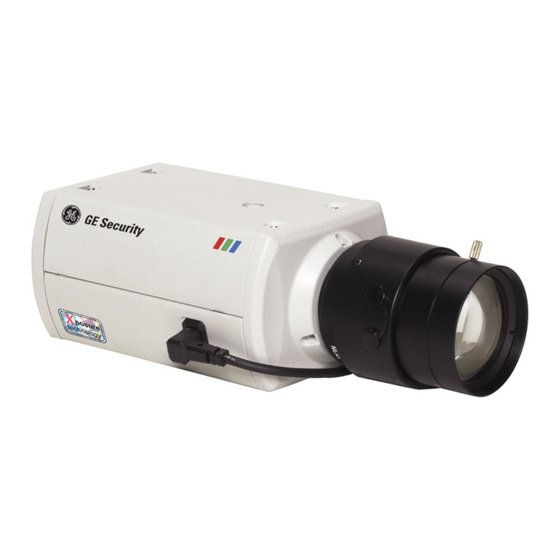
- Page 1 KTC-XP1 UltraView Camera With Xposure Technology...
- Page 2 © 2004 GE Security All Rights Reserved. Any GE Security software supplied with This equipment has been tested and GE Security products is proprietary and found to comply with the limits for a furnished under license and can be used or...
-
Page 3: Table Of Contents
KTC-XP1 UltraView Camera Table of Contents ABLE OF ONTENTS ..............4 EFORE EGIN ............5 ACKAGE ONTENTS ..............6 NSTALLATION 2.1 M ........6 AKING IDEO ONNECTIONS 2.2 S DIP S ......7 ETTING THE WITCH 2.3 A ....8 TTACHING THE USTOMER UPPLIED 2.4 M ........9... -
Page 4: Before You Begin
Before You Begin KTC-XP1 UltraView Camera EFORE EGIN Read these instructions before installing or operating this product. Note: This installation should be made by a qualified service person and should conform to local codes. This manual provides installation and operation information. To use this document, you must have the following minimum qualifications: •... -
Page 5: Package Contents
KTC-XP1 UltraView Camera Package Contents ACKAGE ONTENTS CAUTION: Use direct plug-in UL listed power supplies marked Class 2 or LPS (limited power source) of the required output rating as listed on the unit. Manual Camera C-mount adapter (for C-mount lenses only) Figure 1. -
Page 6: Installation
Installation KTC-XP1 UltraView Camera NSTALLATION AKING IDEO ONNECTIONS Note: With the Xposure technology, both the BNC (composite) and S-video (Y/C video) connections provide sharper images of all scenes (especially high-contrast scenes). The S-video connection, however, provides even greater clarity over the BNC connection. -
Page 7: Setting The Lens -Mode Dip Switch
KTC-XP1 UltraView Camera Installation DIP S ETTING THE WITCH Note: If your lens has a manual iris, ignore this switch. It is for autoiris lenses only. See Figure 3 and set switch as shown: Set to VD Set to DD... -
Page 8: Ttaching The Ustomer Upplied Ens
Installation KTC-XP1 UltraView Camera TTACHING THE USTOMER UPPLIED Note: For optimal performance, use an autoiris lens. Refer to the instructions that came with the lens you purchased for complete installation instructions of the lens. In general, see Figure 4 and perform the following:... -
Page 9: Making Power Connections
KTC-XP1 UltraView Camera Installation AKING OWER ONNECTIONS CAUTION: Use direct plug-in UL listed power supplies marked Class 2 or LPS (limited power source) of the required output rating as listed on the unit. Complete all instruction steps before supplying power to the unit. -
Page 10: Programming
Programming KTC-XP1 UltraView Camera ROGRAMMING Use the OSD (on-screen display) menus to program the camera. OSD C ONTROL OF ENUS OSD menu controls: Use the center selection button to enter a menu or to select a menu option. Use the up and down... -
Page 11: Main Menu
KTC-XP1 UltraView Camera Programming 3.2.1 Camera Setup menu Use these menus to configure signal format (NTSC/PAL), camera ID (i.e., title), iris settings, synchronization mode, and gain control. See section 3.2.2 Camera Setup. White Balance Use this menu to adjust the white balance. -
Page 12: Changing The Signal Format
Programming KTC-XP1 UltraView Camera 3.2.2.1 C HANGING THE IGNAL ORMAT To change the signal format: CAMERA SETUP At the Camera Setup menu, use SYSTEM <NTSC> the up and down buttons ( CAM_ID SETUP. LIGHT CONTROL AIS. to move to the System option SYNC LINELOCK. -
Page 13: Setting The Lens Mode And Adjusting The Defaults
KTC-XP1 UltraView Camera Programming a) Move to the ID DISPLAY option and toggle between the OFF and ON options. Leave the desired option displayed. ON displays the camera ID on the monitor screen. b) Move to the CAMERA ID option and press the center selection button ( ) to access the 12-character label. - Page 14 Programming KTC-XP1 UltraView Camera To set the lens mode (light control): CAMERA SETUP At the Camera Setup menu, use SYSTEM NTSC the up and down buttons ( CAM_ID SETUP. LIGHT CONTROL <AIS. > to move to the Light Control option SYNC LINELOCK.
-
Page 15: Adjusting The Sync Mode
KTC-XP1 UltraView Camera Programming 3.2.2.4 A DJUSTING THE CAUTION: The phase adjustment must be made by a qualified service person. To reduce the effect of picture roll on the monitor caused by the difference in the vertical interval sync pulses of your equipment (cameras, power supplies, monitors, switchers, etc.), you can synchronize the vertical... -
Page 16: (Agc)
Programming KTC-XP1 UltraView Camera If line lock is selected, you can SYNC MENU adjust the vertical phase as follows: V-PHASE With LINELOCK selected and still PREVIOUS PAGE... highlighted, press the center selection button ( ), then use the right and left buttons ( ) to adjust the marker on the scale. -
Page 17: Xiting Amera Etup
KTC-XP1 UltraView Camera Programming Select ON to set the maximum automatic gain value and select OFF to set the system gain manually. To set the maximum level of the AGC MENU (OR MANUAL GAIN) automatic or manual gain: LEVEL With ON or OFF selected and still PREVIOUS PAGE... -
Page 18: Locations (Lighting Environments)
Programming KTC-XP1 UltraView Camera • Hold: In the hold mode, the white balance color temperature is computed as a reference at the moment HOLD is selected with the center selection button ( ). This setting is best when the color range remains constant. - Page 19 KTC-XP1 UltraView Camera Programming To select a lighting environment MAIN MENU setting: CAMERA SETUP. At the Main Menu, use the up and WHITE BALANCE LOCATIONS <GENERAL> down buttons ( ) to move to PTZ. the LOCATIONS option, use the EXIT SAVE CHANGES.
-
Page 20: Ptz
Programming KTC-XP1 UltraView Camera 3.2.5 The camera provides a digital PTZ (pan/tilt/zoom) of 1X – 4X. To access the digital PTZ menu: MAIN MENU At the Main Menu, use the up and CAMERA SETUP. down buttons ( ) to move to... -
Page 21: Exiting With Saving Or Canceling Changes
KTC-XP1 UltraView Camera Programming 3.2.6 XITING WITH AVING OR ANCELING HANGES To exit: MAIN MENU At the Main Menu, use the up and CAMERA SETUP. down buttons ( ) to move to WHITE BALANCE LOCATIONS GENERAL the EXIT option, use the right and PTZ. -
Page 22: Troubleshooting
Troubleshooting KTC-XP1 UltraView Camera ROUBLESHOOTING Problem Probable Cause Solution No picture on the Lens cap is still in Remove the lens cap monitor place No power to the Check that the power camera LED at the camera is lit If the LED is not lit, check... - Page 23 KTC-XP1 UltraView Camera Troubleshooting Problem Probable Cause Solution Picture quality is poor Camera lens is dirty Clean the camera lens Monitor is not set up Ensure that the monitor properly settings are correct Ensure that termination at the monitor is correct...
Need help?
Do you have a question about the KTC-XP1 and is the answer not in the manual?
Questions and answers