
Related Manuals for GE PJ1


Summary of Contents for GE PJ1
-
Page 1: User Manual
GE Digital Camera P Series : User Manual Playback Preparations Basic operation Camera function controls Using the Menus Camera connectivity Appendix... -
Page 2: Declaration Of Conformity
WARNING Do not expose the camera, battery pack, or other accessories to rain or humidity to prevent a fire hazard or electrical shock. For customers in the U.S.A. Tested To Comply With FCC Standards FOR HOME OR OFFICE USE FCC Statement This device complies with part 15 of the FCC Rules. -
Page 3: Safety Precautions
SAFETY PRECAUTIONS Camera notes: Do not store or use the camera in the following types of locations: • In rain, areas with high humidity and dusty places. • In a place where the camera can be exposed to direct sunlight or subjected to high temperatures, e.g. Inside a closed car in summer heat. -
Page 4: Before You Start
BEFORE YOU START Preface Thank you for purchasing this GE digital camera. Please read this manual carefully and keep it in a safe place for future reference. Copyright © Copyright 2011 General Imaging Company All rights reserved. No part of this publication may be reproduced, transmitted,... -
Page 5: About This Manual
About this manual This manual provides you with instructions on how to use your GE digital camera. Every effort has been made to ensure that the contents of this manual are accurate, however General Imaging Company reserves the right to make changes without notice. -
Page 6: Table Of Contents
CONTENTS WARNING ...i SAFETY PRECAUTIONS ...ii BEFORE YOU START ... 1 Preface ...1 Copyright ...1 Trademarks ...1 Safety information ...1 About this manual ...2 Symbols used in this manual ...2 CONTENTS ... 3 GETTING READY ... 7 Unpacking ...7 Camera Views...8 Battery Charging ... - Page 7 Advanced Functions Menu ... 25 WB (White Balance) ... 26 ISO ... 26 Quality ... 27 Size ... 27 Color ... 28 Exposure Compensation ... 28 USING THE MODES ... 29 LCD Screen Display ... 29 Still Picture Mode Display ... 29 Video Shooting Mode Display ...
- Page 8 ID ... 38 Fish eye ... 38 Travel shooting ... 38 Photo frame ... 38 Sketch ... 38 PLAYBACK ... 39 Viewing Photos and Videos ... 39 Thumbnail View ... 40 i button playback function ... 41 Using Zoom on Playback (for still pictures only) ... 43 Using the Delete Button ...
- Page 9 HDR-High Dynamic Range ... 60 Resize ... 61 Rotate ... 61 Red-eye Reduction ... 62 Display Setup ..62 Slideshow ... 63 Wallpaper Settings ... 63 Setup Menu ... 66 Beep ... 67 LCD Brightness ... 67 Power Saver ... 68 Zone ...
-
Page 10: Getting Ready
GETTING READY Unpacking Your package should contain the camera model you purchased along with the following items. If anything is missing or appears to be damaged, please contact your vendor. Warranty Card CD-ROM Special USB cable Rechargeable lithium-ion battery Wrist Strap Base plate External power Power supply... -
Page 11: Camera Views
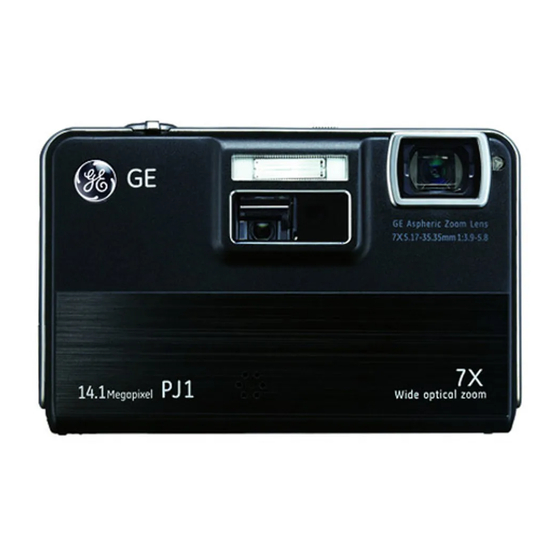
Camera Views Front View Back View Right View... -
Page 12: Top View
Top View Left View 10 Speaker 11 i Button 12 Mode button 13 Playback Button 14 Menu Button Bottom View 24 25 26 Flash Lamp Projector window Infrared Beem receiver (face) Lens AF Assist/Timer Indicator Microphone LCD Screen Status Indicator Infrared Beem receiver (back) 15 Disp/Up Button 16 Flash Mode/Right Button... -
Page 13: Battery Charging
Battery charging 1. Put the battery into the camera. 2. Connect the power extension cable to the external (travel adapter will vary according to location, it is subject to the power supply charger). 3. Insert the external supply charger into a power socket. 10 10 When charging, if the camera indicator is red, it shows that the battery is not fully charged;... -
Page 14: Remote Control
Remote control When using the remote control for the first time, please remove the insulating film as shown in the diagram: Remote control diagram: : Infrared location. : Please see Page 46 for specific functions of remote control keys. Replacing the remote control battery 1. -
Page 15: Insert The Battery And Sd/Sdhc Card (Not Included)
Insert the Battery and SD/SDHC Card (Not included) 1. Open the battery compartment. 2. Insert the battery into the battery slot in the correct position as shown in the following diagram. - Page 16 3. Insert an SD/SDHC card (not included) into the memory 4. Close the battery compartment. card slot as shown below. Write- protection buckle 13 13...
-
Page 17: Turning On And Off
Optional SD/SDHC cards are not included. The use of 64 MB to 16 GB memory cards from recognized manufacturers such as SanDisk, Panasonic and Toshiba are recommended for reliable data storage. To remove the SD/SDHC card, open the battery compartment and gently push the down to release it. Pull the card out carefully. -
Page 18: Mode Button Operation
Mode Button Operation The GE features a convenient mode button that allows for easy mode selection. All available modes are listed as follows: Mode Name Icon Auto mode Select to take still pictures in automatic mode. Manual mode Many of the camera settings can be configured manually in this mode. -
Page 19: Setting Date/Time And Language
Setting Language and Date/Time The Date/Time and Language setup will automatically appear when the camera is turned on the first time. To set the display language, date, and time, go to the following setup options in the General Setup menu. •... -
Page 20: Setting The Date And Time
Setting the Date and Time 1. Select Date/Time with the Up/Down button, then press or right button to enter setting. 2. Use the Left/Right button to select date or time field, then press Up/Down buttons to adjust values. 3. Press the button to confirm the setting. -
Page 21: About The Lcd Screen
About the LCD Screen When you turn the camera on, various icons are shown on the LCD screen to indicate the current camera settings and status. To learn more about the displayed icons, see “LCD Screen display” on page 29. LCD Screen notes: Extremely high-precision technology had been used to manufacture the LCD screen so that most of the pixels are... -
Page 22: Basic Operation
BASIC OPERATION Shooting in Auto Mode Auto mode is the easiest mode to take photos. While operating in this mode, the camera automatically optimizes the camera's settings for best results. To start taking pictures, do the following: 1. Press the Power button to turn the camera on. 2. -
Page 23: Flash
Flash Press Right/Flash button to enter the flash interface, then press Left/Right button to switch among six different flash modes: Flash: Auto • Camera flash goes off automatically based on existing light conditions. • Flash: Red-eye reduction The camera emits a brief flash before the picture is taken to reduce red-eye effects. -
Page 24: Macro Mode
Macro Mode Press the Left/Macro button to enter the close-up photo selection interface, press the Left/Right button to switch between two close-up shooting modes: • Macro : On Select this to focus on subjects that are 5cm from the lens. •... -
Page 25: Ois Anti-Shake
OIS Anti-Shake Enabling the OIS Anti-Shake function will avoid blurry photos caused by hand shake. After selecting the OIS anti-shake function, press the Left/ Right button to select ON/OFF. OIS anti-shake function has two options: • : OFF • : ON Taking photos under extremely unstable conditions (for example, shooting in a moving vehicle) can result in blurry images. -
Page 26: Face Detection
Face Detection This function automatically detects facial features and directs the camera to focus on them. In face detection mode, the camera will automatically detect faces and display a rectangular focus frame around them. The focus frame will turn green to indicate that the face or faces are in focus. -
Page 27: Blink Detection
Blink Detection Blink Detection is enabled automatically under normal shooting conditions. When shooting, if human face is detected with closed eyes, the Blink Detection ( ) will display on the screen to indicate that a blink has been detected. 24 24... -
Page 28: Advanced Functions Menu
Advanced Functions Menu The Advanced Functions menu of the camera includes image size, image quality, white balance, image allow, ISO and EV value. The corresponding functional settings you to capture pictures and videos with optimal results. Set the advanced functions as per the following steps: 1. -
Page 29: Wb (White Balance)
WB (White Balance) The White Balance adjustment allows you to adjust the color temperature for varius light sources to ensure faithful color reproduction. (The WB settings are only available when the Manual mode). camera is in the The White Balance settings include: •... -
Page 30: Quality
Quality The quality setting adjusts the compression ratio of the images. Higher quality settings will produce finer detailed photos, but will take up more memory space. Three quality settings are available: • Quality : Best • Quality : Fine • Quality : Normal Size The size settings refer to the image resolution in pixels. -
Page 31: Color
Color The color settings allows you to add artistic effects directly when taking pictures. You can try different color tones to alter the mood of your pictures. (The Color settings are only available when the camera is in the The color options include: •... -
Page 32: Using The Modes
USING THE MODES LCD Screen Display Still Picture Mode Display Mode: 1 Shooting Mode Icons 2 AF Mode 3 Expo Metering 4 Image Size 5 Image Quality Manual mode Auto mode ASCN mode Scene mode Panorama mode Portrait Single-AF Multi-AF Spot Center AiAE... - Page 33 6 Remaining number of pictures 7 Memory card/built-in memory 8 Battery Status 9 WT Ratio (Displayed only when zoom is activated) 10 Zoom 11 Exposure 12 ISO Value (Adjustable only in 13 Histogram 14 Focus Frame 15 OIS Anti-Shake 16 Continuous Shot 17 Detection Mode indicator (Face Detection/Smile Detection) 18 Picture Color (Adjustable only in 19 White Balance (Adjustable only in...
-
Page 34: Video Shooting Mode Display
Video Shooting Mode Display Mode : 1 Video Mode icon 2 Continuous AF 3 Metering Spot Center AiAE 4 Video Quality 5 Macro Mode 6 Self-timer 7 Remaining Time for Video Recording 8 Memory Card/Built-in Memory 9 Battery Status 10 WT Ratio (Displayed only when zoom is activated) 11 Zoom 12 OIS Anti-Shake 13 Recording Status Icon... -
Page 35: Playback Mode Display
Playback mode display Mode: 32 32 1 Playback Mode icon 2 DPOF file 3 File protection 4 Picture Count Indicator 5 Memory Card/Built-in Memory 6 Battery Status 7 Image Zoom 8 Zoom Magnification Area Indicator 9 Field of View Indicator 10 Memory Space (this picture/Total number of pictures) 11 Recording Date and Time 12 OK:PLAY... -
Page 36: Ascn Mode
ASCN mode In the "ASCN" mode, different recording conditions are detected intelligently and the most suitable settings will be automatically selected. With "ASCN" you can always take good pictures easily. To use "ASCN": 1. Press the Mode button to select ASCN mode, the LCD screen will display the following. -
Page 37: Night Portrait
Night Portrait When you shoot portraits at night, or in low light conditions, ASCN will automatically adjust the exposure for people and night scenes. Backlit Portrait When the sun or any other light source is behind you, ASCN will automatically adjust the foreground exposure to produce good pictures. -
Page 38: Panorama Mode
Panorama mode Panorama Mode allows you to create a panoramic picture. The camera will automatically compose a panoramic picture using the individual shots that you take. Follow these steps to create a panoramic picture: 1. Press Mode button, use the Left/Right button to select Panorama mode, then press the Panorama mode for shooting. -
Page 39: Scene Mode
Scene mode In Manual Scene mode, you can select from a total of 20 scene types to match your needs. You just need to select the right scene for the occasion and the camera will automatically adjust to the optimal settings for you. Press the Mode button to select Scene Selection mode, then enter the scene selection mode, the LCD screen will display the following:... -
Page 40: Sport
Sport For fast-moving subjects. Capture sharp action shots without blur. Indoor For indoors. Reduce blur and improve color accuracy. Snow For snow scenes. Reproduce natural and clear white scenes. Fireworks For fireworks at night. Slow shutter speed adjusted for brilliant images.The use of a tripod is recommended. -
Page 41: Gathering
Gathering For taking pictures of large groups or in areas with uneven lighting. For shooting ID size photos. Fish eye Creates a fish-eye effect, by distorting the center of the image. Travel shooting Produces background image blur that emphasizes the motion of the main subject. -
Page 42: Playback
PLAYBACK Viewing Photos and Videos To view stored photos and video clips on the LCD screen: 1. Press the button to enter the Playback mode. The last recorded photo or video clip is displayed. 2. Use the Left/Right navigation buttons to scroll through the photos or video clips stored in the internal memory or memory card. -
Page 43: Thumbnail View
When playing movie, press Up/Down arrow button mute the volume, press the down arrow until the mute 40 40 Thumbnail View appears. In the playback mode, slide the zoom lever to photos and video thumbnails will display on the screen. 1. -
Page 44: I Button Playback Function
i button playback function In the playback mode, press the button for single playing, date folder and scene search view functions. 1. Press key to enter function menu. 2. Press Up/Down button to select from the following two functions: •Full Screen Playback •Date Folder View 3. - Page 45 When selecting a date in the date folder, sliding the zoom lever to will zoom in the picture; sliding the zoom lever will first zoom out the picture then enter into the date folder index. Press the button to return to the original scale.
-
Page 46: Using Zoom On Playback (For Still Pictures Only)
Using Zoom Playback (for still pictures only) The zoom lever can be used to zoom in from 2X to 8X when playing photos. 1. Press the button to go to the Playback mode. 2. Use the Left/Right navigation buttons to select a photo to magnify. -
Page 47: Using The Delete Button
Using the Delete Button In Playback Mode, you can press the Down/Delete button to delete pictures or videos. To delete pictures or videos: 1. Press the button to enter the Playback Mode. 2. Select the picture or video clip you want to delete with the Left/Right button. -
Page 48: Projector Use
Projector Use Use the camera to project directly This camera has a build-in projector. Photos and movies can be projected with simplicity. To operate the projector, follow these steps: 1. Place the camera on a tripod or a stable surface such as a table. -
Page 49: Show Setting
The function of each button on the remote control unit while in projection mode is as follows: Button Instructions Display 9/16 pcs photo thumbnails, press to return to the full screen playing mode Zoom in 2X to 8X when playing photos, press to return to the full screen playing mode Photo: press photo/video ,... -
Page 50: Slide Show On
Slide Show Press the Up/Down button to select Slide Show On option, press to confirm the setting or press the Left button to return to the main menu, press projecting screen. • Off • Start Effect Press the Up/Down button to select the Effect option, press to confirm the setting or press the Left button to return to the to return to the main menu, press... -
Page 51: Interval
Interval Press Up/Down button to select Interval option, press confirm setting or press Left button to return main menu, press to return to projecting screen. • 2 seg • 4 seg • 8 seg 48 48 Show Time Press the Up/Down button to select Show Time options,, press to confirm the setting or press the Left button to return to the main menu, press •... -
Page 52: Using The Menus
USING THE MENUS Still Menu Mode: In any of the above Still Picture Modes, press the go to the Still Picture menu. To adjust each setting: 1. In the Still Picture menu, choose between different Photo Setup or Camera Setup pages using the Left/Right button, to select the page with the function you want to adjust and press the Down button. -
Page 53: Af Mode (Auto-Focus Mode)
AF Mode (Auto-Focus mode) Use this setting to control the auto-focus mechanism while taking pictures. Two options are available: • Single-AF: The focus frame appears in the center of the LCD screen to focus on the subject. • Multi-AF: The camera automatically scans the field of view in a wide area to find the focus point. -
Page 54: Continuous Af
Continuous AF After Continuous AF is turned on, the camera will adjust focus automatically in response to any camera or subject move- ment. Expo Metering (Exposure Metering) Use this setting to select the size of the area for the exposure to be obtained. -
Page 55: Continuous Shot
Continuous Shot Use this setting to perform continuous shooting. After entering this mode, you can shoot multiple images by continuously holding the shutter button down. There are five available options: • OFF: Turn off the Continuous Shot function. • Continuous shooting: Press and hold the shutter but- ton to shoot continuously until you release the shutter button or when the memory card has run out of space. -
Page 56: Quick Review
Quick Review This setting refers to the quick photo review immediately after taking a picture. The picture stays on the LCD screen for an adjustable period of time. Four options are available: • Off • 1 sec • 2 sec •... -
Page 57: Slow Shutter
Slow Shutter In Slow shutter mode, the shutter will remain open as long as the Shutter button is pressed down. This gives you complete control over the duration of exposure. (The slow shutter mode is available only in manual mode). •... -
Page 58: Movie Menu
Movie Menu Mode: In the Movie Mode, press the button to go to the corre- sponding Movie menu. To configure each setting: 1. In the Movie menu, switch between the Movie Setup or different Camera Setup pages using the Left/Right button, select the page with the function you want to adjust and press the Down button. -
Page 59: Continuous Af
Continuous AF After Continuous AF is turned on, the camera will adjust focus automatically in response to any camera or subject movement. 56 56 Expo Metering (Exposure Metering) Set metering mode for various lighting conditions. Three options are available: • Spot •... -
Page 60: Playback Menu
Playback Menu Mode : button to enter the Playback In Playback mode, press the menu. Please refer to the following sections for detailed instructions on the various menu options. Protect To prevent any pictures or videos from being accidentally erased, use this setting to lock one or all of the files. To protect/unprotect a picture or video: 1. -
Page 61: Delete
2. Use the Up/Down button and select One to lock the selected picture or video, or select All to protect all pictures/videos stored in the built-in memory or memory card. 3. Press the button to select Yes to lock displayed photos or videos, or select De-protection to unlock them, then press the Up/Down button to select Back to return to the playback menu. -
Page 62: Dpof (Digital Print Order Format)
• Delete All: 1. In the Delete option, select All and then press the button. 2. Use Up/Down button to select Yes to delete all files, or select Cancel to return to the menu. Delete Date Folder: 1. In the Delete option, press the button after selecting Date Folder. -
Page 63: Trim
Trim The Trim setting allows you select an area of the photo you want to keep and then save it as a new photo. To trim a picture: 1. Select the Trim setting from the 2. Using the Left/Right buttons, locate the photo that you want to crop and have it displayed on the LCD screen. -
Page 64: Resize
Resize This setting allows you to resize a picture to a specified resolution, and saves it as a new picture. 1. Select the Resize setting from the Playback menu as described previously. 2. Use the Left/Right navigation buttons to select a picture to resize. -
Page 65: Red-Eye Reduction
Red-eye Reduction Use this setting to remove red-eyes in your photos. 1. Select Red-eye Reduction in the Playback menu as described previously. 2. Use the Left/Right button to select the picture from which the red-eye effect needs to be removed. 3. -
Page 66: Slideshow
Slideshow This setting allows you to view all the stored pictures as a slideshow. 1. Select Slide Show menu, press the enter the slide show setup interface. 2. Press Up/Down button to select effect, interva or repeat, and press or Right button to enter and adjust settings. Press button to confirm settings. -
Page 67: Menu Wallpaper
Startup Screen: Use the Up/Down button to select the Startup Screen option, press the to exit the menu. page, and press to confirm or press Left button to return to last to exit the menu. • User • GE logo... -
Page 68: Set Back To Default
Set back to default: Use Up/Down button to select Back To Default, press the to confirm or press the Left button to return to the previous page, and press to exit the menu. • Yes • No... -
Page 69: Setup Menu
Setup Menu Mode : The Setup menu for the camera is available in all modes. Each menu page can be selected by pressing the switching between menus with the Left/Right button. To adjust the settings: 1. Select the menu page with the function you want to adjust and press the Down button. -
Page 70: Beep
Beep Use this setting to adjust the beep volume when buttons are pressed and change the tones for Shutter button, self-timer, and power-on/power-off. To change this setting: 1. Select the Beep setting from the Setup menu as described previously. 2. Use the Up/Down navigation buttons to switch between volume, shutter tone, key tone, self-timer tone, and power tone fields. -
Page 71: Power Saver
Power Saver This setting allows you to save power and get the maximum possible running time from your battery. Follow the steps below to turn off the LCD screen and camera automatically after a period of inactivity. 1. Select the Power Save setting from the Setup menu as described previously. -
Page 72: Date/Time
Date/Time See “Setting the Date and Time“ section on page 17. Language See “Setting the Language“ section on page 16. File and Software Format Memory Please note: formatting enables you to delete all contents in the memory card and built-in memory, including protected photo and movie files. -
Page 73: File Numbering
File Numbering After you take a picture or video clip,the camera will save it in a sequential number. You can use this to reset the file numbering to 1. (When more than 999 images are on the memory card, the use of this features will have no effect). 1. -
Page 74: Reset Settings
FW Version (Firmware Version) Use this setting to view the camera's firmware version. Select FW Version in the File and Software menu. To update to the latest firmware version, go to the following website: www.ge.com/digitalcameras and look under Support. -
Page 75: Transmission
Transmission Connecting to a PC Use the USB cable and ArcSoft software (CD-ROM) supplied with your camera to copy (transfer) pictures to a computer. Setting the USB mode Since the camera’s USB port can be set to connect with either a PC or a Printer, the following steps will allow you to ensure that the camera is correctly configured to connect with a PC. - Page 76 5. Disconnect the camera once transfer is completed. If the USB option is set to [PC] : Turn the camera off and disconnect the USB cable. If the USB option is set to [PC (PTP) ] : Remove the camera from the system as described below before turning the camera off and disconnecting the USB cable.
-
Page 77: Connecting To A Pictbridge Compatible Printer
Connecting to a PictBridge Compatible Printer PictBridge allows printing images from a memory card in a digital camera directly to a printer, regardless of brand. To find out if a printer is PictBridge compatible, simply look for the PictBridge logo in the packaging or check the manual for specifications.With the PictBridge function on... -
Page 78: Connecting The Camera And Printer
Connecting the camera and printer. 1. Make sure both the camera and printer are turned on. 2. Connect one end of the supplied USB Interface Cable to the Digital port on your camera. 3. Connect the other end of the cable to the USB port on the printer. -
Page 79: Using The Pictbridge Menu
Using the PictBridge Menu After setting the USB mode to Printer, the PictBridge menu will appear. Press the Up/Down button to select a menu item, then Press or Right button to enter this item. Refer to the following sections for more detailed information on each setting. -
Page 80: Print Without Date
3. Use the Up/Down navigation button to select the number of prints for the displayed photo. 4. Press the button and the following screen will appear. 5. Select Yes to print, or Cancel. Then press the Print without date Use this setting to print the photos without dates on them. 1. -
Page 81: Print Index
2. Select Yes to print, or Cancel. Then press the 5. Select Yes to print, or Cancel. Then press the button. button. Print index You can use this setting to print all the photos currently in your camera. 1. Select Print index from the PictBridge menu. The following screen will appear. -
Page 82: Print Dpof
Print DPOF (Digital Print Order Format) To use DPOF printing, you must make the selection of photos for printing using the DPOF settings before hand. See the “DPOF” section on page 59. 1. Select Print DPOF from the PictBridge menu. The follow- ing screen will appear. -
Page 83: Appendices
APPENDICES Specifications Design and specifications are subject to change without notice. Effective Image Sensor Pixels Image Sensor Focal Length F = 35mm film equivalent F number Lens Construction Optical Zoom Focusing Range Anti-Handshake Digital Zoom 14.1 Megapixels 14.2 Megapixels [1/2.3” (CCD)] 5.05mm (Wide) ~ 35.35mm (Tele) 28mm (Wide) ~ 196mm (Tele) F3.9 (Wide) ~ F5.8 (Tele) - Page 84 Still Image Number of Recording Movie Pixels Image Compression DCF, DPOF (Ver1.1) Support Still Image File Format Movie Shooting Modes Smile Detection Blink Detection Face-Detection Red-eye Removal 14MP, 12MP(3:2), 10MP(16:9), 8MP, 5MP, 3MP, 2MP(16:9), 0.3MP 1280x720pixels: 30fps/15fps, 640x480pixels: 30fps/15fps, 320x240pixels: 30fps/15fps 1280×720 pixels: 30 fps : continuous up to 29 min.
- Page 85 Pan-Capture Panorama Size Distance PC projecting Resolution Brightness Contrast ratio Projector connection LCD Display ISO Sensitivity AF Method Light Metering Method Exposure Control Method Exposure Compensation Shutter Speed Continuous Shooting 5 to 70 in. 20cm~2.5m 640x360 up to 13 lumens (peak) 300:1 Computer connection 3.0 inch (230,400 pixels) LTPS (low-temperature polycrystalline silicon) TFT color...
- Page 86 Playback Modes White Balance Control Internal Flash (Shooting Range) Recording Media Other Features Jacks Power Shooting Capability (Battery Performance) Operation Environment Dimensions (W x H x D) Mass Single Photo, Index (9/16 thumbnails), Slide Show, Movie (Slow-Motion possible), Zoom (Approx. 2X~8X), Audio, Histogram Display Auto (AWB), Daylight, Cloudy, Fluorescent , Fluorescent CWF, Incandescent, Manual Auto/Red-Eye Reduction/Forced Flash/No Flash/Slow Synchro/Red-Eye...
-
Page 87: Error Messages
Error messages Messages Card error Card full Write protect Picture error No picture System error WRITE PROTECT Out of the range Explanation • The memory card is not formatted. • The memory card is full and cannot store any new images. •... - Page 88 Messages Card is not formatted, format? This image cannot be deleted Warning!! Camera recording, please wait. Warning!! Battery exhausted. This file cannot be played back No connection Print error Cannot print Explanation • Confirm whether the memory card should be formatted. •...
-
Page 89: Troubleshooting
Troubleshooting Problem Camera does not turn on. Camera turns off suddenly during operation. The picture is blurred. Images and video files cannot be saved. No picture is taken when pressing the Shutter button. Images cannot print from the con- nected printer. Possible causes •... - Page 90 Problem Write to memory card slowly Cannot write to the memory card Too many movies to process Exceed maximum folder number in the memory card Possible causes • When movie above HD is recorded into the memory card below Class 4, perhaps it is too slow to continue recording.
- Page 91 Printed in China © 2011 General Imaging Company...
Need help?
Do you have a question about the PJ1 and is the answer not in the manual?
Questions and answers
I would like to purchae GE PJ1 camera
John Vitols