
Related Manuals for 3Com 3CCFE575BT


Summary of Contents for 3Com 3CCFE575BT
- Page 1 Part No. 09-1345-001 June 1998 3Com Megahertz 10/100 LAN CardBus PC Card User Guide...
- Page 2 The software described in this documentation is furnished under a license agreement included with the product either as a separate document or on the software distribution diskette in a root directory file named LICENSE.TXT. If you are unable to locate a copy, please contact 3Com and a copy will be provided to you.
-
Page 3: Table Of Contents
NSTALLING THE Before You Begin Setting CardBus Mode Toshiba Notebooks IBM ThinkPad Series 760 Notebooks Connecting the 3CCFE575BT CardBus PC Card Connecting the 3CXE589ET CardBus PC Card with XJACK Connector NSTALLING THE Before You Install the Network Driver Which Driver Installation Instructions Should You Use? Which Windows 95 Version Are You Running? Windows 95 Version 4.00.950B (OSR 2) - Page 4 Displaying Configuration Changing Configuration Settings DOS Configuration Program PECIFICATIONS ECHNICAL Online Technical Services World Wide Web Site 3Com Bulletin Board Service 3ComFacts Automated Fax Service 3ComForum on CompuServe Online Service Support from Your Network Supplier Returning Products for Repair NDEX 3-13...
-
Page 5: Installing The Pc Card
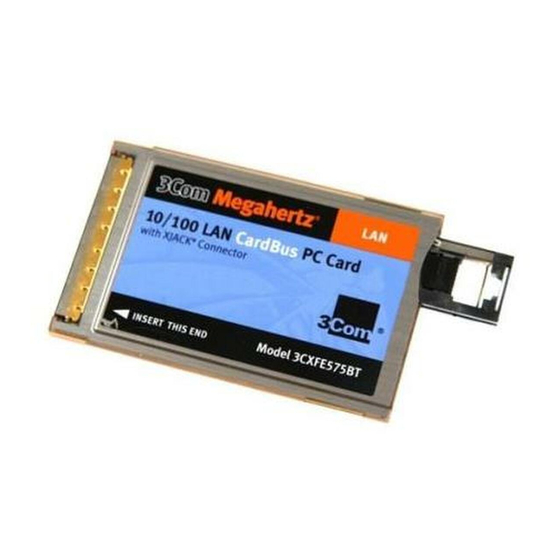
Ethernet or Fast Ethernet network. The only difference between the two models is the connector. Figure 1-1 3Com Megahertz 10/100 CardBus LAN PC Cards These CardBus PC Cards automatically operate at 10 Mbps when connected to a 10BASE-T Ethernet hub and at 100 Mbps when connected to a hub supporting 100BASE-TX Fast Ethernet. -
Page 6: Before You Begin
Before You Begin Make sure that you have a CardBus notebook and these items: 3Com Megahertz 10/100 LAN CardBus PC Card PC Card cable (6 inches) and network cable (six feet) 3Com Megahertz 10/100 LAN CardBus PC Card User Guide... -
Page 7: Ibm Thinkpad Series 760 Notebooks
6 Using the Start menu, select shutdown the computer and then click Yes to confirm. 7 Turn the notebook back on. The notebook is now set up to run in CardBus mode. IBM ThinkPad Series 760 Notebooks 1 Using the Start Menu, select Programs >Thinkpad >Thinkpad Configurations. -
Page 8: Connecting The 3Ccfe575Bt Cardbus Pc Card
1: I HAPTER NSTALLING THE Connecting the 3CCFE575BT CardBus PC Card 1 Remove all PC Cards from your notebook. 2 Connect the PC Card cable to the CardBus PC Card and to the network cable Figure 1-2 Connecting the CardBus PC Card 3 Connect the RJ-45 connector to the network port 4 Turn the notebook on. -
Page 9: Connecting The 3Cxe589Et Cardbus Pc Card With Xjack Connector
Connecting the 3CXE589ET CardBus PC Card with XJACK Connector Connecting the 3CXE589ET CardBus PC Card with XJACK Connector 1 Remove all PC Cards from your notebook and turn it on. 2 Connect the network cable XJACK connector. Figure 1-3 Connecting the CardBus PC Card 3 Insert the RJ-45 connector into the network port 4 Insert the PC Card into the CardBus PC Card slot Slide it all the way in. -
Page 11: Installing The Network Driver
Table 2-1. The latest network drivers are available on 3Com’s World Wide Web site. To download the latest drivers: 1 Go to the 3Com web site. Type the 3Com URL into your browser: http://www.3com.com/ 2 Scroll down to Software and Drivers and double-click. -
Page 12: Before You Install The Network Driver
2: I HAPTER NSTALLING THE Before You Install the Network Driver Now that the CardBus PC Card is inserted in your notebook and the network cable is connected to the network port, the final installation step is to install the network driver. This section describes the requirements for a successful driver installation. -
Page 13: Windows 95 Version 4.00.950B (Osr 2)
Install the NDIS network driver when your notebook is running Windows 95 4.00.950B (also known as OSR 2). The 3Com software automatically detects which OS your notebook is running and installs the correct NDIS driver. 1 Make sure the CardBus PC Card is installed and connected to the network, as described in Chapter 1. -
Page 14: Windows 95 (Versions 4.00.950 And 4.00.950A)
6 In the Select Device window, click the Have Disk button. 7 Insert the LAN Installation Disk in the floppy drive and click OK. 8 Select 3Com Megahertz 10/100 LAN CardBus PC Card Manual Load and click OK to copy the CardBus PC Card files to your notebook. -
Page 15: Confirming Installation
4 Click the Device Manager tab. A list of devices appears, arranged by type. 5 Double-click the Network Adapters icon. The name of the installed CardBus PC Card appears: 3Com Megahertz 10/100 LAN CardBus PC Card Manual Load Windows 95 (Versions 4.00.950 and 4.00.950A) -
Page 16: Windows Nt Version 4.0
2: I HAPTER NSTALLING THE 6 Double-click 3Com Megahertz 10/100 LAN CardBus PC Card to display a description of the CardBus PC Card and its current status. If the CardBus PC Card is not operational, go to Chapter 3 for troubleshooting information. - Page 17 The PC Card Setup Network Settings screen appears. 10 Click OK to accept resource allocations or enter new values. 3Com Megahertz 10/100 LAN CardBus PC Card appears in the Network window. 11 Click Close. If prompted, enter your IP address and click OK.
-
Page 18: Confirming Installation
4 Select Wired to the Network and click Next. 5 Click Select from list. 6 Click Have Disk. 7 Insert the LAN Installation Disk. 8 Type a: and click OK. 3Com Megahertz 10/100 LAN CardBus PC Card appears in the Select OEM Option window. ETWORK RIVER... - Page 19 9 Click OK. The Network Setup Wizard window appears. 10 Click Next. The Network Protocols configuration box appears. 11 Select the appropriate network protocol. If you choose TCP/IP, you will be prompted to set TCP/IP later in this installation. 12 Click Next. The Network Services configuration box appears.
- Page 20 2-10 2: I HAPTER NSTALLING THE 18 When Figure 2-4 appears again and asks for the location of the files, type a: 19 Click Continue. 20 After Windows NT copies files, select new Network Settings if required. Ask your system administrator if you are not sure what to select.
-
Page 21: Windows Nt Version 3.51
Name of the NT Server domain or workgroup you belong to IP address if you are not using DHCP To install the 3Com network driver on a notebook running Windows NT version 3.51, follow these steps: 1 Make sure the CardBus PC Card is installed and connected to the network, as described in Chapter 1. -
Page 22: Windows For Workgroups (Wfw)
2-12 2: I HAPTER NSTALLING THE 11 Click OK to accept the default settings for the CardBus PC Card or enter new settings if requested by your MIS department. The Network Settings Window appears. 12 Click OK to bring up the TCP/IP configuration window. 13 Enter the IP address. -
Page 23: Installing The Dos Enhanced-Mode Driver For Wfw
8 Insert the LAN Installation Disk in floppy drive A, enter a:\, and click OK in the Install Driver dialog box. 9 Select 3Com Megahertz 10/100 LAN CardBus PC Card and click OK in the Unlisted or Updated Network Adapter dialog box. -
Page 24: Autolink For Windows 3.X, Windows For Workgroups, And Dos
DOS This section describes how to install the network driver for a notebook running Windows 3.x, Windows for Workgroups, and DOS using the 3Com AutoLink program automatically installs the NetWare ODI client software (including the driver), and modifies the CONFIG.SYS and AUTOEXEC.BAT files. -
Page 25: Supported Network Drivers
The NDIS 3 driver can be used by both Windows 95 version A and Windows 95 OSR 2 (version B). The NDIS 4 driver can only be used by Windows 95 OSR 2. The 3Com software automatically selects the correct driver after determining which OS is running. -
Page 27: Troubleshooting
This chapter provides the following troubleshooting information: Checking the CardBus PC Card LEDs Running the 3Com PC Card Diagnostics program Accessing the 3Com CardBus PC Card help system Support services Generating a problem report DOS Diagnostics program Removing the CardBus PC Card software Resolving hardware resource conflicts... -
Page 28: Leds
CardBus PC Card must be connected to the network (see Chapter 1) and the network drivers must be installed (see Chapter 2). Figure 3-1 3CCFE575BT CardBus PC Card Cable LEDs Figure 3-2 3CXFE575BT CardBus PC Card LEDs... -
Page 29: 3Com Pc Card Diagnostics Program
The help system includes PC Card release notes, frequently asked questions, and the PC Card KnowledgeBase. To display the 3Com help system, follow these steps: 1 Install the CardBus PC Card and connect it to the network as described in Chapter 1. -
Page 30: Displaying Release Notes, Frequently Asked Questions, And Knowledgebase
The pop-up box displays information about the selected item. 7 Click the links and tabs to display information about each of the 3Com PC Card Diagnostics screens. Displaying Release Notes, Frequently Asked Questions, and KnowledgeBase 1 Click the Support tab. - Page 31 3Com logo appears in the Windows 95 and Windows NT 4.0 tray at the bottom of your screen after you reboot. You can double-click the logo to run the 3Com PC Card Diagnostics program. Close down the PC Card Diagnostics program before you reboot or remove the CardBus PC Card.
- Page 32 3: T HAPTER ROUBLESHOOTING 3 Click the Diagnostics tab to display the diagnostics screen shown in Figure 3-4. Figure 3-4 Diagnostics Screen 4 Click Start in the Self Test section to run the self test. The following tests run in sequence: Register Access EEPROM FIFO...
-
Page 33: Running The Echo Test
PC are operating. You need two computers, each with a 3Com network adapter installed, to run an echo test: one computer to send data and another to receive data. - Page 34 ROUBLESHOOTING 3 On both computers: a Click the Windows Start menu. b Click Programs. c Select 3Com PC Card Utilities. d Select 3Com PC Card Diagnostics. For Windows NT v3.51, select File>Run, and type tnicdiag.exe The PC Card Diagnostics general screen appears on both computers, as shown in Figure 3-2.
-
Page 35: Troubleshooting Support Services
3Com PC Card Diagnostics program CardBus PC Card Release Notes, including: Release Notes Frequently Asked Questions CardBus PC Card KnowledgeBase 3Com BBS telephone numbers and modem speeds 3Com World Wide Web information 3Com Problem Report Generator 3Com PC Card Diagnostics Program... - Page 36 KnowledgeBase. Click BBS Information to display the BBS telephone numbers and modem speeds. http... displays the 3Com World Wide Web address. Click Problem Report to generate a 3Com problem report that you can use to report a problem to 3Com.
-
Page 37: Generating A Problem Report
3Com Customer Support solve your CardBus PC Card installation and configuration problems. You can email the completed report to 3Com Customer Support and receive an email answer within two business days. To generate a problem report, follow these steps: 1 Click Problem Report on the support screen shown in Figure 3-5 to access the first problem report... - Page 38 Select your notebook processor speed using the pull-down menu. 5 Click Next to display the Problem Description screen. 6 Enter your problem description, the 3Com case number if you have one, and select if you can reproduce the problem or not.
-
Page 39: Dos Diagnostics Program
Removing the PC Card Diagnostics using Windows 95 and Windows NT 1 In the Control Panel, select Add/Remove Programs. 2 Select 3Com PC Card Diagnostic Utilities. 3 Click the Add/Remove button. The PC Card Diagnostics Program is removed from your notebook. -
Page 40: Changing The I/O, Irq, Or Memory Range
3-14 3: T HAPTER ROUBLESHOOTING 3 Select 3Com Megahertz 10/100 LAN CardBus PC Card and click Properties. 4 Change I/O or IRQ value and click Confirm. Changing the I/O, IRQ, or Memory Range If you discover resource conflicts, you can change the I/O Base Address, Interrupt Request (IRQ), or Memory Range using Windows 95. -
Page 41: Re-Enabling Pc Card Support For Windows 95
Disabling PC Card (PCMCIA) Support for Windows 95 4 Click OK. 5 Reboot the notebook to disable PC Card Support. If prompted, select Do Not Install a Driver. Some notebooks may re-install the PCMCIA sockets (PC Card Support) without prompting you. Refer to Windows 95 help on disabling devices to disable PCMCIA sockets. -
Page 42: Disabling Pc Card (Pcmcia) Support For Windows Nt
3-16 3: T HAPTER ROUBLESHOOTING Disabling PC Card (PCMCIA) Support for Windows NT 1 In the Windows NT Control Panel, double-click Devices. 2 Click PCMCIA on the list that appears. If no controller is listed, PC Card support is already disabled. If you select a different PCMCIA controller, write down the name;... -
Page 43: Frequently Asked Questions
A list of suggested interrupts is included in the on-line help system. To access the help system: 1 Click the 3Com icon in your system tray. 2 Click the Support tab. 3 Click the Help button. 4 Click the Frequently Asked Questions link. - Page 44 (continued) (continued) Answer Yes. Yes. 1 Double-click the 3Com icon to start the 3Com PC Card Diagnostics program. 2 In the right bottom corner of the main window, click the Enable Tray Control check box to remove the check mark.
- Page 45 By creating switched short cuts, Fast IP allows end stations to bypass the router and transfer data across wire-speed switched paths. Fast IP is part of 3Com’s DynamicAccess software. Client requirements: Notebook running Windows 95, Windows NT (versions 4 or 3.51), 3Com Megahertz...
-
Page 46: Troubleshooting Tips
PC Card Diagnostics Program, you must remove the PC Card Diagnostics and driver and reinstall the 3Com network driver. If you think you have resource conflicts (I/O base address or interrupts) run the Windows 95 conflict troubleshooter as described in the previous section. -
Page 47: Changing Configuration
This chapter describes how to display and change configuration settings for the CardBus PC Card. Before you change these settings, contact your MIS department. Configuration Settings Table 4-1 lists each configuration option, the default setting, and the available settings. Table 4-1 Option Settings Option Duplex Media Type... -
Page 48: Displaying Configuration
Chapter 3. Displaying Configuration If you are running Windows 95 or Windows NT, use the 3Com PC Card Diagnostics program to display configuration information. Otherwise, use the 3Com DOS Configuration program described in the INSTRUCT.TXT file in the Help directory on... - Page 49 To display the current configuration of the CardBus PC Card using the 3Com PC Card Diagnostics program, follow these steps: 1 Install the CardBus PC Card and connect it to the network as described in Chapter 1 and install the driver as described in Chapter 2.
- Page 50 HAPTER HANGING To display the 3Com logo icon on your Windows 95 and Windows NT task bar for easy access to the 3Com PC Card Diagnostics program, click the box next to Enable Tray Control. You can display the CardBus PC Card help system by clicking the Help button on the PC Card Diagnostics General screen.
-
Page 51: Changing Configuration Settings
Changing Configuration Settings 1 Click the Properties tab on the 3Com PC Card Diagnostics General screen, shown in Figure 4-1. Figure 4-3 Properties Screen 2 To display the options for a setting, highlight the setting and use the right pulldown menu. - Page 52 4: C HAPTER HANGING ONFIGURATION...
-
Page 53: Specifications
PECIFICATIONS Table A-1 CardBus PC Card Specifications Network Interface 10 Mbps Ethernet 10BASE-T 100 Mbps Ethernet and 100BASE-TX Physical Dimensions Length Width Height Weight Environmental Operating Range Operating temperature Relative humidity Card Information Structure (CIS) and Memory Size Drivers Diagnostics FIFO Ethernet IEEE 802.3 industry standard for a 10 Mbps baseband CSMA/CD... - Page 54 A: S PPENDIX PECIFICATIONS Network Cable Specifications UTP Cable Requirements: Category 3 LAN and high-speed data cable (10 Mbps) that meets the requirements of EIA/TIA-568 and EIA/TIA TSB-36 Category 4 extended distance LAN cable that meets the requirements of EIA/TIA-568 and EIA/TIA TSB-36 Category 5 voice and data transmission LAN cable (100 Mbps) that meets the requirements of EIA/TIA-568 and EIA/TIA TSB-36 Power Requirements...
-
Page 55: Technical Support
3Com Bulletin Board Service 3ComBBS contains patches, software, and drivers for all 3Com products, as well as technical articles. This service is available through analog modem or digital modem (ISDN) 24 hours a day, 7 days a week. -
Page 56: 3Comfacts Automated Fax Service
3ComFacts Automated Fax Service 3Com Corporation’s interactive fax service, 3ComFacts, provides data sheets, technical articles, diagrams, and troubleshooting instructions on 3Com products 24 hours a day, 7 days a week. Call 3ComFacts using your Touch-Tone telephone using one of these international access numbers: Country U.K. -
Page 57: 3Comforum On Compuserve Online Service
Italy 1678 99085 3ComForum on CompuServe Online Service 3ComForum contains patches, software, drivers, and technical articles about all 3Com products, as well as a messaging section for peer support. To use 3ComForum, you need a CompuServe account. To use 3ComForum: 1 Log on to your CompuServe account. -
Page 58: Returning Products For Repair
PPENDIX ECHNICAL Returning Products for Repair Before you send a product directly to 3Com for repair, you must first obtain a Return Materials Authorization (RMA) number. Products sent to 3Com without RMA numbers will be returned to the sender unopened, at the sender’s expense. - Page 59 NDEX Numbers 3Com Bulletin Board Service (3ComBBS) B-1 3Com URL B-1 3ComFacts B-2 3ComForum B-3 bulletin board service B-1 cabling specifications A-2 troubleshooting 3-20 Card Information Structure (CIS) memory size A-1 changing I/O, IRQ or memory range 3-14 CIS Memory Address 4-2 CompuServe B-3 configuration...
- Page 60 B-4 software options changing 4-1 software, removing (Window 95) 3-13 support services 3-9 technical support 3Com URL B-1 bulletin board service B-1 CompuServe service B-3 fax service B-2 network suppliers B-3 product repair B-4 Toshiba PCs...
-
Page 61: Imited Warranty
ARDWARE 3Com warrants its hardware products to be free from defects in workmanship and materials, under normal use and service, for the following lengths of time from the date of purchase from 3Com or its Authorized Reseller: Network interface cards... -
Page 62: Fcc Classb Statement
IMITATION OF IABILITY TO THE FULL EXTENT ALLOWED BY LAW, 3COM ALSO EXCLUDES FOR ITSELF AND ITS SUPPLIERS ANY LIABILITY, WHETHER BASED IN CONTRACT OR TORT (INCLUDING NEGLIGENCE), FOR INCIDENTAL, CONSEQUENTIAL, INDIRECT, SPECIAL, OR PUNITIVE DAMAGES OF ANY KIND, OR FOR LOSS OF... -
Page 63: Eclaration Of Conformity
NOTE: In order to maintain compliance with the limits of a Class B digital device, 3Com requires that you use quality interface cables when connecting to this device. Changes or modifications not expressly approved by 3Com could void the user’s authority to operate this equipment. Refer to the manual for specifications on cabling types. - Page 64 TRADE SECRETS; TITLE: You acknowledge and agree that the structure, sequence and organization of the Software are the valuable trade secrets of 3Com and its suppliers. You agree to hold such trade secrets in confidence. You further acknowledge and agree that ownership of, and title to, the Software and all subsequent copies thereof regardless of the form or media are held by 3Com and its suppliers.
Need help?
Do you have a question about the 3CCFE575BT and is the answer not in the manual?
Questions and answers