Table of Contents
Advertisement
Quick Links
Advertisement
Table of Contents

Related Manuals for PowerVision PowerEgg Series


Summary of Contents for PowerVision PowerEgg Series
- Page 1 PowerEgg Drone Quick Guide PEGA-E1.0...
- Page 2 1. Brief introduction to PowerEgg 2. Controller Standard Controller Brief Intro Maestro™ Base Station 1. Download App and then watch tutorials 2. Check the battery and charge Prepare the charger Flight Preparation Check the battery ...
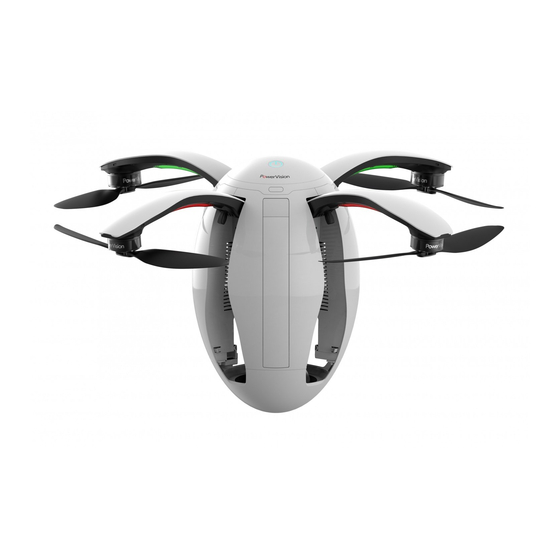
- Page 3 Brief Introduction to PowerEgg Aircraft The PowerEgg™ Aerial Camera Drone is equipped with a high precision navigation control system. It is designed to perform indoor and outdoor hovering, flying, autonomous take-off, landing and Return-to-Home. It is also equipped with advanced technology to provide you with functionalities such as Follow-Me, Orbital Flight, Electronic Fencing and Autonomous Flight modes.
-
Page 4: Standard Controller
Controller Standard Controller • The PowerEgg™ Standard Controller is equipped with an integrated “one-click” technology. With one click the users can manage the take-off, Return-to-Home and Follow Me functions and have the camera oriented toward the pilot. Users can easily perform other tasks by using the standard two-handed controller, including landing gear retraction, gimbal pitch control, gimbal roll control, photo taking and video recording. - Page 5 Controller PowerEgg Maestro™ Gesture-Based Controller PowerEgg Maestro™ controller simplifies the aircraft operation and navigation by allowing users to control the aircraft through body gestures. It has an integrated “one-click” technology that allows users to perform take-off and landing, Return-to-Home, Follow Me, and selfie taking with a single click.
- Page 6 Controller Base Station • The PowerEgg Base Station has an integrated cutting edge UHD image and data transmission system, which can transfer the video and flight status to a smartphone, tablet and other compatible devices. The maximum distance of image/data transmission in an ideal environment is miles.
-
Page 7: Flight Preparation
Scan the QR code on the right side to learn about our product specifications. Flight preparation Please download Vision+ App and watch PowerEgg tutorial videos Please scan the QR code or download Vision+ App from the Apple App Store or Google Play. Watch video tutorials in Vision+ or on our official website. - Page 8 Check the battery and charge Check the battery Aircraft battery Check the battery indicator Each light indicates 25% battery Press the battery button; the number of lights indicates the remaining battery level Standard controller Check the battery indicator Turn on the power 30% or more 10% - 30% less than 10%...
- Page 9 Maestro Check the battery indicator 30% or more 10% - 30% less than 10% Turn on the power Base Station Check the battery indicator 60% or more 20% - 60% less than 20% Turn on the power...
- Page 10 Battery, Standard Remote Controller, PowerEgg Maestro Controller and Base Station can be charged simultaneously. Standard Controller Aircraft battery Maestro battery Base Station battery battery can take ~ 2.5 hours can take ~ 3.5 hours can take ~ 2 hours to can take ~ 5 hours to to fully charge to fully charge...
-
Page 11: Prepare The Remote Controller
Prepare the remote controller If using the Standard Controller, place the Base Station on the bracket of the Standard Controller and connect them with a cable. Please connect through this port Please connect through this port If using PowerEgg Maestro as your controller, connect the Base Station and the controller with a cable. Please connect through this port Please connect... -
Page 12: Prepare The Aircraft
Prepare the aircraft 1. Open the four PowerEgg’s arms, following the position as shown in the picture. You will hear a clicking sound indicating that they are in the right position. 2. Open the top battery cover. Hold the aircraft’s arms and press the battery into the chamber with the thumb. - Page 13 3. Remove the gimbal cover at the bottom. Attention: Make sure to do this before turning on the aircraft in order not to damage the gimbal motor. 4. Press once and then press and hold the power button until the blue light is on. After hearing the notification sound, hold the aircraft’s arms and press the power button 3 times in quick succession to deploy the landing gear.
- Page 14 5. Open the propellers with both hands. 6. Place the aircraft on a suitable ground at a safe distance of over 10 meters away from people. The head of the aircraft should face the direction that the pilot is facing. Safe radius 10m Head of the aircraft...
- Page 15 7. Turn on the Standard Controller or Maestro and Base Station. 8. Turn your mobile device connect WiFi: Power_Groundxxx. Password is 1234567890. Enter password...
- Page 16 9. Open Vision+ App. After around 30 seconds, click Start the Flight when it shows that the device is connected. The device is connected. START THE FLIGHT The device is connected. START THE FLIGHT 10. Wait until the aircraft status indicator becomes green, and the status indicator of Standard Controller or Maestro...
- Page 17 11. When collapsing your PowerEgg for storage, hold the aircraft above the ground by one of its arms, press the power button three times in quick succession, and the landing gear will close automatically. Close the arms one by one by pressing the trigger located on the underside, making sure to position the propellers so that they fit into the cavity.
- Page 18 Flight and Safety Flight and shooting There are two ways of controlling the aircraft: • The Standard Controller ensures precise PowerEgg control through dual joysticks. It can perform the following functions: take-off and landing, Return-to-Home, Follow Me, open and close the landing gear, control gimbal movement, reorient the aircraft, and take photos and shoot videos.
- Page 19 3. Flight control: Press and hold ascend button to reach the desired height, then use the gesture-based control button to navigate the aircraft by body gestures. Press and hold the gesture-based control button to navigate the aircraft Gesture-based control experience Gimbal 4.
- Page 20 5. To land the aircraft, press the take- off/landing button. The aircraft will release Press and hold the the landing gear, land and lock take-off/landing autonomously (Press the take-off/landing button button once to cancel the autonomous landing). *During any flight emergency, the pilots can press the combination of descend button, shooting button, and swipe the gesture-based control button upwards to stop and lock the aircraft immediately, as shown in the picture (The aircraft will cease function and fall.
- Page 21 * P mode (Professional): manual flight mode, the aircraft maintains the height automatically and the pilot controls the direction using joysticks. * N mode (Normal): fixed point flight mode, the aircraft uses GPS or vision positioning system to stay in the accurate position.
-
Page 22: Flight Safety
Flight safety Fly in an open Good GPS signal Keep your drone in Flying below 120 m space sight Please stay away from crowds, electric wires, tall buildings, and airports. Transmitting towers, high voltage wires and large magnetic metal structures may influence the aircraft and cause safety issues. - Page 23 This equipment has been tested and found to comply with the limits for a Class B digital device, pursuant to Part 15 of the FCC Rules. These limits are designed to provide reasonable protection against harmful interference in a residential installation. This equipment generates uses and can radiate radio frequency energy and, if not installed and used in accordance with the instructions, may cause harmful interference to radio communications.
Need help?
Do you have a question about the PowerEgg Series and is the answer not in the manual?
Questions and answers