Table of Contents
Advertisement
Quick Links
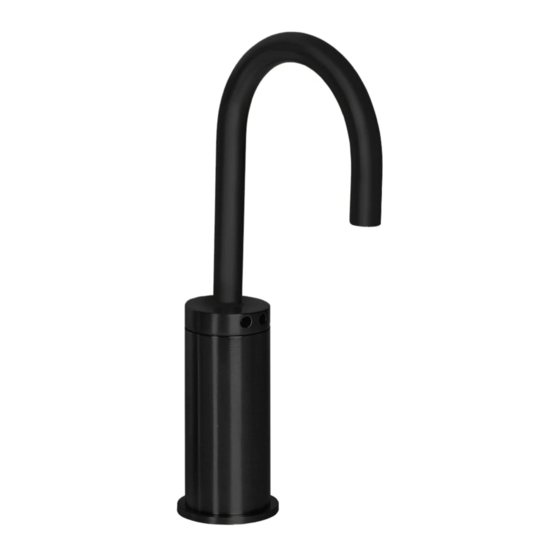
MAC FAUCETS
>>>>>>>>>> FA400 Autoluxe Faucets with risers <<<<<<<<<<<<
Installation Procedure:
Take a moment to view all drawings and read "special Installation note" on page 4 of this manual before proceeding with
installation. Connect Faucet Autmator model FA400 exactly as shown in drawing, with sensor cable connection at left.
Failure to install Faucet Automator Model FA400 exactly as shown will result in premature product failure and will void
1. Make sure surface area is clean and free of debris.
2. **If using deck plate, place plate on deck immediately over center sink hole**.
Install new faucet by placing sensor wire through the riser and the hole in the sink that is designated for spout.
Make sure that wire is not pinched or cut during installation. Cutting or severely crimping sensor wire will cause faucet to
malfunction and will also void warrantee. Sensor wire is specifically designed to resist damage, simple careful steps and
common sense is all that is necessary for a complete and rewarding installation process. You may use silicon or similar sealer
between faucet and deck plate.
3. Fasten Solid Brass Pipe Coupler to faucet shank using plumbers putty or Teflon tape.
4. Affix Solid Brass Riser above plate (if used), then place faucet above Solid Brass Riser.
5. Slide rubber washer and stainless steel washer over faucet shank. Insert sensor wire through special "C" groove in washers.
6. Install retainer nut over faucet shank and tighten. (Do Not Over Tighten).
7. Remove stainless steel braided hose from package and fasten the small end of hose to threads located inside of shank.
8. Locate a spot on the wall that you feel is suitable for installing Faucet Automator FA400. The spot selected should be within
reach of braided hose and sensor wire. Place Faucet Automator FA400 against the wall and mark the spots (2) where
mounting holes will be. Using drill size ¼" drill 2 holes, insert supplied anchors in the holes.
This step is for battery Powered Faucets Only. If your faucet is AC powered, skip this step.
9. Remove rubber band (or tape) that keeps the Faucet Automator's cover to its base. Remove black square rubber cap off
battery compartment, plug battery wire harness into battery pack. Make sure that harness plug makes solid contact with
battery pack. Place black square rubber cap back onto battery compartment. Using 4 small screws fasten Faucet Automator
cover to base.
10. Faucet Automator FA400 using supplied fasteners.
11. Install shank hose to Faucet Automator's water outlet (top).
12. Align groove in sensor wire plug with pin in Faucet Automator FA400 sensor receptacle, insert plug into receptacle, fasten
plug nut by hand only. DO NOT CROSS THREAD OR OVER TIGHTEN.
Before proceeding to steps 11 or 12, purge both hot and cold water lines for at least a minute each at high volume. Purging
water lines clears out dirt and debris that would otherwise find its way to screen filter.
***For single water source application install cold water supply hose to Faucet Automator's water inlet. Do not install hot
water supply hose only in single water source application as this may result in scalding injury..
***For dual water temp system install mixing valve outlet to Faucet Automator's water inlet.
Install hot and cold water supply hoses to mixing valve. Turn angle stops on. Check for leaks.
13. This step is for AC Powered Faucets Only. Battery powered faucets ignore this step. Plug Automator to wall AC.
To enable the faucet to activate from a farther distance or to stay on longer after hands are removed, see "sensor range
To increase or decrease water flow volume, see "flow rate adjustment" section of this manual.
Operation:
Place hands under spout and directly in front of neck mounted sensor, water will begin to flow out in less than a second, water
flow rate is governed by aerator and supply pressure, water temperature is governed by selection at angle stops, mixing valve, as
well as water temperature in supply pipes. Please remember, automatic faucets employ "presence" not
"motion" sensors. An idle object placed directly underneath spout will immediately activate
faucet.
Remove hands and water will cease to flow within 1-3 seconds.
If hands are left underneath spout for 30 or 60 seconds, water will automatically shut off. To initiate flow again move hands away
from faucet and start at step 1.
When attempting to run water over small objects such as a tooth brush, it may be necessary
to bring object closer to sensor to initiate water flow, when water begins to flow, move
object back under stream of water. Once user "gets the feel" of the faucet this step may be
skipped.
all warranties including extended warranty. Also, do not forget step 7.
adjustment" section of this manual.
1
Advertisement
Table of Contents

Related Manuals for Mac Faucets FA400

Summary of Contents for Mac Faucets FA400
-
Page 1: Installation Procedure
7. Remove stainless steel braided hose from package and fasten the small end of hose to threads located inside of shank. 8. Locate a spot on the wall that you feel is suitable for installing Faucet Automator FA400. The spot selected should be within reach of braided hose and sensor wire. - Page 2 When replacing batteries please follow these simple steps: 1. Unfasten the 4 Philips screws at the sides of the Faucet Automator FA400 (these screws are none magnetic stainless steel). Hold both water fittings down and carefully remove enclosure cover. Cover holds solenoid valve in place and when removed, solenoid valve may fall out.
-
Page 3: Trouble Shooting
2. Install “hammer arrestors” in close proximity to your automatic faucet. Please consult a plumbing professional for this task. LIMITED WARRANTY Mac Faucets warrant this faucet to be free of defects for a period of one year from date of purchase. Mac Faucets will replace, free of charge, during this warranty period, parts that prove defective when properly installed and under normal use and service. - Page 4 6. Important: If you do not plan on using faucet immediately after installation (within 30 days of installation), disconnect water supply lines to faucet and unload the water pressure that may be present in faucet. This will keep new solenoid valve components from bonding together under high pressure. MAC FAUCETS 13105 Crenshaw Blvd. Hawthorne, CA 90250 Tel 310.973.9700 –...
- Page 5 MAC FAUCETS Installation Drawings...
- Page 6 Faucet Automator™ Model FA400...
Need help?
Do you have a question about the FA400 and is the answer not in the manual?
Questions and answers