Table of Contents
Advertisement
Quick Links
Thank you for purchasing a Panasonic product.
Please read this manual before using the product and save it for future reference.
1006, Oaza Kadoma, Kadoma-shi, Osaka 571-8501, Japan
http://www.panasonic.com
© Panasonic Corporation 2019
Table of Contents
Getting Started
DECT Repeater
VL-FKD2
PNQX8955ZA
C0319MM0
2
3
4
5
5
6
7
8
9
10
10
10
11
Advertisement
Table of Contents

Related Manuals for Panasonic VL-FKD2


Summary of Contents for Panasonic VL-FKD2
-
Page 1: Table Of Contents
Wall mounting Troubleshooting Cleaning Specifications General information Thank you for purchasing a Panasonic product. Please read this manual before using the product and save it for future reference. 1006, Oaza Kadoma, Kadoma-shi, Osaka 571-8501, Japan http://www.panasonic.com © Panasonic Corporation 2019... -
Page 2: Model No
Introduction This product is an additional product designed to be used with the following Panasonic Video Intercom Systems. – VL-SWD501/VL-SWD501U (Main monitor station: VL-MWD501) – VL-SWD272 (Main monitor station: VL-MWD272) (The corresponding models are subject to change without notice.) R By installing this product, you can extend the range of your Video Intercom System to include areas where reception was previously not available. -
Page 3: Accessory Information
Model No. Product name Name in this manual Wireless sensor camera Camera VL-WD812 *1 The product label reads as follows: VL-FKD2EX or VL-FKD2CX *2 The product label reads as follows: VL-WD812EX Signal range and repeater installation example n Using each repeater connected separately n Using 2 repeaters connected together This extends signals away from the main monitor. -
Page 4: For Your Safety
R Never put metal objects inside the For your safety product. Never spill any liquid on the product. To prevent severe injury and loss of life/ If metal objects enter the product or property, read this section carefully the product becomes wet, unplug the before using the product to ensure product from the power outlet and proper and safe operation of your... -
Page 5: Important Safety Instructions
1.88 GHz to 1.90 GHz, and the RF transmission power is 250 mW Location/avoiding noise (max.).) The repeater and other compatible Panasonic units use radio waves to communicate with each CAUTION other. (The product operates in the frequency range of 1.88 GHz to 1.90 GHz, and the RF transmission power is 250 mW (max.).) -
Page 6: Other Important Information
Environment Other important information R Keep the product away from electrical noise generating devices, such as fluorescent lamps R The AC adaptor is used as the main disconnect and motors. device. Ensure that the power outlet is installed R The product should not be exposed to direct near the product and is easily accessible. -
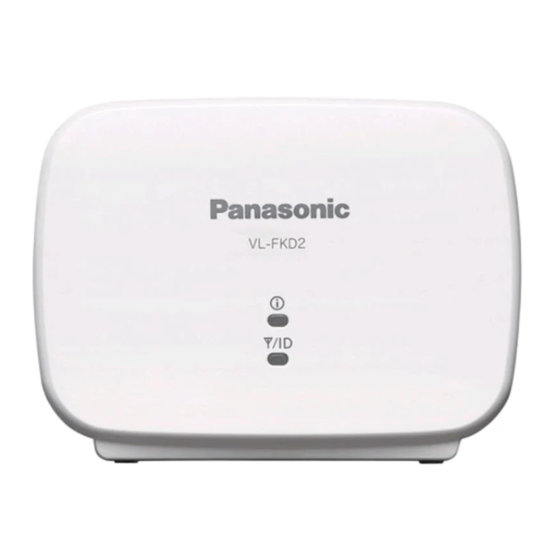
Page 7: Controls
Controls indicator indicator C PROGRAM Understanding the indicator and indicator Indicator Light status Meaning Lit green Registration with the main monitor is complete and the repeater can send signals. Flashing Signals are being sent. indicator green Lit orange Signals are not being sent. Flashing Currently registering to the main monitor. -
Page 8: Installation/Registering The Repeater To The Main Monitor
Installation/Registering the repeater to the main monitor Repeater: Connect the AC adaptor, and plug the AC adaptor into a power outlet. R Use only the supplied Panasonic AC adaptor (® page 3). R When the repeater is turned on, the indicator lights in orange. -
Page 9: Wall Mounting
Wall mounting Make sure that the wall is strong enough to support the weight of the repeater. Place the reference for wall mounting on the wall to mark the 2 screw positions. Install the 2 screws (locally procured) into the wall. R Make sure that the screw heads are at the same distance from the wall. -
Page 10: Troubleshooting
Troubleshooting Problem Cause/solution The repeater does not work. R When the indicators do not light, the AC adaptor is not connected properly. Check the connections. R When the indicators do not light green, move the repeater closer to the main monitor. R When the indicator does not light, the registration with main monitor has not completed successfully. -
Page 11: General Information
R In the event of problems, you should contact your equipment supplier in the first instance. For Europe Declaration of Conformity: R Panasonic Corporation declares that the radio equipment type (VL-FKD2BX, VL-FKD2CX) is in compliance with Directive 2014/53/EU. The full text of the EU declaration of conformity is available at the following internet address: http://www.ptc.panasonic.eu/doc...
Need help?
Do you have a question about the VL-FKD2 and is the answer not in the manual?
Questions and answers