Table of Contents
Advertisement
Available languages
Available languages
Quick Links
Thank you for purchasing a Panasonic product.
Please read this manual before using the product and save it for future reference.
Getting Started
Table of Contents
DECT Repeater
2
3
4
5
5
5
7
8
9
10
10
10
11
Advertisement
Chapters
Table of Contents

Related Manuals for Panasonic VL-FKD2


Summary of Contents for Panasonic VL-FKD2
-
Page 1: Table Of Contents
For best performance Other important information Controls Installation/Registering the repeater to the main monitor Wall mounting Troubleshooting Cleaning Specifications General information Thank you for purchasing a Panasonic product. Please read this manual before using the product and save it for future reference. -
Page 2: Introduction
Introduction This product is an additional product designed to be used with the following Panasonic Video Intercom Systems. – VL-SWD501/VL-SWD501U (Main monitor station: VL-MWD501) (The corresponding models are subject to change without notice.) R By installing this product, you can extend the range of your Video Intercom System to include areas where reception was previously not available. -
Page 3: Accessory Information
Signal range and repeater installation example n Using each repeater connected separately n Using 2 repeaters connected together This extends signals away from the main monitor. This extends the signal away from the main Because signals are sent through the main monitor by sending signals directly between monitor, different types of devices can be repeaters. -
Page 4: For Your Safety
R Unplug the product from the power outlet if the For your safety product emits smoke, an abnormal smell or makes unusual noise, or if the product has been dropped or physically damaged. These To prevent severe injury and loss of life/property, conditions can cause fire or electric shock. -
Page 5: Important Safety Instructions
Location/avoiding noise interrupted transmissions, distorted images and slow image refresh rates. Obstructions can The repeater and other compatible Panasonic include: units use radio waves to communicate with each – Metal doors or metal shutters. - Page 6 These symbols (A, B, C) on the products, packaging, and/or accompanying documents mean that used electrical and electronic products and batteries should not be mixed with general household waste. For proper treatment, recovery and recycling of old products and used batteries, please take them to applicable collection points, in accordance with your national legislation and the Directives 2002/96/EC and 2006/66/EC.
-
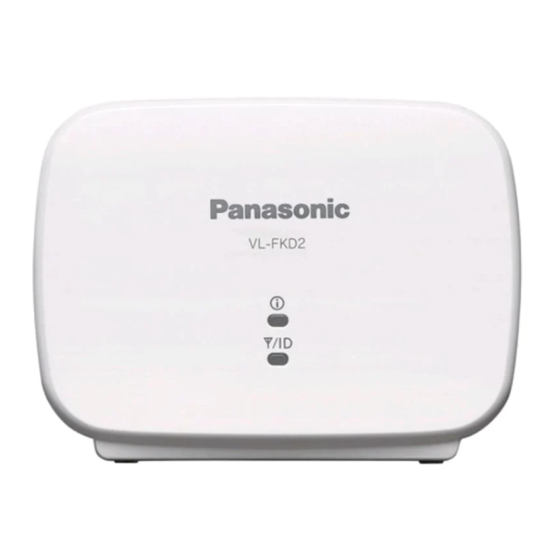
Page 7: Controls
Controls indicator indicator C PROGRAM Understanding the indicator and indicator Indicator Light status Meaning Lit green Registration with the main monitor is complete and the repeater can send signals. Flashing Signals are being sent. indicator green Lit orange Signals are not being sent. Flashing Currently registering to the main monitor. -
Page 8: Installation/Registering The Repeater To The Main Monitor
Installation/Registering the repeater to the main monitor Repeater: Connect the AC adaptor, and plug the AC adaptor into a power outlet. R Use only the supplied Panasonic AC adaptor (® page 3). R When the repeater is turned on, the indicator lights in orange. -
Page 9: Wall Mounting
Wall mounting Make sure that the wall is strong enough to support the weight of the repeater. Place the reference for wall mounting on the wall to mark the 2 screw positions. Install the 2 screws (locally procured) into the wall. R Make sure that the screw heads are at the same distance from the wall. -
Page 10: Troubleshooting
Troubleshooting Problem Cause/solution The repeater does not work. R When the indicators do not light, the AC adaptor is not connected properly. Check the connections. R When the indicators do not light green, move the repeater closer to the main monitor. R When the indicator does not light, the registration with main monitor has not completed successfully. -
Page 11: General Information
R In the event of problems, you should contact your equipment supplier in the first instance. Declaration of Conformity: R Panasonic System Networks Co., Ltd. declares that this equipment (VL-FKD2FX) is in compliance with the essential requirements and other relevant provisions of Radio & Telecommunications Terminal Equipment (R&TTE) Directive 1999/5/EC. - Page 12 Notes...
-
Page 13: Model No
Jak uzyskać najlepszą wydajność Inne ważne informacje Sterowanie Montaż/rejestrowanie wzmacniacza sygnału w głównym monitorze Montaż ścienny Rozwiązywanie problemów Czyszczenie Dane techniczne Informacje ogólne Dziękujemy za zakup produktu firmy Panasonic. Prosimy przeczytać tę instrukcję przed użyciem produktu i zachować ją do późniejszych konsultacji. -
Page 14: Wprowadzenie
Wprowadzenie Niniejszy produkt został zaprojektowany jako uzupełnienie systemów wideodomofonowych firmy Panasonic. – VL-SWD501/VL-SWD501U (Stacja głównego monitora: VL-MWD501) (Odpowiednie modele mogą być zmieniane bez uprzedzenia). R Montaż tego produktu umożliwi rozszerzenie zasięgu systemu wideodomofonowego o strefy, w których wcześniej odbiór nie był możliwy. -
Page 15: Informacje Na Temat Akcesoriów
Zasięg sygnału i przykładowy montaż wzmacniacza sygnału n Używanie indywidualnych wzmacniaczy sygnału n Używanie 2 wzmacniaczy sygnału połączonych podłączonych oddzielnie razem Umożliwia to zwiększenie zasięgu sygnału z głównego Umożliwia to zwiększenie zasięgu sygnału z głównego monitora. Ponieważ sygnał jest wysyłany przez główny monitora poprzez przesyłanie sygnału bezpośrednio mię- monitor, do każdego wzmacniacza sygnału można pod- dzy wzmacniaczami. -
Page 16: Bezpieczeństwo Użytkownika
porażenia prądem elektrycznym i/lub nadmiernego Bezpieczeństwo użytkownika nagrzewania się, a w rezultacie do pożaru. Nie używaj uszkodzonych zasilaczy sieciowych ani gniazd zasilania. Aby zapobiec poważnym obrażeniom i utracie życia/ R Regularnie usuwaj kurz itp. z zasilacza sieciowego, mienia, należy uważnie przeczytać tę sekcję przed odłączając go od gniazda zasilania i wycierając suchą... -
Page 17: Ważne Instrukcje Dotyczące Bezpieczeństwa
Potencjalne przeszkody to: Wzmacniacz sygnału i inne kompatybilne urządzenia – Metalowe drzwi lub rolety. Panasonic wykorzystują do wzajemnej komunikacji fale – Izolacja termiczna, w tym folia aluminiowa. radiowe. (Produkt działa w zakresie częstotliwości od – Ściany betonowe lub wykonane z blachy stalowej 1,88 GHz do 1,90 GHz, a moc transmisji RF wynosi ocynkowanej. -
Page 18: Inne Ważne Informacje
Informacje dotyczące utylizacji w innych krajach Inne ważne informacje poza Unią Europejską Niniejsze symbole (A, B, C) obowiązują tylko w Unii R Zasilacz sieciowy stanowi główny odłącznik zasilania. Europejskiej. Jeśli chcesz wyrzucić te produkty, Dopilnuj, aby gniazdo zasilania znajdowało się skontaktuj się... -
Page 19: Sterowanie
Sterowanie A Kontrolka B Kontrolka C PROGRAM Znaczenie kontrolki i kontrolki Kontrolka Stan kontrolki Znaczenie Zielona - świeci Rejestracja w głównym monitorze została zakończona i wzmacniacz może przesyłać sygnał. Kontrolka Zielona - pulsuje Trwa przesyłanie sygnału. Pomarańczowa Sygnał nie jest przesyłany. - świeci Zielona - pulsuje Trwa rejestrowanie w głównym monitorze. -
Page 20: Montaż/Rejestrowanie Wzmacniacza Sygnału
Montaż/rejestrowanie wzmacniacza sygnału w głównym monitorze Wzmacniacz sygnału: Podłącz zasilacz sieciowy, który następnie podłącz do gniazda zasilania. R Używaj tylko dostarczonego zasilacza sieciowego firmy Panasonic (® str. 3). R Po włączeniu wzmacniacza sygnału, kontrolka świeci na pomarańczowo. A PROGRAM B Zaczep C 100-240 V AC, 50/60 Hz *1 Starannie dociśnij wtyczkę. - Page 21 Montaż ścienny Upewnij się, że ściana jest dostatecznie mocna, aby wytrzymać masę wzmacniacza sygnału. Przyłóż szablon do montażu ściennego do ściany, aby zaznaczyć położenie 2 wkrętów. Zamontuj 2 wkręty (do nabycia oddzielnie) w ścianie. R Upewnij się, że łby wkrętów są w takiej samej odległości od ściany. R Zamontuj wkręty prostopadle do ściany.
-
Page 22: Rozwiązywanie Problemów
Rozwiązywanie problemów Problem Przyczyna/rozwiązanie Wzmacniacz sygnału nie działa. R Kiedy nie świecą kontrolki, zasilacz sieciowy nie jest podłączony pra- widłowo. Sprawdź połączenia. R Kiedy kontrolki nie świecą na zielono, przysuń wzmacniacz sygnału bliżej do głównego monitora. R Kiedy nie świeci kontrolka , rejestracja w głównym monitorze nie została wykonana prawidłowo. -
Page 23: Informacje Ogólne
R Jeśli wystąpią jakiekolwiek problemy, w pierwszej kolejności należy skontaktować się z lokalnym dostawcą sprzętu. Deklaracja zgodności: R Panasonic System Networks Co., Ltd. oświadcza, że niniejszy sprzęt (VL-FKD2FX) jest zgodny z zasadniczymi wymaganiami i innymi odnośnymi postanowieniami Dyrektywy 1999/5/WE w sprawie radiowych i telekomunikacyjnych urządzeń końcowych (R&TTE). - Page 24 Notatki...
- Page 25 Butoane de comandă Instalarea/înregistrarea repetorului la monitorul principal Montarea pe perete Depanarea Curăţarea Specificaţii Informaţii generale Vă mulţumim că aţi cumpărat un produs Panasonic. Vă rugăm să citiţi acest manual înainte de a utiliza produsul şi să îl păstraţi pentru referinţe ulterioare.
-
Page 26: Introducere
Instrucţiuni de operare ale sistemului Video Intercom pentru informaţii suplimentare. R Figurile din manualul (manualele) inclus (incluse) pot să difere puţin faţă de produsul respectiv. Denumirile produselor utilizate în acest manual Nr. model Denumirea produsului Denumirea în acest manual VL-FKD2 Amplificator DECT Repetor VL-MWD501 Unitate monitor principal Monitor principal VL-WD613 Unitate monitor fără... -
Page 27: Informaţii Despre Accesorii
Raza de acţiune a semnalului şi exemplu de instalare a repetorului n Utilizarea fiecărui repetor conectat separat n Utilizarea a 2 repetoare conectate împreună Acest lucru extinde raza de acţiune a semnalelor atunci Acest lucru extinde raza de acţiune a semnalului de la când există... -
Page 28: Pentru Siguranţa Dumneavoastră
R Îndepărtaţi regulat praful, etc., de pe adaptorul de Pentru siguranţa c.a., după ce l-aţi scos din priza de curent, şi apoi ştergeţi-l cu o cârpă uscată. Praful acumulat poate dumneavoastră determina apariţia unor defecte de izolare, produse de umezeală, etc., şi se pot produce incendii. Pentru a preveni producerea unor vătămări corporale R Dacă... -
Page 29: Instrucţiuni Importante De Siguranţă
– Izolaţii termice inclusiv folii din aluminiu. Amplasarea/evitarea zgomotului – Pereţi din beton sau pereţi din foi de metal Repetorul şi alte unităţi Panasonic compatibile utilizează galvanizat. unde radio pentru a comunica între ele. (Produsul – Dacă monitorul secundar este utilizat într-o clădire funcţionează... - Page 30 Informaţii pentru utilizatori privind colectarea şi Altele casarea echipamentelor vechi şi a acumulatorilor R Este interzisă demontarea sau modificarea acestui uzaţi produs. Pentru reparaţii, contactaţi dealerul de la care aţi cumpărat produsul. R În cazul unei pene de curent, acest produs nu poate fi utilizat.
-
Page 31: Butoane De Comandă
Butoane de comandă A Indicator B Indicator C PROGRAM Explicarea indicatorului şi a indicatorului Indicator Starea luminii Semnificaţie Aprinsă în verde Înregistrarea la monitorul principal este finalizată, iar repetorul poate trimite semnale. Indicator Clipeşte în ver- Se trimit semnale. Aprinsă în porto- Semnalele nu se trimit. -
Page 32: Instalarea/Înregistrarea Repetorului La Monitorul
Instalarea/înregistrarea repetorului la monitorul principal Repetorul: conectaţi adaptorul de c.a. şi introduceţi-l într-o priză de curent. R Utilizaţi numai adaptorul de c.a. Panasonic furnizat (® pagina 3). R Atunci când repetorul este pornit, indicatorul se aprinde în portocaliu. A PROGRAM B Clemă... -
Page 33: Montarea Pe Perete
Montarea pe perete Asiguraţi-vă că peretele este suficient de rezistent pentru a susţine greutatea repetorului. Amplasaţi schema de referinţă a suportului pentru montare pe perete, pentru a marca poziţiile celor 2 şuruburi. Fixaţi cele 2 şuruburi (achiziţionate la nivel local) în perete. R Asiguraţi-vă... -
Page 34: Depanarea
Depanarea Problemă Cauză/soluţie Repetorul nu funcţionează. R Atunci când indicatorii nu se aprind, adaptorul de c.a. nu este conec- tat corect. Verificaţi conexiunile. R Atunci când indicatorii nu se aprind în verde, mutaţi repetorul mai aproape de monitorul principal. R Dacă nu se aprinde indicatorul , înseamnă... -
Page 35: Informaţii Generale
R În cazul în care aveţi probleme, trebuie să contactaţi mai întâi furnizorul echipamentului. Declaraţie de conformitate: R Panasonic System Networks Co., Ltd. declară că acest echipament (VL-FKD2FX) respectă cerinţele esenţiale şi alte prevederi relevante din Directiva privind echipamentele radio şi echipamentele terminale de telecomunicaţii (R&TTE) 1999/5/CE. - Page 36 Note...
- Page 37 Kezelőszervek Telepítés/A jelismétlő regisztrálása a központi monitorhoz Fali rögzítés Hibaelhárítás Tisztítás Műszaki adatok Általános tudnivalók Köszönjük, hogy Panasonic terméket vásárolt. Mielőtt használatba venné a terméket, kérjük olvassa el ezt a használati utasítást és tartsa is meg a jövőbeli hivatkozás céljából.
-
Page 38: Bevezetés
Bevezetés Ez egy olyan kiegészítő termék, amit a következő Panasonic videokaputelefon-rendszerekhez lehet használni. – VL-SWD501/VL-SWD501U (Központi monitor állomás: VL-MWD501) (Az egyes típusokat a gyártó külön értesítés nélkül módosíthatja.) R A termék használatával kiterjesztheti a videokaputelefon-rendszer hatósugarát olyan területekre is, ahol eddig a vétel nem volt lehetséges. -
Page 39: Információk A Tartozékokról
Hatósugár és jelismétlő telepítési példa n A jelismétlők használata, ha külön vannak n 2 jelismétlő együttes használatakor csatlakoztatva Növeli a központi monitor hatósugarát azáltal, hogy a Ezzel növeli a központi monitor hatósugarát. Mivel a jeleket közvetlenül jelismétlők között küldi. Mivel a rádiós jeleket a rendszer a központi monitoron keresztül rendszer a rádiós jeleket a jelismétlők között küldi, így küldi, ezért különböző... -
Page 40: Az Ön Biztonsága Érdekében
ruhával megtörli. A felgyülemlett por által felszívott Az Ön biztonsága érdekében nedvesség stb. károsíthatja a szigetelést, ami tüzet okozhat. R Ha a termék füstöt bocsát ki, furcsa szaga van, A súlyos sérülések, életveszély és a vagyoni károk szokatlan hangot ad ki, leesett vagy fizikailag elkerülése érdekében a termék használata előtt megsérült húzza ki a terméket a konnektorból. -
Page 41: Fontos Biztonsági Előírások
és a másodlagos monitor (vagy kamera) közti távolság a javasolt 100 m-en belül van. Elhelyezés/zaj elkerülése Az ilyen akadályok lehetnek: A jelismétlő és az egyéb kompatibilis Panasonic – Fémajtók vagy fémredőnyök. egységek rádióhullámokat használnak az egymással – Alumíniumtartalmú hőszigetelés. - Page 42 Ebben az esetben a kémiai összetevőkről rendelkező Információk az elhasznált berendezések és elemek irányelvek a mérvadóak. gyűjtésével és ártalmatlanításával kapcsolatban Egyebek R A termék szétszerelése és módosítása tilos. A szervizeléssel és hibajavítással kapcsolatos információkért forduljon helyi viszonteladójához. R Ha az áramellátás szünetel, akkor a termék nem használható.
-
Page 43: Kezelőszervek
Kezelőszervek visszajelző visszajelző C PROGRAM visszajelző és a visszajelző jelzéseinek értelmezése Visszajelz Jelzőfény állapota Jelentés ő Zölden világít A központi monitorra történő regisztrálás befejeződött és a jelismétlő készen áll a jelek küldésére. Zölden villog Jelküldés van folyamatban. visszajelző Narancssárga A jelek nem kerülnek küldésre. színnel világít Zölden villog A központi monitorhoz való... -
Page 44: Telepítés/A Jelismétlő Regisztrálása A Központi
Telepítés/A jelismétlő regisztrálása a központi monitorhoz Jelismétlő: Csatlakoztassa a hálózati adaptert és csatlakoztassa a hálózati adapter tápkábelét a konnektorba. R Csak a mellékelt Panasonic hálózati adaptert használja (® 3. oldal). R Ha a jelismétlő be van kapcsolva, a visszajelző narancssárga színnel világít. -
Page 45: Fali Rögzítés
Fali rögzítés Győződjön meg arról, hogy a fal elég erős-e ahhoz, hogy megtartsa a jelismétlő súlyát. Falra történő szerelés előtt tegye a sablont a falra és jelölje be a 2 furat helyét. Hajtsa be a 2 csavart (helyben beszerzendő) a falba. R Ellenőrizze, hogy a csavarfejek a faltól ugyanakkora távolságra legyenek. -
Page 46: Hibaelhárítás
Hibaelhárítás Probléma Ok/megoldás A jelismétlő nem működik. R Ha a jelzőfények nem világítanak, a hálózati adapter nincs megfelelően csatlakoztatva. Ellenőrizze a csatlakozást. R Ha a jelzőfények nem zölden világítanak, akkor vigye közelebb a jelismétlőt a központi monitorhoz. R Ha a jelzőfény nem világít, akkor a központi monitorhoz történő... -
Page 47: Általános Tudnivalók
R Probléma esetén elsőként a berendezésének szállítójával vegye fel a kapcsolatot. Megfelelőségi nyilatkozat: R A Panasonic System Networks Co., Ltd. kijelenti, hogy jelen termék (VL-FKD2FX) kielégíti a rádióberendezésekről és a távközlő végberendezésekről szóló (R&TTE) 1999/5/EK irányelv alapvető követelményeit és egyéb vonatkozó... - Page 48 1-62, 4-chome, Minoshima, Hakata-ku, Fukuoka 812-8531, Japan http://www.panasonic.com © Panasonic System Networks Co., Ltd. 2015 PNQX7867ZA C1015MM0...
Need help?
Do you have a question about the VL-FKD2 and is the answer not in the manual?
Questions and answers