
Related Manuals for Doosan Infracore P250WDO-T4F


Summary of Contents for Doosan Infracore P250WDO-T4F
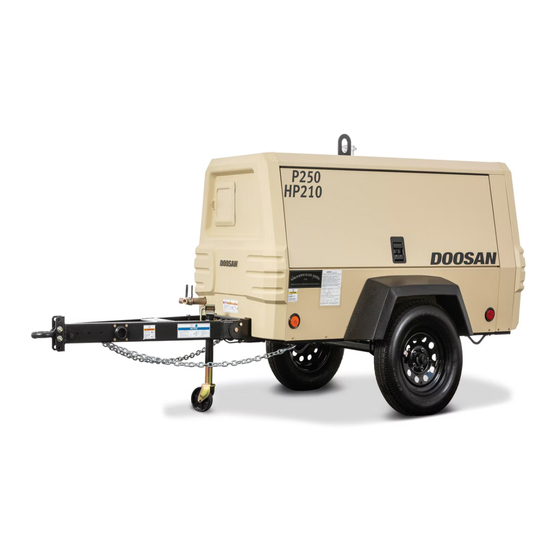
- Page 1 OPERATION and MAINTENANCE MANUAL COMPRESSORS MODEL: P250/HP210WDO-T4F (G91) Doosan Infracore Portable Power 1293 Glenway Drive Statesville, N.C. 28625 DoosanPortablePower.com P/N: 46720670 (2018) Rev C...
-
Page 5: Table Of Contents
TABLE OF CONTENTS Operation & Maintenance Manual TITLE PAGE ................................ iii FOREWORD ..........................9 Information ............................. 10 DRAWBAR INSTRUCTIONS....................13 Instruction Kit For Drawbar ......................14 SAFETY ..........................17 Safety Precautions ......................... 18 Compressed Air.......................... 19 Exhaust System ......................... 20 Materials ............................ 20 Battery ............................ - Page 6 TABLE OF CONTENTS Operation & Maintenance Manual TITLE PAGE Fault and Alert ........................... 41 Service Interval Setup ......................... 43 Languages and Units ........................45 Display Setup ..........................46 Display Compressor and Display Software Information ..............46 Display Compressor and Display Software Information ..............47 Before Towing..........................
- Page 7 TABLE OF CONTENTS Operation & Maintenance Manual TITLE PAGE Compressor Oil Filters........................95 Receiver Separator System......................96 Scavenge Line ..........................97 Exterior Finish Care ........................97 Field Replacement of Exterior Decals ..................98 Preventive Maintenance Schedule....................100 TROUBLESHOOTING .......................103 Introduction ...........................104 Troubleshooting Chart........................105 Diagnostic Codes ........................
-
Page 9: Foreword
Foreword... -
Page 10: Information
Operation & Maintenance Manual Foreword Information The Contents Of This Manual Are Considered To Be Proprietary And Confidential To Doosan Infracore Portable Power (Herein Referred To As “Portable Power”), And Should Not Be Reproduced Without The Prior Written Permission Of Portable Power. - Page 11 Foreword Operation & Maintenance Manual This Compressor Should Not Be Used: • For Direct Or Indirect Human Consumption Of The Compressed Air. • Outside The Ambient Temperature Range Specified In The General Data Section Of This Manual. • When An Actual Or Foreseeable Risk Of Hazardous Levels Of Flammable Gases Or Vapors Exists.
-
Page 13: Drawbar Instructions
Drawbar Instructions... -
Page 14: Instruction Kit For Drawbar
Operation & Maintenance Manual Drawbar Instructions Instruction Kit For Drawbar To Convert from Shipping Position to Towing Position... - Page 15 Drawbar Instructions Operation & Maintenance Manual The Following Tools are Required: Ratchet 13mm Socket to fit Ratchet Torque Wrench set to 68 foot pounds (9.4 kg-meters) 16mm Socket to fit Torque Wrench 5-inch Extension for Torque Wrench Hardware Included: (4) 12mm Bolts with Pre-applied Thread Lock. (2) 8mm Taptite Bolts (2) Washers (2) Safety Chains are zipped tied to Drawbar.
-
Page 17: Safety
Safety... -
Page 18: Safety Precautions
Operation & Maintenance Manual Safety Safety Precautions Never operate the compressor without first observing all safety warnings and carefully reading the Operation and Maintenance Manual shipped from the factory with this compressor. Ensure the operator reads and understands the decals and consults the manuals before operation or performing maintenance. -
Page 19: Compressed Air
Safety Operation & Maintenance Manual Compressed Air Compressed air can be dangerous if incorrectly handled. Prior to performing maintenance or service on the compressor, ensure all pressure is vented from the system and the compressor cannot be started accidentally. Ensure the compressor is operating at the rated pressure and the rated pressure is known to all relevant personnel. -
Page 20: Exhaust System
Operation & Maintenance Manual Safety Exhaust System Hot engine exhaust gas and hot exhaust system surfaces are produced during and after compressor operation. Avoid contact with exhaust gas and hot exhaust system surfaces. Keep flammable and combustible materials away. Do not operate compressor on, under, or near flammable or combustible materials. -
Page 21: Battery
Safety Operation & Maintenance Manual Avoid Ingestion, Skin Contact, And Inhalation Of Fumes. Should compressor oil come into contact with the eyes, irrigate with water for at least 5 minutes. Should compressor oil come into contact with the skin, wash off immediately. Consult a physician if large amounts of compressor oil are ingested or if compressor oil is inhaled. -
Page 22: Coolant System
Operation & Maintenance Manual Safety Coolant System Hot engine coolant and steam can cause injury. Ensure the reservoir cap is removed with due care and attention. Do not remove reservoir cap while radiator is hot. Allow radiator to cool before removing reservoir cap. -
Page 23: Decals
Safety Operation & Maintenance Manual The compressor must be towed in a level attitude in order to maintain correct handling, braking, and lighting functions. This can be achieved by correct selection and adjustment of the vehicle towing hitch and, on variable height running gear, adjustment of the drawbar. 1. - Page 24 Operation & Maintenance Manual Safety Decals on the following pages contain examples of decals available for this equipment. Decals are located on the compressor to point out potential safety hazards. Read and follow these instructions. If you do not understand these instructions, inform your supervisor. (Red Background) Indicates the presence of a hazard which WILL cause serious injury, death, or property damage, if ignored.
- Page 25 Safety Operation & Maintenance Manual...
-
Page 27: Noise Emission
Noise Emission... -
Page 28: Noise Emission
Operation & Maintenance Manual Noise Emission Noise Emission This Section Pertains Only To Compressors Distributed Within The United States. Tampering With Noise Control System Prohibited. Federal Law Prohibits the following Acts or the Causing Thereof: (1) the removal or rendering inoperative by any persons, other than for purposes of maintenance, repair, or replacement, of any device or element of design incorporated into any new compressor for the purpose of noise control prior to its sale or delivery to the ultimate purchaser or while it is in use;... -
Page 29: Maintenance Log
Noise Emission Operation & Maintenance Manual Maintenance Log COMPRESSOR MODEL: SERIAL NO: USER UNIT NO: UNIT IDENTIFICATION DEALER / DISTRIBUTOR INFORMATION Engine Make & Model: Purchased From: Serial No: Purchaser or Owner: Address: Date Purchased: The Noise Control Act Of 1972 (86 Stat. 1234) Prohibits Tampering with the Noise Control System of any Compressor Manufactured and Sold Under The Above Regulations, Specifically The Following Acts or the Causing Thereof: (1) The Removal Or Rendering Inoperative by any persons, other than for Purposes Of... -
Page 30: Introduction
Operation & Maintenance Manual Noise Emission Introduction The Compressor for which this Maintenance Log is provided conforms To U.S. EPA Regulations for Noise Emissions, applicable to Portable Air Compressors. The purpose of this book is to provide (1) The Maintenance Performance Schedule for all Required Noise Emission Controls and (2) Space so that the Purchaser or Owner can record what Maintenance was done, by whom, where and when. - Page 31 Noise Emission Operation & Maintenance Manual PERIOD DESCRIPTION 100 HOURS AIR INTAKE AND ENGINE EXHAUST Engine and compressor air intake and engine exhaust systems should be inspected after each 100 hours of operation for loose, damaged, or deteriorated components. Repairs or replacements should be made before the next period of use.
-
Page 33: General Data
General Data... -
Page 34: General Data Information
1700 COMPRESSOR Rated Operating Pressure - psi (kPa) 100 (689) Safety Valve Setting - psi (kPa) 200 (1380) ENGINE (Diesel) Manufacturer DOOSAN Model DL02 Electrical System 12VDC FLUID CAPACITIES Compressor Lubricant - gallon (litres) 4.5 (17 liters) Engine Cooling System - gallon (liters) 2.6 (9.8 liters) -
Page 35: Expendable Service Parts
PRO-TEC® Compressor Fluid (1 gal) 36899698 Tier 4® Engine Fluid (1 gal) 46557017 Modification or alteration of this machine. Can result in severe injury or death. Do not modify or alter without the express written consent of Doosan Infracore Portable Power. -
Page 37: Operating Instructions
Operating Instructions... -
Page 38: Control Panel
Operation & Maintenance Manual Operating Instructions Control Panel Control/Gauge Panel 1. Air Pressure Gauge: Indicates Pressure in the Separator Tank. 2. Mini-Port Display: Displays Compressor Operating Parameters, and Diagnostic Codes. 3. Hour Meter: Displays Machine Hours. 4. Keypad: Used for Starting and Stopping the Compressor. 5. - Page 39 Operating Instructions Operation & Maintenance Manual STOP: Stops the Compressor. START: Initiates Engine Cranking. SERVICE AIR: Allows Operator to Load Compressor after Warm-Up. HI: Allows Operator to Switch to High Pressure Mode. LO: Allows Operator to Switch to Low Pressure Mode. Pressing and Releasing the UP Button scrolls up through Parameter lists and Menu choices or Increases a value one Item/Unit at a time.
-
Page 40: Quick View Screens
Operation & Maintenance Manual Operating Instructions Quick View Screens Engine and Compressor Parameters The Quick View Screens allow for easy viewing of up to 14 commonly used parameters by pressing the UP and DOWN buttons. Pressing the UP and DOWN buttons continuously loops through the Quick View Screens (i.e., when the last screen is reached pressing the DOWN button displays the first screen and vice versa). -
Page 41: Fault And Alert
Operating Instructions Operation & Maintenance Manual Default Screen The Default Screen will Display the Engine RPM unless the machine is configured with the Fuel Level option. With the Fuel Level option installed, The Default Screen will be Fuel level and the first screen of the Quick View will be Engine RPM. Fault and Alert If a Fault occurs, the Display unit will Display The SPN, FMI, OC, and description for Engine Fault or the CPR Code and description for Compressor Error. - Page 42 Operation & Maintenance Manual Operating Instructions Fault and Alert (Continued) When present, an Alert with the number of Alert conditions will popup on the screen, the User will press the UP or DOWN button to display the Alert, or press the Enter button to acknowledge an Alert has occurred.
-
Page 43: Service Interval Setup
Operating Instructions Operation & Maintenance Manual Service Interval Setup Service will popup on the screen after one of the two hour service channels has decremented to 5 hours. The user will press the UP or DOWN button to display the service channels or press the ENTER button to acknowledge a service has occurred. - Page 44 Operation & Maintenance Manual Operating Instructions Service Interval Setup (Continued) The service intervals can be changed by pressing the ENTER button while on the Default Screen that Displays The Engine Hours. Using the UP or DOWN buttons To highlight the desired interval and press the ENTER button to select.
-
Page 45: Languages And Units
Operating Instructions Operation & Maintenance Manual Languages and Units The Display is User configured to Display in English, Spanish, Or French languages and in either English or Metric units. The Language and Display units can be changed by accessing the Setup Menu. to access the Setup Menu, press and hold the ENTER button while the Default Screen of Engine Hours is Displayed until the Main Menu appears. -
Page 46: Display Setup
Operation & Maintenance Manual Operating Instructions Display Setup The Display Menu functions give users the ability to configure the LCD. Options for configuring the Display include Intensity, Contrast, and Viewing Mode. To access the Display Menu, press and hold the ENTER button while the Default Screen of Engine Hours is Displayed until the Main Menu appears. -
Page 47: Display Compressor And Display Software Information
Operating Instructions Operation & Maintenance Manual Display Compressor and Display Software Information Change Compressor ID The Compressor ID is a unique 3 digit code that identifies the model of machine in the software. The Compressor ID is Set at the Factory and should NOT be Changed. The Compressor ID can be changed by accessing the Setup Menu. - Page 48 Operation & Maintenance Manual Operating Instructions Display Compressor and Display Software Information The Compressor and Display software information can be Displayed by accessing the Misc. Menu. To access the Misc. Menu, Press and hold the ENTER button while the Default Screen is Displayed until the Main Menu appears.
-
Page 49: Before Towing
Operating Instructions Operation & Maintenance Manual Before Towing Failure to follow these instructions CAN cause severe injury or death. • Ensure tow vehicle has towing capacity for weight of this unit as stated on general data decal.Use jack to raise or lower drawbar. •... -
Page 50: Towing
Operation & Maintenance Manual Operating Instructions Towing Failure to follow these instructions CAN cause severe injury or death. Disconnect • Engage tow vehicle parking brake. • Chock tires of compressor. • Set the vehicle parking brake. Chock wheels of unit. •... -
Page 51: Before Starting
Operating Instructions Operation & Maintenance Manual Before Starting • Open service valve(s) to ensure pressure is relieved in receiver-separator system. Close valve(s) in order to build up full air pressure and ensure proper oil circulation. • Check battery for proper connections and condition. •... -
Page 52: Starting
Operation & Maintenance Manual Operating Instructions Starting Do not use ether or any other starting fluid. Starting fluids can cause An explosion, fire, and severe engine damage. The engine is equipped with an electric heater starting aid. 1. Press the main power button. 2. -
Page 53: Shutdown
Operating Instructions Operation & Maintenance Manual 185 cfm at 150 psi regulated set pressure. The regulated set pressure of this mode can be changed (see Pressure Regulating Adjusting Instructions) from 80-150 psi. The mode of the compressor can be changed between the Low and High at anytime. Engine speed will be lower at the HI Pressure Mode setting. -
Page 54: Pressure Regulator Adjustment Instructions
Operation & Maintenance Manual Operating Instructions Pressure Regulator Adjustment Instructions Before Starting 1. Close Service Valves. After Starting 2. Push the service air button on the control panel. The unit should speed up, build air pressure and drop back to idle. With the at idle, press high pressure button, turn the adjusting screw on the pressure regulator clockwise until the discharge pressure gauge indicates 175-180 psi. -
Page 55: Engine Operation
Engine Operation... -
Page 56: Engine Operation And Maintenance
In the event that a part must be replaced, only genuine Doosan parts, as defined by the parts list (Parts Manual) should be used. Doosan shall not be held liable for any critical damage or faults which may be caused by the use of unauthorized or non-factory remanufactured parts. -
Page 57: Safety
Engine Operation Operation & Maintenance Manual Safety This Operation & Maintenance Section divides maintenance operations such as performing engine checks, troubleshooting, or diagnosing faults into three categories, Danger, Warning, and Caution. In addition, Note is used to provide additional descriptions and information required for maintenance technicians to successfully operate our engines. -
Page 58: Instructions
Operation & Maintenance Manual Engine Operation Instructions 1. In order to maintain the best long term performance and safety, please read and understand this manual and perform routine inspections and regular inspections. 2. We have divided the content of this section into causes of bodily injury and damage to assets and causes of pollution. - Page 59 Engine Operation Operation & Maintenance Manual Do not exchange or disassemble a pipe or hose (from the engine fuel circuit, engine oil circuit, coolant circuit, or compressed air circuit) while the engine is operating. The leaked liquid may cause bodily injuries. 3.
-
Page 60: General Repair
4. Store the disassembled parts in a specified space to avoid damage or contamination. 5. Use specified and special tools for efficient and safe repair. 6. If parts need to be replaced, use only genuine Doosan parts for replacement. Using unauthorized or non-factory remanufactured parts may cause critical damage and faults in engine performance. -
Page 61: Environmental Pollution
An engine consists of many parts which are mechanically harmonized. To prevent future engine faults and ensure best performance for a long period, maintenance and replacement of expendable parts should be conducted regularly. Use of Doosan genuine parts is recommended. Using unauthorized or non-factory remanufactured parts may cause critical... -
Page 62: Engine Management
Using an engine for any purposes other than the designed purpose may cause critical faults to the engine for which Doosan shall not be held liable. For details concerning the usage and purpose of the engine, please direct questions to our Sales Team. Do NOT adjust, convert, or change the ECU without our authorization. -
Page 63: Prevention Of Pollution
Engine Operation Operation & Maintenance Manual 8. If there are gauges for battery, oil pressure, coolant, and temperature, check if they indicate a normal status. 9. Do not operate engine without coolant. Always use coolant mixed with antifreeze. If coolant without antifreeze is used, the coolant may freeze causing the coolant passage in the cylinder block to freeze and damage the engine. -
Page 64: Start And Shutdown
3. Be careful not to mix foreign substances in fuel, engine oil, or coolant while injecting the fluid. Keep the fluid clean while it is not in use. Use fuel, oil, and coolant recommended by Doosan. Otherwise, critical damage to the engine may occur. Starting the Engine Observe the following when starting the engine. -
Page 65: Break-In Period Of Engine
Operation & Maintenance Manual Break-in Period of Engine Doosan engines are subjected to a final approval test to ensure the provision of high quality engines before being shipped. However, engines are not operated for a long period of time in this test. - Page 66 4. Replace engine oil and oil filter after the break-in period. If engine oil and oil filter need to be replaced, use only genuine engine oil and parts recommended by Doosan. Operation after Break-in Slowly preheat the engine when starting up during cold weather or in areas with cold climate.
-
Page 67: Inspection After Starting The Engine
Engine Operation Operation & Maintenance Manual Inspection after Starting the Engine Check the pressure of the engine lubrication system by using the engine oil pressure gauge mounted on the apparatus while the engine is in operation. If pressure decreases on oil pressure gauge, immediately shut down the engine. -
Page 68: Operation In Winter
To prevent this, replace oil to engine oil for cold weather or areas with cold climate. When replacing engine oil, use only genuine engine oil recommended by Doosan. -
Page 69: Regular Inspection
DL01/DL02 SAE 15W40 API CJ-4 or Better Note: Doosan engine oils are recommended for use in this machine. If Doosan engine oil is not available, use a good quality engine oil that meets API service classification of CJ-4 or Better. -
Page 70: Checking The Engine Oil
Operation & Maintenance Manual Engine Operation Checking the Engine Oil 1. Move the unit to a flat surface to maintain the engine level. 2. Start the engine and then shut down when it reaches the normal temperature. 3. Wait for 5 ~ 10 minutes. 4. - Page 71 Engine Operation Operation & Maintenance Manual 1. Insert the oil level gauge again by using the ring. 2. If the dipstick doesn't slide in, rotate it 180° and try again. 3. Pull the oil level dipstick upward to remove. 1. Check if the oil is smeared between the upper limit (a) and the lower limit (b) of the oil level gauge.
-
Page 72: Replacement Of Engine Oil
Operation & Maintenance Manual Engine Operation Replacement of Engine Oil Special Tools Tightening Torque Component Tightening Torque Drain Plug 16–20 Nm Oil Capacity Crank Case Oil Capacity 2.4 gal (9.1 liters) Note: Including 0.6 liter in the engine. - Page 73 Engine Operation Operation & Maintenance Manual Prolonged and repeated contact of skin with engine oil may lead to shrinking, dryness of skin and even cause dermatitis. Do not expose skin with exchanged engine oil for a long period. Always wear work clothes and gloves. When skin is stained with engine oil, immediately wash with water, soap or hand cleaners.
- Page 74 Operation & Maintenance Manual Engine Operation 2. Open the drain valve and drain the engine oil. 3. Remove the oil cap. 1. Disassemble oil filter with the filter wrench. Oil in the filter may run down while detaching the oil filter. Be careful not to contaminate the other parts by using a cloth when detaching the filter.
- Page 75 Operation & Maintenance Manual 1. Connect the drain plug at the torque of 3.0 kgf•m. 2. Disassemble the oil level gauge. 3. Inject genuine oil recommended by Doosan. 4. Assemble the oil cap. 5. Assemble the oil level gauge. 6. Remove the engine oil drain container from under the drain valve.
-
Page 76: Coolant
Operation & Maintenance Manual Engine Operation Coolant General Information The coolant plays an important role in the prevention of overheating and freezing of the engine. However, if the engine is used for a long period, the performance of antifreeze and anticorrosion of the coolant degrades. Maintain the condition of the coolant through daily inspections and periodic replacements. -
Page 77: Checking The Coolant
Engine Operation Operation & Maintenance Manual Checking the Coolant If the reservoir cap is opened to exchange or replenish coolant while the engine is overheated, hot water will spurt out and may cause serious burns. If it is absolutely necessary to open the reservoir cap while the engine is overheated, wrap the reservoir cap with a cloth and slowly open the reservoir cap in two steps until the steam pressure has been released from the inside. - Page 78 Operation & Maintenance Manual Engine Operation Measurement time should not exceed 75 seconds. The color changes as time passes. 4. Check the color on test sheet. 1. Compare the color of part A on the test sheet to the color of GLYCOL/FREEZEPOINT (End pad) of the standard color table.
- Page 79 Engine Operation Operation & Maintenance Manual 1. Compare the changed pink color part A of the test sheet with the GLYCOL/FREEZEPOINT (End pad) of the standard color table on top of the container and confirm the concentration. The concentration indication has to be within the color scope of 33~50%.
- Page 80 Operation & Maintenance Manual Engine Operation 1. Make sure that the engine and radiator are cooled. 2. Check the level in the supplementary tank. 3. If the coolant level indicates between the upper limit and the lower limit on the supplementary tank, it means that the coolant volume is normal.
- Page 81 Engine Operation Operation & Maintenance Manual 1. Compare the color of part A on the test sheet to the color of GLYCOL/FREEZEPOINT (End pad) of the standard color table. 2. Compare the color of the test sheet (B) to the color of MOLYBDATE (Middle pad) of the standard color table.
- Page 82 Operation & Maintenance Manual Engine Operation 2. The state of additives for anticorrosion is shown on the point where the color of MOLYBDATE (Middle pad) on the standard color table (which is identical with the Middle (B) of the test sheet) is crossed with the color of NITRITE on the standard color table (which is identical with the (C) of the test sheet).
-
Page 83: Replenishment Of Coolant
Engine Operation Operation & Maintenance Manual Replenishment of Coolant If the coolant level of the supplementary tank is below the lower limit, replenish the coolant as follows: 1. Remove the supplementary tank cap. 2. Replenish coolant until level is between the upper and lower limit of the supplementary tank. -
Page 84: Replacement Of Coolant
Operation & Maintenance Manual Engine Operation Replacement of Coolant Never open the reservoir cap while the engine is overheated. If the reservoir cap is opened while the engine is overheated, hot water will spurt out and may cause serious burns. Open the reservoir cap after ensuring that the engine has been cooled sufficiently. - Page 85 Engine Operation Operation & Maintenance Manual Do not mix antifreezes from different manufacturers. Do not mix the coolant with different concentrations. Do not add antirust which is not recommended by us. As insufficient coolant concentration may cause corrosion or freezing. However, an excessive concentration may degrade the cooling performance.
-
Page 87: Lubrication
Lubrication... -
Page 88: Lubrication
Operation & Maintenance Manual Lubrication Lubrication Lubrication is an essential part of preventive maintenance, affecting to a great extent the useful life of the compressor. Different lubricants are needed and some components require more frequent lubrication than others. Therefore, it is important that the instructions regarding types of lubricants and the frequency of their application be explicitly followed. -
Page 89: Compressor Oil Chart
Preferred: XHP605 XHP1001 Preferred Oil - Use of these oils with Doosan branded filters can extend airend warranty. Refer to the warranty policy for details or contact your representative. Preferred Oil 1 gal. (3.8 Liter) 5 gal. -
Page 91: Maintenance
Maintenance... -
Page 92: General Information
Operation & Maintenance Manual Maintenance General Information Any unauthorized modification or failure to maintain this equipment may make it unsafe and out of factory warranty. If performing more than visual inspections, disconnect battery cables and open manual blowdown valve. Use extreme care to avoid contacting hot surfaces (engine exhaust manifold, piping, air receiver, and air discharge piping, etc.). - Page 93 Maintenance Operation & Maintenance Manual 4. Pull out safety element if installed. 5. Install new filters in air cleaner body. 6. Re-install cover on air cleaner body. 7. Close the 2 latches after securing to air cleaner body. Make sure that all clamps and flange joints are tight. Make sure the pre-cleaner dirt dump is pointed within 30°...
- Page 94 Operation & Maintenance Manual Maintenance Radiator The use of water alone in this engine can result in major engine failure. Refer to engine section for coolant recommendation. Hoses Each month it is recommended that all of the intake lines to and from the air cleaners, the engine cooling system hoses and all of the flexible hoses used for air, oil, and fuel be inspected.
-
Page 95: Compressor Oil Filters
Maintenance Operation & Maintenance Manual Compressor Oil Filters The oil filter must be replaced every 500 hours of operation or six (6) months, whichever comes first. To service oil filters it will first be necessary to shut the unit down. Wipe off any external dirt and oil from the exterior of the filter to minimize any contamination from entering the lubrication system. -
Page 96: Receiver Separator System
Operation & Maintenance Manual Maintenance This should remove the accumulation of grease, oil and dirt from the exterior surfaces of the oil cooler core so that the entire cooling area can transmit the heat of the lubricating and cooling oil to air stream. In the event foreign deposits, such as sludge and lacquer, accumulate in the oil cooler to the extent that its cooling efficiency is impaired, a resulting high discharge air temperature is likely to occur, causing shut down of the unit. -
Page 97: Scavenge Line
Maintenance Operation & Maintenance Manual Scavenge Line High Pressure Air can cause severe injury or death from hot oil and flying parts. Always relieve pressure before removing caps, plugs, covers or other parts from pressurized air system. The scavenge line originates at the manifold and terminates at the compressor airend near the oil filter element. -
Page 98: Field Replacement Of Exterior Decals
Operation & Maintenance Manual Maintenance 6. Blow and tack the area to be painted. 7. Apply a smooth coat of Dupont 1854S Tuffcoat Primer to all bare metal areas and allow to dry. 8. Apply 2 medium - wet coats of Dupont 222S Adhesion Promoter over the entire area to be painted, with a 5 minute flash in between coats. -
Page 100: Preventive Maintenance Schedule
Operation & Maintenance Manual Maintenance Preventive Maintenance Schedule Preventive Maintenance Schedule - Front... - Page 101 Maintenance Operation & Maintenance Manual Preventive Maintenance Schedule - Back...
-
Page 103: Troubleshooting
Troubleshooting... -
Page 104: Introduction
Operation & Maintenance Manual Troubleshooting Introduction Troubleshooting for a Portable Air Compressor is an organized study of a particular problem or series of problems and a planned method of procedure for investigation and correction. The Troubleshooting Chart that follows includes some of the problems that an operator may encounter during the operation of a Portable Compressor. -
Page 105: Troubleshooting Chart
Troubleshooting Operation & Maintenance Manual Troubleshooting Chart Complaint Cause Correction 1. Compressor has Out of Fuel. Add Clean Fuel. stopped unexpectedly Compressor Oil Temp. too See Complaint #6. high. Engine Coolant Temp. too Check Coolant level. If low, high. add Coolant. See Complaint Engine Oil Pressure too low. - Page 106 Operation & Maintenance Manual Troubleshooting Malfunctioning main power Check switch. Replace if switch. necessary. See Electronic Service Manual. Clogged fuel filters. Service fuel filters. See Engine Manual. Out of Fuel. Add clean fuel. Compressor oil temp. too See Complaint #6. high.
- Page 107 Troubleshooting Operation & Maintenance Manual 4. Low Electrical System Loose or broken belts. Tighten or replace belt set. Voltage Loose wire connection. Check wires at switches and connectors to find loose connection. Make repairs. See Electronic Service Manual. Low battery voltage. Check battery condition, recharge if necessary.
- Page 108 Operation & Maintenance Manual Troubleshooting Blocked or restricted oil lines. Clean by flushing, or replace lines. Airend malfunctioning. See Complaints #11, #12. 6. Low Engine Speed Clogged fuel filters. Service fuel filters. See Engine Manual. Drain and clean fuel tanks. Add clean fuel.
- Page 109 Troubleshooting Operation & Maintenance Manual 9. Short Air Filter Life Dirty operating conditions. Move compressor to cleaner environment. Wrong air filter element(s). Install correct air filter element(s). Inadequate air filter element Install new air filter cleaning. element(s). Incorrect stopping Comply with procedure in procedure.
-
Page 110: Diagnostic Codes
Operation & Maintenance Manual Troubleshooting Diagnostic Codes The Miniport Displays Diagnostic Codes For The Compressor System And The Engine. Listings Of These Codes Are Provided In This Section. The Engine Diagnostic Codes Can Also Be Read With The Engine Manufacturer’S Service Tool. -
Page 111: Compressor Diagnostic Codes
Troubleshooting Operation & Maintenance Manual Compressor Diagnostic Codes LCD Display Display Name Description Type CPR CODE 1 LOW Low Engine Speed Engine speed less than 1300 FAULT RPM for 30 seconds. ENGINE SPEED Engine speed greater than 2720 FAULT CPR CODE 2 High Engine Speed HIGH ENGINE RPM for 30 seconds. - Page 112 Operation & Maintenance Manual Troubleshooting CPR CODE Engine Shutdown Engine stopped without an engine FAULT 29 ENGINE Unknown diagnostic code. SHUTDOWN UNKNOWN High Airend Airend discharge temperature FAULT CPR CODE 30 HIGH AIREND Discharge greater than or equal to 251° F. TEMP Temperature Airend Discharge...
- Page 113 Troubleshooting Operation & Maintenance Manual CPR CODE 52 IQ Filters Restricted IQ filters restricted past usable FAULT IQ FILTERS level. RESTRICTED CPR CODE 53 Separator Tank Separator tank temperature FAULT SEP TANK TEMP Temperature Sensor sensor reading out of range. SENSOR CPR CODE 54 Regulation System...
-
Page 115: Appendix A
Appendix A... -
Page 116: Warranty
Operation & Maintenance Manual Appendix A Warranty... - Page 117 Appendix A Operation & Maintenance Manual...
- Page 118 Operation & Maintenance Manual Appendix A...
-
Page 119: Revision History
Revision History REV. REV. DATE DESCRIPTION 02/20/2018 Original Release 05/04/2018 Added Compressor Diagnostic Codes Updates 07/18/2018 Added Prop 65 Warning Label, Updated PMS... - Page 122 Doosan Infracore Portable Power 1293 Glenway Drive Statesville, N.C. 28625 DoosanPortablePower.com © Doosan Infracore Portable Power Printed in the U.S.A.
Need help?
Do you have a question about the Infracore P250WDO-T4F and is the answer not in the manual?
Questions and answers