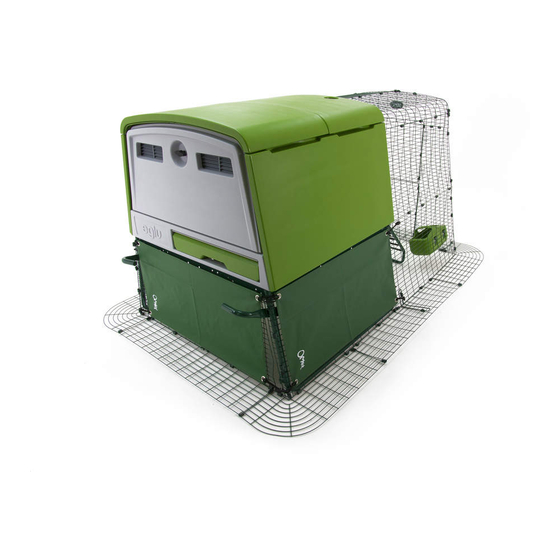
Omlet eglu cube Instruction Manual
House + frame
Hide thumbs
Also See for eglu cube:
- Instructions manual (60 pages) ,
- Manual (43 pages) ,
- Instruction manual (28 pages)
Advertisement
Quick Links
Download this manual
See also:
Instruction Manual
House + Frame
Instruction Manual
Bedienungsanleitung
Manuel D'instructions
Handleiding
Manual De Instrucciones
Manuale Di Istruzioni
eglu
cube
Advertisement

Subscribe to Our Youtube Channel
Related Manuals for Omlet eglu cube


Summary of Contents for Omlet eglu cube
- Page 1 House + Frame Instruction Manual Bedienungsanleitung Manuel D’instructions Handleiding Manual De Instrucciones Manuale Di Istruzioni eglu cube...
-
Page 2: What You Have Received
What you have received · DE Das haben Sie erhalten · FR Qu’avez-vous reçu · NL Wat u heeft ontvangen · ES Qué has recibido · IT Cosa avete ricevuto (Contenuto) 064.0015: Eglu Cube Assembly Box A Roof Panel Front... - Page 3 064.1028 064.1155 064.1043 064.1099 Partition Bracket Locator Block M6x10mm Screw 064.1103 064.1143 800.0197 064.0045: Eglu Cube Frame Assembly Box C Side Panel to Frame Bracket Frame Right Side Frame Left Side Frame Ladder Ladder Friction Strips 064.0027 064.1022 064.0026 064.0030 810.1040...
- Page 4 Eglu Cube Exploded Assembly · DE Eglu Cube Übersichtszeichnung · FR Plan de montage pour l’Eglu Cube · NL Montageplan Eglu Cube · ES Instrucciones de montaje básicas para el Eglu Cube · IT Eglu Cube: Istruzioni di base Roof Panel Rear Roof Panel Front 064.1014...
- Page 5 Eglu Cube House + Frame Instructions 064.1056 800.0037 064.0027 800.0040 064.0026 800.0037 800.0040 064.0028...
- Page 6 064.0030 810.1040 If you have Wheels refer to the Wheels Instruction Manual and assemble at this stage. Once complete continue the House assembly. · DE Falls Sie Räder haben, gehen Sie jetzt bitte zur Anleitung für die Räder. Sobald Sie die Räder angebracht haben, kehren Sie zum Aufbau des Stalles zurück ·...
- Page 7 800.0197 If you have a Run refer to the Run Instruction Manual and assemble at this stage. Once complete continue the House assembly. · DE Falls Sie einen Auslauf haben, gehen Sie jetzt bitte zur Anleitung für den Auslauf. Sobald Sie den Auslauf aufgebaut haben, kehren Sie zum Aufbau des Stalles zurück ·...
- Page 8 800.0197 064.1017 800.0197 064.1022 064.1023 064.1001...
- Page 9 800.0197 064.1017 800.0197...
- Page 10 800.0197 064.0007 064.1099 064.1103 800.0197...
- Page 11 800.0040 064.1101 800.0197 If you have an Auto Door attach it to the house at this stage. Refer to the Auto Door Instruction manual. · DE Falls Sie einen Automatischen Türöffner haben, bringen Sie ihn nun an den Stall an. Genauere Angaben finden Sie in der Gebrauchsanleitung für den Automatischen Türöffner ·...
- Page 12 800.0197 064.1143 800.0197 064.1047 064.1002 064.1142...
- Page 13 800.0197...
- Page 14 064.1003 800.0197 800.0197 064.1155 064.1155...
- Page 15 064.1014 800.0197 800.0197...
- Page 16 064.0011 800.0197 064.1043 064.1010...
- Page 18 064.1012 800.0197 064.0008 064.1028...
- Page 19 2-3mm...
- Page 20 That’s it! You have completed the House and Frame. · DE Das war’s! Sie haben den Eglu Cube mit Gestell nun fertig gestellt · FR C’est fini! Vous avez monté aotre Eglu Cube et son armature · NL Klaar! U heeft het hok en frame compleet ·...
- Page 21 Attach Accessories · DE Zubehör anbringen · FR Accessoires · NL Bevestig accessoires · ES Conecte accesorios · IT Attaccare gli accessori 800.0197 810.0183 064.1040 064.1041...
- Page 22 Door: Egg Port: Partition: The partition is used to keep your chickens in the roosting area at night. · DE Die Trennwand wird genutzt, um die Hühner über Nacht aus dem Legebereich fernzuhalten · FR La cloison est utilisée pour permettre a vos poules de dormir dans la partie dediées a cet effet durant la nuit ·...
- Page 23 Roosting Tray: Make sure the clip engages when putting the tray back. Stellen Sie sicher, dass der Clip einrastet, wenn Sie die Schublade zurück schieben. Faites en sorte de clipser le plateau quand vous l’installez. Zorg ervoor dat de mestlade bij het terugschuiven goed vastklikt. Asegúrate de enganchar el clip cuando coloques la bandeja trasera.
- Page 24 · tel. 01295 750094 · email. hello@omlet.co.uk web. www.omlet.de · tel. +49 9113749072 · email. hallo@omlet.de web. www.omlet.fr · tel. 04 81 68 01 44 · email. hello@omlet.co.uk web. www.omlet.nl · tel. 0202209033 · email. hello@omlet.co.uk web. www.omlet.es · tel. 0931786028 · email. info@omlet.es web.
Need help?
Do you have a question about the eglu cube and is the answer not in the manual?
Questions and answers