Table of Contents
Advertisement
Available languages
Available languages
Quick Links
Anleitung für den Einbau und die Wartung der GRAF
DE
Trinkwasser-Nachspeisung Mains-on-Tap
>> Seite 1-7
Instructions for installing and maintaining the GRAF
EN
Mains-on-Tap mains water top-up unit
>> Page 8-14
FR
Notice d'installation et d'utilisation du
Gestionnaire GRAF Mains-on-Tap
>> Page 15-21
Instrucciones de instalación y mantenimiento del
ES
Sistema de reposición con agua de la red Mains-on-Tap
>> Página 22-28
MAINS-ON-TAP
Advertisement
Chapters
Table of Contents

Related Manuals for Graf Mains-on-Tap


Summary of Contents for Graf Mains-on-Tap
- Page 1 Instructions for installing and maintaining the GRAF Mains-on-Tap mains water top-up unit >> Page 8-14 Notice d’installation et d’utilisation du Gestionnaire GRAF Mains-on-Tap >> Page 15-21 Instrucciones de instalación y mantenimiento del Sistema de reposición con agua de la red Mains-on-Tap >> Página 22-28...
- Page 2 Otto Graf GmbH Kunststofferzeugnisse Carl-Zeiss-Str. 2-6 DE-79331 Teningen Tel.: +49 7641 589-66 Fax: +49 7641 589-50 mail@graf.info www.graf-online.de...
-
Page 3: Table Of Contents
Anleitung für den Einbau und die Wartung der GRAF Trinkwasser-Nachspeisung Mains-on-Tap GRAF Mains-on-Tap Best.-Nr. 350020 Inhaltsübersicht Die in dieser Anleitung beschrie- benen Punkte sind unbedingt zu ALLGEMEINE HINWEISE beachten. Bei Nichtbeachtung er- Sicherheit lischt jeglicher Garantieanspruch. Kennzeichnungspflicht Für alle über GRAF bezogenen... -
Page 4: Allgemeine Hinweise
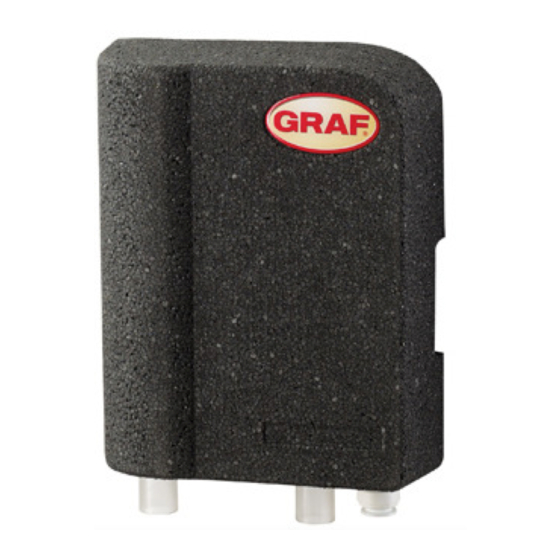
Verwendbar sind Kunststoff-, Beton- oder Metalltanks Durch die automatische Nachspeisung mit Trinkwasser ist auch bei leerem Regenwasserbehälter eine Betriebswasserversorgung gewährleistet. Betriebswasser darf zur Gartenbewässerung, für die Toilettenspülung, zum Wäsche waschen und als Putzwasser verwendet werden. Die Mains-on-Tap ist zur Montage in frostgeschützten, überflutungssicheren und trockenen Räumen vorgesehen. 2 / 28... -
Page 5: Technische Daten / Maße
2. Technische Daten / Maße Technische Daten / Maße Löcher für Wandbefestigung Freier Auslauf Notüberlauf Nachspeiseleitung Trinkwasseranschluss Tank Maße \ Buchstaben 15 21,5 36 70x36 0,6 0,8 1,4 Inch 10,9 2,8x1,4 3 / 28... -
Page 6: Netzanschluss
Ø 36 mm / (1.4") Notüberlauf (M): Ø 21,5 mm / (0.8") Montage und Einbau Die Mains-on-Tap und das beiliegende Zubehör aus der Transportverpackung nehmen. Die gesamte Anlage sofort auf eventuelle Beschädigungen überprüfen. Beschädigungen müssen vor der Montage gemeldet werden. Wandmontage Die Anlage ist zur Aufhängung (oberhalb der Rückstauebene) in frostgeschützten, überflutungssicheren... -
Page 7: Anschluss Notüberlauf
3. Montage und Einbau Anschluss Notüberlauf Der Notüberlauf wird mit handelsüblichen Rohren hergestellt (21,5 mm / 0.8") . In Räumen mit Bodenablauf ist es ausreichend das überlaufende Wasser ohne Anschluss an die Kanalisation aus der Nachspeiseeinheit herauslaufen zu lassen, da im Normalbetrieb kein Wasser austritt. Ist kein Bodenablauf vorhanden, wird der Notüberlauf an das Abwassernetz angeschlossen. -
Page 8: Inbetriebnahme
4. Inbetriebnahme Inbetriebnahme Stecken Sie den Netzstecker der Anlage in eine abgesicherte Steckdose. Die Komponenten (Magnetventil, Netzstecker und Levelsensor) sind bereits an dem Leistungsschalter (Platine Abb. 2) vormontiert. Hier sind keine weiteren Installationsarbeiten notwendig. Nach dem Einstecken ist das Gerät direkt betriebsbereit. Im Falle, dass der Tank leer ist, öffnet der Schwimmerschalter am unteren Einschaltpunkt das Nachspeiseventil der Anlage. -
Page 9: Störung Und Abhilfemaßnahmen
GRAF Iberica Tecnología del Plástico S.L. – Marquès Caldes de Montbui, 114 – ES-17003 Girona – Tel.: +34 972 913767 – Fax: +34 972 913766 GRAF UK Ltd – Target House – Thorpe Way Ind. Estate – Banbury – Oxfordshire – UK-OX16 4SP – Tel.: +44 1608 661-500 – Fax: + 44 1295 211333... - Page 10 Instructions for installing and maintaining the GRAF Mains-on-Tap mains water top-up unit GRAF Mains-on-Tap Order no. 350020 Contents The points described in these in- structions must be observed in all GENERAL INFORMATION cases. Failure to do so shall invali- Safety date the warranty.
-
Page 11: General Information
The system has no effect on the quality of the process water. Applications The GRAF Mains-on-Tap mains water top-up unit automatically ensures that mains water is supplied to cover the demand for process water when the rainwater tank is empty. -
Page 12: Technical Data / Dimensions
2. Technical data / dimensions Technical data / dimensions Holes for wall mounting Free outlet Emergency overflow Mains water connection Tank feed pipe Dimensions \ letters 15 21.5 36 70x36 0.6 0.8 1.4 Inch 10.9 2.8x1.4 10 / 28... -
Page 13: Mains Power Connection
Mark and drill the required holes on the desired wall (space between holes 75 mm / 3") as per the holes on the back of the Mains-on-Tap unit. The console can then be mounted on the wall using the mounting kit supplied. -
Page 14: Emergency Overflow Connection
The feed pipe should be routed through an empty pipe acting as a conduit. Water is fed into the tank via gravity pressure only from the location of the Mains-on-Tap unit to the rainwater tank. The installation location must therefore be higher than the highest possible water level in the rainwater tank. -
Page 15: Start-Up
4. Start-up Start-up Plug the system's mains plug into a fused socket. The components (solenoid valve, mains plug and level sensor) are already pre-fitted on the circuit breaker (circuit board, Fig. 2). No further installation work is required here. Once the device has been plugged in, it is ready for operation. If the tank is empty, the float switch opens the feed valve at the lower switch-on point. -
Page 16: Troubleshooting
GRAF Iberica Tecnología del Plástico S.L. – Marquès Caldes de Montbui, 114 – ES-17003 Girona – Tel.: +34 972 913767 – Fax: +34 972 913766 GRAF UK Ltd – Target House – Thorpe Way Ind. Estate – Banbury – Oxfordshire – UK-OX16 4SP – Tel.: +44 1608 661-500 – Fax: + 44 1295 211333... - Page 17 Notice d’installation et d’utilisation du Gestionnaire GRAF Mains-on-Tap Gestionnaire Mains-on-Tap GRAF Réf. 350020 SOMMAIRE Afin de garantir le bon fonctionne- ment, il est important de respecter GENERALITES scrupuleusement les instructions. Sécurité Tout manquement à ces règles Marquage annulera systématiquement...
-
Page 18: Generalites
L’eau refoulée par le gestionnaire peut servir pour le jardin, les toilettes, le lave-linge ou pour le nettoyage des sols. Le Gestionnaire Mains-on-Tap doit être placé dans un endroit sec, à l’abri du gel et bien ventilé et au- dessus du niveau de la cuve. -
Page 19: Dimensions
2. Dimensions Dimensions Trous pour fixation murale Trop plein de sécurité Raccordement du tuyau Trop-plein d’alimentation Réservoir Dimensions 15 21,5 36 70x36 0,6 0,8 1,4 '' (pouces) 10,9 2,8x1,4 17 / 28... -
Page 20: Raccordement Électrique
36 mm Trop-plein (M): 21,5 mm Montage et installation Retirer le Gestionnaire Mains-on-Tap ainsi que les accessoires de son emballage. Vérifier que l'installation n’ai subi aucun dommage durant le transport. Les dégradations doivent être signalées avant le montage. Fixation murale L'installation peut être fixée au mur dans un endroit sec, protégé... -
Page 21: Raccordement Du Trop-Plein De Sortie
3. Montage et installation Raccordement du trop-plein de sortie Raccorder le trop-plein de sortie en utilisant des tuyaux PVC disponible dans le commerce (21,5 mm / 0,8") et raccorder au réseau d’eau pluviale. N’installer le gestionnaire que dans une pièce disposant d’une évacuation d’eaux car dans le cas d’un incident, de l’eau pourrait couler par le trop-plein. -
Page 22: Mise En Service
4. Mise en service Mise en service Branchez le câble d’alimentation de l'installation dans une prise protégée. Les composants (électrovanne, cordon d'alimentation et capteur de niveau) sont déjà pré-montés (platine, schéma 2). Après avoir branché la prise, l’installation démarre immédiatement. Aucune autre installation n’est nécessaire. -
Page 23: Erreurs Et Mesures Correctives
GRAF Iberica Tecnología del Plástico S.L. – Marquès Caldes de Montbui, 114 – ES-17003 Girona – Tel.: +34 972 913767 – Fax: +34 972 913766 GRAF UK Ltd – Target House – Thorpe Way Ind. Estate – Banbury – Oxfordshire – UK-OX16 4SP – Tel.: +44 1608 661-500 – Fax: + 44 1295 211333... - Page 24 Instrucciones de instalación y mantenimiento del Sistema de reposición con agua de la red Mains-on-Tap GRAF Mains-on-Tap Código 350020 Índice de contenido Los puntos descritos en estas instrucciones deben ser INDICACIONES GENERALES respetados obligatoriamente. No Seguridad seguir las instrucciones prescribe Obligatoriedad de identificación...
-
Page 25: Indicaciones Generales
El equipo no influye sobre la calidad del agua no tratada. Campos de aplicación El sistema de reposición con agua de la red Mains-on-Tap, de GRAF, es una unidad que garantiza la reposición automática con agua potable en función de las necesidades, incluso estando el depósito de agua de lluvia vacío, para un abastecimiento con agua no tratada. -
Page 26: Datos Técnicos / Dimensiones
2. Datos técnicos / Dimensiones Datos técnicos / Dimensiones Orificios para la fijación mural Rebosadero Rebosadero de emergencia Toma de agua potable Tubo de reposición del depósito Dim. \ Letras 15 21,5 36 70x36 0,6 0,8 1,4 pulg. -
Page 27: Sistema De Reposición Con Agua De La Red
Rebosadero de emergencia (M): 21,5 mm / (0,8”) Montaje e instalación Retirar el equipo Mains-on-Tap y los accesorios incluidos del embalaje de transporte. Examinar de inmediato el equipo completo para detectar eventuales desperfectos. Comunicar los desperfectos antes de proceder al montaje. -
Page 28: Conexión Del Rebosadero De Emergencia
3. Montaje e instalación Conexión del rebosadero de emergencia El rebosadero de emergencia se confecciona con tubos corrientes en el comercio (21,5 mm / 0,8”) . En locales con desagüe en el suelo no es necesario realizar una conexión al alcantarillado y basta con dejar que el agua que rebosa escape de la unidad de reposición, porque durante el funcionamiento normal no saldrá... -
Page 29: Puesta En Servicio
4. Puesta en servicio Puesta en servicio Enchufe la clavija de red del equipo en una toma de corriente protegida eléctricamente. Los componentes (electroválvula, clavija de red y sensor de nivel) ya vienen conectados al interruptor de potencia (placa de la fig. 2). Aquí no son necesarios otros trabajos de instalación. El equipo es operativo desde el momento en que se enchufa. -
Page 30: Averías Y Soluciones
GRAF Iberica Tecnología del Plástico S.L. – Marquès Caldes de Montbui, 114 – ES-17003 Girona – Tel.: +34 972 913767 – Fax: +34 972 913766 GRAF UK Ltd – Target House – Thorpe Way Ind. Estate – Banbury – Oxfordshire – UK-OX16 4SP – Tel.: +44 1608 661-500 – Fax: + 44 1295 211333... - Page 31 Notizen / Notes / Notas...
Need help?
Do you have a question about the Mains-on-Tap and is the answer not in the manual?
Questions and answers