Televic CONFIDEA G3 User's Installation Manual
Hide thumbs
Also See for CONFIDEA G3:
- Installation & user manual (35 pages) ,
- Quick install manual (4 pages) ,
- User manual (49 pages)
Table of Contents
Advertisement
Advertisement
Table of Contents

Related Manuals for Televic CONFIDEA G3


Summary of Contents for Televic CONFIDEA G3
- Page 1 CONFIDEA G3 USER & INSTALLATION GUIDE...
-
Page 2: Copyright Statement
However, the information in this manual is supplied without warranty, either express or implied. Neither the authors, Televic Conference NV, nor its dealers or distributors will be held liable for any damages caused or alleged to be caused either directly or indirectly by this book. -
Page 3: Table Of Contents
CONTENTS Introduction Getting started About this manual Compatibility About Confidea G3 Safety Instructions Safety instructions Safety FCC & ICES Information Conformity and Certification Info for Japan Important safety instructions Lithium batteries General conformity info Power connections Confidea G3 Components Introduction... - Page 4 Electrical and acoustic properties Microphone connector Operation Installation Design Wireless network and frequency bands Wireless LAN Televic Confidea wireless system Frequency bands Installation Process Mount the Confidea WCAP POSITION THE CONFIDEA WCAP OPTIMIZE POSITION OF THE WCAP ANTENNAS MAXIMUM RANGE OF THE WCAP...
- Page 5 Use the operator mode System configuration Regional settings update Confidea G3 Login settings System info Logging Encryption Link CoCon to WCAP Introduction Upload license Couple Confidea G3 with Plixus Camera control Introduction Configure camera control...
-
Page 6: Introduction
INTRODUCTION This chapter will give you a short introduction to this manual and a general description of the Confidea G3 and its functionalities. -
Page 7: Getting Started
GETTING STARTED About This Manual Throughout this guide we use different icons to designate different types of information: This is a note. A note gives additional information, such as the meaning of the color of the LEDs. A note also provides information that may only be applicable to some situations. This is a tip. -
Page 8: Compatibility
Compatibility This user manual applies to the following products: Product Version WCAP + firmware version ≥ 1.06 WCAP fpga version ≥ 1.06 WDU + firmware version ≥ 1.06 WCAP + 71.98.0033 CoCon ≥ 3.02 G ETTING STAR TED... -
Page 9: About Confidea G3
ABOUT CONFIDEA G3 The Confidea Wireless G3 uses wireless technology to give you much more flexibility to set up your conference system. The basic system consists of the following elements: The Confidea Wireless Conference Access Point (WCAP)(A), which acts as a mini central unit. - Page 10 SAFETY INSTRUCTIONS This chapter describes all safety instructions needed to use the Confidea G3 system. Read this before using the equipment.
-
Page 11: Safety Instructions
SAFETY INSTRUCTIONS The safety instructions contain general safety guidelines that integrators, installers, operators, end users, and anyone else who installs or uses Televic Conference material is required to read and follow at all times. Safety All Televic Conference systems are state of the art devices and have been designed to meet all quality standards. -
Page 12: Conformity And Certification Info For Japan
2. This device must accept any interference received, including interference that may cause undesired operation. Changes or modifications made to this equipment not expressly approved by Televic Conference may void the FCC authorization to operate this equipment. Conformity And Certification Info For Japan... - Page 13 5. Cleaning. Unplug this product from the wall outlet before cleaning. Do not use liquid cleaners or aerosol cleaners. Use only a damp cloth for cleaning. 6. Ventilation. Any slots and openings in the device or equipment are provided for ventilation and to ensure reliable operation of the product and to protect it from overheating.
- Page 14 If the provided plug does not fit into your outlet, consult an electrician for replacement of the obsolete outlet. 15. Power-Cord Protection. Power-supply cords should be routed to that they are not likely to be walked on or pinched by items placed upon or against them, paying particular attention to cords at plug, convenience receptacles, and the point where they exit from the product.
-
Page 15: Lithium Batteries
23. Replacement Parts. When replacement parts are required, be sure the service technician has used replacement parts specified by the manufacturer or have the same characteristics as the original part. Unauthorized substitutions may result in fire, electric shock, or other hazards. 24. - Page 16 OTHER Do not fold the battery cased with laminated film such as pouch and Polymer. Do not store the battery in a pocket or a bag together with metallic objects such as keys, necklaces, hairpins, coins, or screws. Do not short circuit (+) and (-) terminals with metallic objects intentionally. Do not pierce the battery with a sharp object such as a needle or screw drivers.
-
Page 17: General Conformity Info
The battery can be used within the following temperature ranges. Don't exceed these ranges. Charge temperature ranges : 0℃ ~ 45℃ Discharge Temperature ranges : -20℃ ~ 60℃ Store the battery at temperature below 60℃ Cover terminals with proper insulating tape before disposal. CAUTION ELECTRICAL MISUSE Battery must be charged with constant current-constant voltage (CC/CV). -
Page 18: Power Connections
EN60065 EN55103-1/-2 IEC60914 Power Connections For permanently connected equipment, a readily accessible disconnect device shall be incorporated in the fixed wiring; For pluggable equipment, the socket-outlet shall be installed near the equipment and shall be easily accessible. This label may appear on the bottom of the apparatus due to space limitations. The lightning flash with an arrowhead symbol, with an equilateral triangle, is intended to alert the user to the presence of un-insulated ‘dangerous voltage’... - Page 19 Installation should be performed by qualified service personnel only in accordance with the National Electrical Code or applicable local codes. Installation should be performed by qualified service personnel only in accordance with the National Electrical Code or applicable local codes. SAF ETY INSTR UCTIO NS...
-
Page 20: Confidea G3 Components
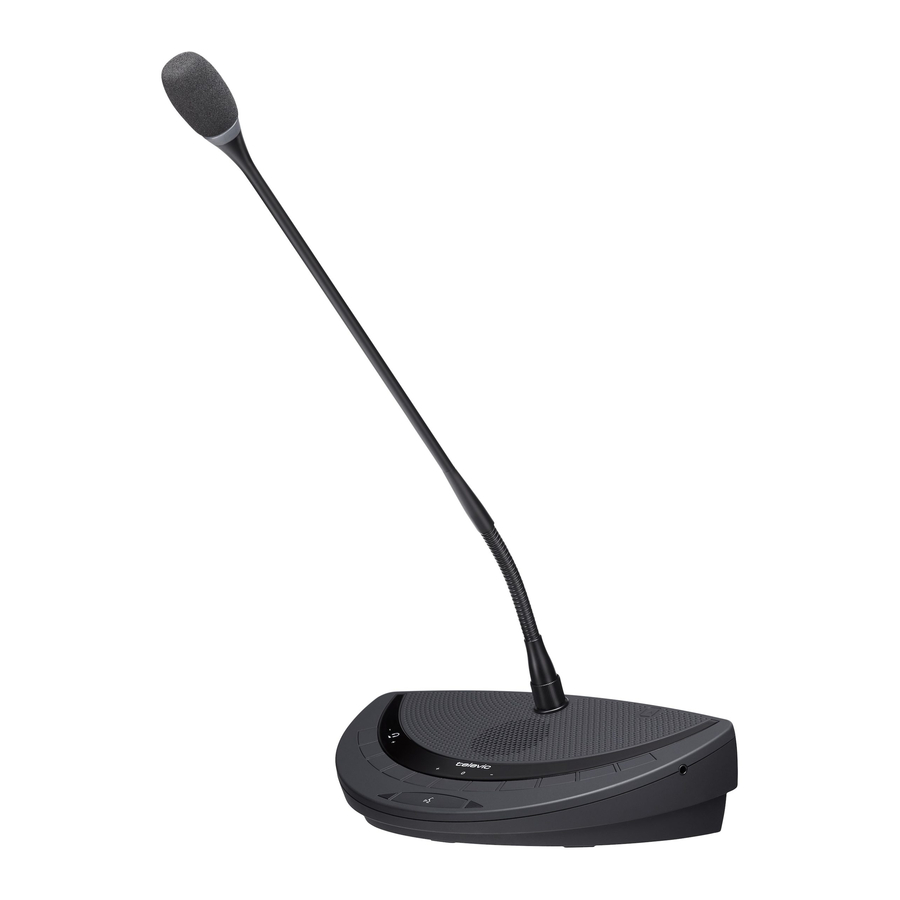
CONFIDEA G3 COMPONENTS A Confidea G3 setup consists of three elements: the Confidea G3 WCAP, Confidea G3 units, a charging case. This chapter will describe these hardware components together with how you can use these components to match your needs. -
Page 21: Introduction
General System Architecture COMPONENTS Confidea G3 is a wireless conference system offering conferencing capabilities over a robust wireless link. Depending on the model, these facilities include discussion, voting and/or language distribution. The units (delegates/chairman) are table top units that make a wireless link to a Wireless Conference Access Point called WCAP G3. -
Page 22: Wireless Conference Access Point (Wcap)
The WCAP can be mounted on the wall by means of the 2 fixing holes at the bottom of the device. To prevent accidents from happening, attach the device to the wall in accordance with the installation instructions. Figure 1-3 How to mount the Confidea G3 WCAP to a wall WIR EL ESS CO NF ER ENCE ACCESS PO INT (WCAP) -
Page 23: Connections And Controls
TRIPOD MOUNTING The WCAP can also be mounted on a tripod. Figure 1-4 How to mount the WCAP onto a tripod Connections And Controls Figure 1-5 Confidea WCAP connections WIR EL ESS CO NF ER ENCE ACCESS PO INT (WCAP) - Page 24 LED 1 LED 3 LED 2 Figure 1-6 Confidea WCAP LEDs 1. Power Switch: The WCAP can be switched on/off with the power switch at the back of the WCAP. 2. Power Supply: The power supply of the WCAP is provided by a 110 - 230VAC/24VDC adaptor 3.
- Page 25 Plixus coupling active and initialization is open Fixed green Fixed pink Fixed blue Plixus coupling active, the WCAP has no associated Confidea G3 units (when more then 1 WCAP is coupled with Plixus) Blinking red, green, Blinking red, green, Blinking red, green, Test mode...
-
Page 26: Wireless Contribution Units
The chairman units are used to guide and control an ongoing discussion. Controls And Indicators The Confidea WDU has the following features: Figure 1-7 The front view of the Confidea G3 CIV unit with all possible options WIR EL ESS CO NTR IB UTIO N UNITS... - Page 27 Figure 1-8 The back view of the Confidea G3 CIV unit with all possible options 1. Microphone connector: Connection of a microphone to the wireless unit. 2. Microphone button: Activation / deactivation of the microphone. 3. Loudspeaker: distributes the floor channel. Mutes in case microphone is active.
-
Page 28: Install Unit
12. Information display: Indication of voting, volume and channel information. 13. RFID card reader 14. RF Status LEDs Blue LED Indication of the condition of the RF connection. Off : connection established Blinking : searching connection On : out of range 15. - Page 29 Meaning Both LEDs blink red Searching for WCAP connection after startup Both LEDs blink green green WCAP connection lost Both LEDs blink red for a few seconds + Left led fixed & right led Trying to connect to WCAP blinking few seconds WIR EL ESS CO NTR IB UTIO N UNITS...
-
Page 30: Battery Pack
BATTERY PACK Introduction The Confidea wireless battery pack is used with the wireless conference units. Output voltage 7.2V Capacity 6600 mAh Charge time 4 Hours Max charge voltage Charge current Autonomy + 28 Hours (Typical) Read the safety instructions before using the Lithium battery. Power Supply 15V / 2A DC power plug:... -
Page 31: Battery Charging And Handling
Figure 1-9 Confidea G3 battery pack bottom side up 1. Test button: Push to check the capacity and the status of the battery pack. 2. Capacity and status indicator: Shows the capacity of the battery pack 3. Clip: Locks/unlocks the battery pack in the wireless unit. -
Page 32: Installation
Store the Confidea G3 battery under the correct conditions: between 0 °C and 35 °C and with a relative humidity between 5% and 75 % Installation The indicator is a five segment LED. The first LED (LED1 closest to the test button) is red and indicates a low capacity battery. -
Page 33: Microphones
MICROPHONES Introduction Use the Confidea-D MIC30SL (30 cm) - D MIC40SL (40 cm) - D MIC50SL (50 cm) removable microphones with the different delegate and chairman units. This microphone ha a unidirectional response for optimum performance even in noisy conditions, and has a very low susceptibility to RF-interference from mobile phones. -
Page 34: Microphone Connector
Microphone Connector Figure 1-10 Microphone connections pin 1 : microphone GND pin 2 : microphone signal pin 3 : unused pin 4 : LED + pin 5 : LED – Operation The microphone contains the following elements. Indicator ring: shows the status of the microphone Union nut: attaches the removable microphone to the unit Microphone plug: connects the microphone to the unit The color of the microphone indicator ring shows the status of the microphone. -
Page 35: Installation Design
INSTALLATION DESIGN This chapter describes how to set up the installation of the Confidea G3 system before you can physically install it. You will find more information on the technical details of the different components and how to combine and configure them. -
Page 36: Wireless Network And Frequency Bands
WIRELESS NETWORK AND FREQUENCY BANDS Wireless LAN Most of the wireless local area computer networks today are based on the IEEE 802.11 a/b/g standards. These standards were developed by the IEEE (Institute of Electrical and Electronics Engineers) in order to insure inter-operability between different WLAN vendors. -
Page 37: Televic Confidea Wireless System
TELEVIC CONFIDEA WIRELESS SYSTEM The wireless network of the Televic Confidea wireless system is based on the 802.11 a/g standards. Additional protocols have been added on top of the 802.11 a/g standards to provide high robustness against interference from other wireless devices. These additional protocols also ensure a guaranteed quality of service for the audio streams on the wireless network. - Page 38 In the 2.4 GHz ISM (Industrial Scientific Medical) band, there are 13 overlapping high-frequency carriers available. Only 3 non-overlapping carriers are available. USA and ISM 2.4 GHz Europe Japan Korea Taiwan Brazil China Egypt Canada 2412 MHz √ √ √ √...
- Page 39 USA and RLAN low Europe Japan Korea Taiwan Brazil China Egypt Canada 5320 MHz √ √ √ √ √ √ √ When transmitting in the 5.15-5.25 GHz band, this device is restricted to indoor use only. In the “RLAN high” frequency band, there are 10 non-overlapping carriers. USA and RLAN high Europe...
-
Page 40: Installation Process
INSTALLATION PROCESS This chapter describes how to physically set up and install the Confidea G3 system. Here you can find all technical details needed to correctly install all Confidea G3 components. -
Page 41: Mount The Confidea Wcap
MOUNT THE CONFIDEA WCAP POSITION THE CONFIDEA WCAP Do not place the WCAP behind obstacles such as walls, cabinets, panels, projection screen, glass screens etc. These objects can significantly reduce RF signal strength as well as quality. Antennas should not be placed above suspended ceilings as this can cause unnecessary reflections and signal attenuation. -
Page 42: Optimize Position Of The Wcap Antennas
Figure 1-11 How to position a WCAP in relation to a wall or ceiling OPTIMIZE POSITION OF THE WCAP ANTENNAS When the antennas of the WCAP are positioned very close to a wall or ceiling, this may result in absorption of the RF signal , which can decrease RF signal quality. It is important not to point the antennas directly towards the units. -
Page 43: Maximum Range Of The Wcap
Figure 1-12 How to position the antennas of the Confidea WCAP MAXIMUM RANGE OF THE WCAP A single WCAP has a range of 30 m in “open field". However, the maximum range can depend less on the position of the WCAP by positioning the antennas in relation to the position of the delegate units. The frequency used also has an effect on the range of the WCAP. -
Page 44: Installing The Confidea Wcap
1. Plug in the 24V adapter to the device and the power socket. 2. Connect the LAN cable to your computer or the LAN network that contains your computer. 3. Switch on the Confidea G3. The left LED light will start blinking white, this means the system is booting. -
Page 45: Configuration
This chapter describes how to configure the Confidea G3 network using the Confidea G3 Core web server. It includes a description of how to connect to the built-in web server together with how to initialize units and configure audio settings... -
Page 46: Configure Ip Settings
CONFIGURE IP SETTINGS Before you start using the Confidea G3 web server you need to configure your local IP settings to be able to access the web server. Follow the procedure below to configure this. To be able to access the web server your computer needs an IP address and subnet mask that can access the IP address of the WCAP. - Page 47 4. Right-click the Local Area Connection and select Properties. 5. Select Internet Protocol Version 4 (TCP/IPv4) and click Properties. 6. To assign a fixed IP address to your computer, click Advanced. CO NF IG UR E IP SETTING S...
-
Page 48: Change Ip Settings In Macos
Internet via WIFI, and it is connected to a central engine using a network cable), do not fill in the default gateway. 9. Click OK. You are now ready to access the Confidea G3 system. Change IP Settings In MacOS 1. - Page 49 2. Select Network from the menu. 3. Click the Advanced button. 4. Select TCP/IP in the menu on top. CO NF IG UR E IP SETTING S...
- Page 50 5. Change Configure IPv4 to Manually. 6. Enter an IP address in the range of the WCAP, for example 192.168.1.25. Fill in 255.255.255.0 as subnet mask. 7. Click OK. CO NF IG UR E IP SETTING S...
-
Page 51: Access The Wcap Web Server
ACCESS THE WCAP WEB SERVER ACCESS THE WCAP WEB SERVER FOR THE FIRST TIME 1. On the computer connected to the WCAP, open your web browser and type 192.168.1.110 or wcap3.local in the address bar. 2. Press Enter. 3. Follow the wizard for initial setup of the WCAP. 4. - Page 52 5. In step three you can define a hostname. This name will then be associated with this WCAP, allowing easy identification and differentiation between multiple WCAPs. With the hostname you can see which host uses which frequency. 6. In step four you can define a user name and password to login to the web server. If you do not enable this, you can leave these fields blank on the login screen.
-
Page 53: Access The Configured Wcap
7. When ready click the Finish button. 8. After initial setup, change the IP address as described in "Configure IP settings" on page 46 to prevent conflicts when multiple access points with the same IP address are available in the network. ACCESS THE CONFIGURED WCAP 1. - Page 54 ACCESS THE WCAP WEB SER V ER...
-
Page 55: Introduction To The Web Server
INTRODUCTION TO THE WEB SERVER Compatibility The web server is compatible with different types of mobile and desktop devices. Some of the web server’s functionality may be blocked by security software installed on your computer. Quick Start To The Application After you enter the IP address of the WCAP in the address bar of your browser, you will see the screen displayed below. - Page 56 Figure 1-15 Web server menu The following menu items are available, the table below gives a short description of every item. Icon Menu item Description Home Returns to the home screen. Frequency On this page you can choose a frequency from an overview of all available frequencies and their signal strength.
- Page 57 Icon Menu item Description Logging Contains all the systems logging. Encryption Configure the encryption settings. Update Update the WCAP and delegate units. version INTR O DUCTIO N TO THE WEB SER V ER...
-
Page 58: Configure Network Settings
CONFIGURE NETWORK SETTINGS Change IP Settings 1. Click the Menu button and click the Network menu item. You can configure the following settings: Parameter Description Hostname Change the hostname of the WCAP. Address mode Choose between static and DHCP mode: Static: in this mode the IP address and subnet mask are fixed and must be inserted into the appropriate fields. - Page 59 2. Click Save settings. CO NF IG UR E NETWO R K SETTING S...
-
Page 60: Configure Frequency Settings
CONFIGURE FREQUENCY SETTINGS Select Frequencies 1. Click the menu icon and select Frequency settings. The left part of the page shows which frequencies are selected (A). The frequency used by the WCAP is indicated in green. 2. Select frequencies on the right part of the page (B), this list contains all available frequencies. Select all frequencies in a category by clicking the checkbox next to the title (C) or select separate frequencies (D). -
Page 61: Frequency Planning
Frequency Planning FREQUENCY INTERFERENCE If more than one WCAP or Wi-Fi access points are in the same room or within 30 m, we advise that only one uses automatic frequency selection. This is to avoid that the frequency scanning is disturbed by the other access point(s). -
Page 62: Configure Conference Settings
CONFIGURE CONFERENCE SETTINGS Initialization In stand-alone mode, the WCAP supports two kinds of initialization: Open access: any unit can connect to the WCAP without an initialization procedure. Manual initialization: a unit can only connect after it completes a certain procedure. INITIALIZE UNITS THROUGH OPEN ACCESS 1. - Page 63 MANUALLY INITIALIZE UNITS 1. Click the Menu icon and select Initialization. 2. On the Initialization page select Manual initialization. To be able to detect the units, it must be active (press the microphone button on the unit). If the unit did not detect the WCAP, its LED lights will blink green.
- Page 64 even when WCAP is switched off and on again. Figure 1-16 How to manually initialize units. The battery icon shows the remaining battery life of the unit. EDIT UNITS Once units are linked to the WCAP it is possible to edit some of the features of the units. You can change the name, create groups and add units to specific groups.
-
Page 65: Configure Discussion Options
4. Click Add new group to create a new group. Choose a color, define a name and press ENTER. 5. Click Stop editing to save and leave the edit page. 6. Click the remove icon to delete groups or units. When you click Clear initialization, all units will be removed, but not the groups. - Page 66 Parameter Description Direct speak Enables the delegate to switch his microphone on/off at any time. The only limitation is the maximum amount of active microphones. When the option Interrupt possible is selected and the maximum amount of active microphones is reached, then the microphone that has been active the longest will be switched off.
- Page 67 Parameter Description Very similar to Direct speak, but microphones are activated by voice detection. Vox Treshold: determines the sound level needed to activate the microphone. The threshold is to be chosen in such way that the microphone is switched on directly after the person begins to speak.
- Page 68 Parameter Description Last microphone remains on Select this option to keep the microphone of the person who last spoke active, creating an ambient sound. If you select the option On, with ring lit, then the LED of the microphone remains on. If you do not select this option, then the microphone is on, but you will not be able to see it.
-
Page 69: Configure Audio Settings
The settings are grouped into three categories: General, AUX IN (1) and AUX OUT(1). Figure 1-18 Configure Confidea G3 audio settings in the web server General Audio Settings You can configure the following general audio settings:... - Page 70 Parameter Description Microphone Configure the sensitivity of the microphone. This setting depends on: presets The distance of the delegate to the microphone. Volume of external loudspeakers (if present). A combination of a Far microphone preset together with high external loudspeaker volume or external loudspeakers positioned close to the microphones can cause acoustic feedback.
- Page 71 Parameter Description Audio None: no additional audio routing is done. routing Distance conferencing: this adds an external signal, using AUX IN, to the local floor signal and sends the local floor signal, using AUX OUT, to a remote party, for example sitting in a different room.
-
Page 72: Aux In Settings
Parameter Description AUX IN Settings The Confidea G3 WCAP has one auxiliary input. You can configure the following AUX IN settings: Parameter Description AUX IN status Switch the input on or off AUX IN level Adjust the volume of the input... - Page 73 Parameter Description Professional level Two input level ranges are possible: Off (= Consumer level) : nominal level -10 DBV , max input level +10 On (= Professional level) : nominal level +4 dBu , max input level +24 The professional level setting should be same for the AUX IN and AUX OUT CO NF IG UR E AUDIO SETTING S...
-
Page 74: Use The Operator Mode
USE THE OPERATOR MODE In operator mode ( ) you can see which delegate is speaking or requesting to speak. You can also (de)activate the microphone of units, or requests to speak. When you select the microphone mode Operator, then microphones can only be activated using this screen. The image below explains which actions are available on the Operator page. -
Page 75: System Configuration
You can also select the country or region, this will determine which frequencies are available in accordance with local regulations. Figure 1-20 How to configure the regional settings of Confidea G3 SY STEM CO NF IG UR ATIO N... -
Page 76: Update Confidea G3
3. To check whether you have the latest version, go to https://www.televic- conference.com/en/confidea-g3-software-updates and select Confidea G3. On these pages you can also see the latest release notes. UPDATE FIRMWARE OF WCAP AND WDU The same update procedure applies for the WCAP firmware as for the WDU firmware. - Page 77 3. Download the update for the WCAP (A) and/or the WDU (B). WCAP and WDU firmware versions need to be updated separately. The format of the update file of the WDU looks like this: “WDU.x.yz.tar“ or “WDU.x.yz.tuf”. The update file of the WCAP has the following format: “AP.x.yz.tar“ or “AP.x.yz.tuf“. 4.
-
Page 78: Login Settings
If a unit is accidentally switched off during the update (e.g. due to empty battery) , this will temporarily stop the update , but after a few minutes the update for the other units will continue 6. When the update is finished, click Continue to reboot the WCAP. After a delegate unit update, only the devices will reboot. -
Page 79: Logging
Figure 1-21 The system info page Logging To see the system logging select the Logging ( ) from the main menu. You can use the logging screen as a monitoring or analysis tool when certain problems occur . This page captures every event , change of settings , warning and other messages. -
Page 80: Encryption
Icon Information type Description Info Messages concerning delegate units connecting, microphone activations Settings Messages concerning change of settings Warning Warnings messages, this designates anything that can potentially cause problems. Error Indicates that there is a problem that needs further attention Encryption To see and alter encryption settings select Encryption ( ) from the main menu. -
Page 81: Link Cocon To Wcap
When you want to acquire a license follow the procedure described below: 1. Go to https://www.televic-conference.com/en/software-license-request , the website describes where you can find all relevant information needed to request a license. - Page 82 3. Select the license file you received by email. 4. When the upload is complete, you will be able to see which models are licensed. 5. Connect CoCon to the central equipment. L INK CO CO N TO WCAP...
-
Page 83: Couple Confidea G3 With Plixus
Plixus. The only settings you can adjust are those that are displayed on the Home screen. Figure 1-23 Home screen when Confidea G3 is coupled to Plixus In Plixus mode you can still configure the frequency settings and the network settings. For all other settings such as initialization and discussion options, you need to configure this on the Plixus engine. - Page 84 When you want to update the Confidea WCAP and the WDUs, you will have to uncouple Confidea from the Plixus network. CO UPL E CO NF IDEA G 3 WITH PL IX US...
-
Page 85: Camera Control
3000. Figure 1-24 Camera control settings in the Confidea G3 web server The WCAP sends data to the camera after a microphone button event in JSON format: {“UID”: micnr,“status”: x}. - Page 86 TE LE VIC CONFE RE NCE Leo Bekaertlaan 1 8870 Izegem Belgium +32 51 30 30 45 GET IN TOUCH...
Need help?
Do you have a question about the CONFIDEA G3 and is the answer not in the manual?
Questions and answers