enervent Salla eWind Installation Instructions Manual
Hide thumbs
Also See for Salla eWind:
- Operating and maintenance instructions manual (20 pages) ,
- Operating and maintenance instructions manual (100 pages) ,
- Installation instructions manual (112 pages)

Related Manuals for enervent Salla eWind


Summary of Contents for enervent Salla eWind
- Page 1 19 September 2018 Enervent Salla eWind Installation instructions for the ventilation unit...
- Page 2 Copyright © Enervent Zehnder Oy 2018. Unauthorised copying and distribution is prohibited.
-
Page 3: Table Of Contents
CONTENTS READ FIRST ....................... . 4 Type plate . -
Page 4: Read First
READ FIRST This instruction manual is intended for all the persons involved in the installation of the Enervent ventilation units. Only qualified professionals may install the equipment described in this manual in accordance with the instructions in this manual and the local laws and regulations. -
Page 5: Type Plate
TYPE PLATE ilmanvaihtolaite ventilation unit TYYPPI/TYPE: W/ V/ HZ / A: SRJ. NRO/SERIAL NO: IP 20 www.enervent.com If you need technical support, please check the equipment type and serial number from the type plate. Installation instructions for professionals... -
Page 6: Safety
SAFETY General information Electrical safety DANGER DANGER Always check that the supply voltage to the Only an authorised electrician may open the equipment is switched off before opening the electrical box. service hatch. DANGER WARNING In case of a malfunction, always determine the Follow the local regulations on electrical installations. -
Page 7: Contents Of The Delivery
0–10 V/24 V K930030006 %RH humidity transmitter 0–10 V/24 V M230110002 Humidity transmitter duct mounted KLK100 K930030008 Overpressure push button ‘fireplace switch’/boost K930030029 KNX bus adapter K900010010 Water trap Enervent Salla Installation instructions for professionals... -
Page 8: Technical Specifications Of The Unit
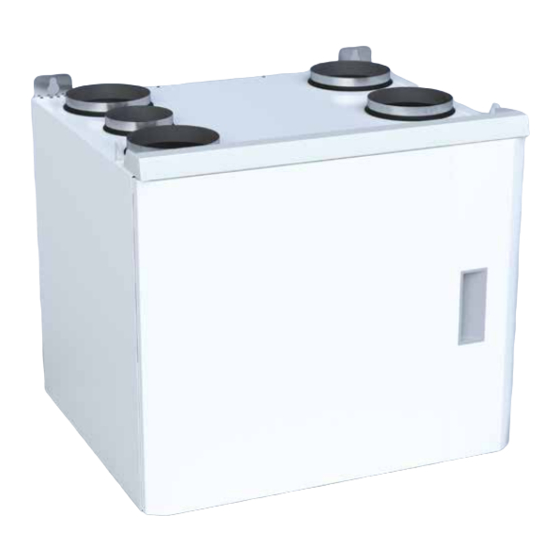
TECHNICAL SPECIFICATIONS OF THE UNIT Right-handed CHC connection cable with plug inlets for external sensors motherboard type plate extract filter heat exchanger extract fan inlet filter supply fan condensate connection G 1/4" internal thread heat exchanger’s drive belt heat exchanger’s spare belt Width 580 mm Depth... -
Page 9: Duct Connections
Checking the handedness in the type plate ilmanvaihtolaite ilmanvaihtolaite ventilation unit ventilation unit TYYPPI/TYPE: TYYPPI/TYPE: Salla eWind E RIGHT Salla eWind E LEFT W/ V/ HZ / A: W/ V/ HZ / A: SRJ. NRO/SERIAL NO: SRJ. NRO/SERIAL NO: IP 20 IP 20 www.enervent.com... -
Page 10: Before Installation
WOULD YOU LIKE TO KNOW MORE? If you would like to know more about the construction of ventilation systems and the insulation of ventilation ducts, you can read about them on our website at www.enervent.com. -
Page 11: Installation
FOR YOUR INFORMATION INSTALLATION Check before the installation of the ventilation unit that there are no foreign objects in the ventilation unit or ductwork. Wall installation without a bracket 45 kg A = min. 25 mm, B = min. 75 mm vibration-damping rubber pad condensate connection G 1/4"... -
Page 12: Installation Of The Ewind Control Panel
Installation of the eWind control panel The eWind control panel (see section ‘Control system and the eWind operation panel’ on page 16) is installed in a wall- mounted device box or using the surface-mounting box supplied with the accessory delivery. No more than two external control panels can be installed in the ventilation unit. - Page 13 Installation instructions for professionals...
-
Page 14: Installation To The Modbus Bus
• No parity or parity The order of the poles in the Freeway connector is marked in the controller board. The Modbus registers are available on the Enervent website at www.enervent.com. CAUTION Do not connect an external bus to the... -
Page 15: Commissioning
COMMISSIONING Requirements Air flow adjustment When the unit has been switched on, the air flows must Operational requirements for the ventilation unit: be adjusted to the designed values. • Supply and exhaust air temperature below +55°C. • The air flows are adjusted in connection with the •... -
Page 16: Control System And The Ewind Operation Panel
Control system and the eWind operation panel Mode (standard display) 2. Temperature (standard display) 3. Mode button Eco button Temperature button Cable connection Important information about the control Setting the operational parameters system The fan speed settings for different operation modes must The factory settings are suitable for most installations. - Page 17 Parameter list Factory Modbus Field Parameter Description Note setting register setting Extract fan speed, mode 1, region: 20–100%, ‘Away’ mode step: 1% Supply fan speed, mode 1, control range: ‘Away’ mode 20–100%, step: 1% Extract fan speed, mode 2, control range: Home mode 20–100%, step: 1% Supply fan speed, mode 2, control range:...
- Page 18 Parameter list Factory Modbus Field Parameter Description Note setting register setting Threshold value for summer/winter 4°C The 24-hour average temperature of the temperature, outdoor air. Above the threshold value, the boosted operation for the removal humidity control range –10…+10°C, step 1°C is in the summer mode, and below the threshold value, it is in the winter mode.
-
Page 19: Data Display
Data display You can view the available functions in the eWind info list on the data display. eWind info list eWind info list Marking Definition Opening: Standard mode is on Boosted ventilation for the removal of humidity Simultaneously press buttons once. -
Page 20: Measurement Display
eWind measurement list Measurement display Opening: You can monitor temperature, humidity, heat recovery Simultaneously press buttons efficiency and other measurement values in the eWind times. • Parameter (r1..rn) and the parameter values are measurement list, which is displayed on the measurement displayed. -
Page 21: Troubleshooting
Troubleshooting Alarm Alarm Description Symptoms Possible cause Measure Notes limit FILS Maintenance 4 or 6 It is time for the periodic Replace the filters. Acknowledge by reminder. maintenance. pressing any button months Inspect the ventilation unit. for 5 seconds. Clean, if necessary. Check the unit for visible damages. - Page 22 Alarm Alarm Description Symptoms Possible cause Measure Notes limit Supply fan No supply air. The supply fan has stopped. Repair or replace the supply The unit will not malfunction. fan. start until the alarm mode has been Extract fan No exhaust air. The extract fan has stopped.
-
Page 23: Appendices
APPENDICES Dimensional drawings Technical dimensional drawing, 4-duct right-handed Installation instructions for professionals... -
Page 24: Technical Dimensional Drawing, 4-Duct Left-Handed
Technical dimensional drawing, 4-duct left-handed... -
Page 25: Technical Dimensional Drawing, 5-Duct Right-Handed
Technical dimensional drawing, 5-duct right-handed Installation instructions for professionals... -
Page 26: Technical Dimensional Drawing, 5-Duct Left-Handed
Technical dimensional drawing, 5-duct left-handed... -
Page 27: Electrical Diagrams
Electrical diagrams Connections Installation instructions for professionals... -
Page 29: Eu Declaration Of Conformity
Salla eWind E right, Salla eWind E left, Salla eWind E CHC right, Salla eWind E CHC left, Salla eWind E (D) right, Salla eWind E (D) left, Salla eWind E CHC (D) right, Salla eWind E CHC (D) left... - Page 31 Installation instructions for professionals...
-
Page 32: Quick Reference Guide
= 19200, 3 = (5...15 min) 115200) ˚C TE32 RH30 η% ˚C TE30 ˚C TE01 ˚C TE10 η% ˚C ˚C TE02 TE05 Enervent Zehnder Oy Kipinätie 1 FI-06150 Porvoo, Finland Tel. +358 207 528 800 Fax +358 207 528 844 enervent@enervent.com www.enervent.com...
Need help?
Do you have a question about the Salla eWind and is the answer not in the manual?
Questions and answers